Install scissor steps
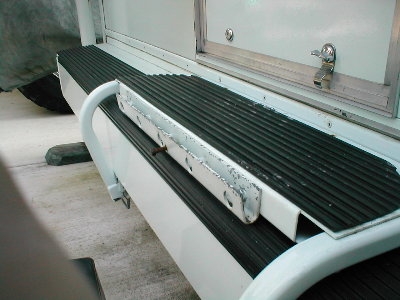
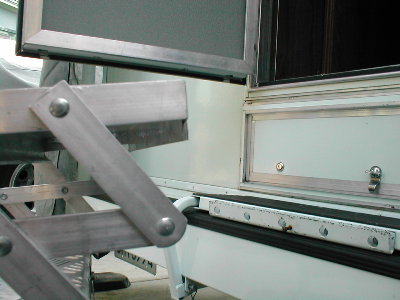
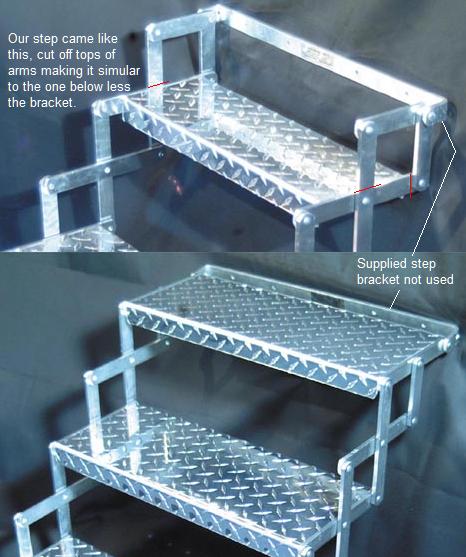
So I cut off the supplied bracket and upper part of arms that sets in the mounting track. We use the rear folded lip/edge of top step to set in the track. I mounted track to back side of camper flip down step in the stored position. This lessens the vertical distance stepping out of the camper to step surface & doubles the width of landing (camper step+scissor step). Cool. Added a small set screw in middle of camper step track and a hole in step. When mounted I just reach under and thread the screw in until it goes thru the step hole. Keeps the steps centered & from jumping out of the track.
I also made a simple base (no pic & no longer used) out of 1/4 plywood, its a bout 6" deep and a bit wider longer than the bottom hoop, Used 1x2 to capture step base (just a flat bar hoop) and 2 pieces under neath at ends to act as feet. A lot of places are not flat so this helped keep it stable and from sinking/sliding in dirt.
A lot of folks hard mount the scissor steps but we just carry them. On the road or loading/unloading at home using the campers flip out step is ok and easy. Once at camp its minor putting out the step. Hard mounting there always there and you don't need a place to carry. Plus an minus to every thing huh?
Note some steps the attaching bracket is attached to the step and not on arm extensions as ours was. You could either use or just remove.
06/01 Installed a handrail to make using the scissors more comfortable
Update 03/07
- I finally added some adjustable feet to bottom of steps, allowing to adjust for camper height and un level ground.
Also built a bottom landing that also is adjustable.
See 02/07 on main page - Or link here 'adding some adjustability'
- Added spacers to camper flip step to gain 1" less distance from door to scissors steps
See 02/10 on main page - Or link here add spacers to step
- replaced the original scissors steps above with new Glow Steps due to installation of Basement step. Though the added spacers above are still on the flip over step (used when off loaded) and added adjustability legs were incorported-original steps above retired. See 07/13 on main page or link here add Torklift Basement step and 8" scissor steps
Back to Ourelkhorn Camper Modifications page