Installed rubber wheels
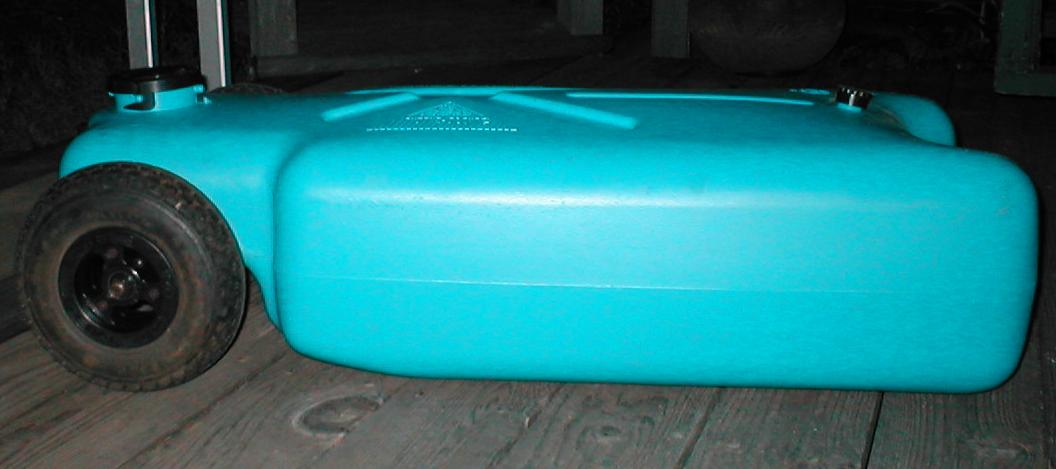
Finally installed some rubber wheels. Been on the roundtoit for a while. Couldn't justify the cost.., even though eventually could be a major problem. The wheels on the poo bucket are hollow plastic, the axle is just a piece of 5/8 steel rod that slides into groove in bottom of tank. The wheels do not have bushings-just a round hole in the plastic, push caps hold them on the axle.Several reasons this will be a problem sooner or later.
1. you have plastic wheels that are going to wear out, either the hole is going to wallow or just enlarge because of lack of bearing or bushing-lot of weight on plastic hole spinning on a metal rod. (if nothing else you should use powdered graphite on them, not dirt collecting grease). I've heard of folks towing the tank to fast and actually melting the wheels, not difficult to imagine.
2 I've not had a lot of success with push caps. there difficult to remove if your trying to work on something but I've had all kinds of stuff where they fail & pop off. Lot of side moment pushing on them (a hole, washer & cotter pin would be nice).
3 The axle just slides in a groove, there's really not much holding it, and there is NOTHING that keeps IT from spinning if the wheels decide they don't want to, grind right thru the tank.
4 Again the axle really isn't held in that well-it does slide back and forth--grinding into the tank groove.
5. If walking your tank not to much concern, but towing it even at 5 mph-there's no suspension , rubber tires will at least give it some cushion, help keep it from bouncing.
6. WOW plastic wheels-there just LOUD-imagine a kids big wheel -now amplify that noise by a large hollow plastic tank.
The reason though I finally got around to this is I stopped at a yard sale. Picking thru some mics old hardware I notice the kids (college age) dirt board leaning against the garage-sorta like a snow board but with large rubber wheels. I didn't think it was for sale, until someone else asked, then they walked away. I figured it must be pricey-. It looked like a snow board. I imagine new there really expensive. Looking at the board, the tires looked fairly new, it had spring dampened center pivot axles, boot clamps, very flexy board-just an awesome piece of engineering, Some one paid a LOT for this, but I gather it was only ridden once or twice then sat out side for a few years???. Though lots of rust, the board had no wear marks, the tires still had most of the new nubs on em. Be a shame to cannibalize the board but the tire & wheels look like the right size for the poo bucket.
As I was paying for my stuff I casually asked how much for the board he said 10 bucks....My mouth must have hit the ground
He said " to much? How about 5?" I said without skipping a beat "no...10 sounds fair....". I think my stuff with the board came to $17, I gave him 20, he's my neighbor after all, he didn't want to take it so he gave me a plant he had grafted, some kinda of tropical thing. He told me his story bout raising them, we shook hands and feeling like we both came out even, I said thanks and left. Still I walked home feeling a bit guilty, but the most interesting yard sale experience I've had.
Any way the tires are 2.50X4, (8 3/4" OD) mounted on 2 piece nylon wheels, with a pair of sealed ball bearings. bout 4 bucks a piece, with another pair for some other project.
Like I said the tires look new, still have the nubs and flash on em-puzzling. They are maybe 1/4" smaller od than the plastic wheels on the tank, perfect. Wheel to wheel the board assembly was bout 1 1/2 narrower than the tank wheel axle, so I Couldn't just mount them axle and all. When I removed the wheels from the 5/8" board axle -the ends were turned down to 1/2". Hmmm they were also shouldered for the bearing race to seat against. Hmmm. Also the board wheels were centered, the tank wheels have quite a bit of offset. So the axle rod needs to be quite bit longer than either I have. I could use a piece of rod, but I don't really want to turn down and thread....
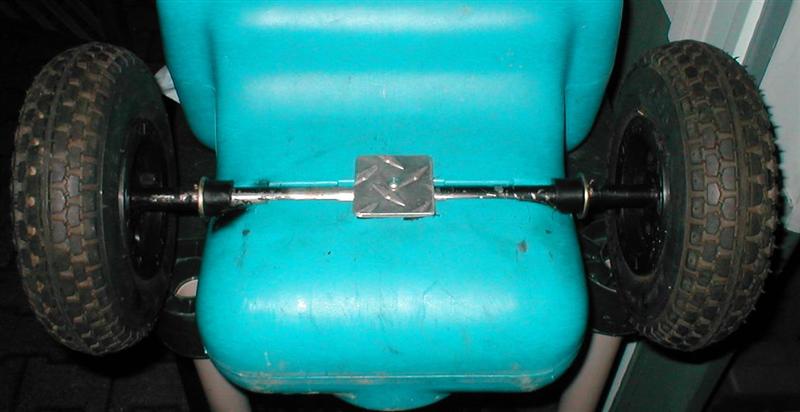
I measured the board axle ends, I measured the width of the tank axle where it passes thru the groove. If I cut off the turned ends plus an inch, cut the tanks rod as wide as the tank, so any weld are was out side- bout 10 1/2" the width would be good. So I cut both ends off the board axle, cut a piece of the rod from the tank axle, ground the ends down to 1/4" dia-with about a 30 bevel, and proceeded to mig weld them together. Slip the new axle into the tank groove, set the wheels on -nice. Its about 2" overall wider because i kept the same inside clearance+ and the new wheels are wider.

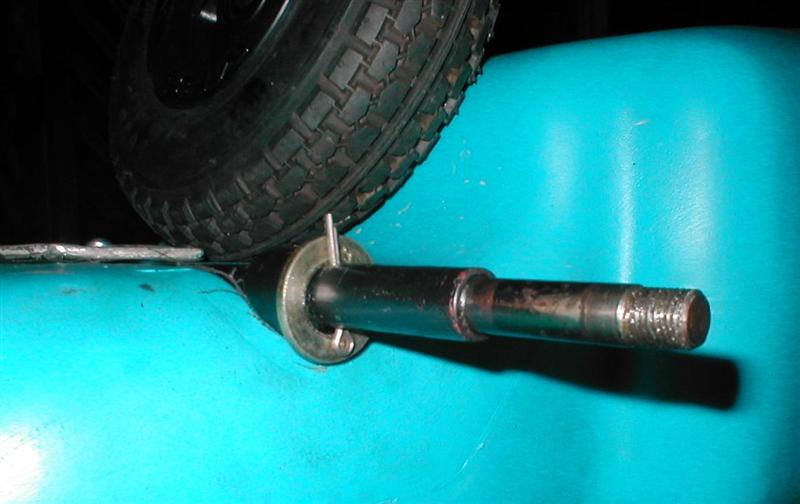
Now to address the sliding axle rod. The original used plastic spacers to keep tires from contacting the tank. I cut these at an angle to match tank profile then slipped over the rod against tank, then put on a large washer and marked. I drilled the axle rod for cotter pins. Now the rod is contained for side to side movement .

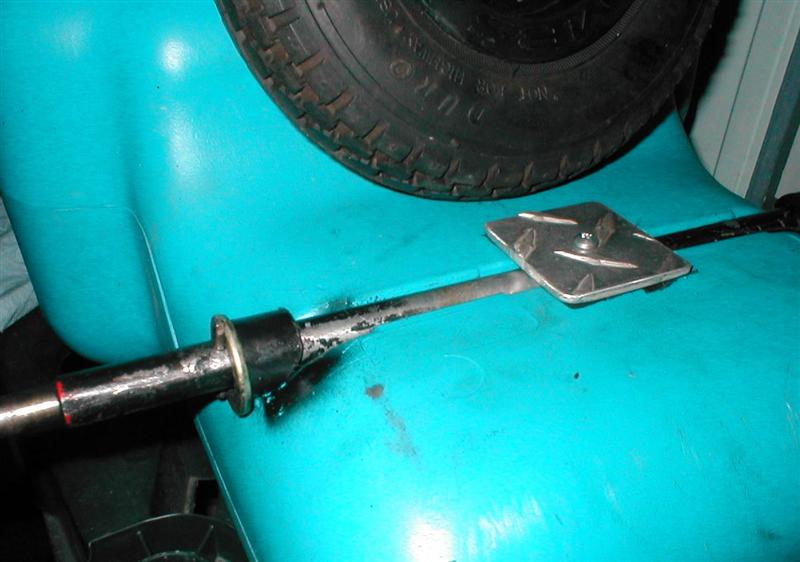
Next to keep axle rod from spinning. It probably will never try since the wheels have bearings now, but still seemed like I could do something. Cant attache to the tank so my best plan was just to make a stop if the rod ties to spin. I drilled the rod and placed a small square of alum plate. It sits bout 1/16 from the tank, so when I screw it on it doesn't try to pull rod out of the groove. I reassembled the axle rod, put on center plate, slid on the angled plastic spacers, then I liberally applied hot glue to keep everything from moving/rubbing and to fill voids. Especially under the "torque' plate and ends. Put on the washers, installed cotter pins. Bolted new wheels & tires onto axle. Wala-


Stealth Poo....
Back to page one Portable tote along auxiliary holding tank
Back to scooter page
Back to our F250 truck page
Back to Ourelkhorn Camper Modifications page