Remodel our Living room.
Intro page
- Pages with more details on different projects that were done along the way.
Primarily furniture reworked to function for our space.
- End tables Where we started when replacing furniture
- Her recliner Lower chair, add levelers and additional release handle
- New light Convert old floor lamp to ceiling lamp.
- 'Smart' Table Convert sliding top to a drawer with hinged lid and joined to small end table
- 'Subwoofer Split & Rework amplified subwoofer into 2 compnents to fit table.
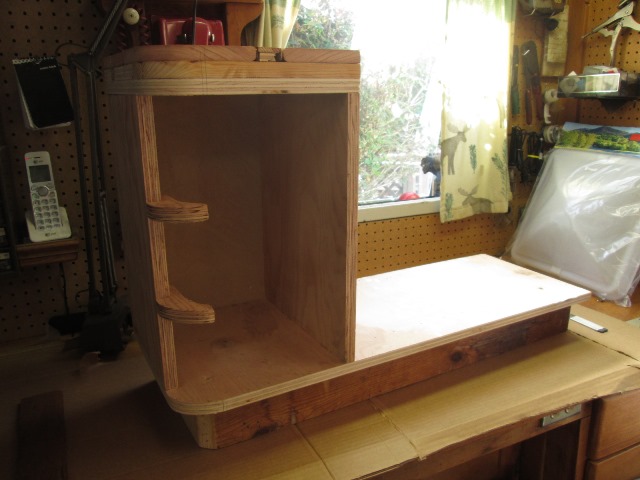
- Sauder TV cabinet Used to 'fill' corner, added center supports for top and bottom.
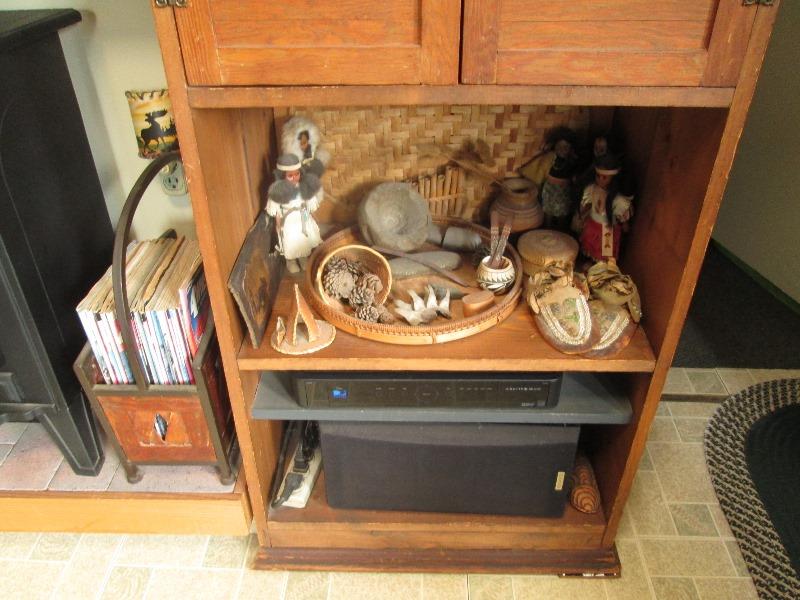
- Sauder Technology cabinet Cabinet to store LPs and house receiver/CD player. Minor mods
- New 'treasure' chest Small shelf to replace old trunk that took up a lot of floor space.
- The remodel: Intro
After putting off for several years, the force to revamp our living room could no longer be resisted. Or simply I gave in. It was getting a bit tired.
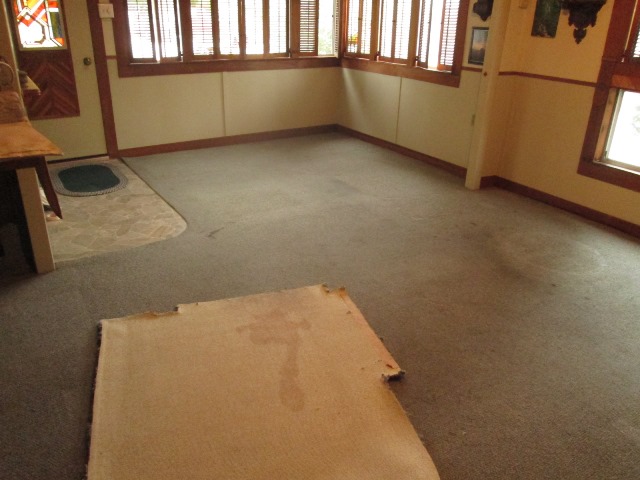
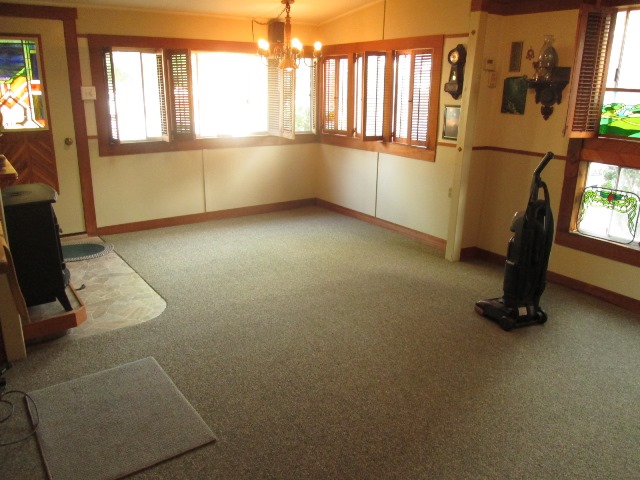
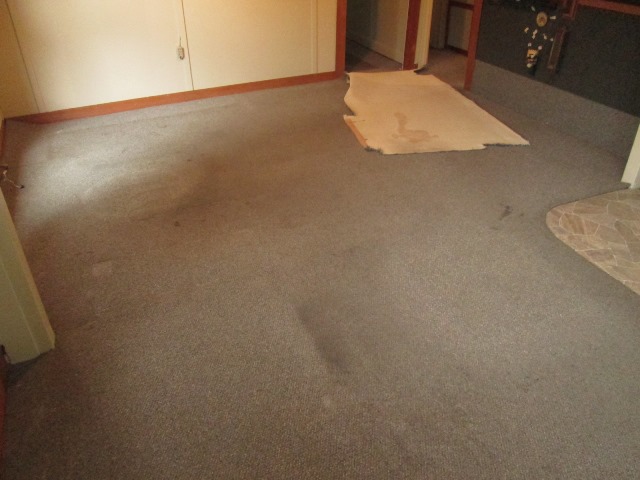
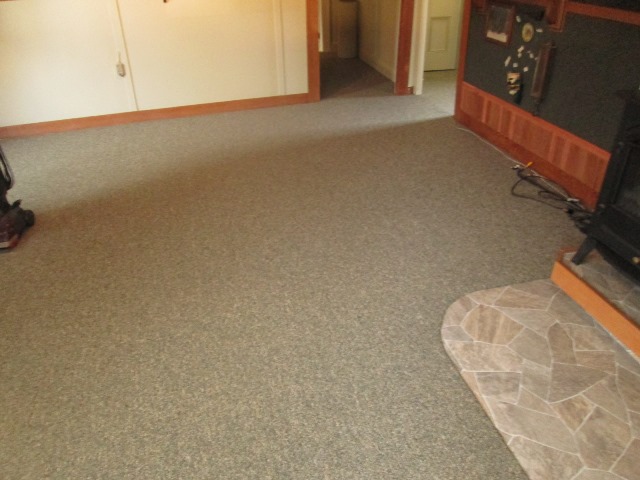
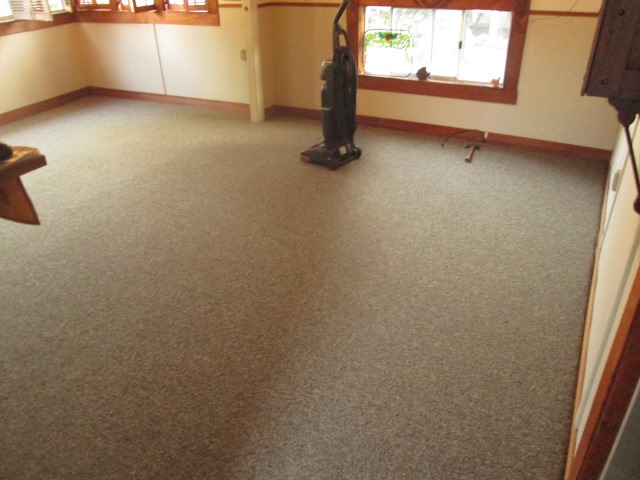
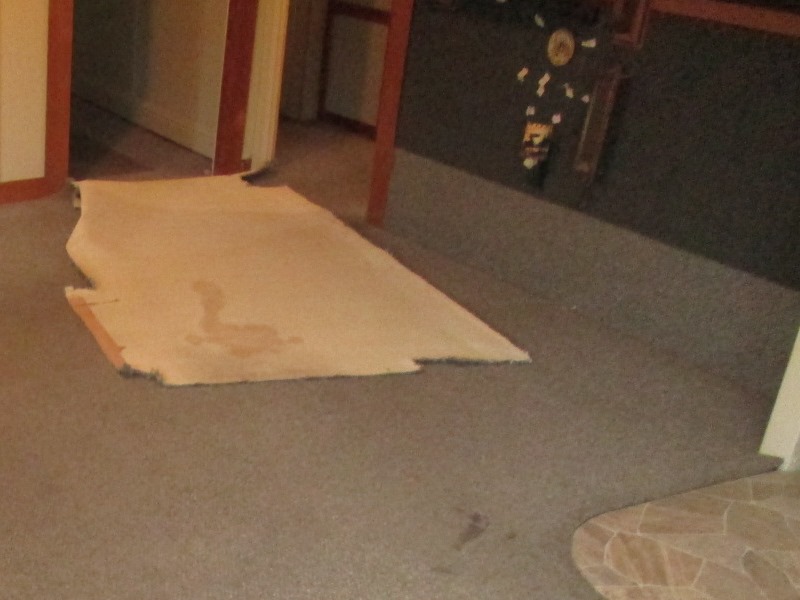
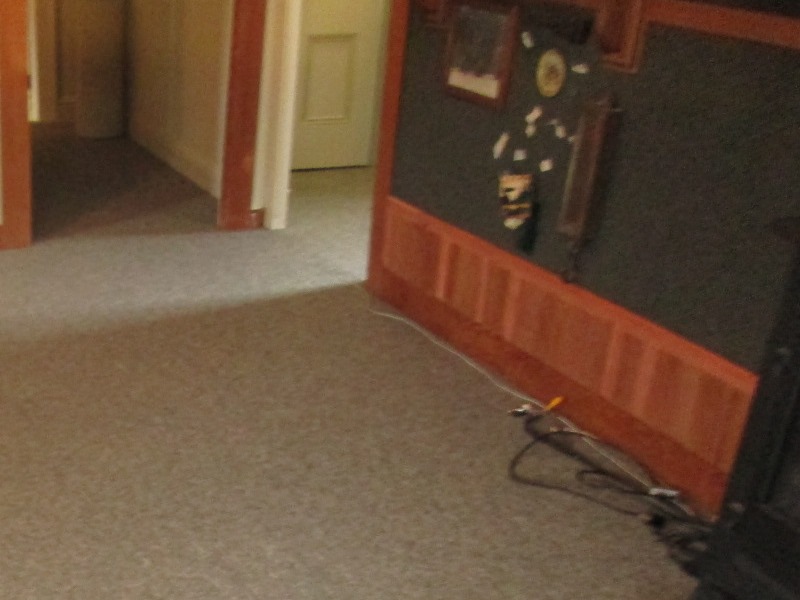
Main thrust was to replace carpet. Couple of pictures of the carpet before & after.

Outlined is generally what we did. Some of the more involved projects mentioned have their own page.
Living room was cleaned up/remodeled many years ago when we moved in but several things were done as a matter of expediency. Since everything is going to be out of living room some could be readdressed. However one thing led to another. Carpet replacement ended up trim/moulding carpentry retrim, repaint, rebuild, retrofit. Then replacing entrance floor, rework most of existing furniture/wall shelves. Then replacing furniture, replace old chairs/couch, which led to customizing the new furniture.
Our bedroom is part of the carpet replacement. The bed frame is built in and carpeted up to it. Since bed was to be replaced at some point we decided now's the time so bedroom could be fully carpeted. Requires a bit of demolition/carpentry work. We haven't even started and project is growing.
Originally we had replaced all of the trim work . IE 4 different doorways trimmed in different moldings, mismatch of base boards that had been added over the years, and completely different window trim, not to mention partial paneling on 2 walls etc. Just to make uniform we used simple 1/4"x4" resawn redwood and re trimmed, everything. Huge improvement and it looked good but its a bit much. Needs to be thinned out. Some details that never were finished. Some repainting. Etc.
Second some of the added built in shelves, desk etc never quit fit or need reworking to fit current use. Some of the furniture also didn't quite fit and or over the years needs some attention. Many since added things (sound system speakers, collections/decorations) needed to be 'arranged, fixed/revamped or deleted. IE added swag lamp in wrong place, wires draped to speakers, lack of plugs. entrance way flooring.
Well what it came down to is almost everything needs to be redone. What we tackled led to other projects. Many, like the entrance way ended up forcing additional time spent like rebuilding part of floor-rebuilding fireplace box.
So for a planned couple of weeks of clean up, we ended up 2 months getting ready for new carpet, and that was only because they showed up to install carpet. When I say 2 months, as I'm retired, that's every day of 2 months. Not to mention, but I will, 2 months after, waiting on arrival of new couch/chairs, new tables etc and assembly. Though nice most of what we did wasn't planned or anticipated.
- "Where does the time go":
Early on, Biggest surprise was redoing the linoleum in entrance way. We only kinda of decided, since were getting new carpet, might be nice to spend a bit to replace the small entrance way linoleum. Pulling up old floor discovered serious rot and structure repair needed at front door from water damage. Wasn't too happy Though a lucky catch, it would have become mandatory fix and necessary at some point, and after (Or during) new carpet installed. As section replaced sub floor run under carpet So an afternoon project became several days. Rebuilt the threshold going into office so its flush. It was raised (actually wall sill plate) when door was added many years ago
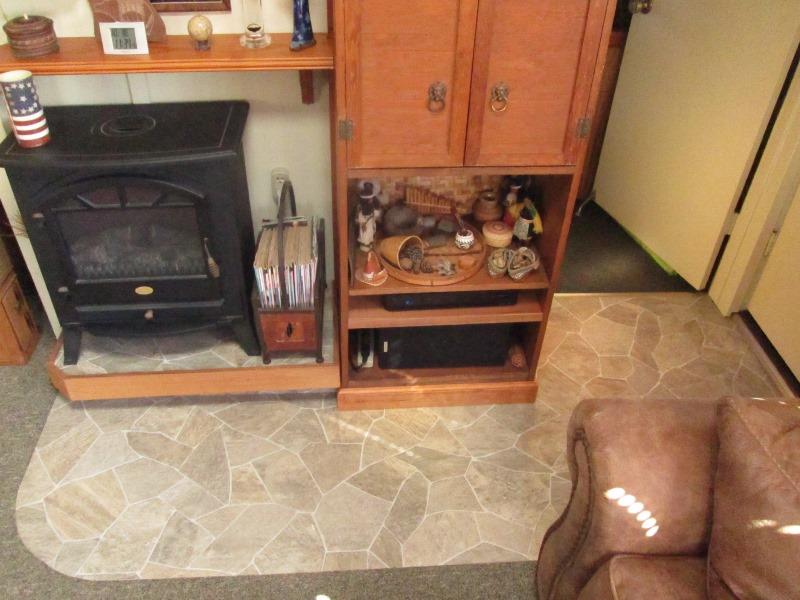
Not part of the floor/fireplace/cabinet but sort of shown is one of the door frames that redwood trim was replaced with paint grade. Repainted to blend with walls. Just opens the corner appearance wise.
Pictures above also sort of shows the small hall way. No pictures of it before. Only 4' wide x 8' long I spent a week+ in there. Took on a life of its own. All new trim work and repaint. It always got left out of updates. The hall was very dark, 3 doors, doorway into kitchen, into living room and door into small room of to side (not shown) had 3 different trims. The redwood baseboard and upper wall & chair rail ran into it to match living room. But just dark and busy. Replaced all with paint grade and painted using the lighter colors.
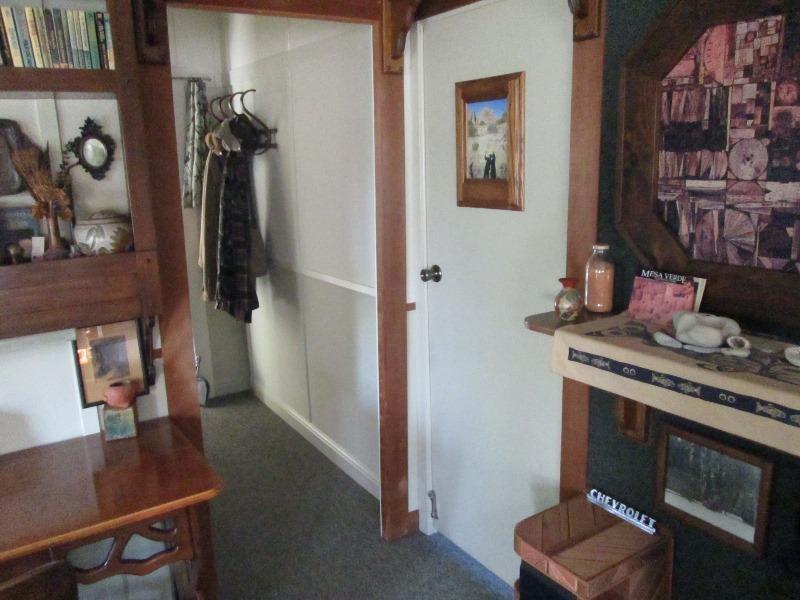
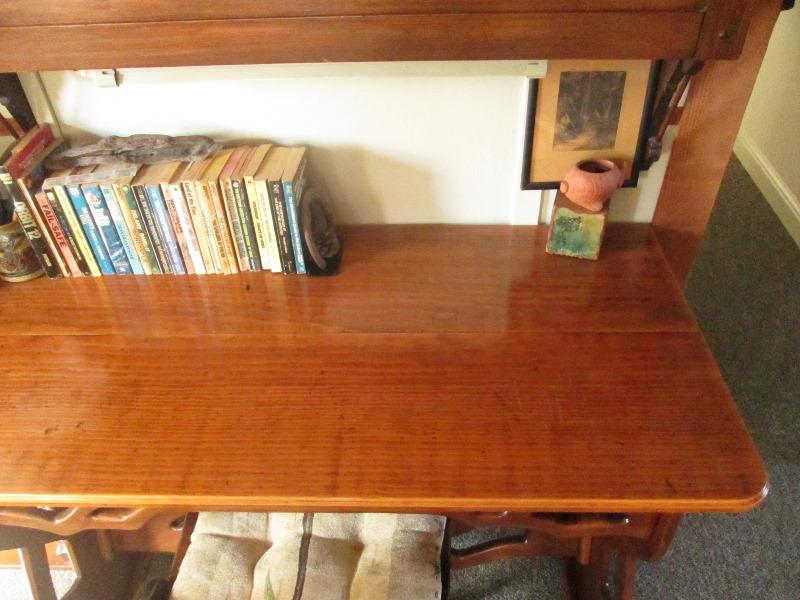
Picture above also shows some other things that were addressed. One is the desk and the mid wall shelf at right. The shelf had a square corner and the desk, which sat over about 3" closer to doorway, also had a square corner. Made egress kinda tight and invariably some one was running into one of them. The wall shelf was easy, just removing (since everything was off), trimming a nice radius in to, strain & replace. The desk was a bit more involved.
Desk placement is due to old 3 tier bookshelf that covers remaining wall to corner,
-
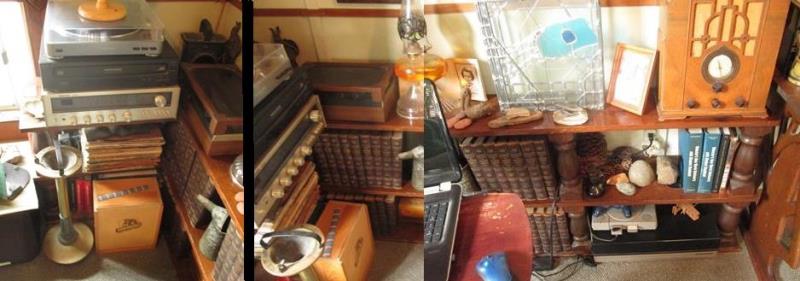
Merged pictures but shelf is huge. Built for this house a very long time ago. It 3' tall x 12" deep x 8', turns corner and continues 30". Has served us well. But it pushes the desk out and also sets partially in front of added window. I should get rid of it but cant, Though I can cannibalize. In order to move desk over required pulling shelf apart to get end turned posts out & cut off 6" then reassembling. This allowed moving the desk over as much as wanted and leave some space between. The bookshelf got removed again couple of weeks later and the 30" section that turned corner where was removed.
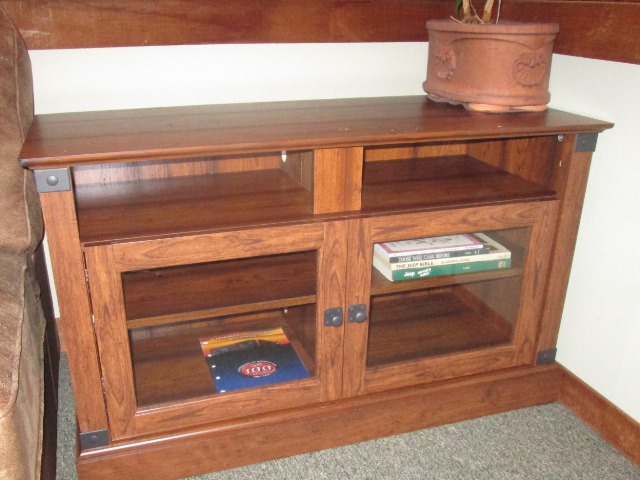
Replaced with a free standing Sauder "technology pier" cabinet we came across during the great furniture episode section discussed below. to house old receiver/LPs etc.
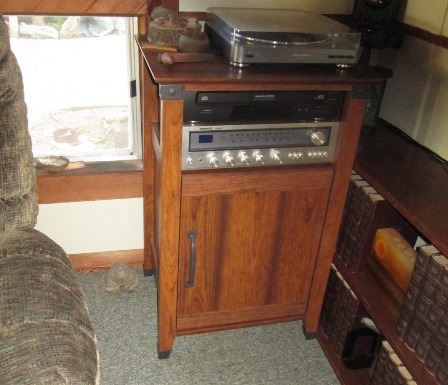
Detailed on separate page, some minor modification to cabinet to make it work. Cleaned up this corner a lot.
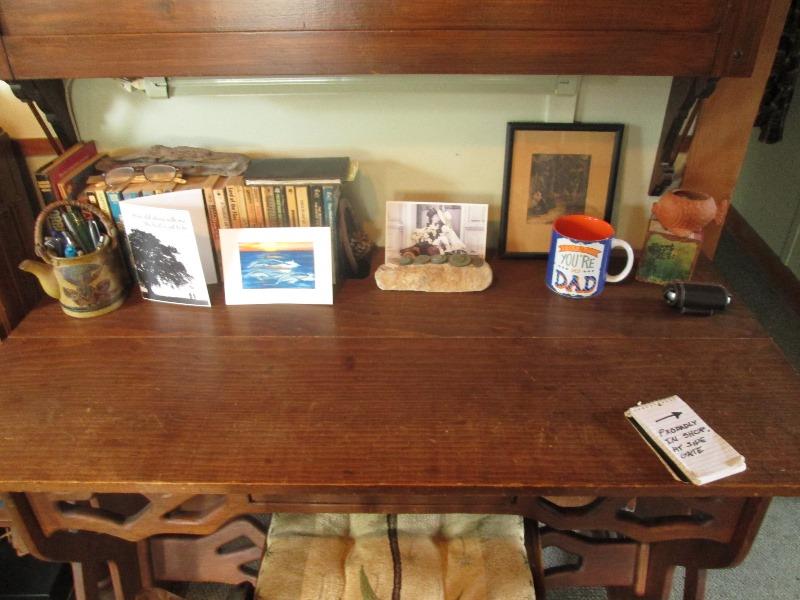
First I needed to re flatten top. Each board was curled up about 1/8" at center. It took very little pressure to flatten though. Surprised as there was only couple of joiners holding seam. I do vaguely remember using grain to counter warpage-I guess it worked, surprised it wasn't worse. I used a strip of high density plywood I had underneath. Its only 7/16" but has like 7 layers. Very strong and extremely rigid. Cut a full length strip 6" wide to cover seam, then notched & cut (4) 2x2s to bridge at right angles but open at ends. With that and small gap still between planks hopefully expansion contraction should't be a problem. Substructure. Worked well. Sanded the top down past most of the small dents.
3 coats of spar urethane, 4 on the top 30+ years later looks pretty good. Forced to make stuff better due to remodel-but this was something I always wanted to do. Better than several days all in all between rework old book shelf and desk, Though I was in & out of the house-multi tasking.
I hate to get rid of the trunk but takes up a lot of room. This will also open walkway.
Meantime: new bed frame arrived. Simple metal frames but required cutting legs for the height we wanted. Its smaller the our previous bed so can access both sides to make. Before it was right against wall so had to make while on it.
-
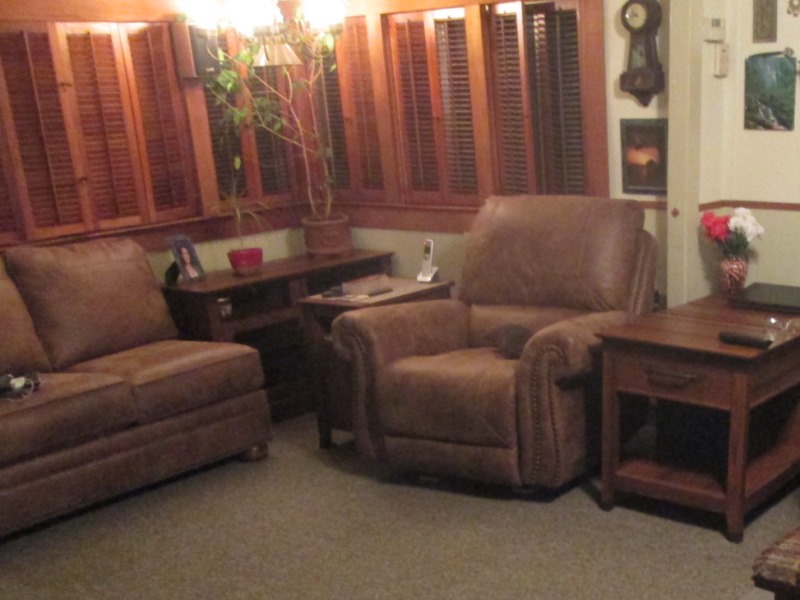
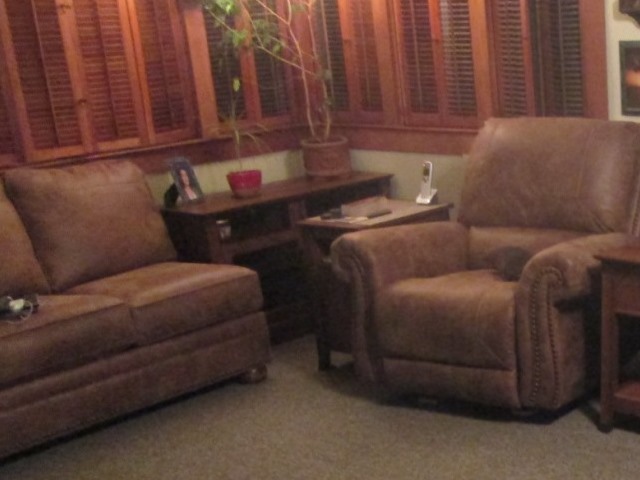
At some point during this we decided to replace the living room corner sectional and my recliner. We opted for a small sofa and 2 recliners. This led to a whole cascading fiasco of furniture events.
Her matching recliner required some 'customization'. It proved to be a bit more involved but basically it also was a bit tall for her. As floor has a slope, chair leaned with no way to adjust. Rather involved chair modification on its own page describes the details. It was lowered 1 1/4", then added leveling feet and structure. Also added release handle to the opposite side. Now its "perfect".
As none of our old furniture would work with new arrangement we began looking at replacements. We ordered 2 small Sauder end tables. One to set at end of sofa, one for her recliner. See what it looks like then find something that will set in corner for plants.
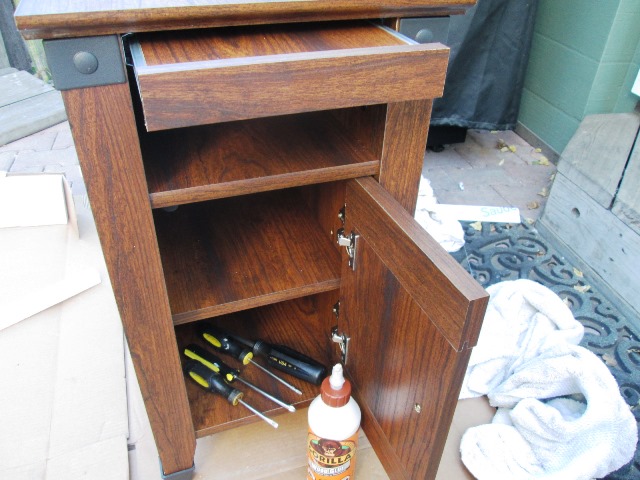
The one small end table was going to move between her recliner and mine. However that proved impractical & too small for space so opted again for another Sauder piece. Called 'smart center' its considerably larger. Intended for storing & charging phones/laptop etc. I could also move the sub-woofer speaker for sound system onto its shelf, freeing up floor space it now occupies. Works well between our recliners. As it sets 2' from wall was going to put the now extra unused end table back there or on the other side of my chair. Both places looked dumb.
Detail on its own page I ended up seriously reconfiguring the smart table and small end table. Merged into one long cabinet/table to set between recliners. I also had to rework the sub-woofer to set on the shelf, it was 1/4" too tall.
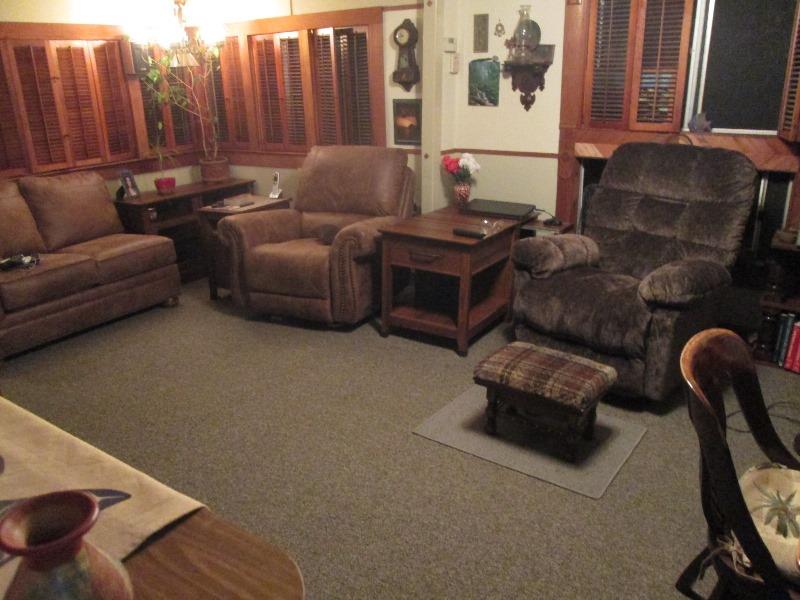
I had ordered extra material with it to recover my footstool. Picture of reworked sofa, recliner and tables. Somewhere during this is where we seen and ordered the Sauder technology pier cabinet mentioned earlier.

Were enjoying it. Still moving stuff in, rearranging to fit new 'space'.