Sauder technology cabinet, 80's tech gets a new cabinet!
- Sauder 'Carson Forge' Technology Pier #412923
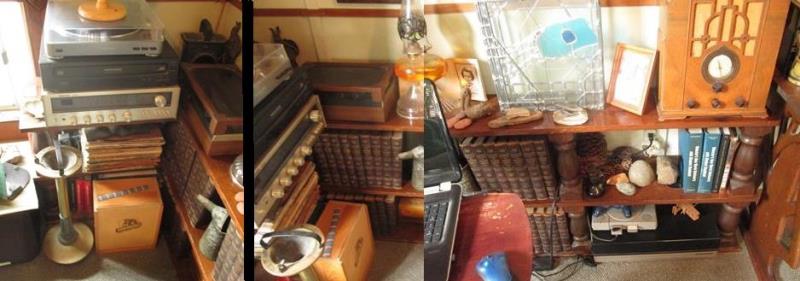
One area addressed during remodel was the storage of LPs and old receiver. turntable and CD player. It was all 'piled at end of old corner shelf
-
Merged pictures but shelf was huge. Built for this house a very long time ago. It 3' tall x 12" deep x 8', turns corner and continues 30". Reworked the shelf, shortening and removing end that turned corner, replaced with the Sauder cabinet.
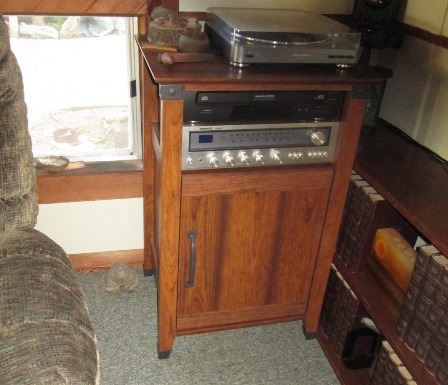
Some minor modifications to cabinet to make it work. Cleaned up this corner a lot.

This is after the fact and measuring our cabinet. Wasn't 100% sure when ordered if it would accept our receiver and CD player/changer on open shelf under top but appeared to be close enough to try. As cabinet is intended to use for printer etc on the shelf I'm not sure why more detailed dimensions are not offered. We recently acquired some other Sauder pieces in living room so I was determined to make this matching cabinet work and prepared to modify if needed. Got lucky all around.
Between the top of shelf and bottom of top, height is 10". However there are trim pieces that fit between legs under top at sides and front. They are ~1 5/8" tall, decreasing access to shelf (or opening) to 8 3/8" height. Trim pieces are only secured to top with 2 L brackets using #8 screws. Simply remove one of the side trim pieces-slide in equip and reinstall the trim.
Shelf is 19 1/2" wide but only 17 1/4" space between legs at front. The sides are 15 1/2" between legs but front to back is about 16". My receiver is 15 1/2" deep including knobs x 17 1/2" deep. (removing knobs would yield another 1/4"-1/2" but prying on 35+ year old electronics not an option for getting in cabinet). CD player is smaller footprint but combined height is 9 1/2". Once I realized height wasn't issue by removing trim just a matter of getting receiver inside. Receiver slide in from side with a 32nd" to spare. Sheer Luck. Once inside moved receiver against front legs so knobs protrude between legs, Gave me about an 1 1/2" at rear for hook up of RCA plugs/speaker leads etc, plenty.

I did bore an 1 1/4" hole thru top just in front of center support to allow the turntable cords to drop straight down to receiver. Turntable cords exit it out its bottom so they are not visible.

The front trim under top hung down a bit to far blocking the CD player door. Simply flipped it on its side to remount so it only hangs down 1/2" allowing full access to player. Actually other than slot in rear that weren't need the only real mod to make cabinet work for us was flipping front trim.

Again the side trim pieces are simply screwed to top with 2 small angle brackets. Easily removable for full access to shelf. allowed me to slide the player on top of receiver, then reattach trim piece. I really like this cabinet, reminds me of an old windup phonograph upright cabinet. But its this view I see from my chair, the side of the cabinet and equipment. Sometime later I decided to address.

Assembled a small plywood insert to place inside of the cabinet between the legs. Top will screw to cabinets trim piece inside, bottom flange will slip under receiver.

Painted it black to be 'invisible'.

Single screw on bottom and couple of small screws at top to trim hold it in place. When receiver is pushed back where it belongs covers bottom flange of new insert. So its virtually unseen. Once I had fitted removed to face outside.
I had some scraps leftover from the TV cabinet cardboard back that was replaced. (I screwed it up when assembling tv cabinet and got a replacement, another story). I cut into a few strips, 3 each side, at 45° angled to center.

We debated back and forth if angle at center should be pointing up or down. Went with down matching some wood work on window trim. Glued and tack nailed strips to plywood insert.
I had 'just' enough to do with the scraps I had. The pattern is just what worked.

It wasn't until set in cabinet that we saw the pattern matched the lower half of cabinet. Had we flipped it would have looked off. It appears, if looking straight on at cabinet from side, it was cut like this intentionally to match. All the graduations of color line up & match, the dark center in line with the center strip at top-just rather confidentially odd.

Nice We like it. Just looks more finished not seeing sides of equipment. Have since ordered and installed 2 more of the metal outside trim corners at shelf height band.