Install rinse flush nozzles to black and grey tanks.
IF nothing else gleaned from this page and you plan to install one of these Camco rinse nozzles: VERIFY HOSES ARE CRIMPED BEFORE INSTALLING and WILL NOT SIMPLY BLOW OFF WHEN WATER PRESSURE APPLIED!Adding tank flush nozzles to simplify and more thorough rinse tanks. Normally when dumping, run water down toilet and down kitchen sink to help rinse tanks. On the black, if able, connecting a wand that goes down toilet to 'blast' walls of tank. The wand is effective to help clean tank but inconvenient and not always practical or have a source of water.
Utilizing the campers water pump, letting water flow does help, at least at valves and unless there is water available at dump station the only option. However currently replacing tank senders with SeeLevel system and having everything open realized its virtually ineffective.
Specifically the grey tank. Both the drain inlet to tank and the dump valve are on the same end of tank. The grey tank is over 5' long, so flowing water pretty much goes into tank and out the valve. Black being more square not as bad, but still unless wand used most of tank doesn't see rinse water.
Since camper tanks are exposed decided to add Camco 'thru the tank' non rotating nozzles. Will introduce water at top of tanks, some flow thru-out and just convenient to hook up water source at same location as dump valves.
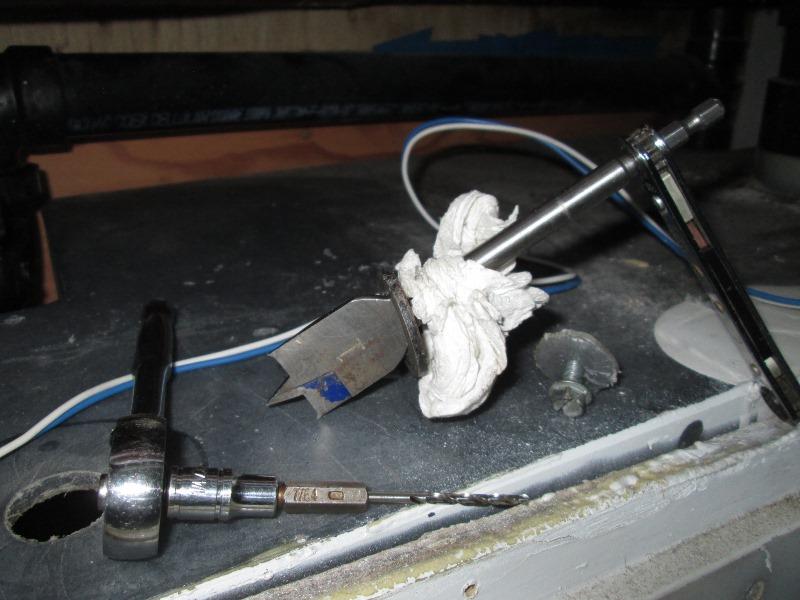
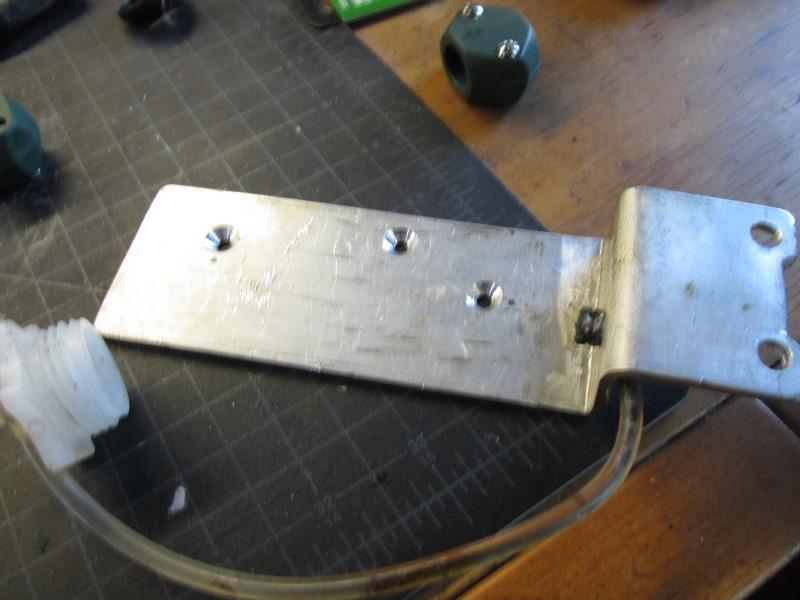
Units arrived-what junk. Other than initial impression discovered (after mounting) the hoses are NOT crimped to hold onto fittings.
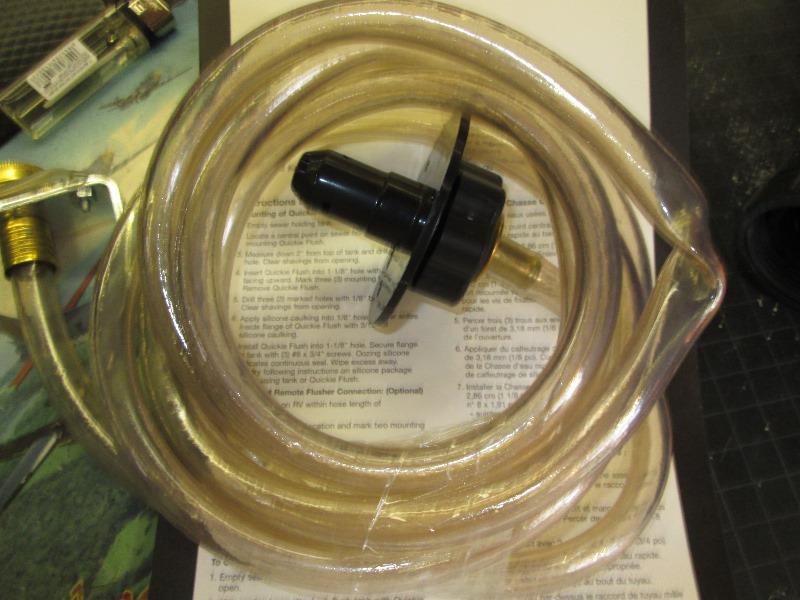
Not bad hose but twisted in package. How do you recoil a hose and make it fold-only by twisting, it would not do it on its own. This apparently a constant issue with Camco packaging. Mine also was missing the hose washer on swivel connection. The brass fittings are VERY thin. One end of hose has factory crimped female end captured on bracket ging. Mine also was missing the hose washer on swivel connection. The brass fittings are VERY thin. One end of hose has factory crimped female end captured on bracket that mounts to camper. Other end a band clamp is used. But I bought so installing...
- Grey tank
- Fail, Fix female ends of hoses to NOT leak or blow off
- Black tank
- Recoat exterior, button up
- Make an Octopus, Y valve to attach to rinser ends
- Rework 07/2019- remove failure prone camco tubes and hose ends. Routed Y valve hoses directly to nozzles
Grey tank:
Installing on the grey tank was planned at opposite end from valve. However plumbing it would require elbows on the hose to get around tank. Briefly thought about installing the city hose connection on opposite side of camper, might help but the generator is very close and getting outside the plastic tank cover would be problematic. End of tank at valve side is exposed inside cabinet, plumbing would be easy, have access if issue and put city connection in more convenient location. Compromise at best, not as effective to rinse tank but I'm not burying the tank connection where I cant get to. Plus don't want to deal with plumbing, cutting up tank cover. So...

Installed on valve side of grey tank. Nozzle does have 3 jets that may reach opposite end of tank. But I am using more for adding water & flow than blasting. It will be more coverage than running water down sink. After seeing the fittings and the numerous reviews of folks having hoses simply blow off, I'll be keeping water pressure low. Still, better rinse ability than we had before.
I added extra screw holes and used stainless screws. For sealant I used DAP all-purpose adhesive sealant, 100% silicone, Aquarium safe/food grade. I assume any Silicone would seal, but it was the only product that didn't say -'not for underwater continuous use'. Also if you happened to drink the waste water, at least you know it wont be the silicone that makes you sick.
Installed the remote hose connector at out side wing. Hose is slightly higher than tank fitting.
Fail:
Next day tested, fitting at tank dry, no leaks. Look out side and water is pouring out the 'factory' crimped fitting.
Or I should say the factory un crimped fitting. Swivel fitting has an inner tube that slips inside hose, an outside tube that's supposed to be crimped to hold and seal hose to inner tube. Crimped but does NOT contact the hose. Hose is slipped over the inner tube but nothing holds it? Had I turned up hose full blast it would have simply blown off--Good grief.
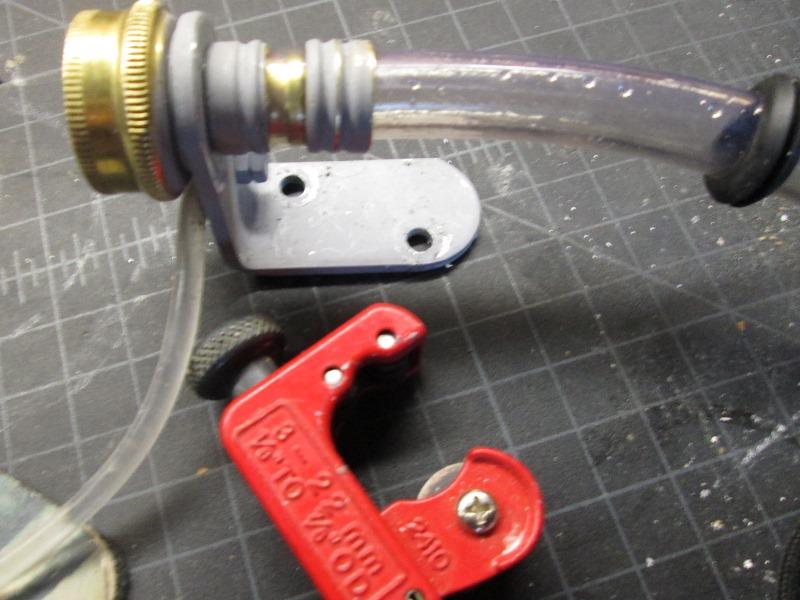
My fix was cutting off the outer tube to use a band clamp. With a mini tube cutter, tightening in VERY small increments, going round and around, cut brass tube. Because the tube is sooo thin you cant force cutter-let the round and round action cut, actually score thru the tube. Outer tube once separated it slid off, SLID OFF!
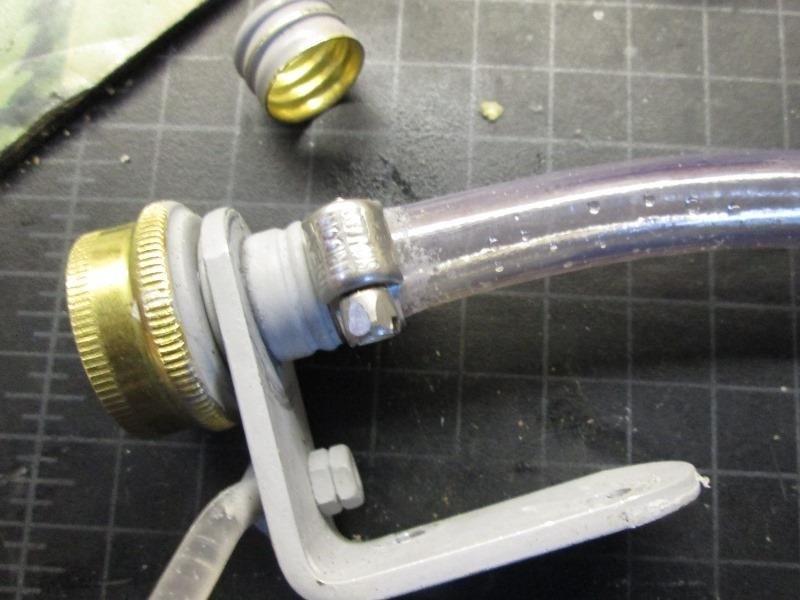
Just enough room for small band clamp. Reconnected and tested-dry! What utter junk.
The real fix is replacing the hose with good hose and better fittings. Length and making/using old bracket will take some thought. I'm sure will happen sooner than later. I don't trust the vinyl hose and thin fittings at all-even a little. Hose is only about 14" long so will have to make . The black tank, I could coil up extra hose so can use short 3'-4' pre made hose if any issues.
For now grey is operational.
Black tank:
Was going to do this later but since I have time and everything is open going to install second tank rinser on the black tank (now that I know how to fix). The black tank I'm installing nozzle on top. Only option. Also if issues less likely to leak on top, say if anti-backflow fails. Even then only 6" clearance so cant use power tools to cut/drill.
Oh Boy. Used 1/4" box ratchet to spin a 1" bore bit. Got down to where I could finish with xacto blade, screwed in a lag bolt to keep plug from falling in.
Same deal with the screw holes. Even my cordless that folds is too tall. Used 1/4" socket on ratchet with drill bit. I ended up starting holes with sharp truss head screw.
Prepped for rinse nozzle. Hose will exit at level of top of tank and go to remote hose connection on camper skirt above the grey connection. It will be several inches higher than the grey but both will be accessible.
Using stainless screws to attach nozzles to tank. So my telescopic magnet wont retrieve the last screw I dropped into tank--Oh I have a piece of super magnet from old hard drive, wonder if that's strong enough- the stainless is slightly magnetic...
Worked!-retrieved drop screw. I'll 'fix' the hose before installing.
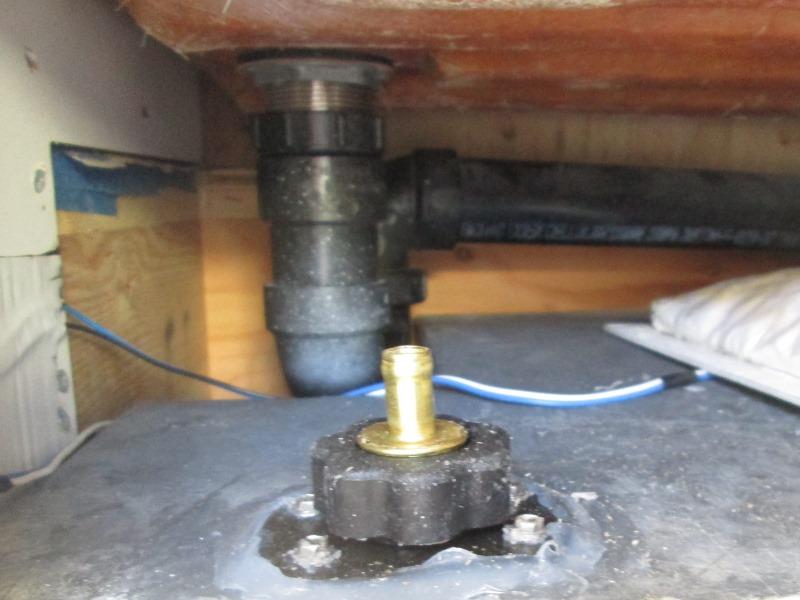
And nozzle installed.
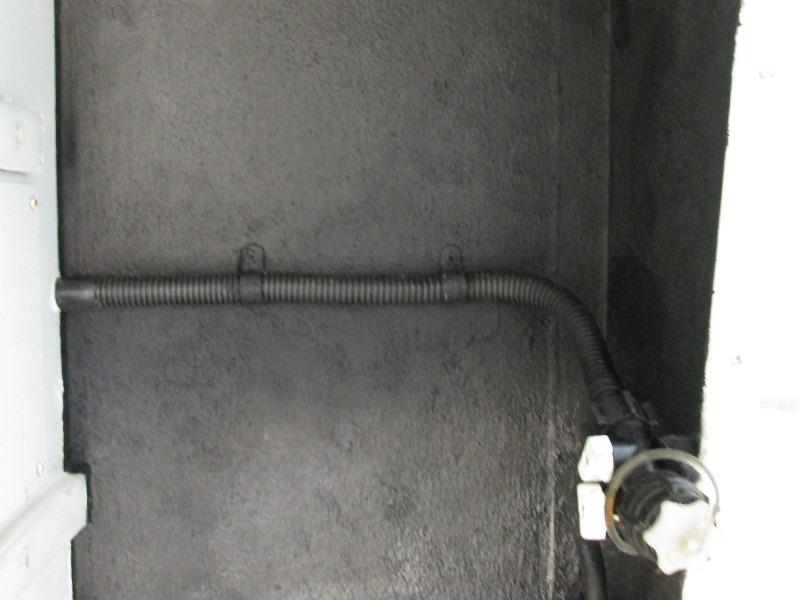
Routed up and over about an inch higher than tank. Wrap bend in Gorilla tape hopefully to stave off hose kinking.
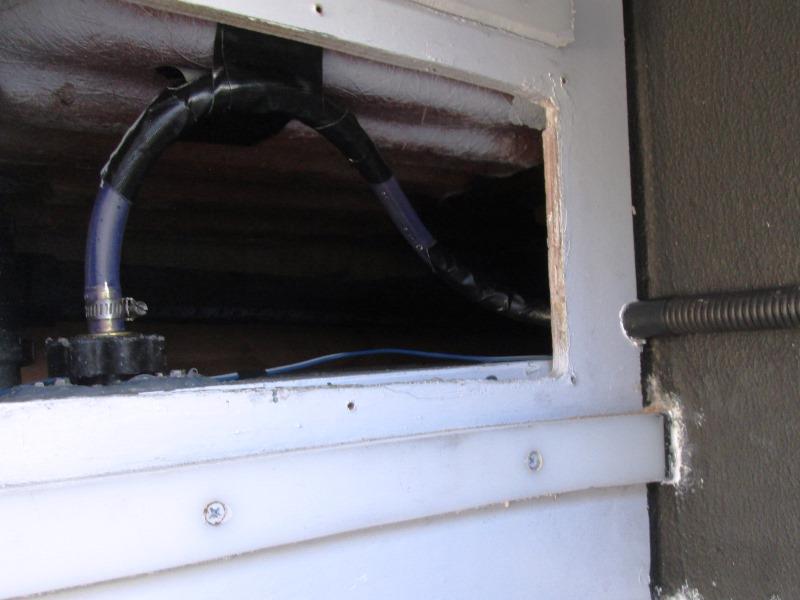
Slipped a piece of old loom before running across box to hose connection. Secured with some EMT clamps.
Repeated process of cutting off outer band to use hose clamp at remote end. Second one leaked worse that the first one. Later I am going to replace hoses. Use pre made hose- cut out middle section to reuse formed ends, reassemble with barbed couplings. Allow running hose thru small holes, fit in rinser bracket-
Reinstalled the lower plastic tank cover that was off to install new monitor system. Caulked. Tested-so far no leaks.
Button up:
Recoat the box-done.

Simplify rinsing tanks, assuming water available, so might rise more often.
1st trip-Works awesome. However, turning on/off water to move hose tank to tank, kinda of a pain, though easier than dragging hose inside. At minimum picking hose end shut off ball valve so I can throttle at the connections and/or quickly turn off. Jeesh- really don't trust this. May put together a Y connector from source hose to rinsers. Allow just one connection at 'station' once Y connected. Easy on/off for each rinser and throttling control at camper instead of back & forth to faucet moving hose.
Y valve
Later..
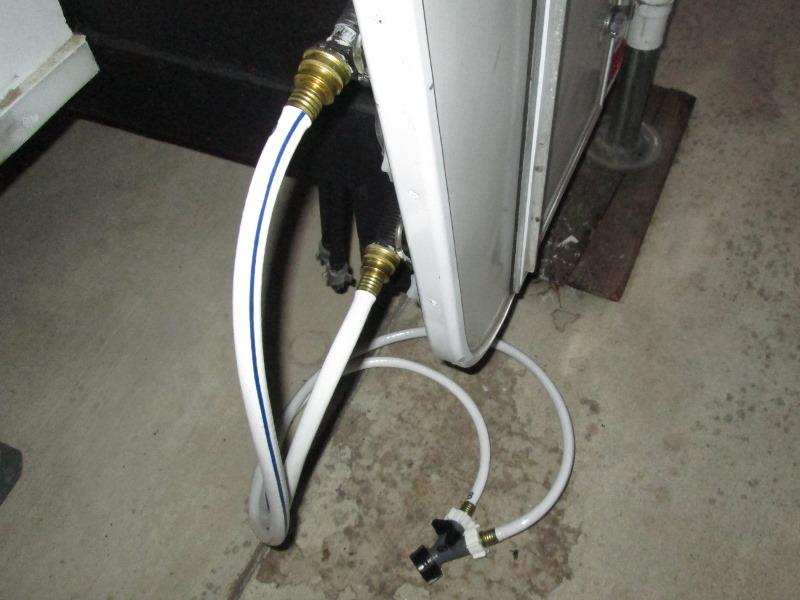
Like this. Hose Y with shut offs to select tank to rinse and throttle flow. Two 4' sections of 1/2" hose, premade less than 4 M/F ends to make?. In the garden & hose section, RV water safe. Over in the RV section different brand same hose $12.99?.
Way easier and faster to use. If at public dump pre install the Y so when my turn, set up drain hose, while draining tank, connect black water hose to Y. Once drained rinse tank, then go to next tank.
Now that this Octopus is made realized what I should do is remove the failure prone clear tubing and ends/ route the new hoses directly to rinse nozzles. Hard mount the Y on camper. Wouldn't have to store and only one hose connection to make. Fairly simple do change, but I'm done for now. I may do in future or definitely if any issues. I suspect as long as I pay attention and keep volume low should last.
Rework 2019:
Well only took year and a half...
Removing the likely to fail Camco hoses and inlets from camper. Hard plumbing the Y pictured above directly to nozzles.
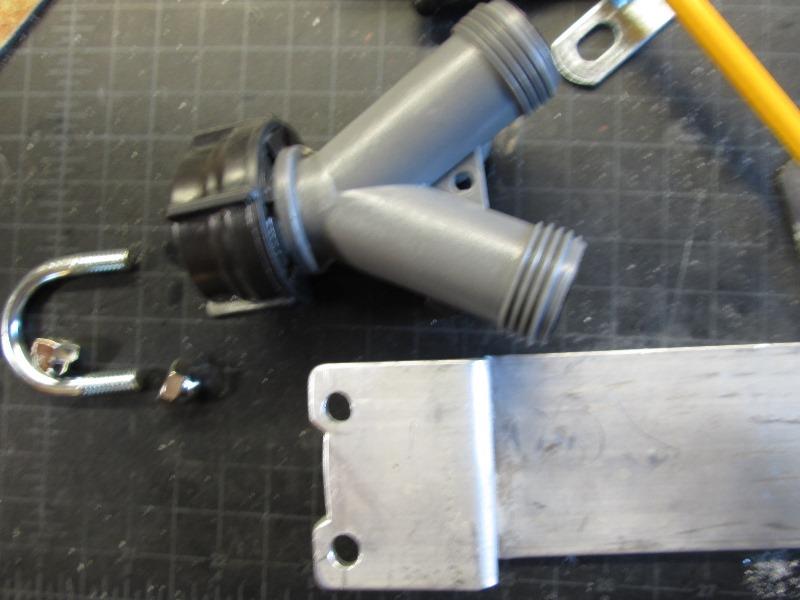
First issue to solve is the Y valve is rather bulky and also needs a bracket to mount. Main reason this didn't get done.
What I came up with is bending a piece of 1/8"x2" aluminum flat bar. Use a 1/4"x 1 1/8" diameter x 2" long U-bolt to mount Y to bar.
(Camera refused to focus?)Bent so when mounted valve and hose ends don't contact camper. Had to notch bar to clear valves reinforcing ring so end of bar would go forward enough to get holes for u-bolt away from edge

Also allows full flat of the valves Y to sit on flat bar.
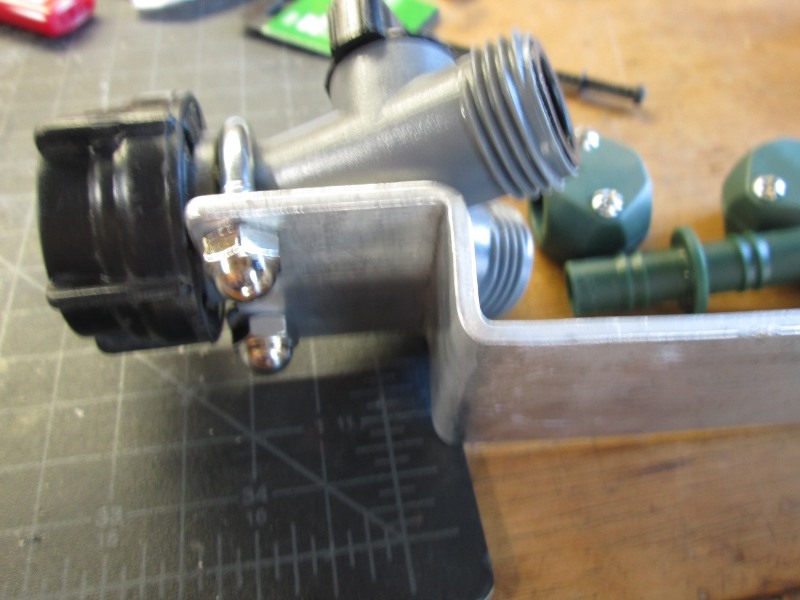
Cut about 5/8" from u-bolt threads, acorn nuts bottom out just as it tightens.
Added cap lanyard and drilled to utilize existing screw holes.
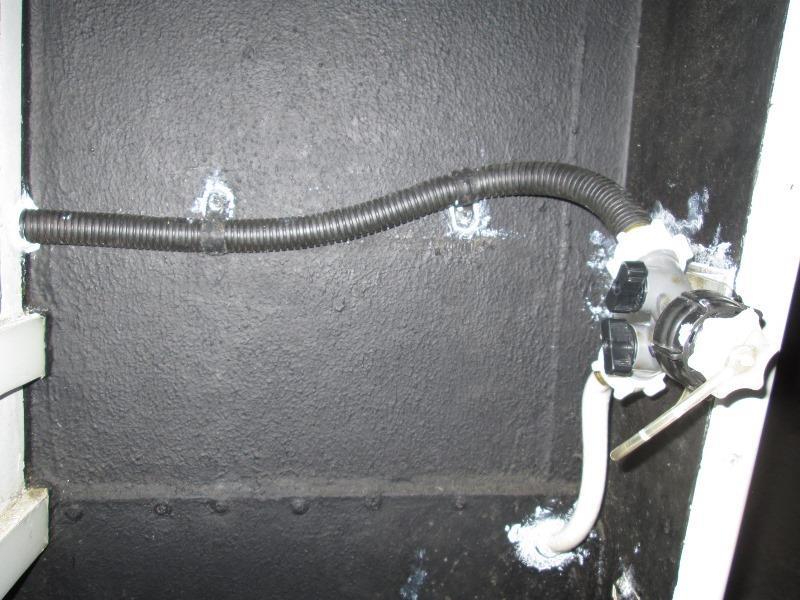
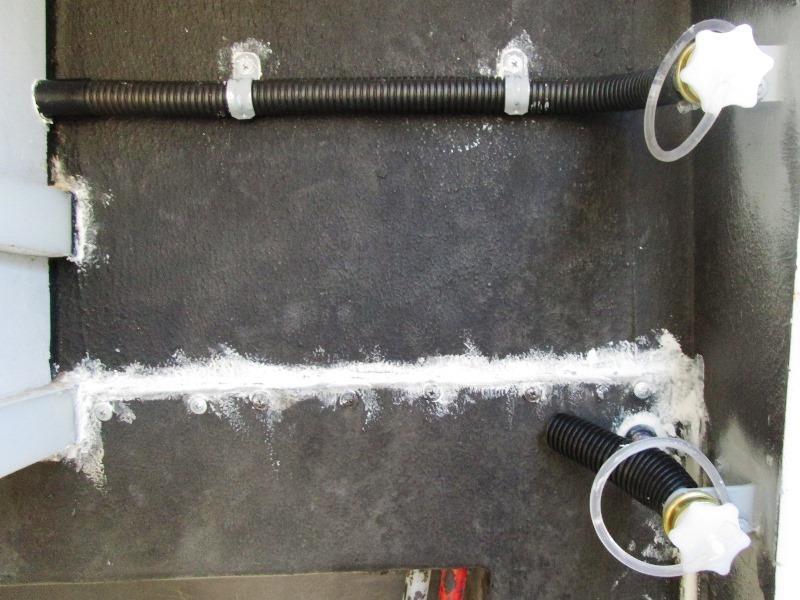
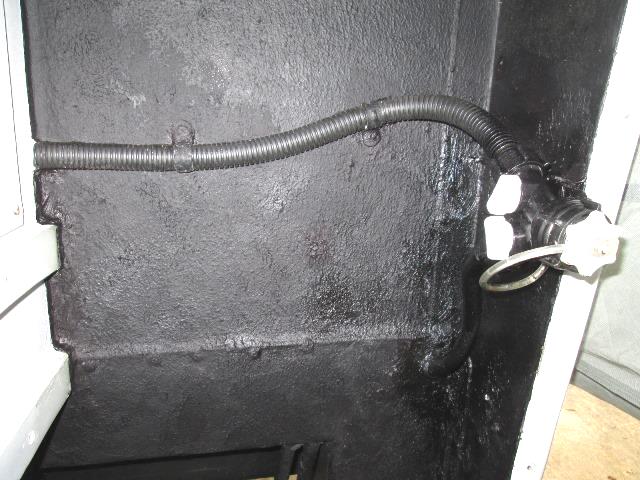
Mounted valve. As I didn't want to enlarge holes in camper and the hoses were too long I had already decided I would cut hoses and couple. Not really liking hose layout but trying to keep relaxed and make the needed turns, is what it is. Appearance wise I should have drilled a new hole about 2-3" higher, would also ease the tension on bend. To reuse existing clamp and screw holes just rotated the right one up.... Slipped the black hose inside the loom then entered camper. Pull back a bit and liberally caulk so when reinserted pushed caulk into holes. Need another piece of loom for the grey hose. Not really showing but on bottom grey hose slid a rubber grommet to act as drip diverter from water running down hose.
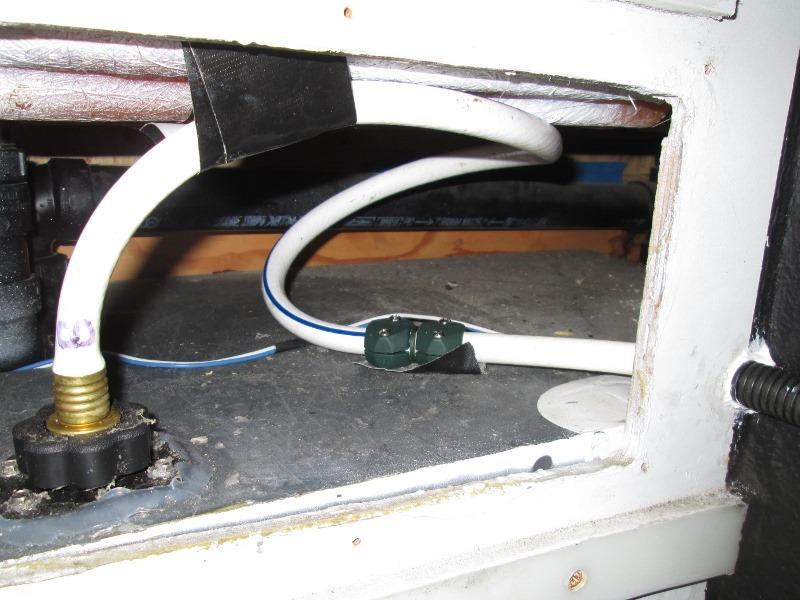
Left the black hose a bit long so hose relaxed at fitting. Taped but will make a support from stiff wire to keep elevated. One so hose doesn't fold but also so waste water less likely to enter hose.
Grey hose coupled. Though it can't really fold anymore, need to loosen coupler try to relax hose. Didn't see until looking at picture, hose twisted and folding a bit.
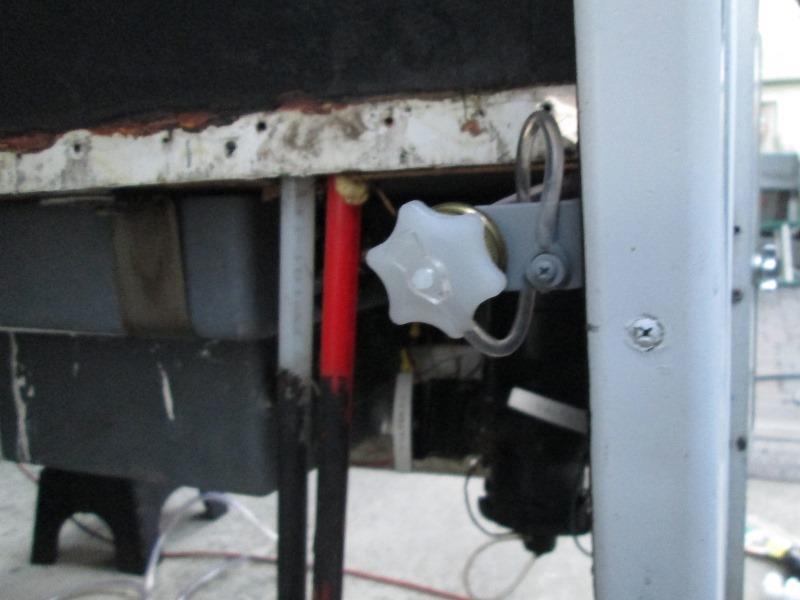
Last is to recoat/paint. Pull the valve off of mount and coat all the metal parts. 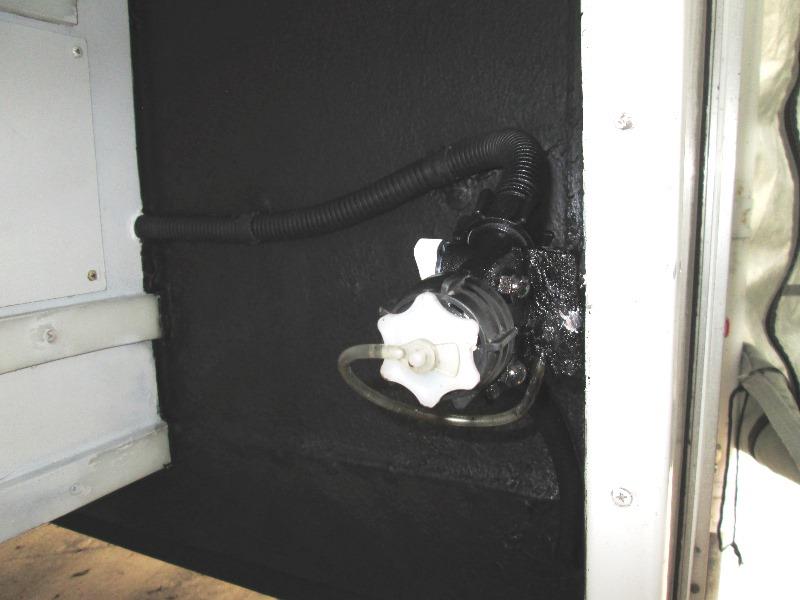
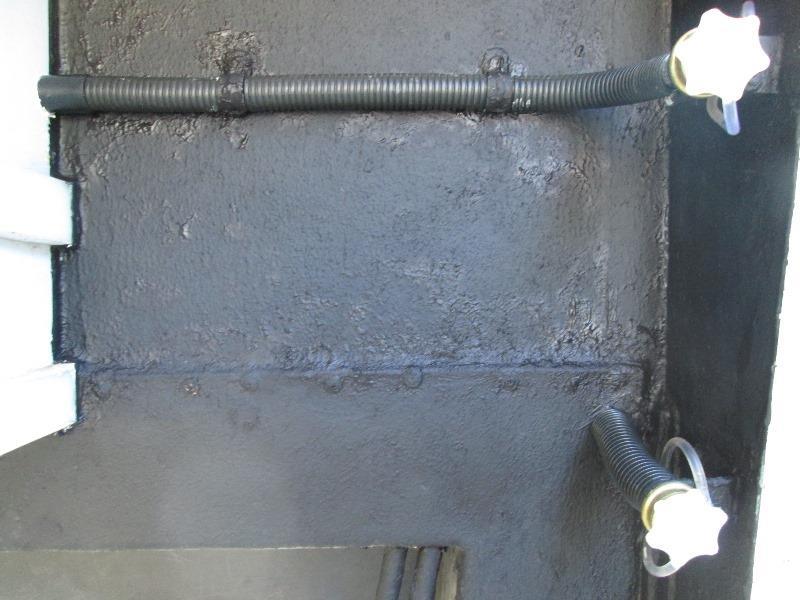
Reassemble, painted the knobs white. Coating still wet, dries flat black. So none of this is really visible except the cap. Done. Well that's what I keep trying to convince myself of but I keep seeing. The hose droop bugs me, a lot of tension making the bend, the one clamp will direct water behind it, the entire length of hose holds water...so likely will drill a new hole and raise black tank hose, reclamp to wall.
Sooner than later...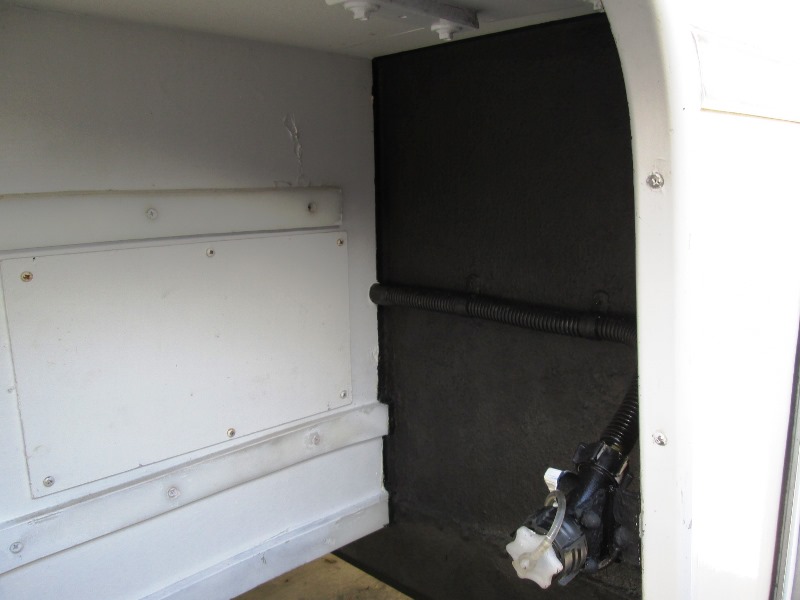
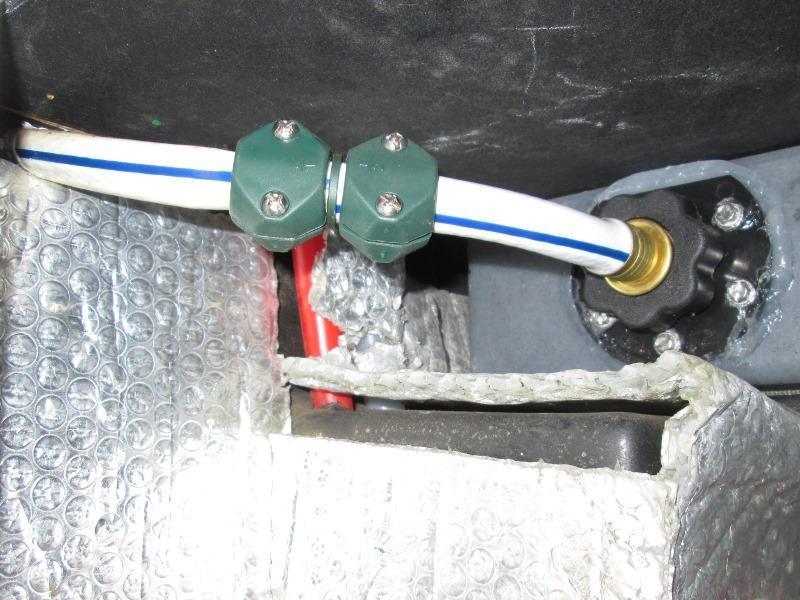
Ended up drilling new hole about 3" higher to route hose. Other than appearance mostly to relax the radius the hose is making to bend in corner. Because the valve is pointing up, having horizontal length lower than where valve is pointing and corner so close to valve, caused the compound bend seen earlier. Too tight and under tension it also sat further out from corner. Which I hadn't taken into account was our water flitter hangs in this corner.
Raising the filter up into corner it hit the hose. Still after moving hose I almost got to completely redo.

Filter housing clears by about 1/8". Just luck.
As I usually turn on non-potable hose faucet to see pressure 1st and I've seen some pretty high pressure added an in line pressure reducer to my black hose.
Bottom line, now I can turn on the water with out any concern about hoses blowing off. Every time I used this was expecting a disaster. Biggest plus is not having to retrieve and/or store the Y, thread 3 hose connections. So well worth the effort.
Related-done at same time Add LPG monitor for propane tanks
What led to this Replace holding tanks monitor with SeeLevel system
Back to Ourelkhorn Camper Modifications page