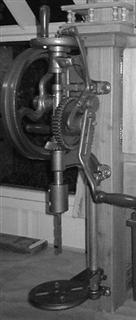
Mounting Champion Blower & Forge Co. post drill
One of the planned additions when rebuilding the shop was to find a place to mount my old post drill. Been stuck under bench for several years, then got laid outside while shop rebuild was done. It more than likely would have gotten slid under the bench again-but when I went to put it in shop-it had rusted solid and wouldn't turn. I started playing with it to free up and ended up rebuilding it, which included procuring some missing parts. I discovered another whole world of folks out there whose pastime is restoring old machinery & tools. Very informative. At any rate if interested the drills restore has its own page linked on main page or direct LINK.
Back to mounting my drill. Once completed it sat on the shelf for quite a while, one was no where to mount it. Then a major snafu with our camper tied up all my free time for about 2 months. First real use the 'new' shop was put to the test-the extra depth and bench top surface was awesome allowing me to work inside while raining. At any rate did give me the opportunity while standing there hours on end to eyeball possible solution to mount the old drill
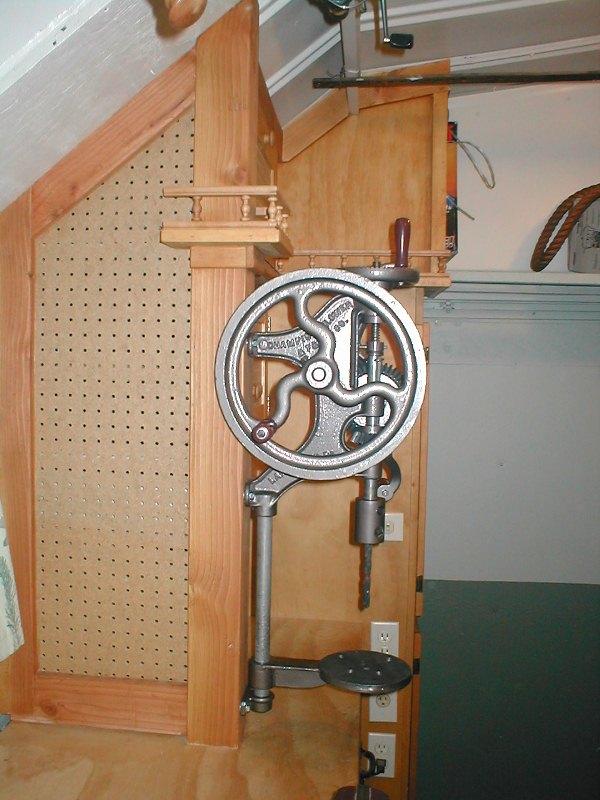
I only have completed pictures of the mount. The drill originally came mounted and shipped on a piece of 2x4 oak. Intended to be mounted to a post, like in a barn etc., hence the term 'post' drill. I had thought of just mounting to a wall but I wanted the ability to actually use. Placing a 4x4 from the top of bench by door I could tie into both the roof and tie to front of building. I mounted the post as far back from edge as I could but still have table center over edge.
Adding several braces it soon became obvious add couple of doors and I'd have a cabinet. If I extended side I could carry to roof adding another, though small, cabinet. If I ran another brace could add a couple of drawers....So as I added material to secure post it morphed into building a cabinet out of support structure-as I added material to make it a cabinet more options revealed them selves. Kind of fun project that tool on a life of its own. Finished I was kind of amazed-though all resultant from the bracing it actually looks like a cabinet. but not by plan or skill simply luck.
The Post
Basically added the 4x4 post by cutting a square hole in bench top. The post extends thru 3 1/2". Underneath top I added (2) 2x4 stringers and blocked to capture bottom of post.
At the roof post is notched to set to the 3/4 ply that is surface mounted to roof. It's structural. I then added the 2x4s to wall, bench top and roof to stabilize. To these I cut a 1/2"x1/2" notch full length on inside corner to attach the pegboard. This ended up with post quite solid.
However I did see possibility of post moving sideways.
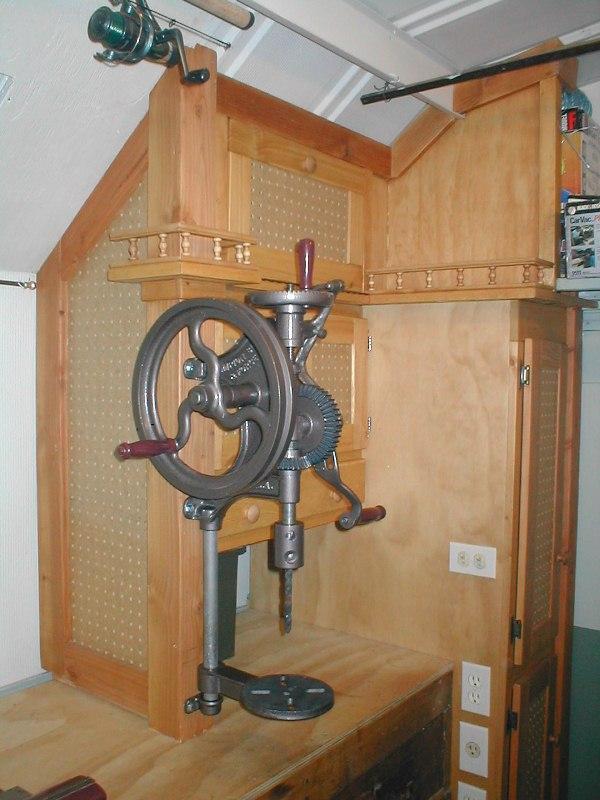
After some eyeballing I cleated and added 1x2s tying into end cabinet wall. One at mid height & one under top of existing end wall. I then removed the top off end cabinet and replaced with a piece of ply that covered it and ran to post. Virtually eliminating any possibility of post twisting. This is when I saw utilizing as cabinet by simply adding a shelf to lower brace and adding doors between.
Worked out pretty slick. Added a 'lil more wood making face for doors and built the 2 doors. Cool, I had the post to mount my drill, front to back wall divider and a small 2-door cabinet.
Originally stopping where the rail is now. the space above, especially with full bench to ceiling end looked a bit odd. I added some more cleating and close off the space with a drop down door. I then extended the end cabinet to go to ceiling. Wrapped the corner a tad. Eventually adding a shelf over main doors that will tie to this I may or may not add doors but allowing for it.
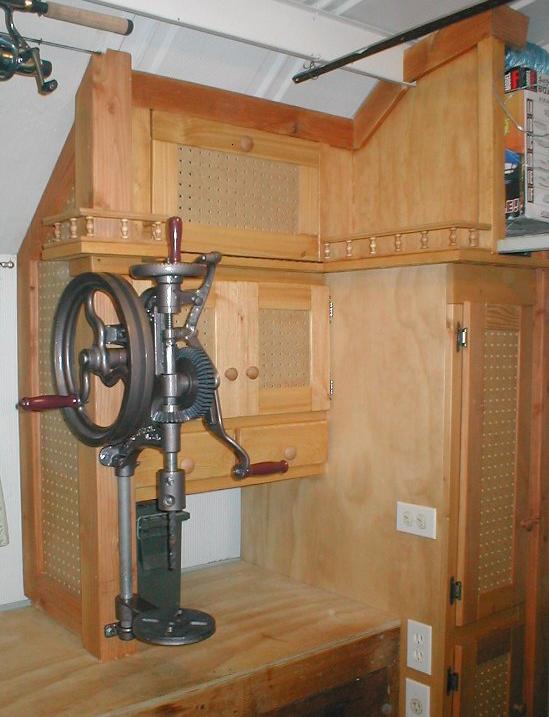
The end cabinet to ceiling piece I had to set back a few inches for the door clearance and tie into the metal channel building spreader bar. This left a small ledge in front. To make it look like a 'planned' shelf I added the rail. Liking it added the trim and rail to post to sort of match. Did make the post look like part of the cabinet.

Taking some measurements I was thinking of adding more doors underneath. Instead decided I could use the open space on bench but could still add a couple of small drawers.
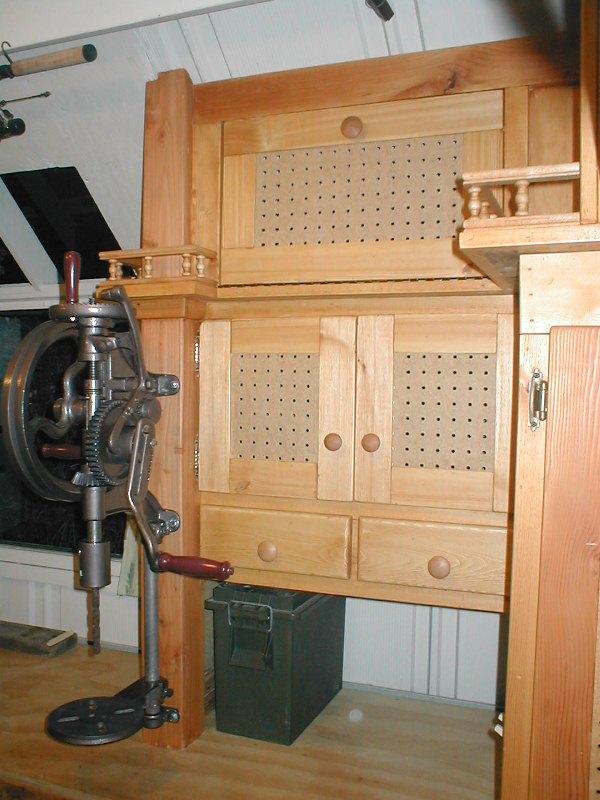
Nothing about this other than adding the post and securing to support the drill was planned. Just kept adding wood. Think it's why I like it and fun to build -it just happened. Ended up with a lot of usable storage. I had the original oak backboard for drill, unfortunately it was pretty rough and had a good 1/2" twist to it. So I mounted drill directly to the 4x4.
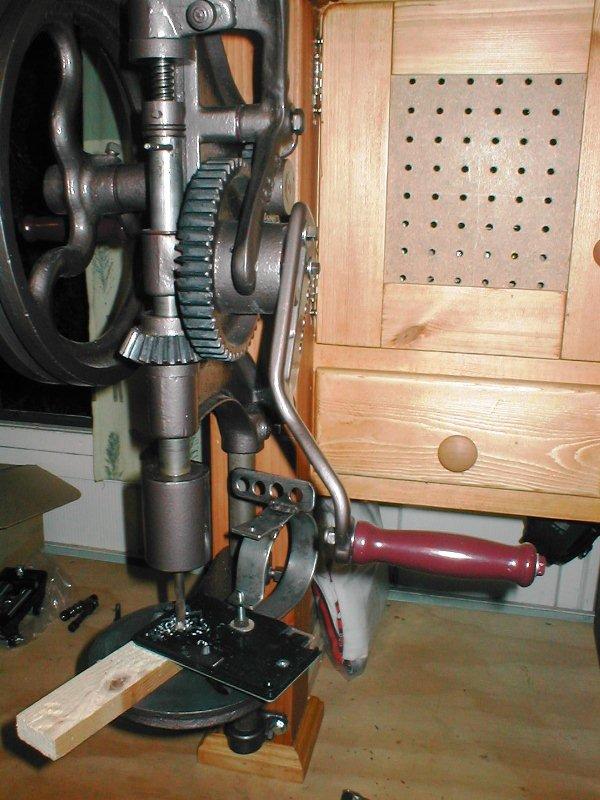
My Champion Blower & Forge post drill in use. Rarely use and then only use for light plastics or aluminum but these drill are actually quite capable. Hearing the gears turn is a pleasure. I've since made a bracket that the advance pawl arm sets on so it's not engaged.
So that's my post drill-turned cabinet build. 45 years after finding in barn it's finally mounted.
Back to top of page
Back to shop mods/additions
Back to Our shops home page