Increase step storage 01/09
During the insulation project I had the lid off of the wiring access box inside the step box to dinette. Realized the covered side was quite a bit larger than it really needed to be, I assume the space inside the step was just divided in half.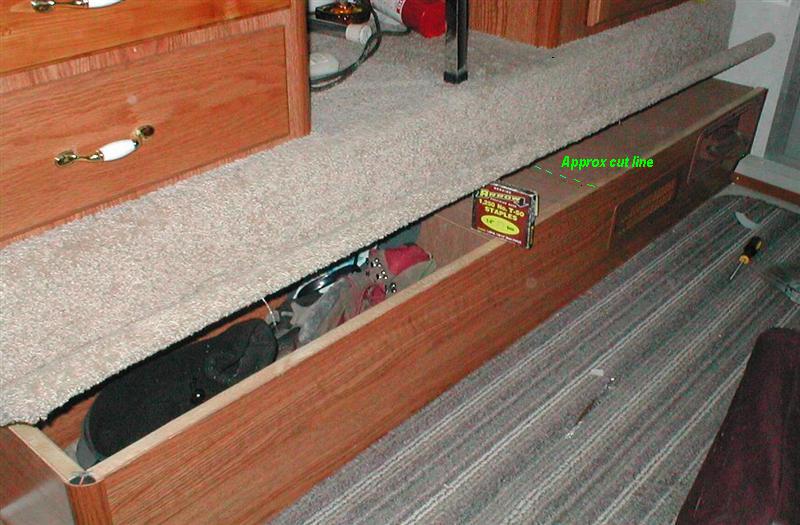
10 minute job (that took bout an hour) to move divider. Its just 1/8" paneling on 1x1 frame. Recut top, also 1/8" Its held in place with just 2 screws. Gained almost 14" of space. Hey it was easy -free.
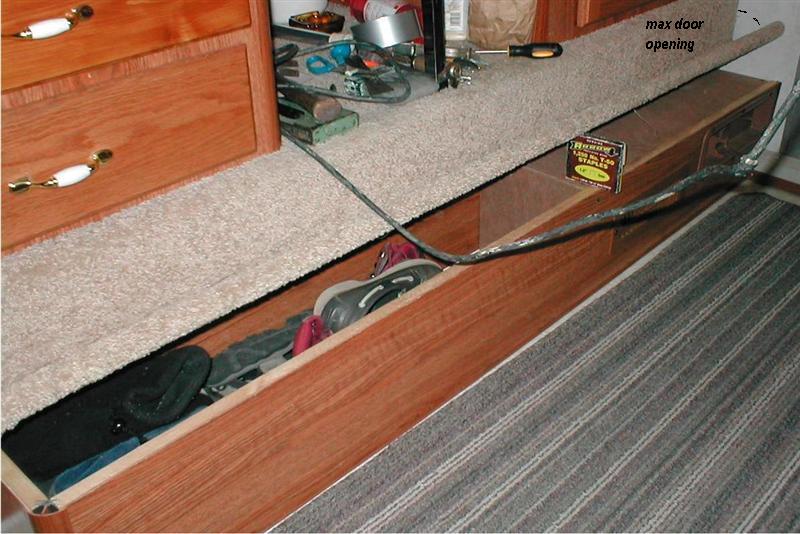
Notice the angle of the door/step lid. You cant open it anymore. The step lid is full width of box interior, but its hinged under the slide floor skirt. When opening the lid it hits the skirt, making it difficult to put stuff in or take out. The skirt is just a piece of paneling attached to slide floor. (Kinda hard to see in pics, when I cut Ill take a picture of lid down). I gather so you can't 'see' under the slide though you have to be on floor or standing outside.
I was going to just cut off skirt, but then I don't want to see under the slide either-however briefly. So I think Ill pull carpet back, its just stapled along bottom edge, cut off the paneling bout 2 1/2" up. then check out the view. If you cant really see under the slide area, I'll just fold the carpet up and re staple, done.
If its too ugly a gap I can cut a 1/2" or so strip from the removed paneling. Fold the carpet over the strip and restaple. The carpet will simply hang down. That would only increase the gap maybe an 1" taller. The carpet would then fold out of the way when opening lid. Course moving the edge the lid hits up 1" will increase the opening considerably. I wonder if when I recut the skirt I can get a dremel in there to cut hinge. It would be nice if the lid wasn't full length. We usually set muddy shoes etc at the end by the door. hmm lilt more work but think thats how I'll do it -pics to come.
Ok here I've started modifying the step lid, I pulled up the carpet from the slide "skirt", stapled back. Im going to cut 1 3/4" off from 1/8" ply skirt.
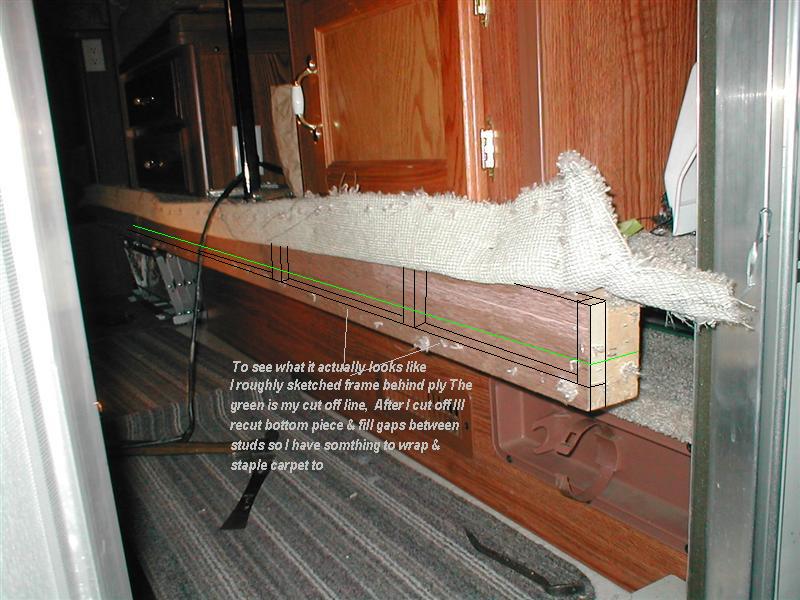
The carpet originally was cut flush at bottom edge of skirt. At end you can see its just 1/8 ply stapled to 1/2x1 frame. Studs are spaced every 14". I had to pull slide in so I could get to back side & pull out large staples between bottom 1/2x1 piece & studs. You can see the studs below.
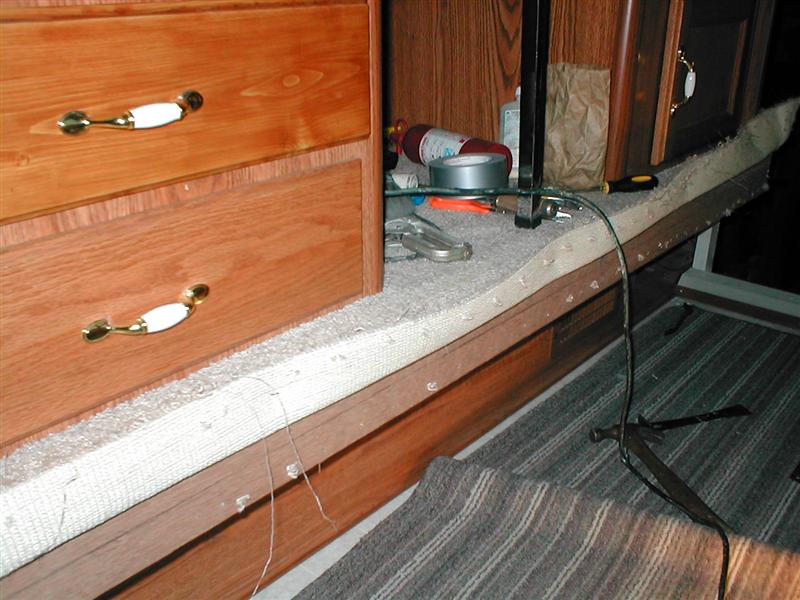
Another view , ready to cut with stiff hand keyhole saw.
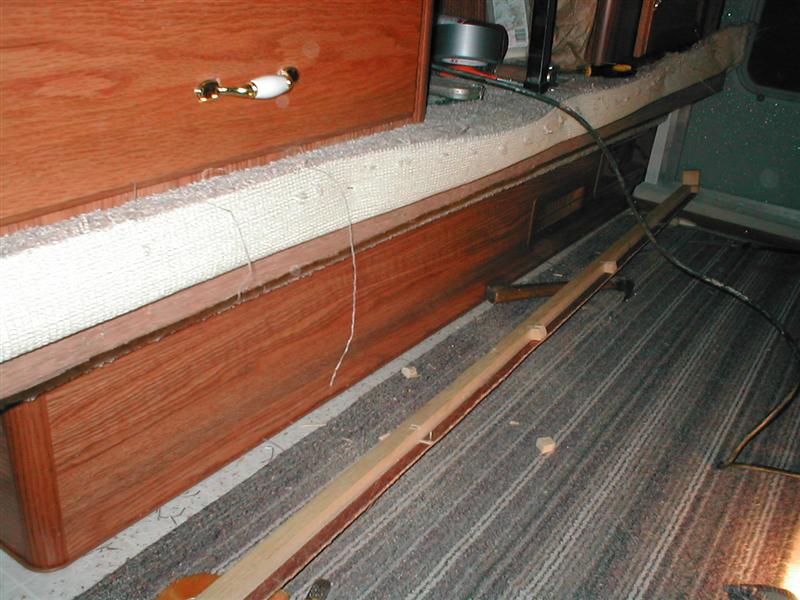
Cut. you can see the 'studs'. Im going to clean up cut scrap, removing still attached ply, studs & carpet staples. Since I want to actually wrap the carpet around bottom of shortened skirt, I'll need to cut the original bottom piece and space between studs. Then I can restaple the carpet to bottom edge.
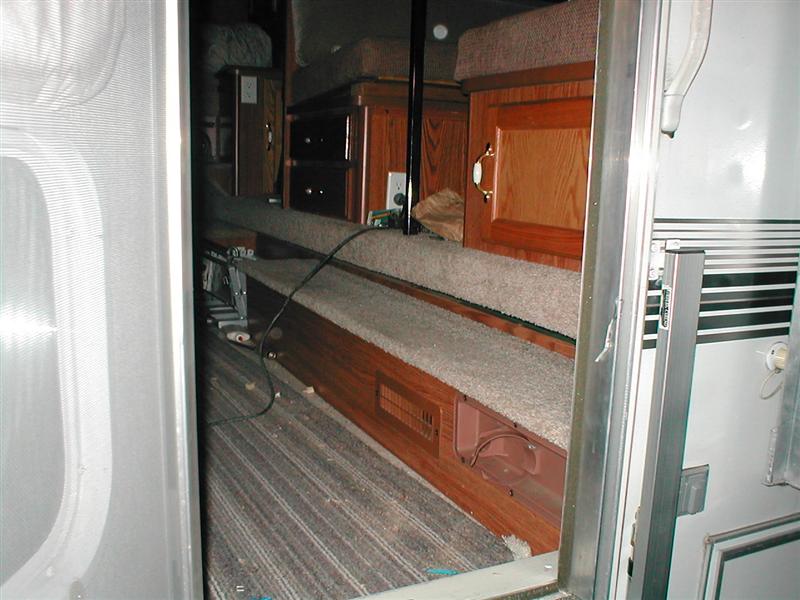
Got carpet stapled. With the slide partially out to access the back side cut 1/2x1 pieces, glued, using small clamps to hold in place while stapling paneling. The carpet actually wrapped around to back side, looks a lot better. Stapled along bottom edge & back side at ends, the middle (most) the carpet tucked in between skirt & metal lip of slide mech on back side. Took slide fully out, from inside you don't see underneath, this I had to stand off to the side to see under. It really looks better to me, I like it.
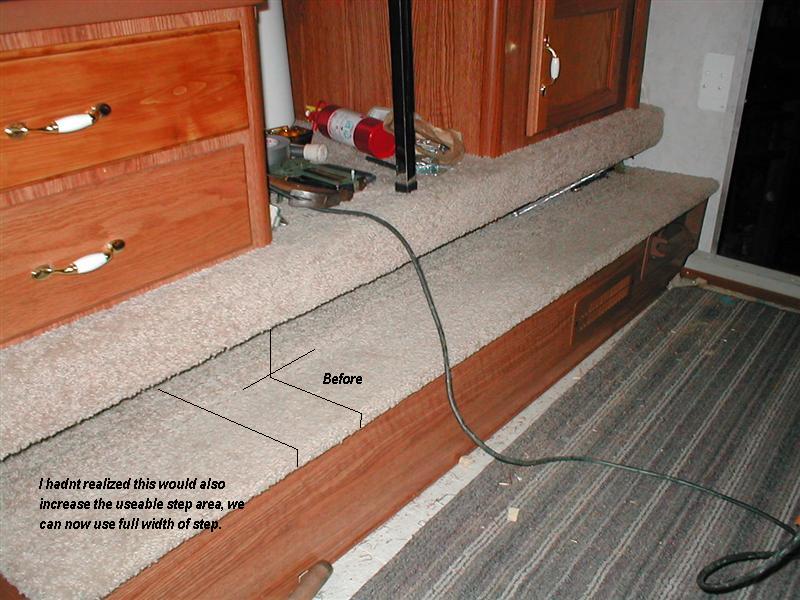
Nice, As the carpet was previously cut flush we were constantly trimming off strings. Bonus is there's actually more step area now that your foot can be placed on cause it can go underneath, always had to step up a bit sideways. There is enough clearance 4" shouldn't catch.
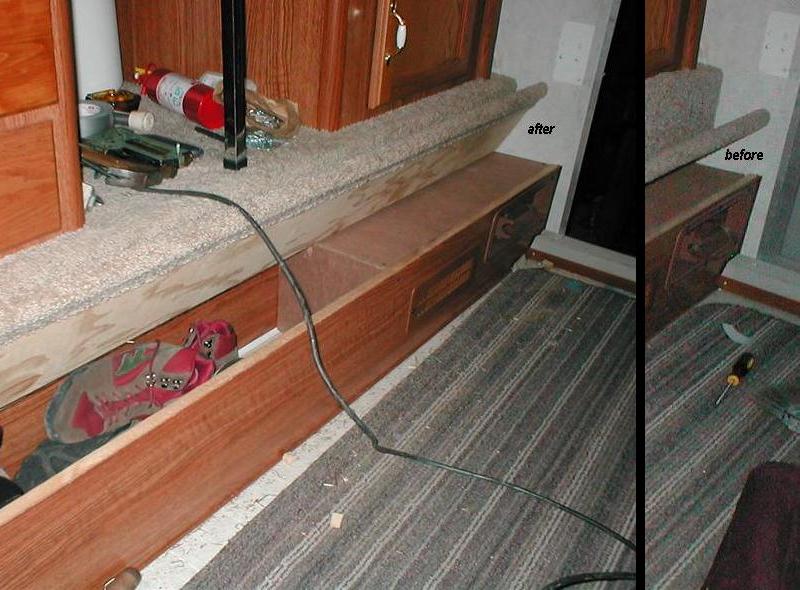
Oh & the whole reason, check how much door will open. HOoHOO. More storage, easier access and more usable step surface. I really like it.
Not counting time I spent taking stapler apart 50 times-yep I think its finally toast, I probably have 3 hours in this. Free easy project. I have plenty of access so I'll go ahead & cut the lid length of storage area so edge is at divider, only hesitation is it'll probably fray, Ill glue edges. Lift assist might be nice-think I have an old one lying around.....
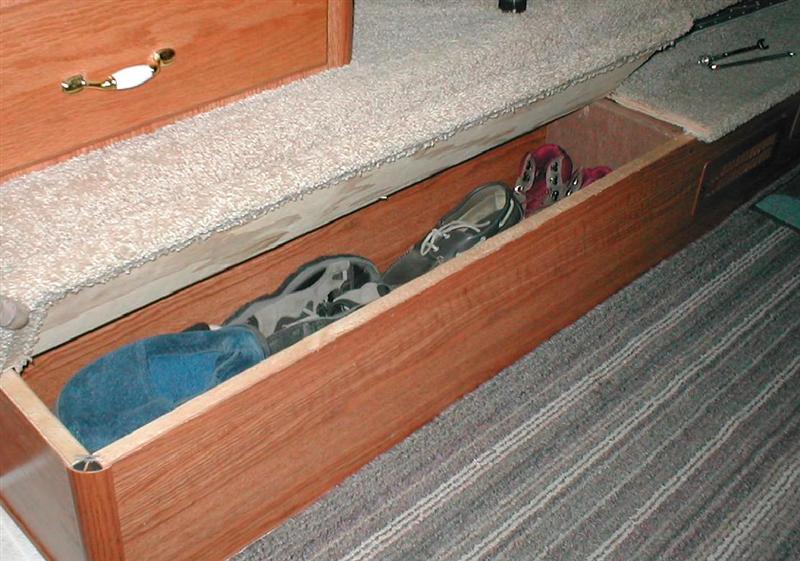
Easy cut, the piano hinge is aluminum. Was able get keyhole hand saw and cut board. No more having to move stuff to access shoe box.
When /if we ever recarpet Ill widen gap between lids so I can wrap the edges. The only reason I hadn't replaced carpet so far is I think the dinette boxes will need to be removed, least there on top of carpet. Ill cut back 1st see if there is enough surface to hold carpet at front. Maybe summer project.
Time to go camping...
update 09/16
Add gas assist spring to dinette step box lid to lessen effort to open & hold open
Carpet replacement Finally replaced the shag carpet around dinette.
Back to Ourelkhorn Camper Modifications page