Labor Day weekend project-add gas spring to dinette step/ shoe box lid
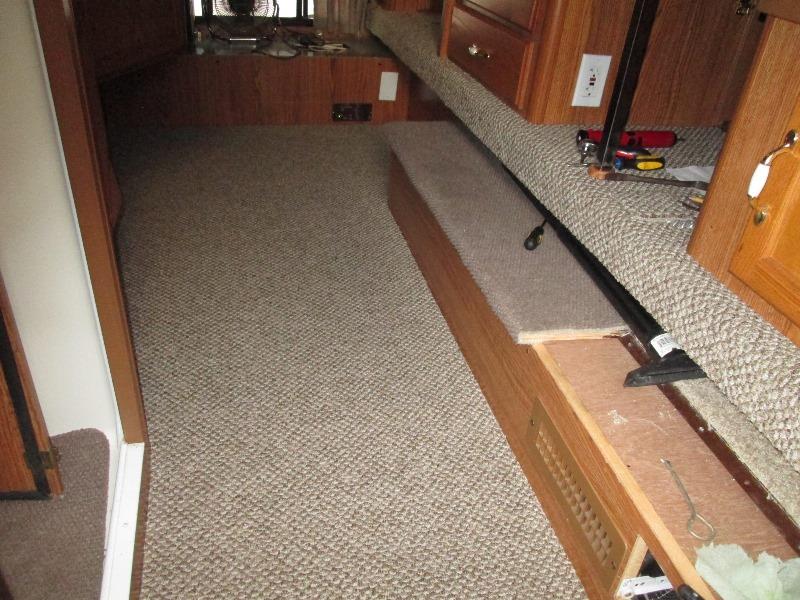
When we recently re carpeted camper one item that needed to be re-addressed was the dinette step. We store shoes in it. The lid I spilt several years ago as it was a pain to open the whole length lid. When I wrapped new carpet I left the old carpet on step as we are not padding. New carpet is shorter nap so folding over edges backing would show, old carpet makes edges "rounder". You can see in pic above full length piano hinges used on lids, under carpet. The stiffness of new carpet in addition to existing carpet under neath resulted in it now requires a lot of effort to open lid. More just to hold it open.
Got on line looking at assist springs to counter the force needed to open lid. Our old MH had them on overhead cabinets where doors swung up to ceiling. I found a pair of 7" gas springs (5-7") that should fit in step box. (Amazon https://www.amazon.com/dp/B0156P6YVC.
They were also the lightest rated at 18#. (and at the time cheapest) If needed I'll use both but though difficult to open pretty sure 2 at 18# lid wouldn't stay closed. Which though I just want to make it easy to open again. I hadn't realized installing the spring might also hold open the lid, that would be awesome. Never occurred to me to add something to hold lid open, it is a pain to hold lid while accessing contents. But again this primarily just to assist in opening.
Its all about the geometry
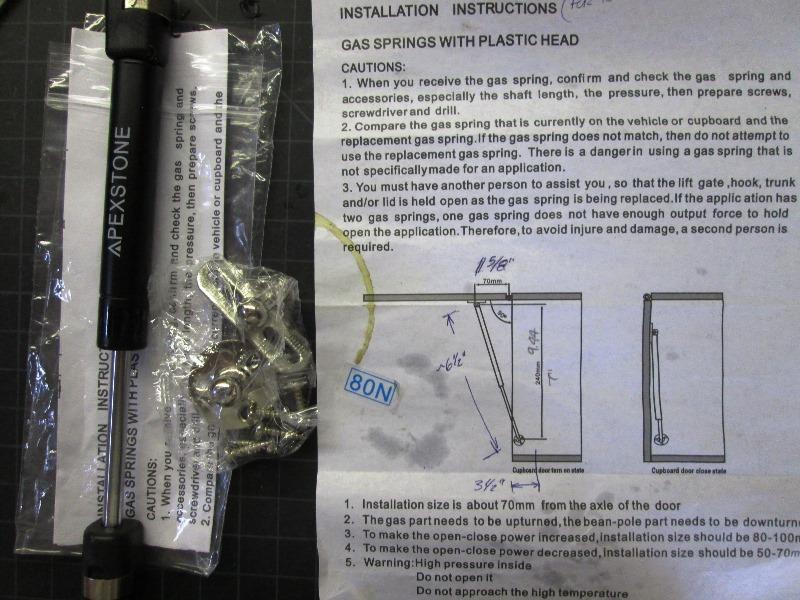
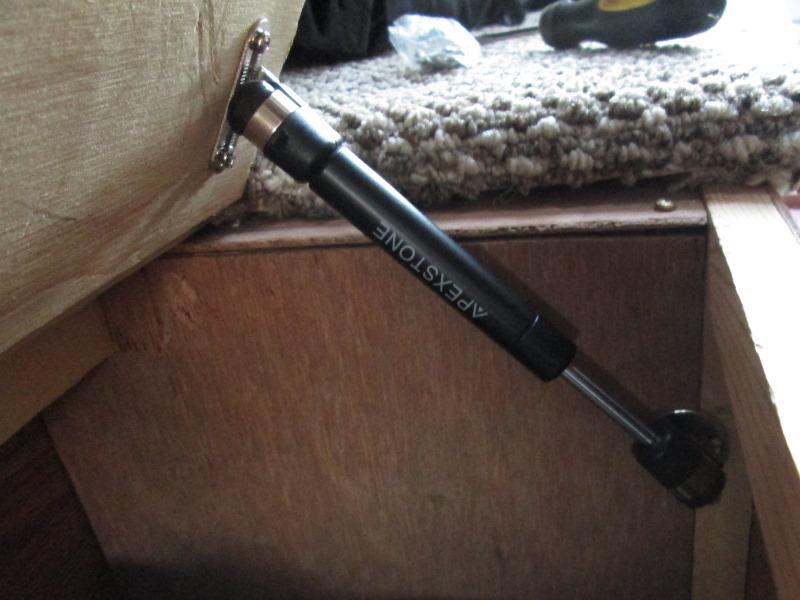
Springs arrived. Look pretty nice. Instructions though are for the 10" springs. Odd. Also our lids hinge point is about 2" from back side of box The actual box opening width is less than the spring length. So its going to take a bit of head scratching to mount springs.
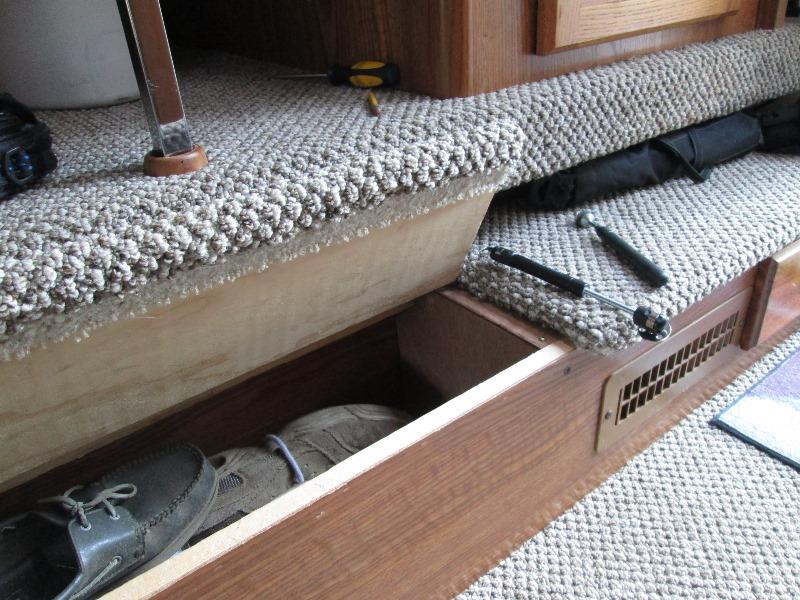
Only reference I found for dimensions for the 7" spring was an about an 1 1/4" for door attachment end verses the 2 3/4" shown. Using that as starting point mounted the top bracket to door/lid. Compressing to about 6 1/2" guestimated where bottom end would be and mounted bracket. Snapped on spring. And it almost worked. I guess because of angle I had to mount it doesn't hold door open and closing it shut pretty hard. Rotated bottom mount up about half an inch and forward or away from hinge about 1/4", top /lid side up or away from hinge about a 1/4".
And it works. Given the angle I had to mount spring it is far from optimum but it allows opening/closing door with one finger. Once at top it holds open, Closing it gently shuts when within about an inch. So I'm done-for now.
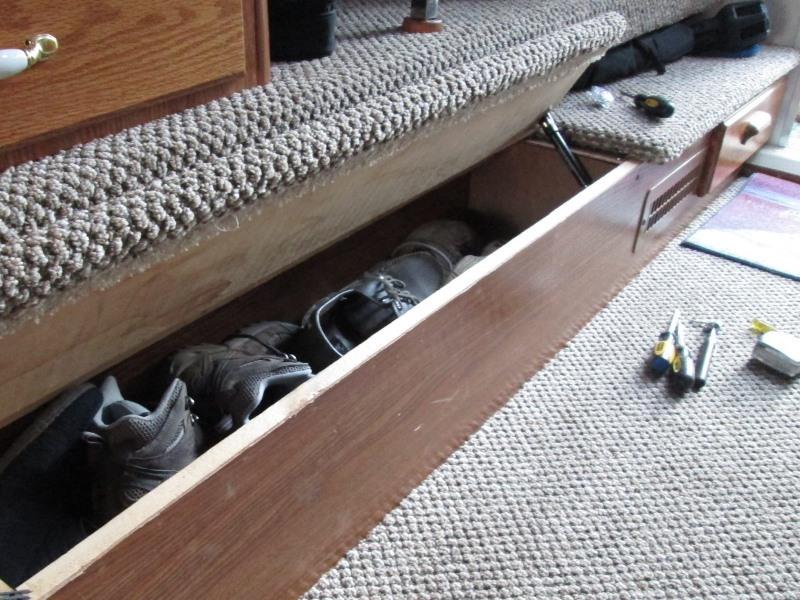
Really nice, took all the effort out of opening, and it stays up by itself using only one spring. It is a bit light at the top when open but that's because as lid opens the angle of the spring increases. Which translates to: as the angle increases less of the extension travel is being applied to door. It really needs to be flatter, could rotate the bottom end a bit up and still keep length. If I moved the hinge side down to keep length then again loosing amount of force verses travel at distance from hinge. Brainteaser. Only real reason its working as set is the door cant/doesn't open full 90° and spring looses leverage coincidental where door stops- about 70°.
If needed as spring looses pressure, I can adjust a bit. Looking at open position, moving both mounts up would increase force. Where point of not closing probably close. Alternately add another spring. Carpet should also soften after a bit from flexing. But for now done. Made a short video of opening & closing with new assist spring.
Lid open / lid close video (no annoying music, just annoying hinges squeaking :)
Related "remodel" projects done at same time
New door curtain to replace pillow case that was hung temporaily...10 years ago.
Bed side cabinet, replace fabric door insert with wood-
Replace camper cabinent hardware just getting rid of all the bright shiny brass.
Replace carpet new carpet throughout- what started this
Back to Ourelkhorn Camper Modifications page