2001 Ford F250 Headlight Removal/bulb changing
-
There are many places that describe this better and
I don't have the occasion to remove the headlights that often. When I do its just a royal pain. Needing to remove passenger light I had to look it up again. Fought the silly clips and lens still wouldn't come out...oh yea there's an all but hidden clip down at the outer bottom edge. errr, how do you release it?
Though not a removal procedure tutorial, pictures of the clips and how they work may help in understanding what your trying to do. If you are only swapping bulb not too difficult, however on mine the drivers side I need to pull lens/housing to get enough clearance to pull the bulb.
Decided Im going to document the procedure so maybe next time Ill remember, but mostly try to see why its so difficult and what I can do to make it easier. Its just a headlight, jeesh. One of my pet peeves-working on cars, it isn't the disassembly, fixing its simply figuring out HOW its put together. Maddening when a simple screw would suffice and you have to interpret some egyptian hieroglyphic form of thinking, fighting some non intuitive interlocking gizmo. I swear they must have contests- "How can we join these two pieces together in a way that has never been done before...then bury it making access near impossible?"
Changing the bulbs:
Or, if removing the light housing from truck you need to either pull bulb or unplug the wires.
. On the Ford, removing the light bulb from housing/lens.
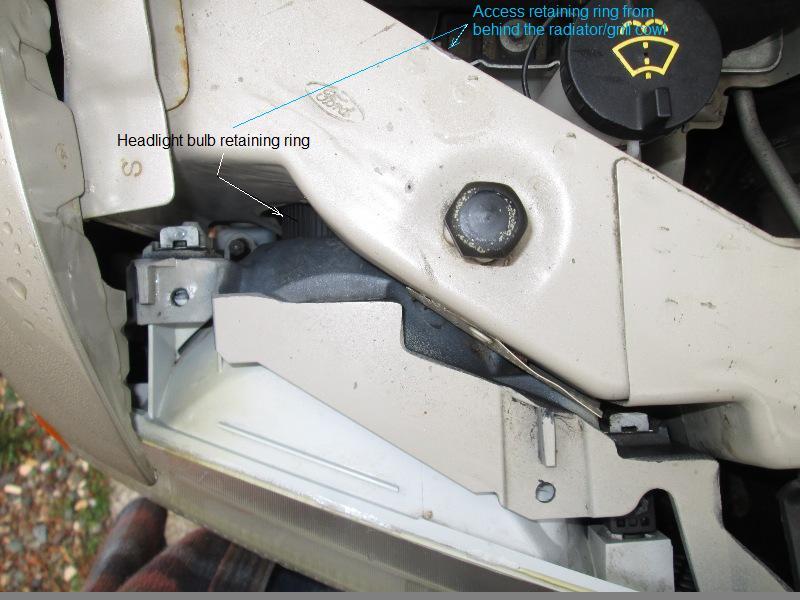
Looking straight down on passenger side headlight. You can see the retaining ring that holds bulb. It protrudes thru the radiator/grill sheet metal.

From the back side, unscrew the ring about 1/4 turn, slide back.
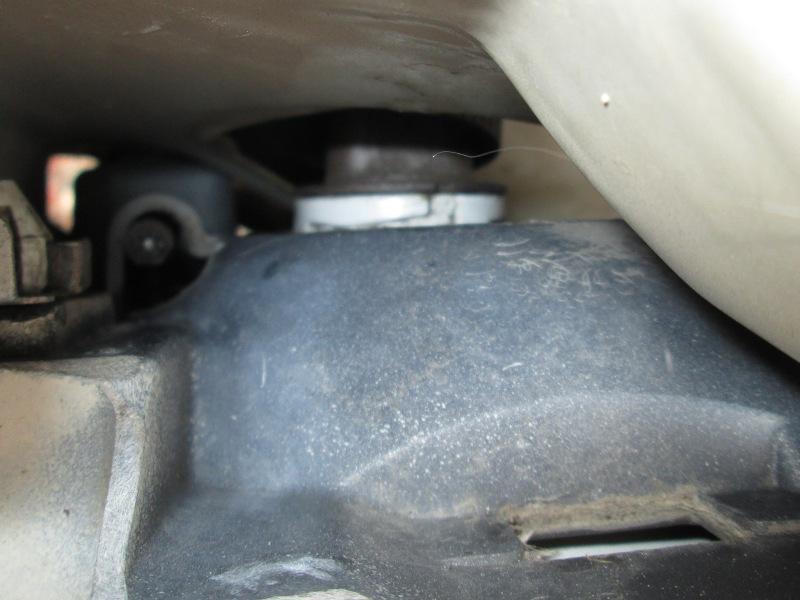
Just showing groove in headlight housing (white) the ring turns in.
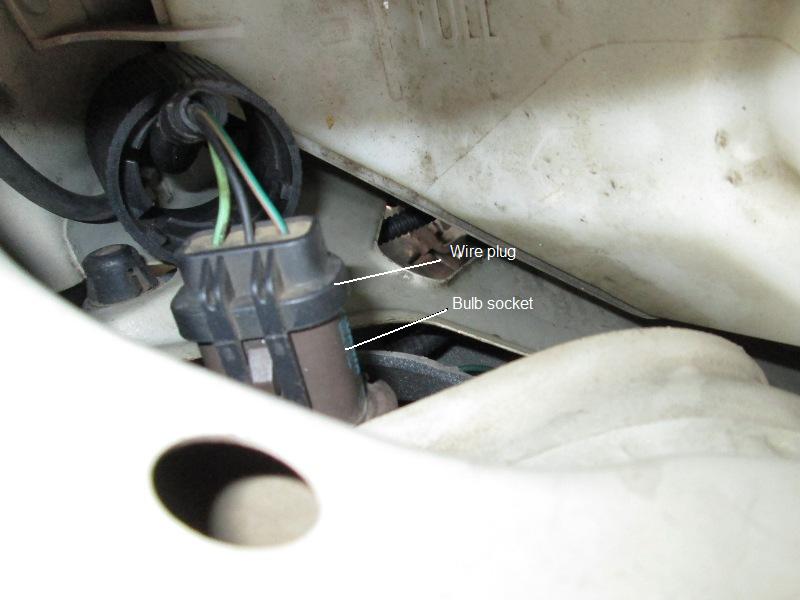
With the socket exposed the bulb socket simply pulls straight out. It is not necessary to unplug the wires. If you need to there are locking clips on both sides. The bulb socket has an o-ring that seals it into housing, so gently wiggling it should come out.
If your just replacing bulbs- If have some silicone/synthetic or even dielectric grease, its a good idea to clean the o-ring and mating surfaces, regrease, lightly. Don't want grease inside. The bulb is a plug in, simply pull out, push in the new but try to keep clean, use a rag on new bulb. Carefully reinsert the bulb housing. Push the retainer ring back on and lock 1/4 turn.
Easy peeszy. However on our truck, diesel with 2 batteries, the drivers side requires either removing the headlight housing or the battery/air box. Not enough room to pull bulb out (if I could even get my hand back there.) Though I did first time, skinning the back of my hand trying and successfully unscrewed the ring, only to find there isn't enough slack in the wire to slide ring back or pull bulb because it hits the air box.
Removing the headlight housing
So the purpose of the page.To show the clips that need to be released, where they are, what they are and how they work. And what I did so the next time a bit easier.
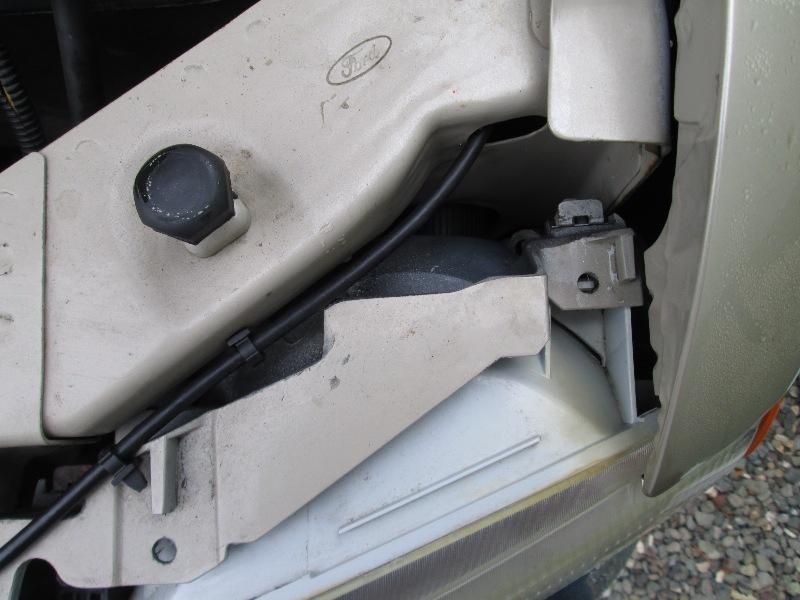
This is the drivers side looking straight down. Never looked at gas engine or single battery truck. It might be a non issue, similar to my passenger side as far as replacing bulb.
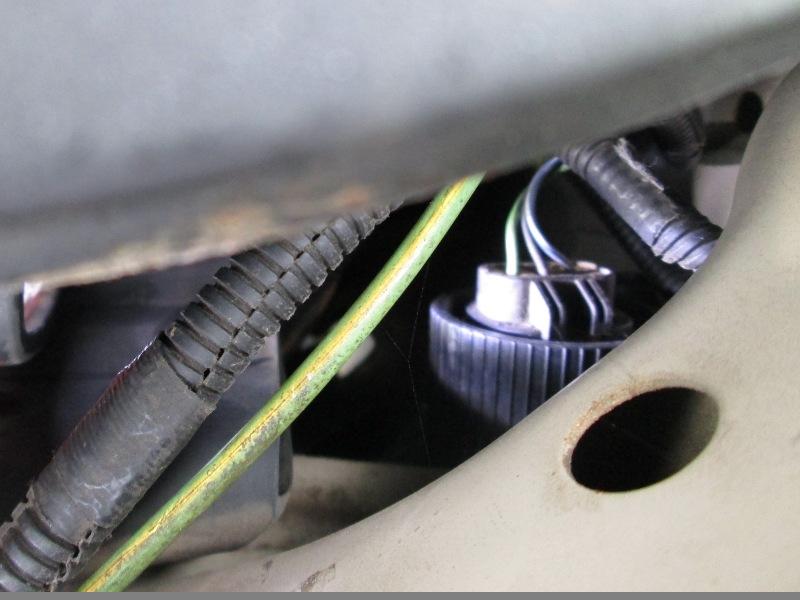
However this is looking behind the radiator/grill sheet metal showing the retaining ring on drivers side. You can see the way too short wires, and butted right up against the air/battery box. Again on our truck I need to release the housing retaining clips, pull the light housing out a bit to simply have room to change the bulb.
There are 3 clips, two on the top that are supposed to pull straight up to release and a 3rd the has ears that need to be squeezed. The top 2 most finally get, the third mostly because of access (and not knowing how it works or even that its there causes a of grief
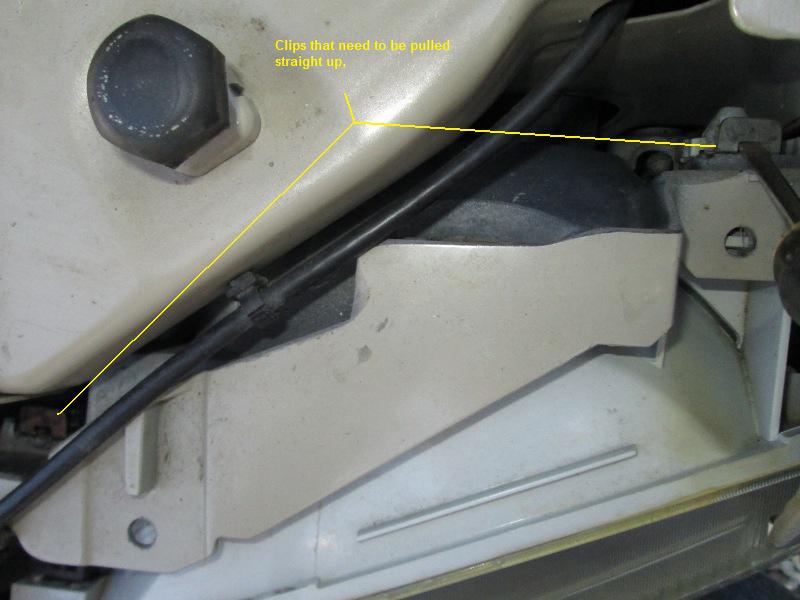
Starting with the 2 'easily' released clips. In theory these 2 simple clips with the correct tool simply pull up about 1/4"-3/8" to release. However with mud dirt rust they really don't want to. The correct tool is anything you can grab clip, preferably something that enters the slot in top and will hook clip. A sharp jerk they should release. Last time I had a part i lathered in anti seize thinking it would keep dirt out, but they simply would release. Pulling up the first clip bent. I resorted to inserting a nail while pulling and finally got it
The how & why
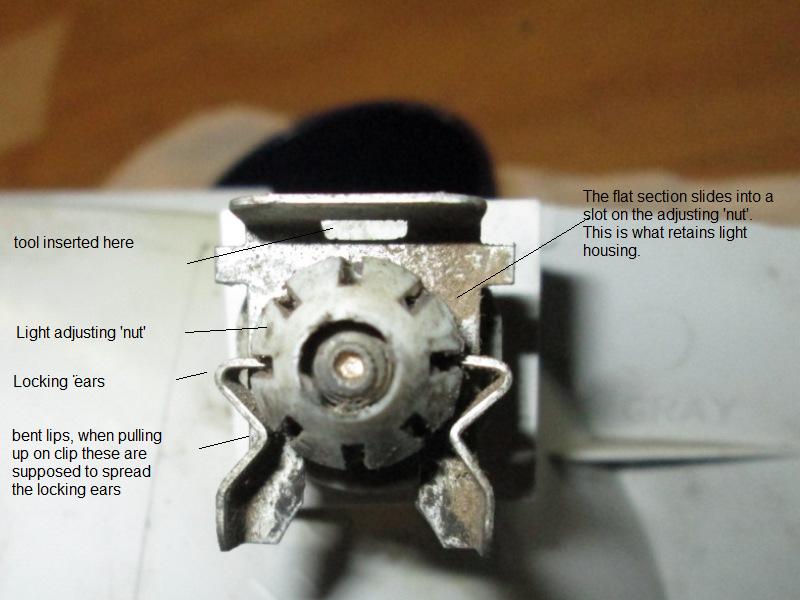
This is looking at the back side of top clip. The clips function is 2 fold. The adjusting nut which is attached to the housing poke thru hole in front plastic sub assembly. The lip slides over in slot in the adjusting nut to capture so housing cant pull back out. But also keeps the adjusting 'nut' assembly from spinning. Same for the locking ears-they enter the adjusting nut slot so clip wont come loose but they are what engages in the adjusting nut slot to keep from spinner.
AS you pull up on the clip to remove the lower bent V contacts the adjuster and should force the ears apart. But the upward force causes ears to contact hard enough in the slot to keep this from happening. Indeed as mentioned the one that I was able to pull out simply bent the 2 ears over.
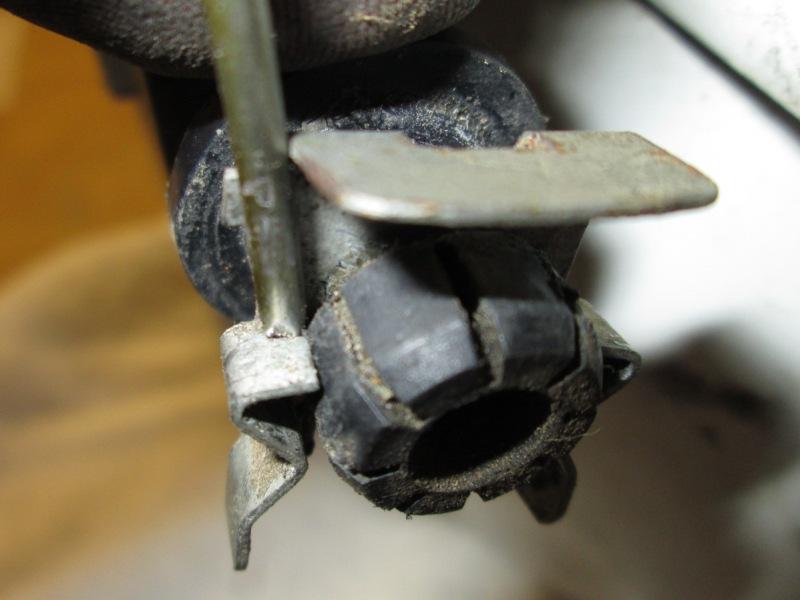
To not bend the remaining clips I inserted a nail between the clip ears and nut in the slot of adjusting nut. It happens the ear has a notch in it so nail just fit? Though this worked easily Im not doing this again.
After removing all of them my fix was simple. When I tried to rebend the clip that bent the locking ears snapped off. Thinking Id need to buy a clip I realized the Vs would still engage in the adjusting nut anti rotation slots-retaining the clip and keep the nut from spinning. So without any more thought I snapped all the locking ears off. Fixed- worst case is adjusting the headlights they try to spin, well in 14 years I haven't adjusted but inserting a small screwdriver thru the clip into slot would solve that.
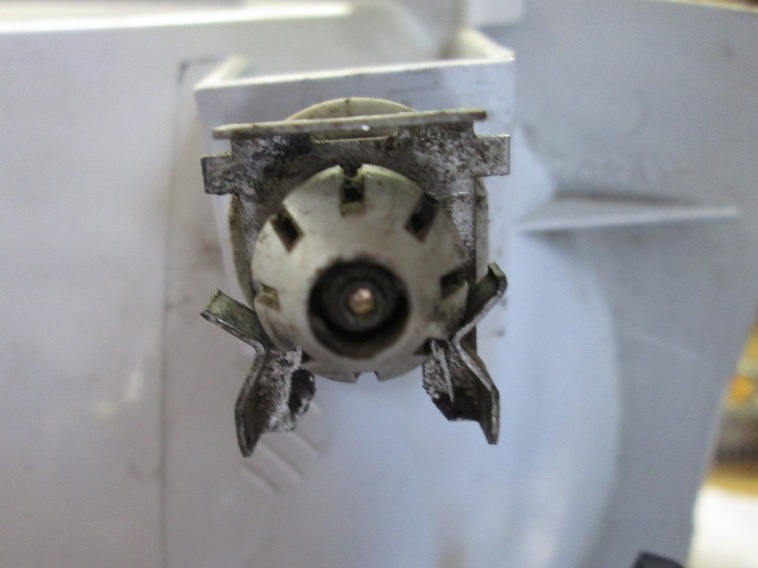
Wont be fighting these again. Shown in the full down position but when reinstalling slide clip down until the V's snap into the adjusters slots. They engage with enough force so they stay put.
The squeeze
Lastly is the 3rd retainer that causes a lot of grief.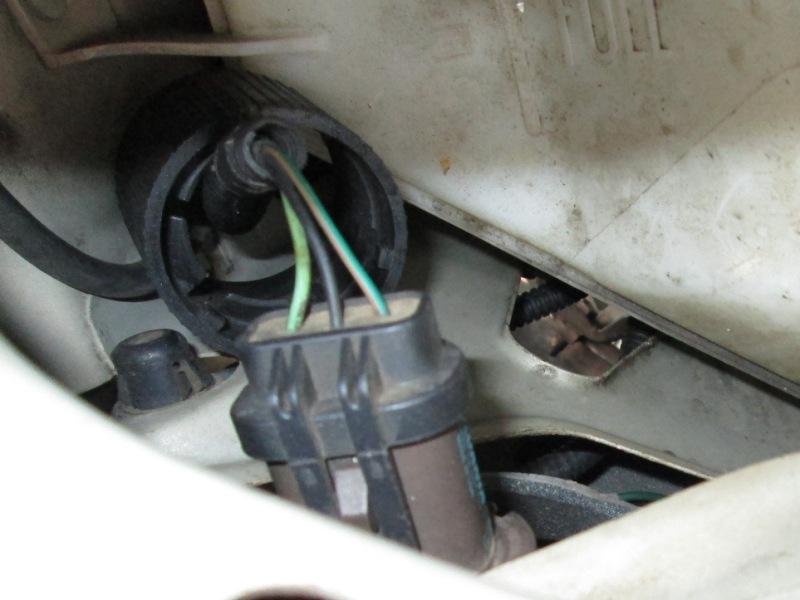
First it pokes thru the sheet metal, not visible while releasing the top 2. Its accessible from behind like the bulb retainer. Way down there toward the fender side. It doesn't have a release clip. Instead its barbed.
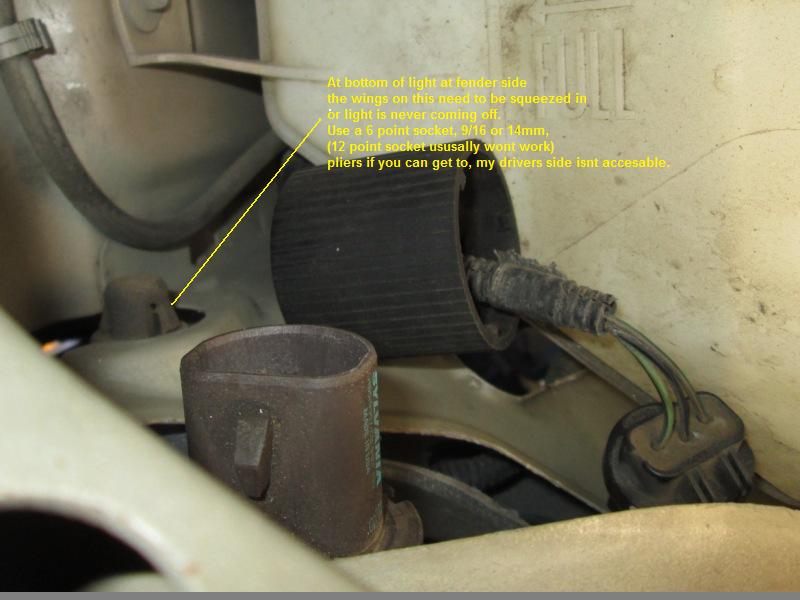
Sliding a socket is the easiest, though difficult as you cant really see it. Driver side is invisible. But sliding 9/16" 6point or 14mm socket over then pulling on light housing it 'should' release.
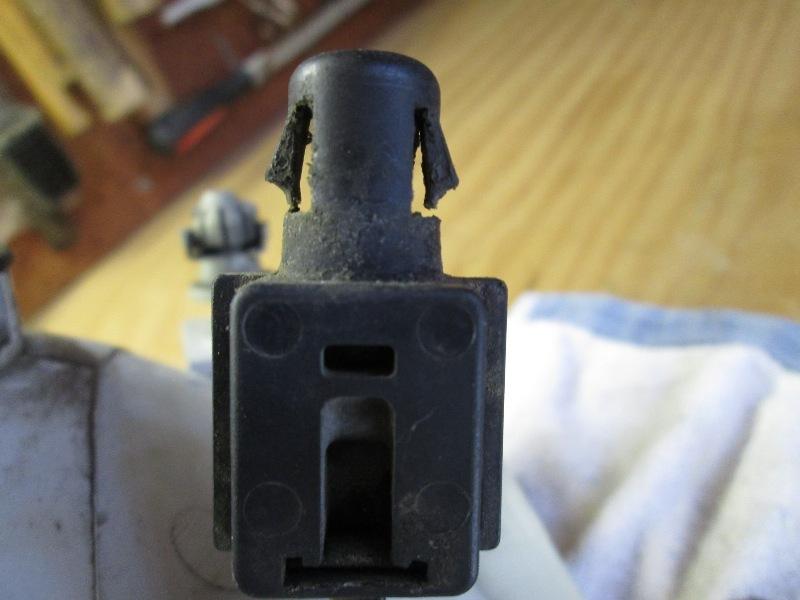
Just a picture of the bottom retainer and the ears that need squeezing
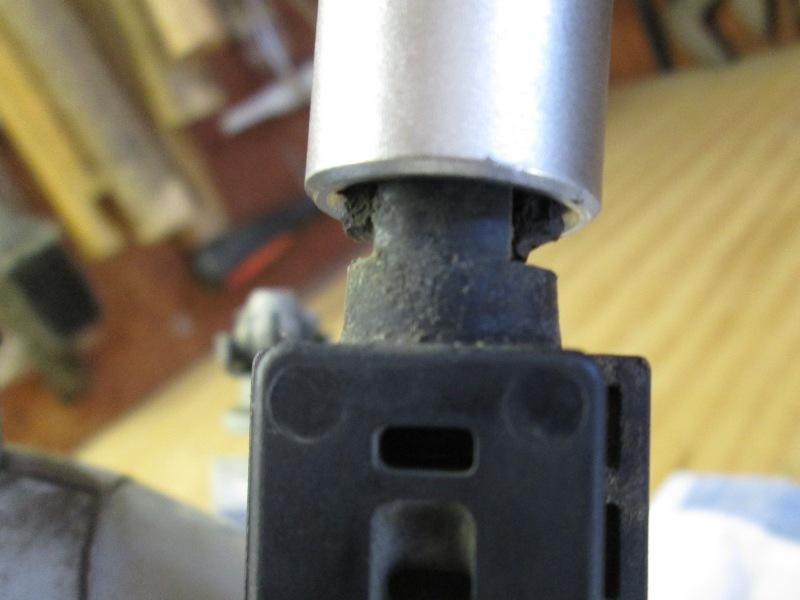
Socket squeezing the barbs.
I will add on mine I generally pull the turn signals-just for more room. They are held on by 2 small phillips screws between the lens/housing and bumper. Once screws removed the lens will pop out. There are plastic alignment pins, part of the housings, that also hold but once screws out they will pull free. A small magnet helps as invariably your going to drop the screws, hopefully not disappearing in the bumper assembly. More fun is trying to reinsert the screws if you don't have magnetic screwdriver as the holes are a ways back.
Update 04/16: changed the trucks headlights to '05-07 style. New head lights Never have to mess with the factory retainer/adjuster clips again. The headlight and signal is 1 piece, uses screws at top and the lower original signal light screws.
Back to Ourelkhorn Camper Modifications page