Ordering parts to reconnect air lines during running board install I stumbled upon these tailgate control devices. I was unaware these were made. Basically a shock that controls decent of tailgate when opening. Thought it was a cool idea. Ours is heavy, takes both hands, to control, but mostly its the action of about halfway down need to re orientate hands that's a pain. Or if you have something in hands, tailgate falls. Justification and its worth up to the individual. I Thought it was simple and slick. Found one for about half price and decided to try.
Sold by several companies- EZ Down, mines by 'Stabillis'. Very simple install, and there a many installs and videos showing procedure. On Ford, mounting hardware consists of a replacement upper cable pin bolt that has 2 slots, allows reattachment of factory cable and the new shock. Which is cool-I wasn't sure if Ford unit would be easily removable, I'm often taking off tailgate. If not for this allowance I probably wouldn't have installed.
A thread insert is installed on the tail gate to thread the lower pivot bolt bracket. Shock bottom slides on tailgate pin and secured, top slides on bed pin secured with spring clip similar to existing cables. Easy
In reading customer reviews and installs, one area of issue was installing the thread insert into tailgate. So that's my main focus, installing so its tight and doesn't spin. Much like a toggle bolt or wall anchor, as you tighten, it collapses on the inside to 'sandwich' the wall between outer surface of insert and thread section. Much like a toggle bolt or wall anchor, I also have most spin before they become tight.
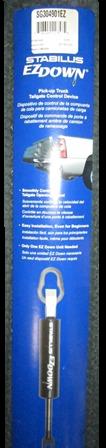
EZ Down tailgate control
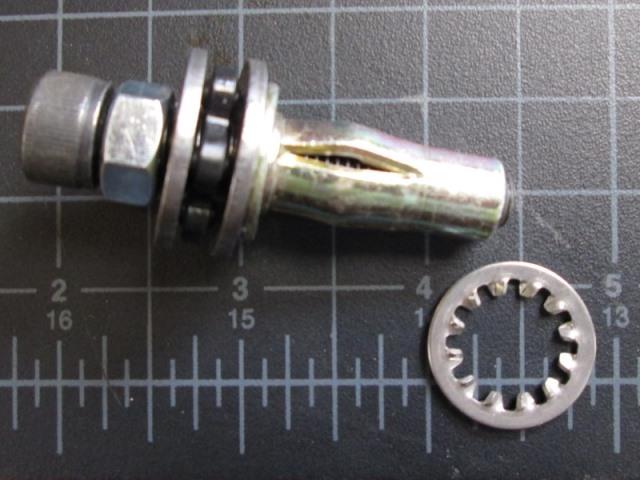
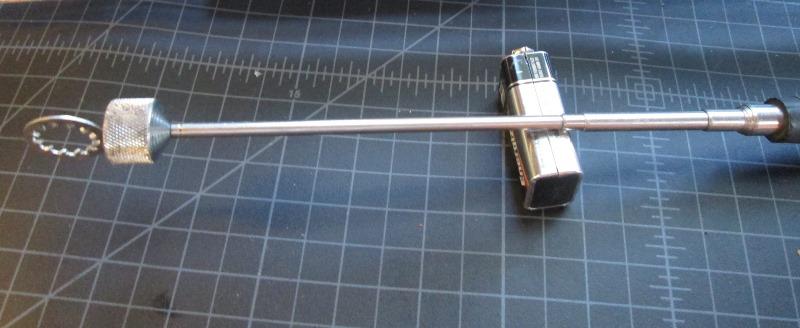
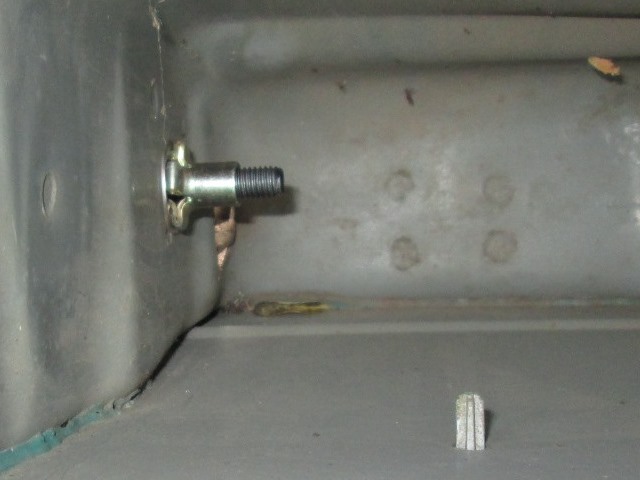
This is the included thread insert, with the tool used to seat attached. Tool is the socket head bolt, nut, washer, bearing, another washer. The insert is placed into hole, with bolt threaded into insert, the nut is tightened down pulls threaded portion toward it and the tube (where slots are) collapses and folds. Only thing I can determine is, one there's a shoulder on insert to center in hole, its actually just a tad deeper than sheet metal thickness. Second is thinness of tailgate sheet metal. Between the 2 its difficult, as the insert 'wings' collapses to get them to fold flush pinching the sheet metal. It has to be tightened quite a bit and the insert threads can pull. That and both are smooth surface so even tight it could spin.
I will note: a LOT of the videos I watched folks were not full threading the 'tool' thru the insert. The less threads that are engaged in the insert the more likely to strip. Second after seating the insert and removing the tool the bolt holding on lower pivot bracket is threaded into insert. It needs to be tight but DONT reef on it. Pay attention otherwise you'll spin the insert.
My Thought was simple star washer. Which would work but that would hold the shoulder out from hole and it could slide around in hole. Then it occurred to me where it really needs to be is on INSIDE, under the collapsed arms. Fine, how do you do that?.
Removed the tailgate access panel. Stuck my favorite tool when working blind so I can 'see' what I'm trying to do, camera. Stuck the camera inside tailgate and took a picture-yup I can see the hole.
With little confidence stuck the star washer on end of telescoping magnet. Fed to hole till I could see the washer from outside of hole. Inserted the thread insert and stabbed it! First try, that easy, in disbelief removed the magnet, holding the thread insert at downward angle. Stuck magnet on end of tool bolt and lightly tapped it until washer walked to tailgate.
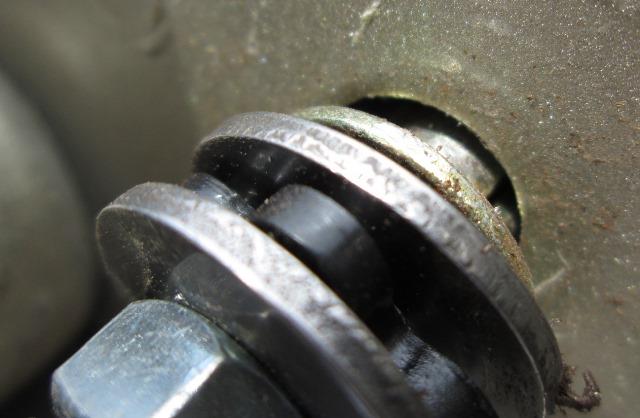
Well doesn't show but I could see the teeth of tooth washer! Slowly tighten nut to capture washer. Instructions call for no more than 9 turns. I had forgot to mark nut and no way was I letting go to get a magic marker. So continued to tighten, once I had what I thought tight stuck the camera back inside.

Collapsed wings barley contacting...
Ran several more turns till it contacted washer
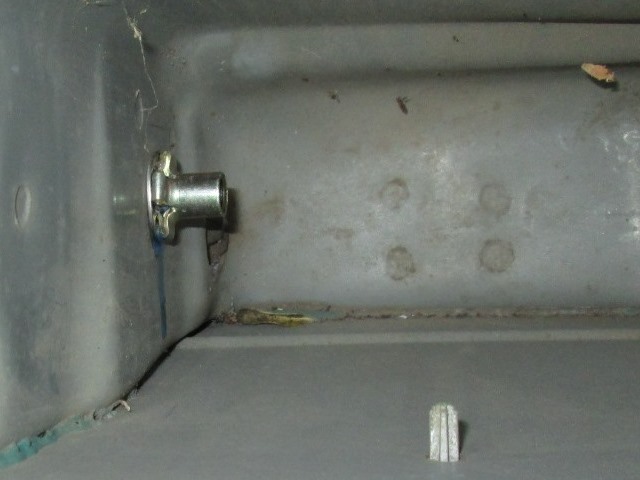
Squirted a pretty good shot of blue locktite into hole, gave it another partial turn. I know many trucks wouldn't have access but this worked well on ours.
Installed the lower bracket after pre painting. Removed old top cable pin bolt and installed the new top pin bolt. I hate Torx. Kit provided a T50 throw away wrench. Applying as much inward pressure as turning force to keep it from jumping out, it worked. I've had my bolts out before so wasn't too bad-though wrench didn't survive, might plan on getting a T50 bit before starting.
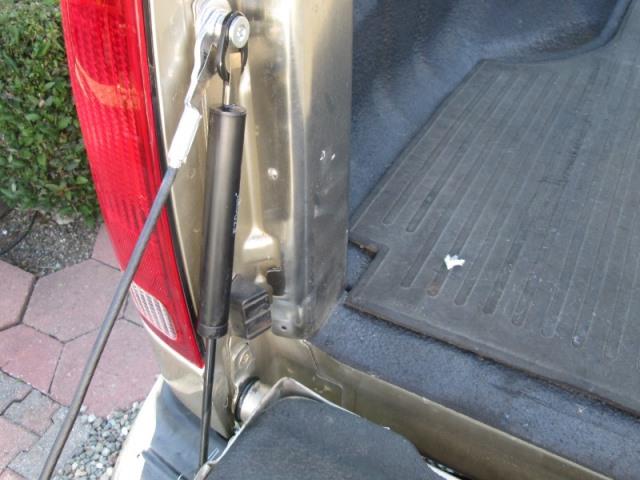
And installed. Note: I had removed the lower rubber bumper per instructions. Afterwards looking at it I didn't like it, so reattached to see if I could trim it to clear shock and still contact gate. Well bumper didn't touch the shock? Doesn't interfere with cable or anything I could see. Have no idea why they tell you to remove it- mines back on.
Without knowing what to expect, open the tail gate with hands ready to catch- WOW. Not as slow as some mentioned-nor fall due to lack of shock strength. Perfect. Goes down slow enough to control but not standing there waiting on it. When I ordered the original EZ down it was a customer return-it was shipped to me without any hardware or brackets, just the shock. Got a return authorization and ordered another return unit. It came with everything. Decided to keep the original unit as a spare-still end up less than new.
And the whole point- link to youtube video
Another silly useless video, no information. Watching tailgate slowly glide down...
Back to our F250 truck page
Back to Ourelkhorn Camper Modifications page