Add battery maintainer to our Ford F250
Had added a small solar battery maintainer while back. It sort of works-during summer. During the winter, though prolongs the life when setting, inclement weather/short days just couldn't keep up. Ill still use it when camping or during the summer but need alternative.
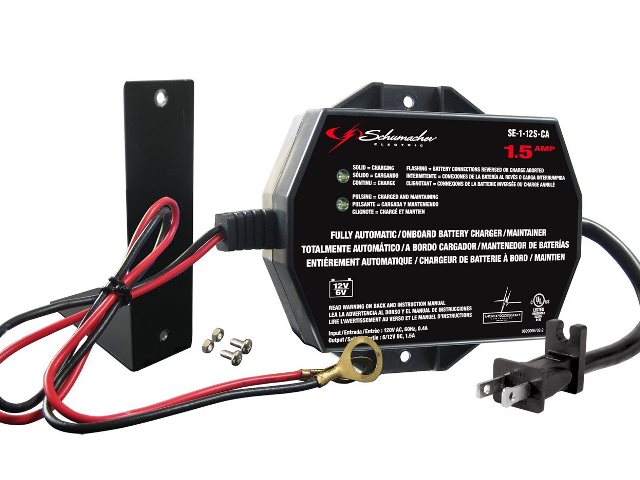
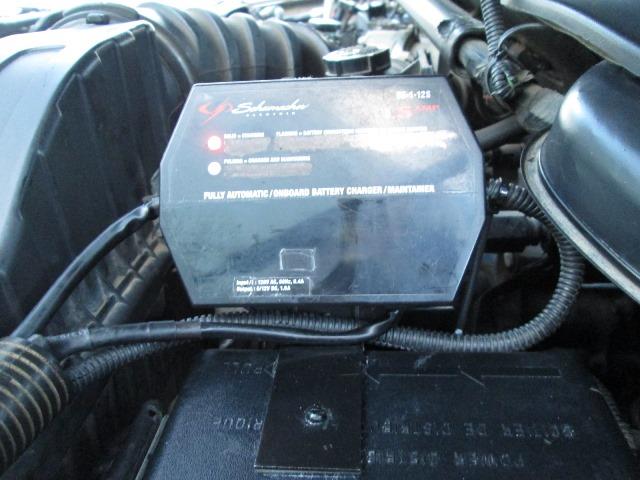
Picked up a Schumacher SE-1-12S-CA on board battery maintainer. Mostly because it can be mounted in truck. All I'll need to do is plug in. I have a plug that's close by so make it easy. Plan is to eventually add a hardwired female plug to truck, then wont even need to open hood.
After verifying unit worked I promptly voided my warranty. I bought this as a customer return from AmazonWarehouse deals. "Used" because it was a return and cant be sold as new, but otherwise new condition in the box, save a couple of bucks. You get charger and mounting bracket. Comes prewired with very short 15" 110v power cord and a 18" battery hook up cords with ring terminals.
To my surprise Whoever sent this back also stuffed in the box a new battery connection cable. Its not part of the Schumacher charger.
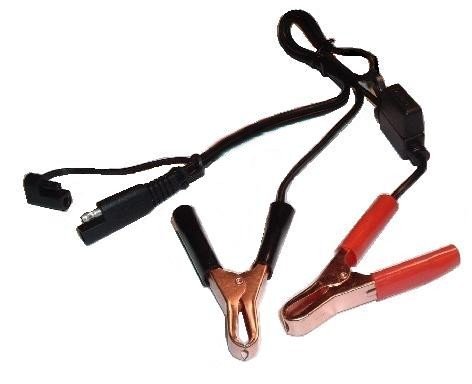
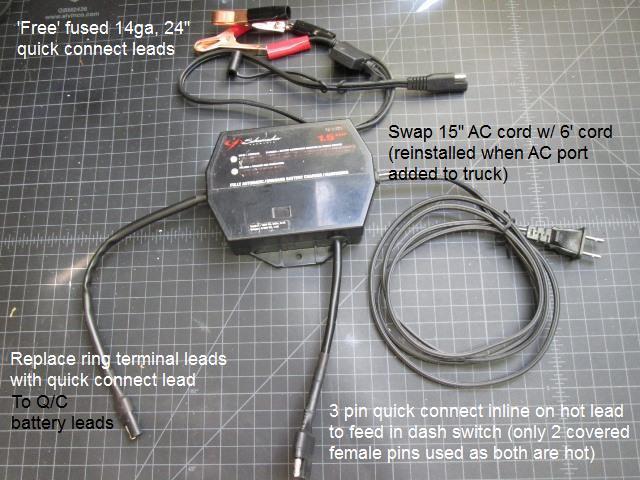
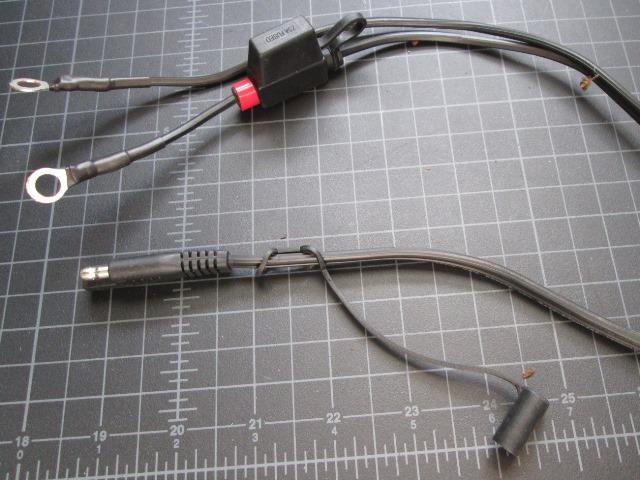
Looks like what's included with Battery Tender chargers, part# 081-0069-4. Nice!, fused 24" cable with 2 pin quick connect and battery clips. FREE. I had already determined I likely would need to extend cables when I had ordered for this to work in our truck- Now with the "free" longer quick connect cable it will be easy
Now on to voiding my warranty.
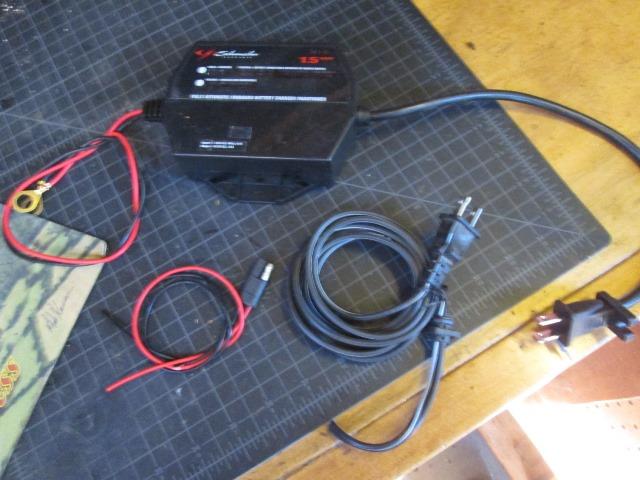
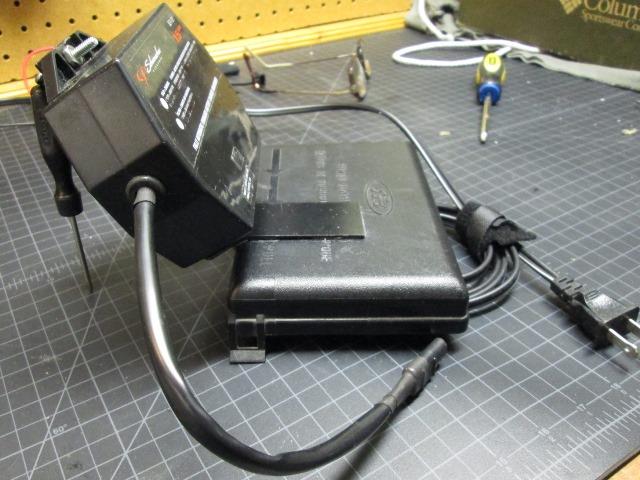
First I hooked up charger to a battery in the shop to verify it worked. As it was a small MC battery didn't take long before charger switched to maintenance mode- red LED went off and the green one is pulsing-cool
Then without hesitation cut off, removed or blacked out profuse labeling in 3 languages from the case. Warranty voided
Unless I run extension cord up inside of the engine bay there is no way to plug charger in. Because of the short battery connector wires, charger would have to all but set on the battery to reach. Maybe on some cars-I dunno. So planned is replacing both cords. Also, though I don't believe needed, there's some reference to disconnecting charger from vehicle when not charging-like while driving. The option to turn off would be nice with out disconnecting stuff-so I may add switch
But to use, replacing the short power cord with a salvaged 6' appliance cord, has a strain relief so perfect replacement. Will reach outside to plug on wall. To utilize longer better 'free' battery cable I have a 12" quick connect cable that Ill swap for the prewired ring wires.
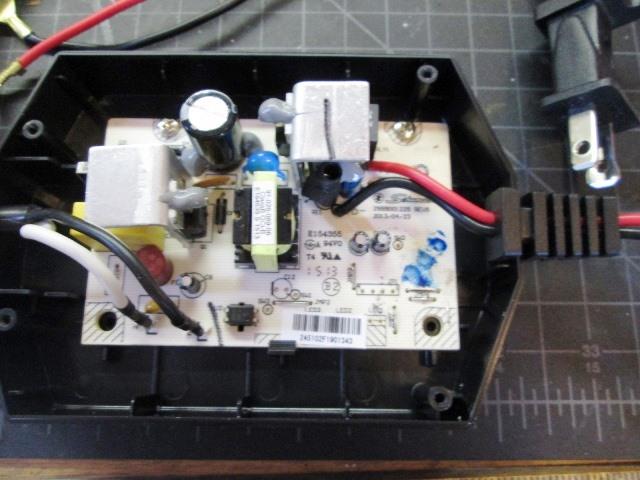
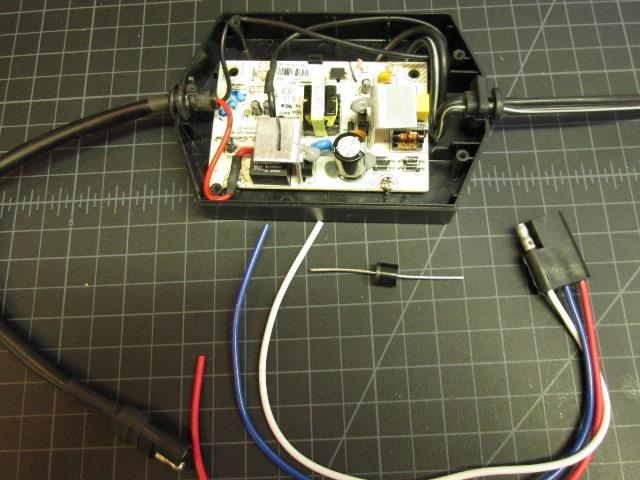
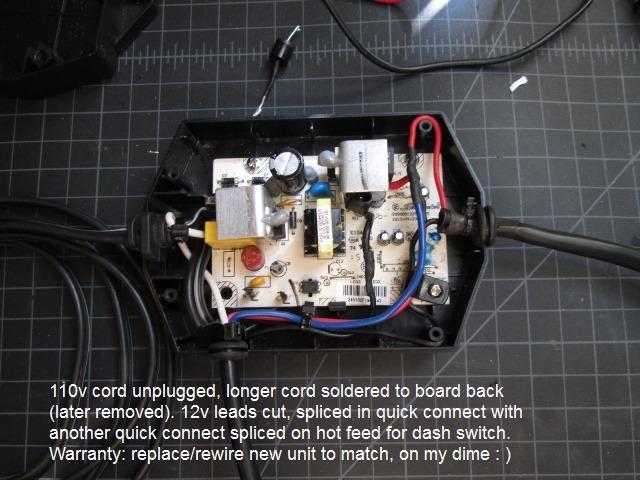
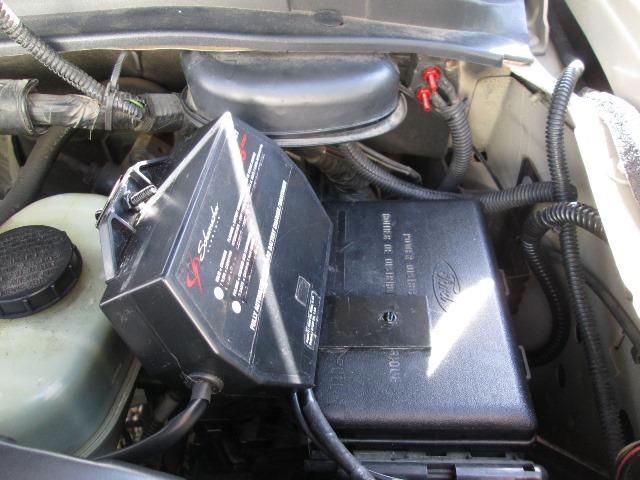
Just inside picture before molesting. The black & white 110v cord plugs on to board so that will be easy. Rather large solder area on back of board for the pins so solder new cord leads there and leave pins intact. The red & black 12v outlet wires are soldered to board. Instead of de soldering and soldering in new leads on board Ill cut off old wires leaving and inch and splice new quick connect leads.

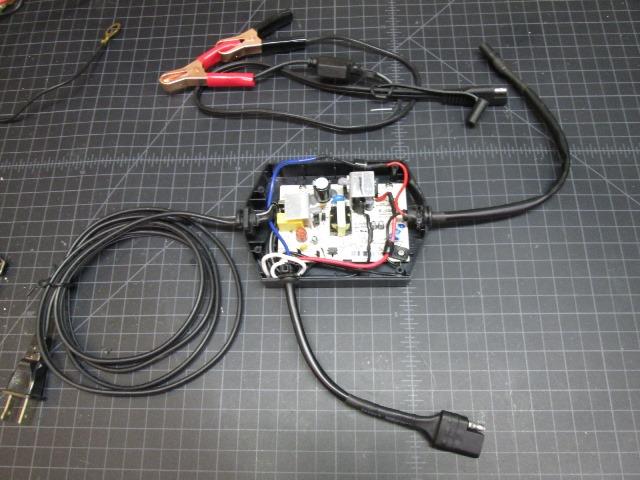
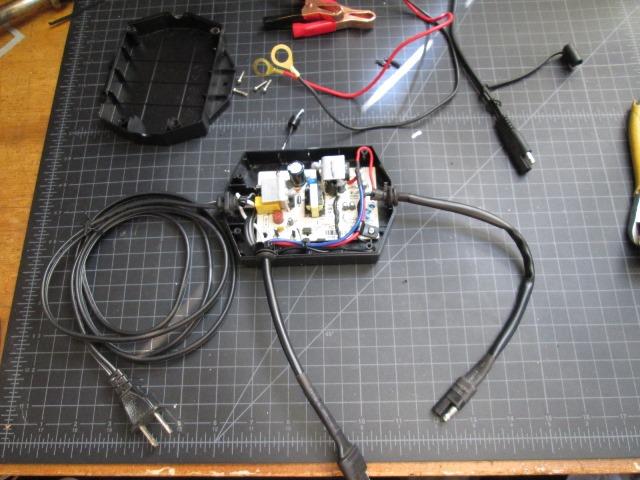
Just in case warranty still valid...New 6' 110v power cord and 36" total battery leads.
Opened that case a bit for grommet on outlet cord. Sleeved the cord. Routed the 12v leads so they cant easily be pulled, added zip behind grommet. Once finalized Ill hot glue back side of grommet and sleeve to immobilize.
On the round to it-Ill be adding a switch to disconnect the charger from battery. At that time Ill replace the battery clamps with ring terminals
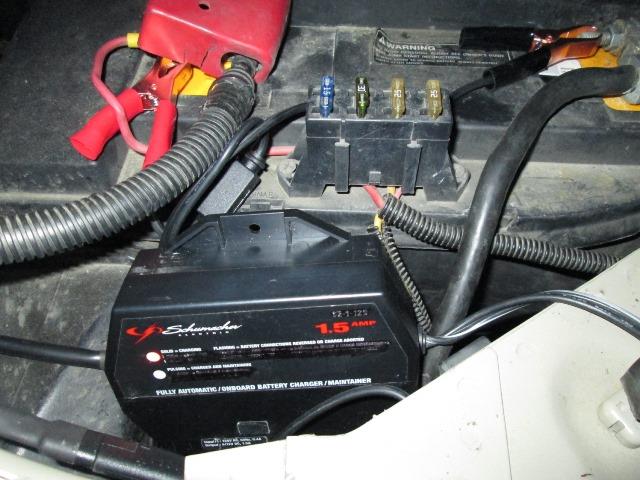
Stuffed it all in the truck to run a few days and see numbers. Not sure where mounting yet. Initial volts @ 12.27, that's actually a bit more than after setting couple of days. Generally 12.2 is where they sit. Plugged in charger, took a few hours before leveling at 14.5 or so. But sat there at that rate for unknown time-. Last check at 10 pm so at least 6 hours. Next morning in maintenance mode- bout 13.6 volts...
Wasn't sure- our truck has 2 batteries, if this would work. Let the charger go until evening. Unplugged but left charger connected to battery. Last thing Ill check voltage before calling it a night then check in the morning. Some have reported these draw down battery if not plugged in. I cant imagine that's the case but want to verify.
Next morning batteries at 12.76v, last check night before 12.84v after 2 hours of unplugged. If that's a drop due to charger draw overnight Ill take it! I honestly don't think batteries had stabilized yet when showing the 12.84v. I've noted though others have stated the LEDs on charger stay lit- but when I unplug, regardless of mode, all lights go out.
Later that evening checking batteries were at 12.72- plugged in a few hours (2) until back in maintenance mode. Once green LED on unplugged and disconnected charger. Next morning batteries at 12.68! Virtually no difference allowing charger wasn't in maintenance mode as long as night before. Last check- left charger unplugged and disconnected until following morning with no charge for 24hours. Next morning 12.56v. Hokey smoke. I have 60 to 72 ma parasitic drain, unless the door ajar switch sticks. I don't have bulb in interior light, use map lights if I want to see something, but if the door switch sticks, the relay it triggers to turn on light can easily double drain on battery. -happy camper.
I'm pretty confident charger wont draw down battery-the short time I've used charger has made a difference in battery health. Albeit the 13.5 volts that charger keeps batteries at seems a bit high. Overall pretty happy. Now to mount the charger.
- Adding in dash switch
Well I'm adding a switch to isolate the charger from truck. Decided I need to add that before mounting charger. No pics of my dash dis-assembled, adding switch or drilling thru firewall to get to charger. Most of the day to get switch in dash and wire run. But got it.

Added new switch below solar switch. Loomed and routed wire behind dash. Drilled a hole thru to engine bay.
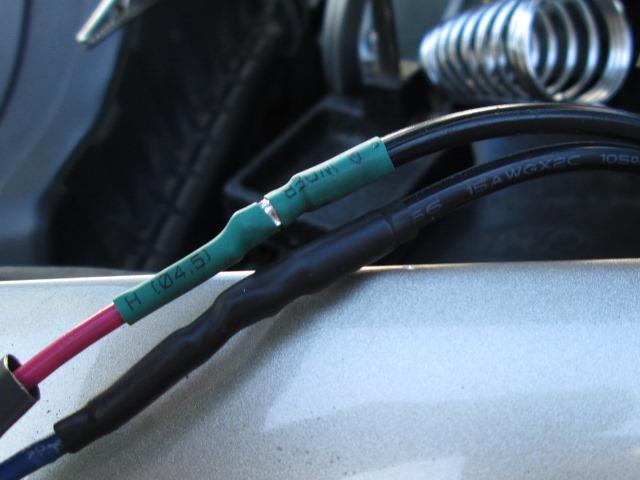
Solder on 3 pin plug to wires from switch. Its what I had and keeps from inadvertently plugging into 2 pin plugs. I'm not using the ground, male pins to/ from switch so both the hot output from charger and connection to battery are both in female housing other half of quick connect. Shrink tube then covered wire in loom. You can almost see the blob of silicone where wire exits firewall.
Getting ready to add switch lead to charger. Cutting, again, the red charger out put lead, solder on red wire from plug that will feed in dash switch to lead from board. Blue return wire from switch will go to other end of red wire feeding 2 pin connector.
All is good until I realized pilot light is always going to be on. Power source (charger output) in to switch batt connection as it should be. When switched turned allows power to go to battery, pilot comes on. However the wire feeding the battery is also hot... so pilot, in either switch position, receives power....err. Solve is simple diode on the side connected to battery. Couple of things didn't occur to me...Adding diode, one its uses pilot to show charger working instead of the fact switch is on-second is it blocks charger from sensing battery, but didn't take long to get schooled.
Wired, case drilled for connector lead. Nice. Plug n charge
Placing back in the truck, plugged everything in. Turn on the switch nothing. No pilot, no power to battery,, no lights on charger after initial flash of red and green LEDS when plugged into 110v. Triple checked everything then it dawned on me.
Realized its the added diode. It's keeping charger from seeing the battery, it will not start. To verify I jumpered across the diode -charger comes on. Removed jumper and charger stayed on- um ohhh. Once charger on- without seeing the battery it cant tell what state its in- likely would never shut off. Well diode certainly wont work- I should have seen that, just dumb.
I'm going to remove the diode and unplug ground on the pilot don't, really need it. Then figured out, since the whole point of this is to isolate the charger from battery when not charging, simply swapping leads at switch, the pilot would only come on when charger is connected to battery (not if charger is charging). And that's what I need pilot to do, alert me that switch is in on position connecting the charger to battery. Otherwise defeats whole purpose of switch. If I left the switch on, charger/battery connected, charger unplugged, start to drive off, the pilot would alert me charger is connected to battery. Perfect- simple and better. Except having to open up dash again.. open up charger to remove diode. Why didn't I see this earlier? Too obvious, guess seeing the pilot showing charger working blinded me.
- Third times a charm? Think I can I warranty this?
Apart it comes again. Removed the diode,
, Better wire anchoring. Not shown but before I closed up used hot glued all the screws, further immobilize wires and help restrain/seal exiting cording.
New and improved...Plugging it all back in truck to verify charger working. Ill take dash apart tomorrow to swap leads on switch to fix pilot issue.
Plugged in the charger, switch is in on position, lights flash then goes to charge. Cool. Go inside to turn off and see the pilot light is on? Turn off and pilot goes off, Went to engine bay, charger is off. Hmm- turn on switch, pilot comes on-go back outside, charger is on. Did this several times...this shouldn't be possible. Unless switch also disconnects ground or power to pilot-never heard of simple SPST pilot switch doing that. Checked another switch in shop- nope if there's power at load side pilot stays on. What the heck - Totally puzzled.Gave up
Setting in the shop-drew it out trying to get a handle on this. I mean it would be nice not to take the dash apart, everything is working- but it cant.
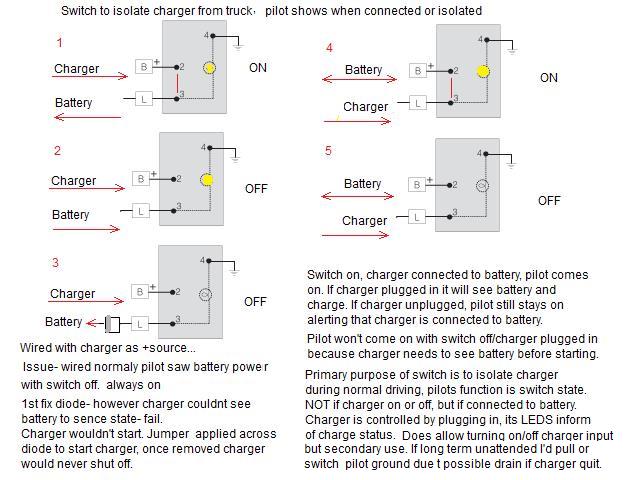
#1 and 2 show pilot always on due to hot 12v both batt&load of switch. #3 shows fix for pilot but stopped charger from working. #4 & #5 shows swapping charger and battery leads to make pilot work AND charger function. But its working and is connected like #1 & #2.
Scrolling thru pictures I noted this one I took to record wire colors. Ribbed is return (always) smooth is hot. Jeesh...
Do you see it? I added the charger output red wire to the ribbed side, battery is to the smooth side. They are reversed, well to what I planned and thought I did. Explains why system is working, good grief. This is what I was going to do but at the switch, reverse flow thru switch.
Wow miss-wired saved me from having to tear my dash apart again. Charger and switch is functioning correctly so we are good. I'll take it- not right in my opinion. Maybe, it doesn't matter since both sides are hot- its an inline switch on single positive lead basically. Um actually- if I was in dash- wanted to grab direct 12v power, my assumption would be the smooth wire hot/source-which it is.
Bottom line its working. Charger power cord long enough to plug in to wall, out put cords long enough to reach battery, in dash switch to isolate, turn/on off at will. Though my path became a bit convoluted. Now that it is done, should I need to replace charger, an hour maybe to transfer cords to new unit- that's my warranty.
- Now to mount...

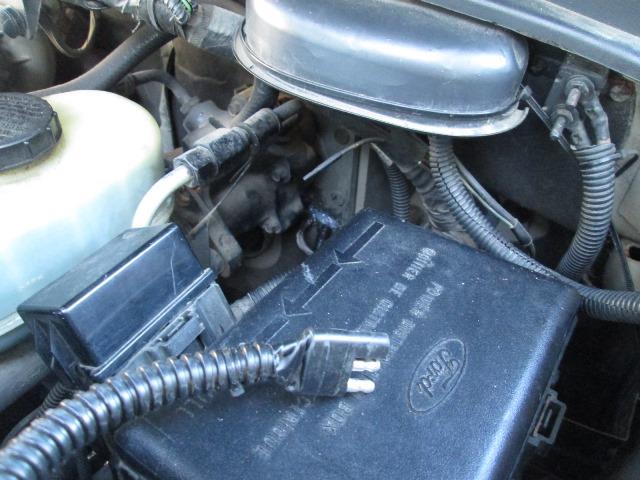
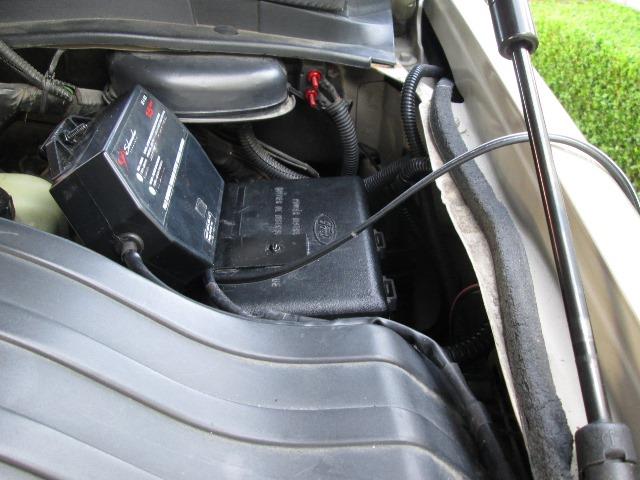
Mounted to lid of fuse box. I used some 3M automotive double side tape. Stuff is all but permanent. To the bracket I added screws & nuts with a longer on at the top. The charger basically just slides onto 'posts'. One nut on top, easily removable.
Does require removal of charger to swing lid far enough to check fuses, however at that point easier to pop off the lid for free access.
Slightly shaped bracket so it would lean back enough to not be hit by hood. Set about 30° with a bit of back bend to lower the bottom of charger a bit more. This was in my opinion the best compromise as far as interference with other stuff and again the best location within the engine bay to protect from heat, air & water.
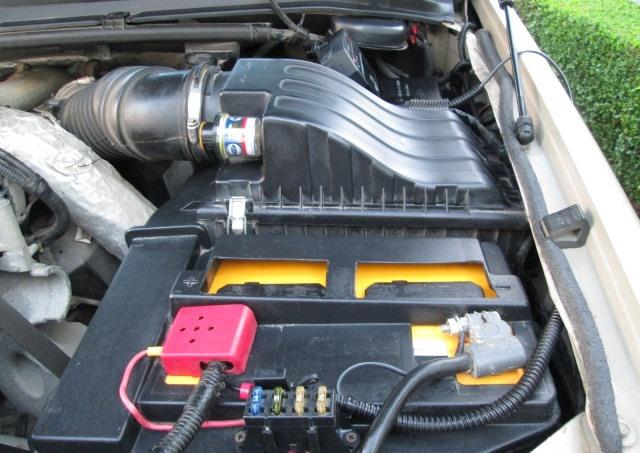
Finally cut off the battery clamps now that I can route wire.
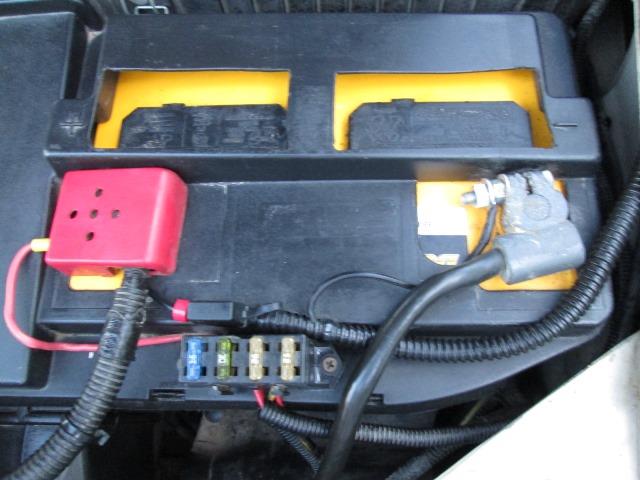
Crimped on some smaller eyes that fit the 5/16" battery cable bolts.
Snap the fuse box lid back on, slide charger on. I just couldn't help myself and added a nut & bolt to the bracket attaching to lid. 98% confidant it would never come loose, and even if it did cant go anywhere but....
Happy charger
Playing with the wire routing.
Adding some loom trying to clean up a bit before closing the hood and calling it good. Limited though until I hardwire the 110v inlet.

Cord coiled up inside, or draped over fender until then. Pretty happy with the results. Keeping the batteries maintained certainly will be a lot easier.
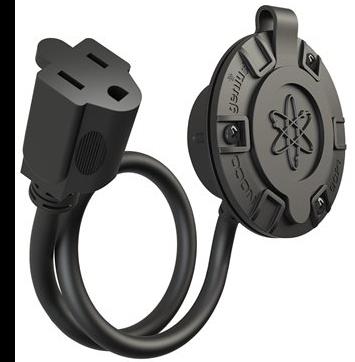
Limited though until I add the power outlet/port. This is what I'm going to use. Once I figure out where to mount that's easily accessible yet as protected as possible. Could put in grill alongside the block heater but really leaning to the fender well. To be determined.
Link to amazon as long as it lasts NOCO Genius GCP1 AC Port Plug Cost almost as much as the charger but will work well.
One thing I don't like is not seeing charger indicator lights-cant tell what its doing without opening hood. Have to assume but still would be nice to glance and see its in float mode... Wonder what consumption of volt meter is...
Nice is I'll also be able to charge the truck (if generator starts) from the camper if needed. Or charger the scooter if I made a long enough pigtail to plug into chargers 2 pin- hmm, all about options :)
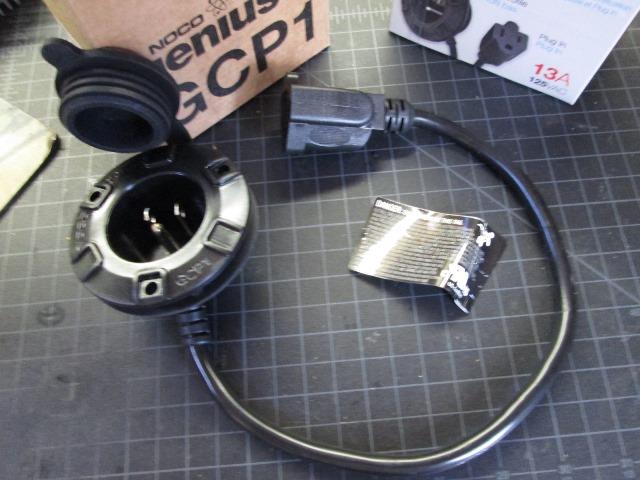
Port arrived
Packaged box in a box.. Rather amazed, seems pretty good quality for what it is. If I used the engine block heater I'd add another for the trucks plug. But this I think I'll add in the front wheel well- will be protected when plugged in as this is in drive way. Hopefully lives up to others reviews and opinion when on the road. As long as the plug cover doesn't disappear think it will.
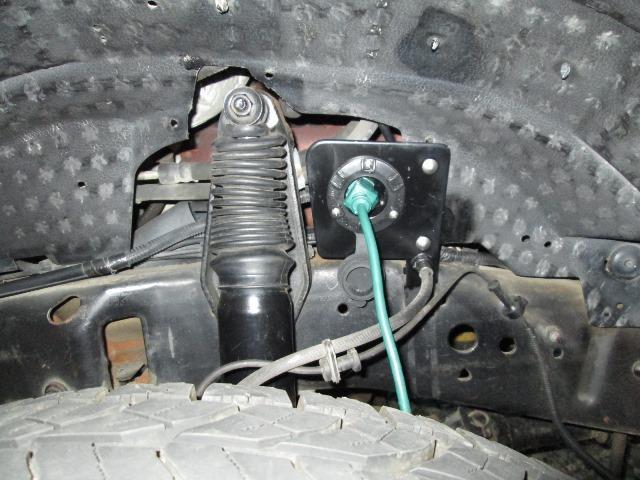
Placing in the wheel well will also let me put the shorter factory cord back on the charger. Wont need the length I have now. Decided to make a bracket for the port.I was going to cut into the well liner but there's a huge open area directly below charger in well liner and a bracket that can be utilized to hold plate.
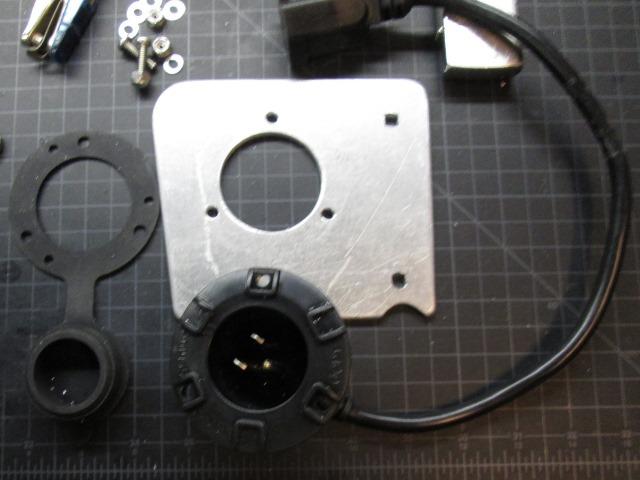
Had a scrap of 3/16" aluminum, lot of eyeballing, shape I came up with, sort of fills the space. 2 holes on right for SST carriage bolts, lower one thru brake line holder bracket, upper on thru liner.
The port itself I've rotated 60° to get a bit more upward length on cord and still have cord where it exits body facing down.. Used a hole punch so I can rotate the cap/gasket to hinge from bottom. I hate holding stuff open while trying to do something, takes 2 hands. There is also a small hole in the 'bottom' of body cavity. Some refer to as 'weep' hole which I'm sure it does but without it the pressure would make it difficult to insert or remove cap. So plugged it with silicone, drilled another on new bottom orientation.
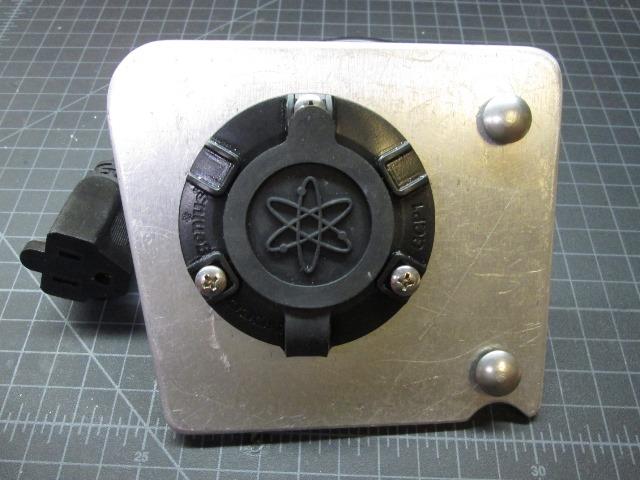
Nice, if I wasn't so lazy might polish but I'm painting plate satin black. Surprised the housing, as stiff as it is, puckered between the bolts- and they are just barley snug. If this were mounted on a thru the wall application it wouldn't seal-doesn't matter in this application, otherwise drill and use the other 3 bosses.
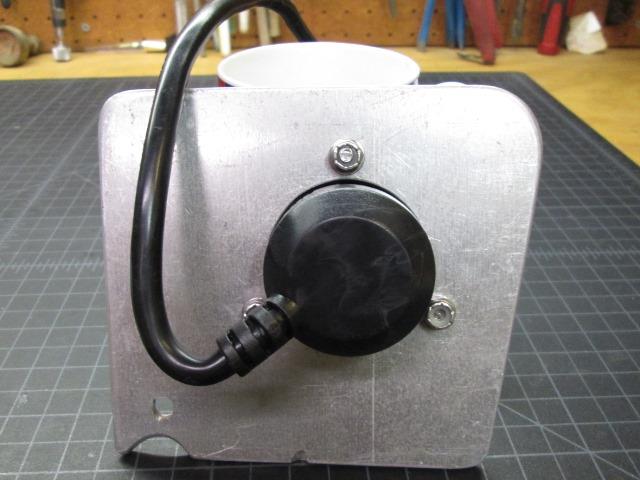
Just back view of plate. Removed the charger and replaced power cord. Mounted the port, remounted the charger after plugging into port cord. I laced a zip tie securing the plugs together to ensure they don't come loose. Also silicone the perimeter of plugs before joining. This is a semi permanent install. If I should need to remove the charger Id open case and unplug the 110v leads.
Plugged into wall outlet. Nice, I can finally close the hood.

Happy truck. Batteries at 12.7+ volts in trickle.
Just for my use-
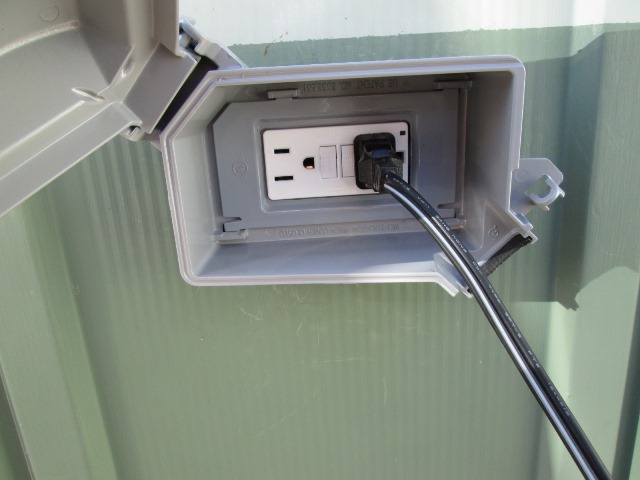
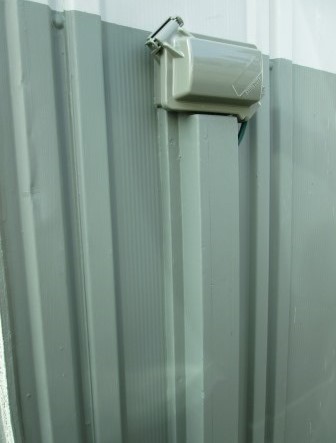
Replaced the outside receptacle and weather proof cover with a GFI receptacle and "in-use" box cover.
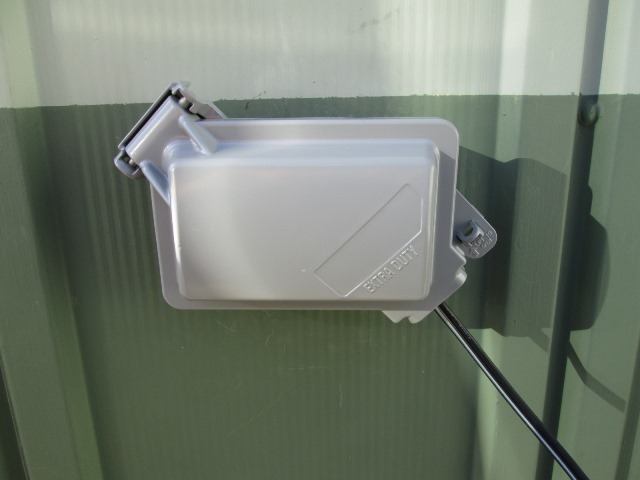
When I don't take with us, female end of cord will get stuffed into the box to keep dry. Still on the round to is a post to hang (and obscure) the extension cord. Right now its kinda accessible and advertising 'free cord'. Maybe a large box to store cord, that would work-be easier...round to it.
Sooner than later...Wind blowing caused the cord to bang annoyingly on the side of metal shed so built post.
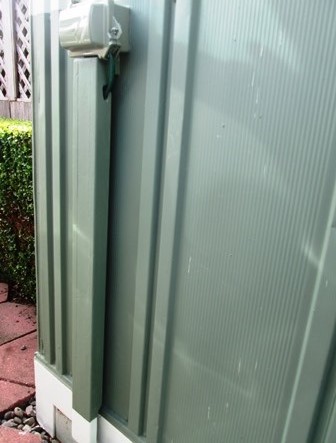
Four 1x2s glued & nailed to make a cord protector. Sandwiched to metal shed wall. Simple enough. Cord just tucks behind, with the notch at top it stays inside. When not in use female end of cord is also stuffed behind and placed in inside box.
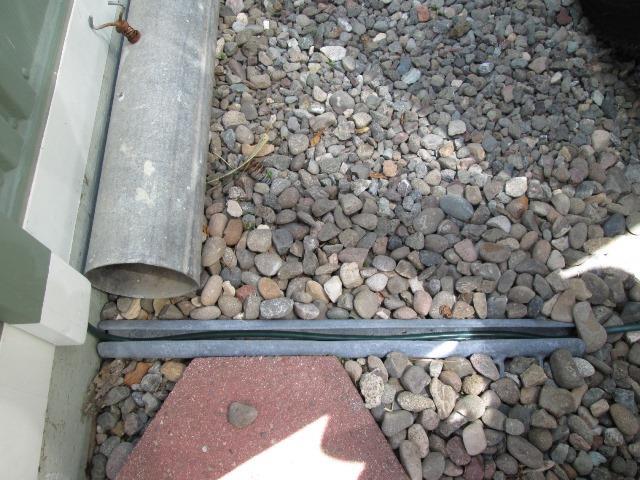
Cut a piece of 2" pipe to route cord in gravel between shed and where truck sets. Extension cord lays in it so I'm not stepping or tripping over it.

Lastly to use charger with camper. An extension cord so if needed I can plug into camper or other source away from home to charge truck. But primarily so that charger can be used to charge our scooter. Made a fairly long output cable to reach around truck. Fused clamps to connect to scooter or what ever, 2 pin plug cord will plug into chargers output.
As scooter 7amp batt doesn't take much theoretically I suppose could charge thru inverter..but that would take an awfully big need. Though we'd need shore power, charger 'could' be used if all other systems fail- to replenish campers batteries to keep systems alive. (truck thru 12v umbilical, solar or, gen, shore thru converter). That's really a stretch, not really viable as charger only puts out 1.5 amps. More effective would be hog wiring the portable solar directly to single battery. But 'could', however I carry jumper cables if needed to reach between camper (once camper disconnected from battery) and truck. Easy to get lost in 'what-if' scenarios and McGyvering yourself out of a pinch. This just allows simple use of on board charger for scooter-which need does happen. Anyway some more items to 'live' in the truck.
Back to our F250 truck page
Back to Ourelkhorn Camper Modifications page