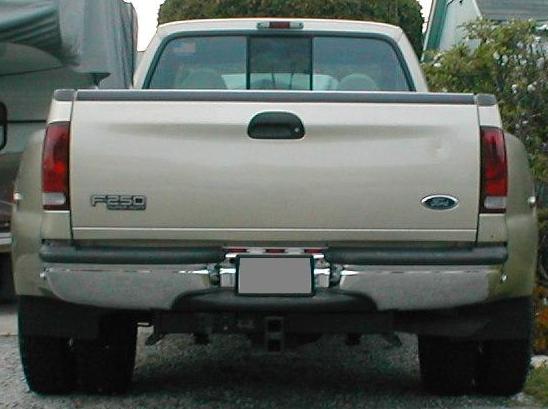
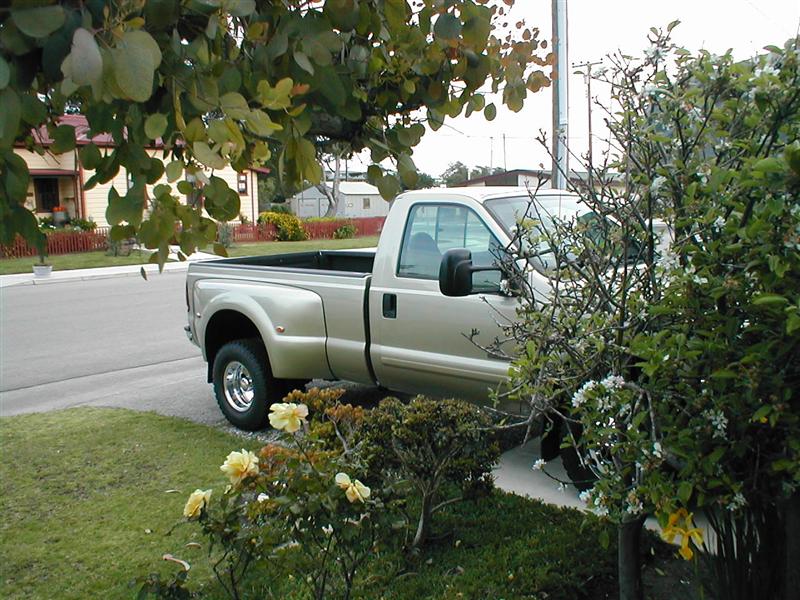
F250 Dually
Installed a Dual wheel conversion kit from Arrowcraft.I've never been comfortable with the weight of our camper on single wheels and the handling. Going around corners all that wieght would transfer to the single tire, even at 80psi on e's you could see em squish. Constant bobing and rocking. Ive done a couple of other mods that vaslty improved the ride and handling-its all in the rear tires. We've recently picked up a trailer for hauling our jeep, that was the clincher. That and the tires were ready to be replaced again so the time is now!
Short of buying another truck there's couple of other options to the kit-finding a dually bed and axle, also need the front axle or adapters. Or you could replace just the axles with 1 ton axles and use the after market fenders on your existing bed. Lastley you could just replace the rear axle or use adapters, and carry a second spare for the front. I actaully considered this because I really wanted to keep the wider stock front-but finally gave in to the impracticalty of carrying 2 spares, not being able to rotate different wheels etc.
But for me the Arrowcraft kit was the easiest to get the truck set up. Down the road I may replace the axle with a DRW 1 ton axle (my truck will still be a 3/4 ton) but for now this works. Note: I converted my F250 to dual rear wheels, I didn't convert it to a F350 1 ton (which you cant). This is all about stability, not increasing the GVWR. It actually would decrease the GVWR cause of the extra weight of the kit.
That all said, the truck looks awesome to me. Handling with the camper on is just amazing. The truck loaded, goes around corners FLAT, Just a night and day difference. Couple of snuffoos, but worth the effort, makes hauling the camper enjoyable. If i ever buy another truck it'll be a dually, period.
Now that the install is complete Im very happy with it. I've just received dually brackets for the camper-so for now this is just about the install-not the results with the camper. The kit, though a bolt up, is a still a bit of work. I didn't take photos documenting this install (update: added a few pics during the install a friend took, see below). It is pretty straight forward. Does take a bit of thought /patience to make it work. Most folks with any minor fab / mechanical skills can do this.The most difficult part being fitting up the fenders & drilling the body.
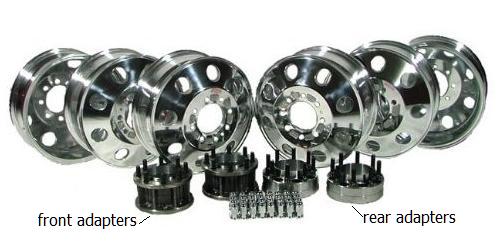
The wheel adapters are a bolt up however the front adapters are a PTA. You cant get a full socket and torque wrench on the nuts, you have to use either a box or something similar. I was able to use a breaking bar and short socket-to get hem tight-but I could only guess at the actual torque. 150lbs is the recommendation, I believe there
at least that, but due to Fords rotors that just love to warp, torquing would a been REAL nice.
The instructions are rather vague, but then the install is fairly simple once you figure it out. Bascially you drill the fender mounting flanges, hold up to body, mark and drill the body. This took us a dozen tries because we had to trim bottoms of fenders, see below. Loosley rebolt fenders to check-then remove again to paint.
I will make a few comments for anyone considering doing this. About the kit and what's not included in the kit. No its not all good. I did a lot of searching but there's just not that much info out there. So hopefully this will help
- Make sure the parts you order are what you need & want. I went with aluminum outer wheels, steel inners. Arrowcraft supplied alum. wheels, but not Alcoas, there Eagles. The wheels to my dismay are only rated for 65psi, which in the rear shouldn't be an issue, but the front...? 1 of them is seriously out of round, like a 1/4". I don't know what the steel wheels are rated for but never seen a dually wheel that Wasn't rated for at least 80 psi. Though I hope to not run that kinda air any more, I probably would have paid the extra for the Alcoas or another brand for the higher psi rating, but didn't realize till after the fact. FYI
- It's a 2 person job, period, with a 3rd being very handy while holding the fenders in place and marking the body for drilling. I fortunatley had the help of a very good friend, Mike and his son Matt. Also used his rather large concrete pad, makes it nice. Sharon took these photos.
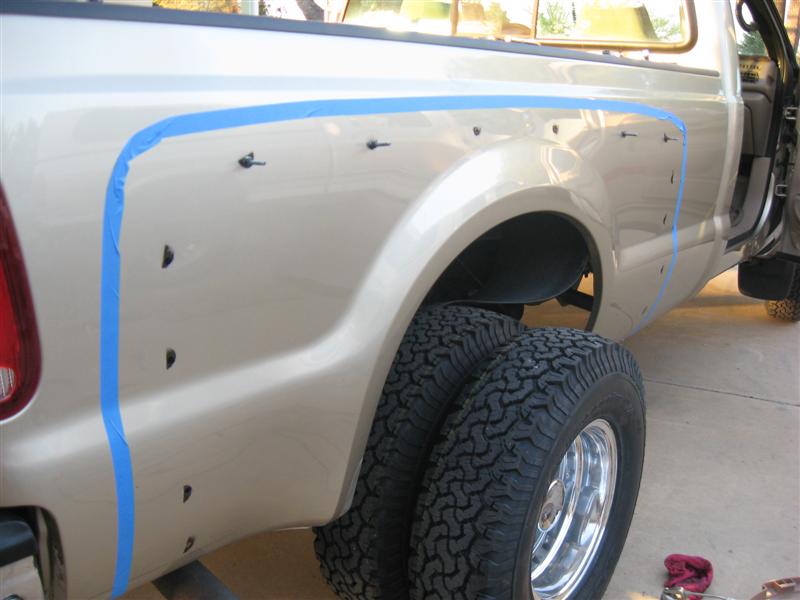
- I put a lot of blue tape on the bed -save your paint...
- The fenders at least on ours, were NOT a direct bolt on. Indeed it wasn't till 1 1 /2 hours later, scratching our heads, laying out how to trim the suckers to fit, that we determined the fenders were mislabeled . Yes, the glassed in label that says drivers side / passenger side, were wrong. After switching sides they almost fit- , very close. Arrowcraft doesn't make the fenders. The fenders are close but not a perfect fit. The contour especially over the raised ares of the truck bed just don't quite match. But with the fender welting it isn't visible,. The very back bottom edge there's a pretty good gap, I allowed it as "drainage..." The lil ear bump out on the bottom flange where the fender brace goes thru-toward the rear on both my fenders, the brace hole and bump center was off by half an inch and the profile didn't match, minor sanding, bout 1/4 tapered to rear and enlarging hole. Probably wont make any sence till you see the fenders but the bottoms of the fender are flat and are suppose to match the rolled edge of your sheet metal. Mine didn't. But again was minor trim. This was a hold up, mark, trim, hold up.... several times till we got em to fit.
- HINT HINT if you loosen the silly fender brace rods the sheet metal will move so that any required trimming is minimized. Actually after removing bottom bolts and loosening top bolts I swung braces out of the way during install.
- the jack nuts supplied (a collapsing threaded anchor for bolting, especially where you cant get to,) are junk. But couldn't come up with a better idea, they work, Only had half a dozen spin..err. They actually make bolting easier, McMaster Carr sells them. I used all of them. After the body was drilled and got the fenders where we wanted, running bolts thru fenders into bed. I then removed the fenders & threaded the bolts (except the very top ones where we couldn't get behind the fender) thru the bed sticking out, instead of thru the fenders into the bed. Used extra nuts and washers to lock bolts in place. Then you can slide fender onto bolts securing with nuts and fender washers. Makes taking the fender on and off much easier. Plus now that its done, removing fender doesn't require fighting the jack nuts. Getting between the mounting flange of the fenders towards both ends is a trick, especially if you use the long bolts. Several bolts were replaced with shorter ones. Ratchet box wrenches make this a lot easier.
- Hole saw works great on fiberglass, which i used for cutting holes for lights. Use caution when drilling the glass fenders, it likes to break out, take it slow. Backing it with wood helps. Friend helping has a small 1" belt sander which worked great for reshaping fenders.
- If your using the welting some areas where fender don't bolt up tight use black silicone to 'glue' the loose areas. On my fenders this was 3" both fenders toward the bottom front leading edges. I also used small alum rivets at both ends of the welting. Because the welting has a pretty short leg, getting it consistently snug and fitted while securing the fenders is just a matter taking your time- tighten/check. Cut pie ticks 3/4 of the leg width to get the welting to smoothly make the tight radius turns...
- I guesstimated where the wiring (not addressed at all in the instructions) would be and drilled holes both sides of the wheel wells BEFORE mounting the fenders, for access later to run clearance light wires.
- Clearance lights aren't addressed in the kit, factory ones are pricy & the aftermarket fenders are not embossed for them. I used some oval leds, screwed in from the back. The lights I used are Maxxima 7 led mini oval lights, M36180R & M36180Y. I painted bezels to match truck. ((Wire & Install before adding liners).
- neither is the wheel well liner. Looks pretty stupid plus you need to protect the fiberglass from rocks. I found a 4X8 sheet of UHMW 1/8" plastic thru Mcmaster Carr and made my own liners. Not sure if the factory ones will work. Used plastic push rivets to secure to fenders. The stock well is slightly smaller than the fender openings, so attaching the liner to the fenders at outer edges forces the liners pretty tight up against the bed. Worked out well. Hardest part was supporting the liner (used lots of small blocks from wheel to fender) to hold in place for marking for outer profile cut. Again install lights and wiring before liners.
- paint of course, the fenders come primed but need some serious sanding and filler prime.
- mud flaps...I ran the fender liners long in the back till I come up with something. I don't really want to hang off the fiberglass so Im looking at hangers off the frame...
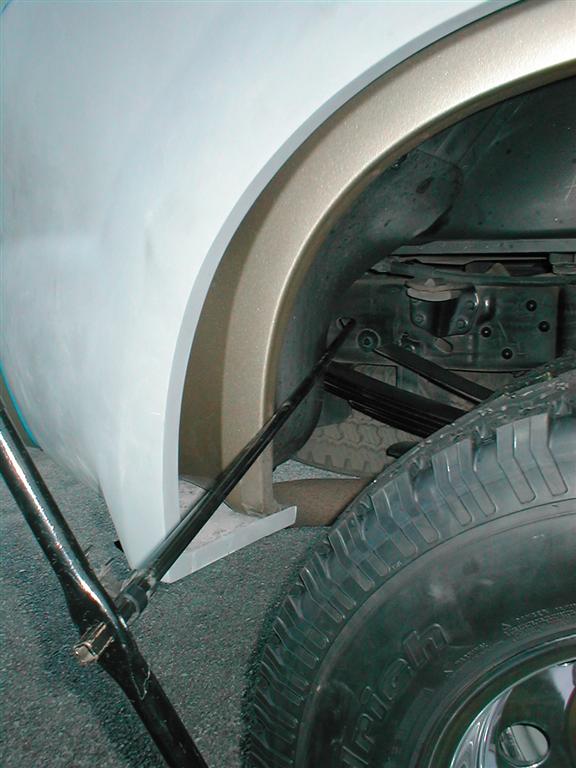
- spare tire. Last minute decided to add spare wheel to Arrowcraft order-good thing- stock Ford wheels wont fit over new adapter wheel 5/8" studs, there larger. Also when I went to mount spare, tire wouldn't raise all the way up. Discovered the dually uses a spacer (item#3) on the end of the hoist cable, ford item #F81Z-1A375-AA. Also the 5/8" lug nuts are huge-I need to get a new tire wrench.

Ford diagram item #3
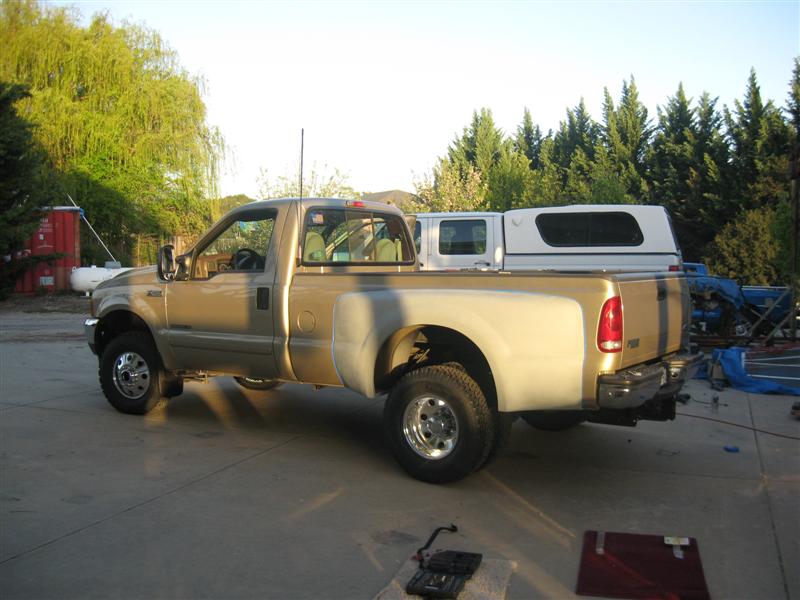
Before paint, liners & lights-checking spare hoist clearance
Oh... I really liked my truck...cant tell you how Hard drilling that 1st hole was
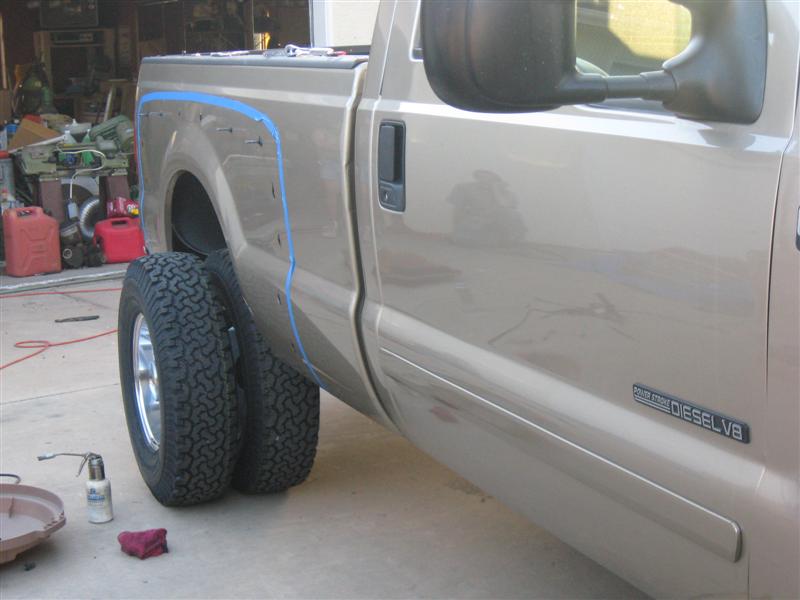
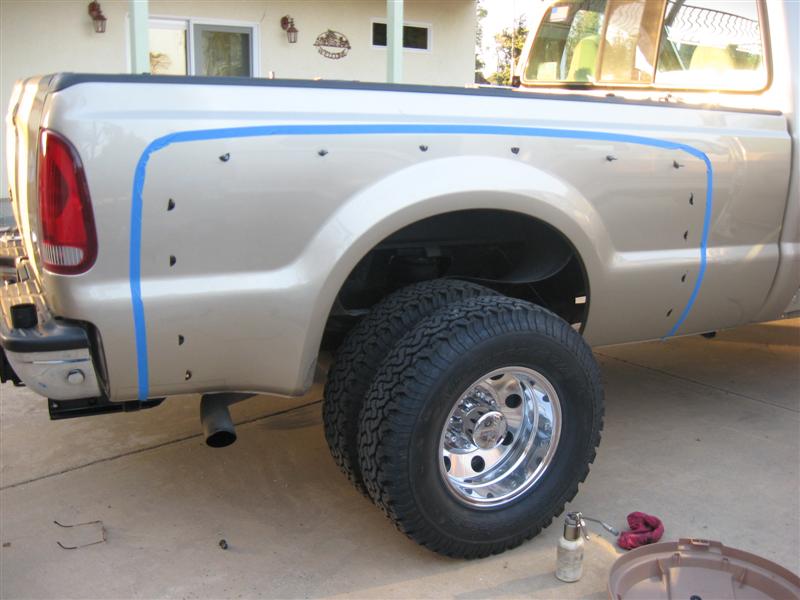
Above you can see we prepainted the holes after drilling the truck. I also prepainted all the hardware. Assembled with prefuse amount of anti sieze then repainted again once the bolts were in. When the fender were reinstalled the last time after painting I repainted the hardware again.
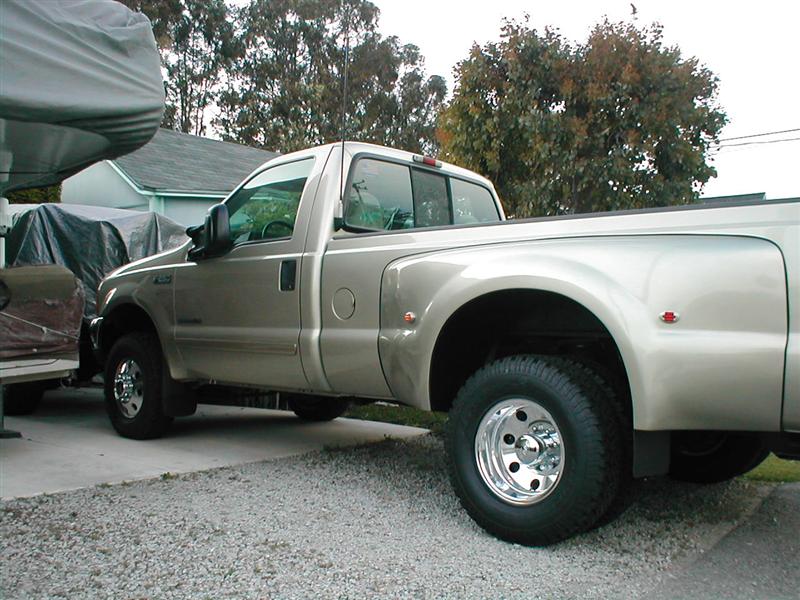
One side done
Some finished pics..Paint, lights & liner
Back to our F250 truck page
Back to Ourelkhorn Camper Modifications page