Build Dinette light fixture for camper dinette
(UPDATE: 04/17, 7 years later swapped fluorescent tube in this fixture with an LED tube that draws 0.2 amps!See LED Tube swap page)
When swapping light bulbs to LEDs in camper, I had planned to add original dual bulb fixture next to the fluorescent fixture over Dinette. Then we could have our 'choice'. The fluorescent draws 0.6 amps, quite a bit of light, however the new LEDs only draw bout 0.12 amps. So even with 2 LEDs on, less power consumption than the fluorescent. but I'm unwilling to part with the light the fluorescent gives. Will probably only be used if we have shore power.
I then reconsidered having both fixtures on ceiling, might look a bit hokey so I attempted to build a box that will house both dual bulb fixture for LEDs & fluorescent fixture. Bit of a challenge, thought a bout it for couple of days but, how to install switch, cut groove for lens, mount, few other things I couldn't 'see'.... I finally figured out if I tried to prefigure it out it'd never get done. So this was a plan as I go project. Worked out well. Bit crude but it'll work and allows LED or fluorescent.
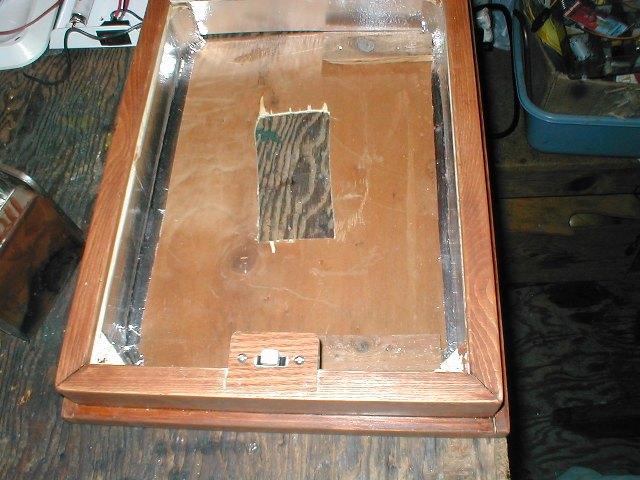
Got er built, a 3 sided box. Used a chisel point blade on skill saw to cut groove down a piece of 1x6 I had then ripped it to 2" wide. I try to stay away from cutting 45s but cuts came out close enough when cutting into side pieces. Made a bottom out of old 1/8 ply drawer bottom, because I realized one end would need to come of to remove lens for access to bulbs/installation. Gives the 3 sided box some structure. Assembled the frame & bottom using nails & glue, with end piece is screwed. Ran a small piece of 3/8 x 3/4 trim just to dress it a bit, that and hide the not to straight cut when I cut the 2" from 1x6. Stained the pre built box so I didn't get it too dirty while figuring out switches, fixture mounts etc. Ill clear coat when done.
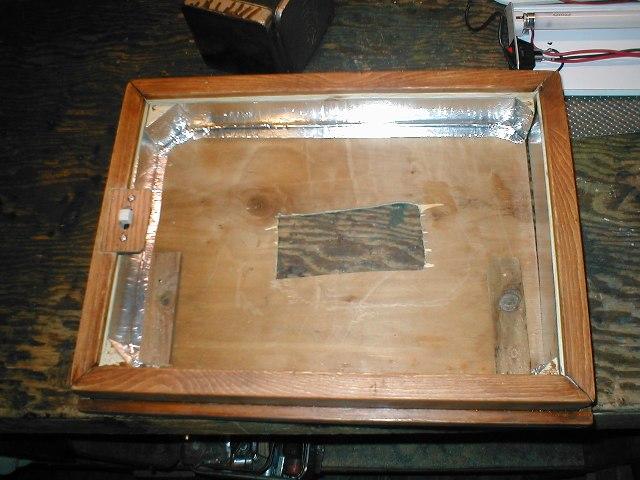
I removed the stock dual bulb fixture switch, set it in piece of scrap camper ply and notched into frame. I had cut a nice wire hole, but hacked it larger so I can freely adjust and center light over table. Lined sides with some tape I had to reflect light around. I glued 2 strips of 3/8 ply to bottom to move fluorescent closer to lens and have a place to stuff wires. I also cut a small gap at the rear to allow air.
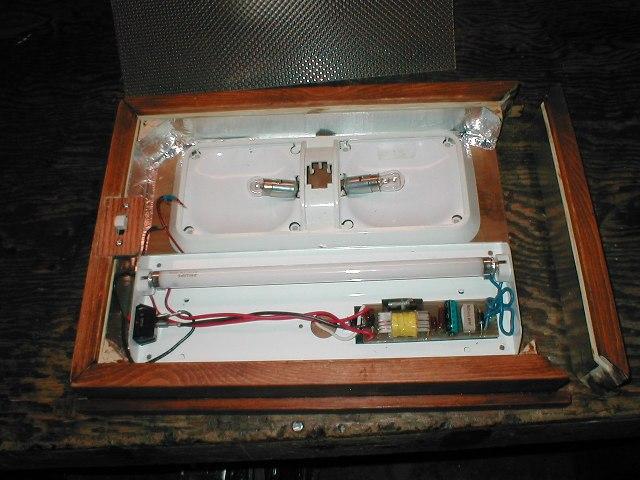
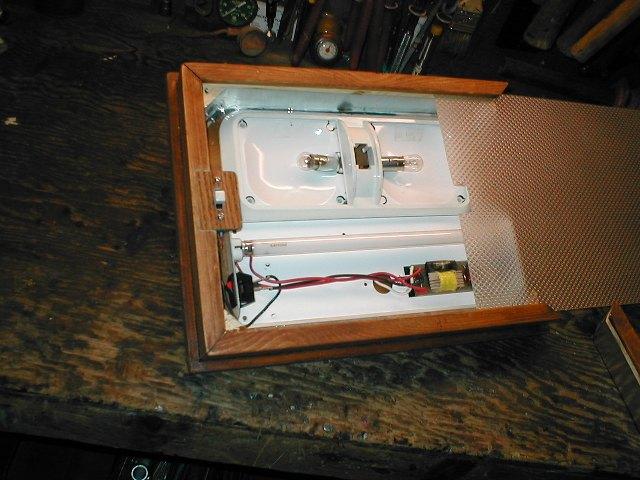
Here laying out the fixtures & how Im going to wire. You'll note the original switch is still in fluorescent fixture. I was going to leave it and in the on position. Wire the moved switch to turn on both LEDs or fluorescent. Also decided I need to cut off the original switch housing from old fixture, its pretty tall and blocks light from opposing bulbs
Just as I was thinking this going ok- cut the lens to fit round switch slides in/ out nice, BUT... removable back piece that allows removing lens, isn't going to work, well not as conceived. Wall is 6-8 away, not enough room to slide lens out. Should have made one of the sides removable-cept for the appearance. I think though If I trim a bit of side of lens, after removing the back, I can slide lens back far enough to clear switch, I can then bow the lens and drop straight down. details.
Almost done-light sanding and applied gloss coat. When dry Ill finish soldering switch.
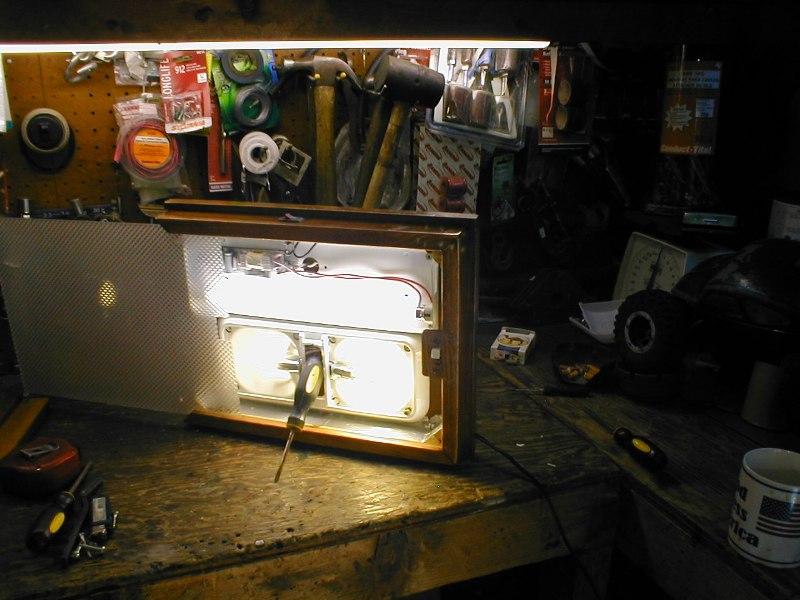
Well all nice and shiny-lot of back and forth on the switch though. Seemed like since this is about saving power there would be occasions that both leds wont needed. So decided instead of turning on both leds or the fluorescent, to revert the removed switch to control the dual bulb fixture as it was originally. So we can use either 1 or both leds. For the fluorescent I'll use another switch, was going to do like I did on the first switch but instead just moved fluorescent fixture switch and installed thru the side of box.
I installed one of the new LEDs & a stock 1141 bulb and turned them all on just to see relative light difference. Doesn't really show to well but the fluorescent is quite blue compared to 1141 or LED bulbs. Can you tell which is the LED in the dual fixture?, the LED & 1141 are almost identical in color and light. Probably the angle.
Kinda neat/ Ill let air for a few days before installing. Am going to paint the inside of base white, where it shows thru, not covered by fixtures, quite visible. The black rectangle in middle is where the dual bulb fixture switch housing was removed.
Cost zero, well other than LED lights. But box stuff was scrap, fixtures already on hand, lens was left over purchased years ago for another project, reused existing switches. Like these kinda projects. Now our primary main light is LED equipped, with the option to use fluorescent. Oh in the pic above showing the bulbs on, the light on the bottom right side of dual fixture is the LED.
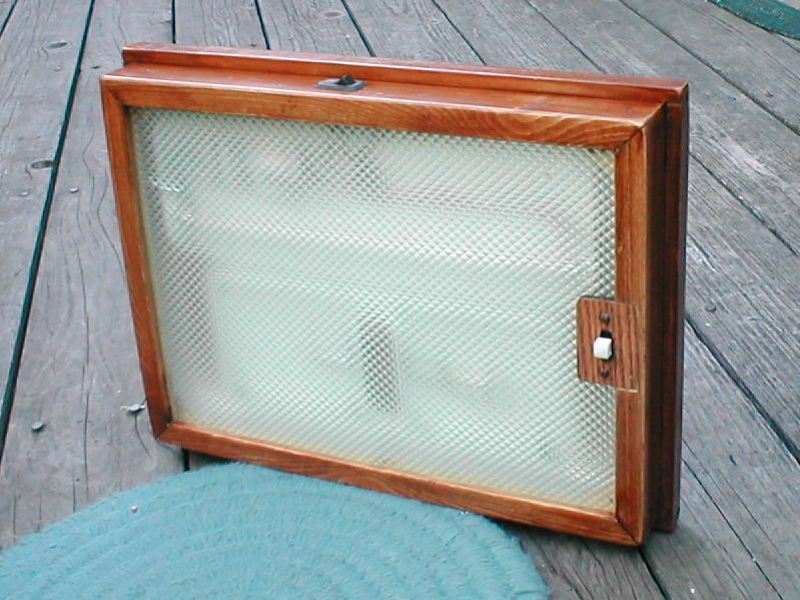
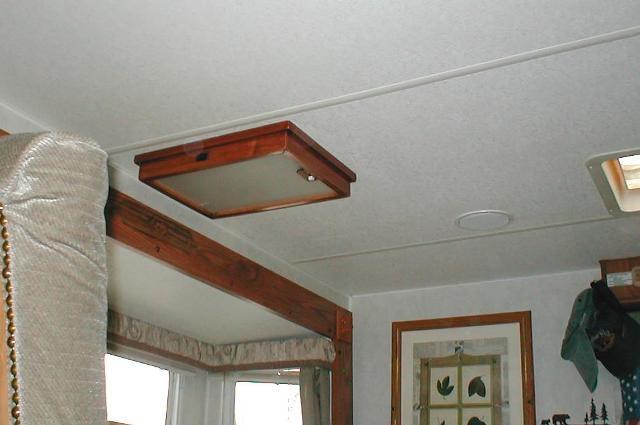

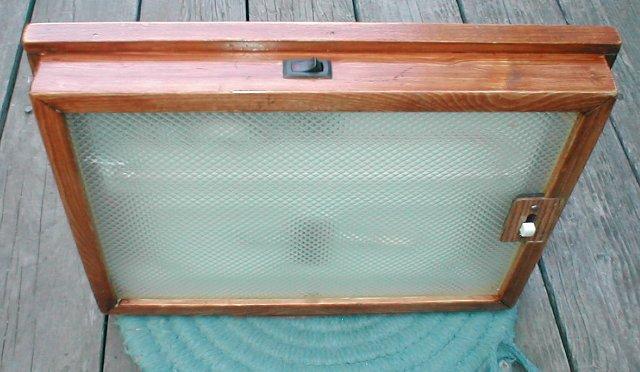
Before
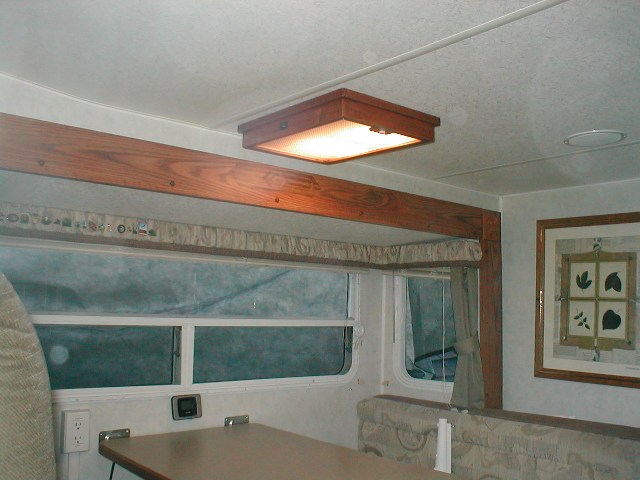
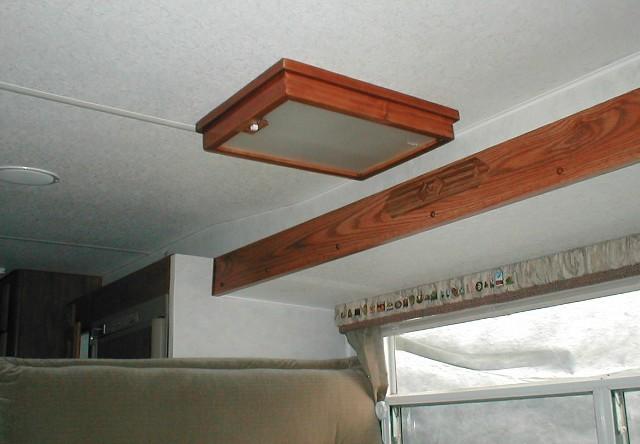
Just some pics installed. I never thought bout the ceiling fixtures but Im really liking this more than the white plastic fixtures, now Im looking at the one over sink-nah
Update:
Changed my mind: Built another box over sink & stove See sinklite page
Back to Ourelkhorn Camper Modifications page