Reinstall camper Air Conditioner
The camper gets a new replacement A/C. ....
AS
typical.. one thing leads to another..another convoluted messy page..in progress
Decision to reinstall an AC
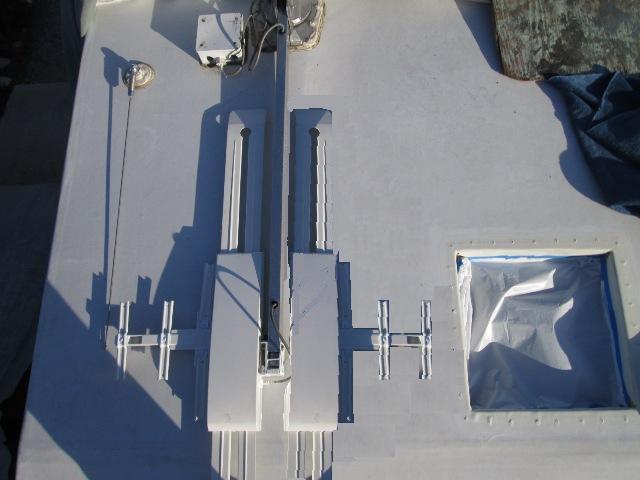
Rework antenna so head is on opposite side of arms.few would do this..but 12/14 moved
Remove existing Fan-Tastic Vent, prep hole. To be done: relocate, cut new hole and reinstall vent
Install new Brisk ll air conditioner 2014
Cut new hole in roof, box and reinstall Fantastic vent
7 years later, Seperate page- Replace failed start capacitor Add 5-2-1 to ease start up
The decision
-
Few years ago rebuilding our roof had decided not to replace the air conditioner. We only used it maybe once or twice a year, its heavy, need to run generator-just wasn't worth the cost & weight.
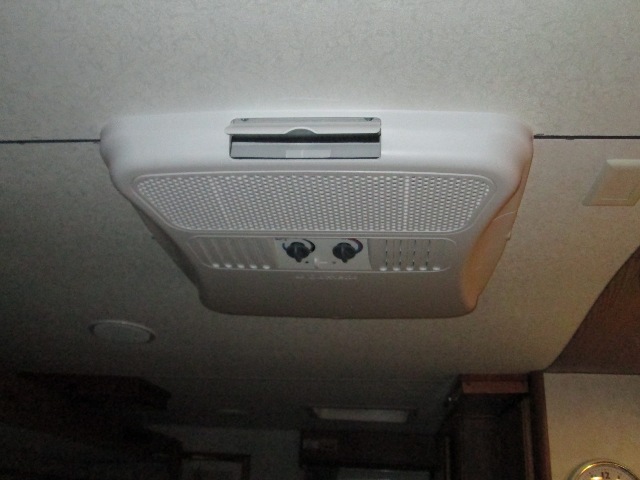
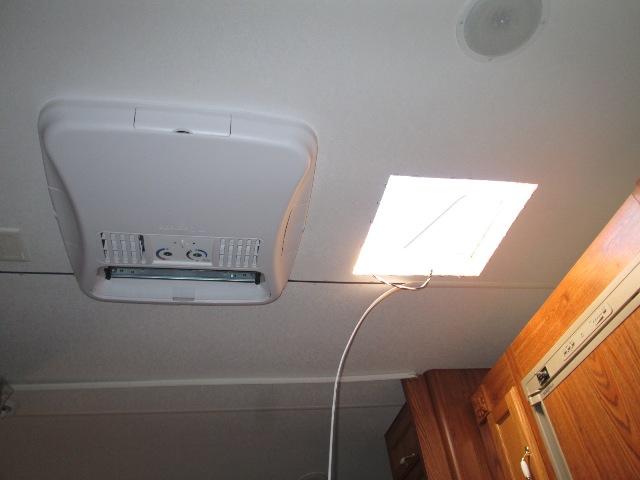
We did install a Fan-Tastic Vent in AC hole- and it is 'fantastic'. Its reversible so can be used to pull cool air in or hot air out. The added light it provided in camper is also welcome. Even not using fan, having vent at center helps a lot.
Well we've since decided to replace the AC. That once or twice a year it, specifically this year, 110° at 10:00 at night on stopover outside of Needles,was rough. We had picked up a portable unit but we only carry when going to a specific place that we know we can/will use. Other wise its just a pain-cooling is marginal. On extended traveling trips just in the way so we don't haul. Our decision to reinstall roof AC just a matter of convenience. If we want it its there.
Previous unit was a 13500 btu and worked well so that's what were looking at. Low profile and smallest amp draw. Which quickly just went out the window. What became primary consideration is physical size.
Generally, if you have a vent its removing and cleaning hole. Run 110v to hole. Set the AC over hole, clamp in position with the inside unit, hook up wires done. Literally that simple.Replacing existing AC even easier. However..
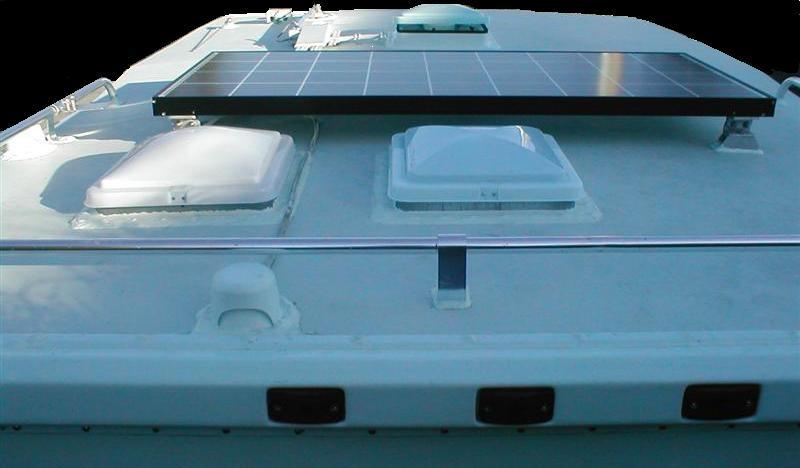
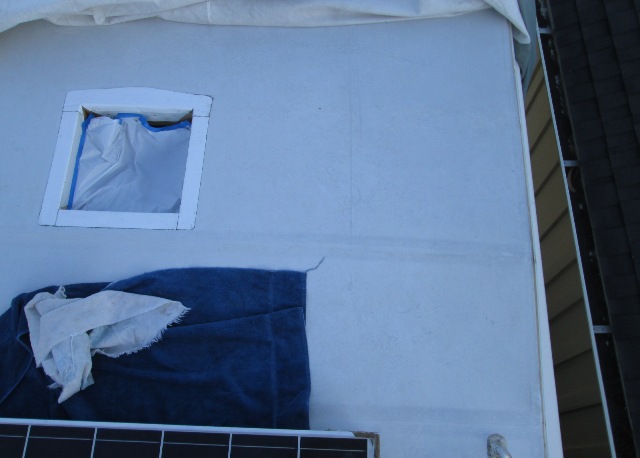
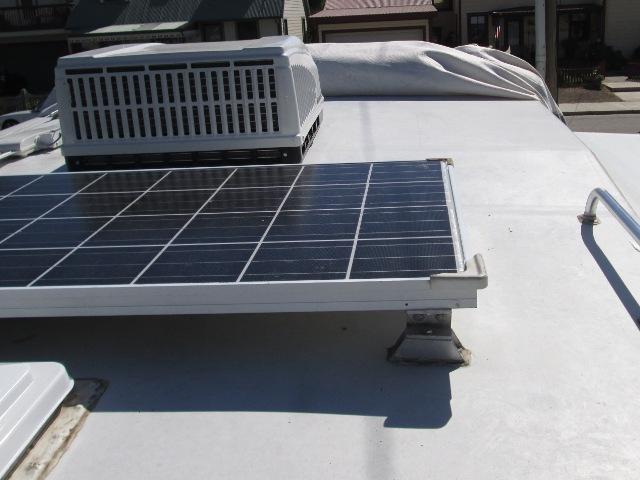
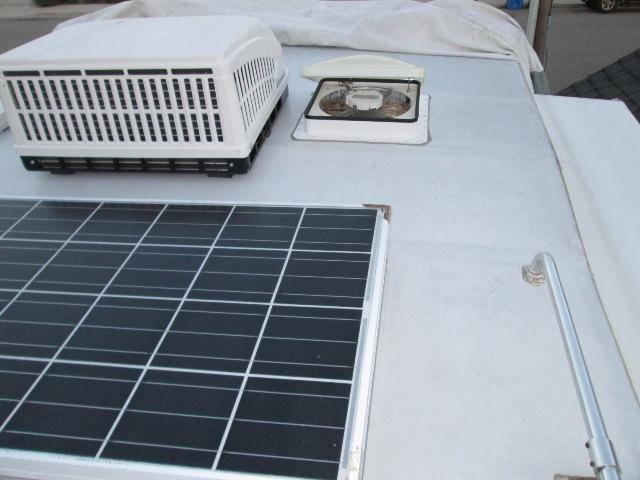
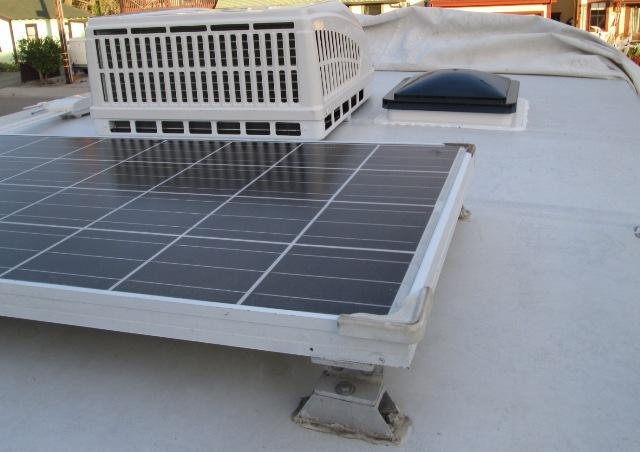
Since AC was no longer there, the space it had occupied had been partially absorbed. Mostly by a larger solar panel, sets to close to hole for all low profiles I looked at. Simply the length of low profile AC wont fit. Width wise, AC the antenna is an issue. It was replaced with wingman feature, seen in the picture above its really close to the vent. Possibly could remove just the wingman feature but the head would still be awfully close, if it cleared. That and antenna really works well.
It seems looking around that ACs are same cubic size, if its shorter its wider, if narrower its longer etc.
Changing parameters and looking at footprint only I found the Brisk ll. It is both shorter, narrower and 20# lighter and only unit that will fit. But is taller at 12 5/8", more than I'd like, amp draw is average, however It is considerably less expensive than most. Its On order, will be a perfect fit. Found the top & inside unit for under 400 thru AdventureRV.
Two things to address. Im flipping the head on our antenna 180° and we are keeping the Fantastic vent. Well the antenna appears everything that could be done to keep a person from rotating the head was intentionally done. Bizarre. The Fantastic vent IS a being kept, not willing as its 98% what we use & the light it provides. However not sure until AC arrives where it will go. I could reinstall in place of one of the existing vents at rear of camper but we want it in the center. Hopefully as it looks like front of AC pan is close to front vent hole that I can cut a new hole in front of AC to remount the Fantastic vent. If not it will go in front but off to the side.
Rotating the Antenna head
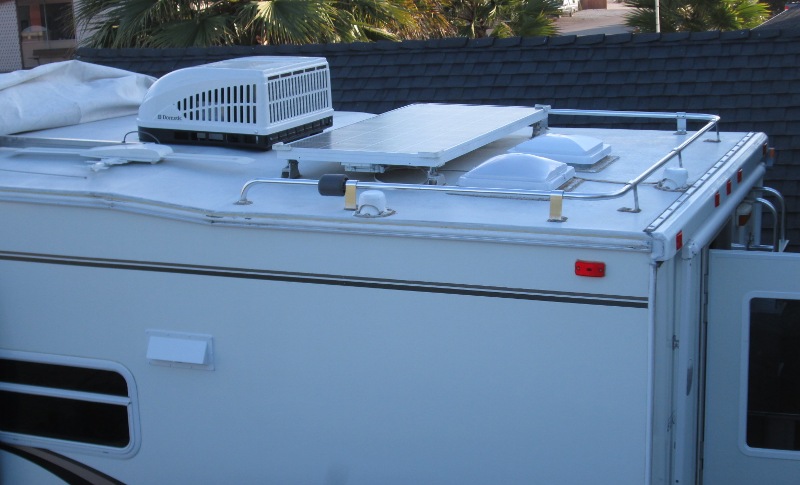
Project was moved off this page to its own to make finding easier for folks needing to do this mod but unrelated to AC install. Needing clearance for antenna and its wingman feature, I flipped the head on our Winegard antenna so it is on opposite side of lift arms.
Just showing head on opposite side. Im unsure why Winegard doesn't make a left or right side antenna. Simple modification, swapping swing and head,. But were done, antenna modified for AC clearance. Wonder if anyone will note our antenna head is backwards?
Winegard Antenna modification page
Winegard antenna modification page if you wish or need to do. Also link to another that did similar 'head flip'.
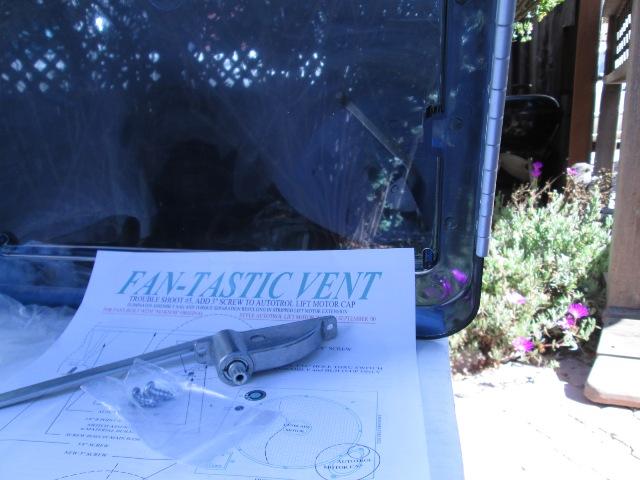
Remove Fan-Tastic Vent, prep hole
-
No pictures of removal.
Remove inside trim from vent. Outside I was able to push screwdriver thru sealant to remove screws. Using PLASTIC putty knives simply cutting sealant. -round and around the perimeter, then inserting deeper under vent flange lighting prying. With putty knives under fan used thin pry bar between putty knife and flange for final lifting. Took a while not wanting to either break plastic vent flange or cut my roof.
Once removed used plastic putty knife , thumb to roll and pull off as much of old sealant as possible. Resign yourself as this will be painful and slow. No short cuts. Then with lightly dampened rag scrubbed off remaining sealants. I used primarily acetone. Took me about how hour and a half. Don't get rubber roof overly wet with solvent. Took vent to shop to clean up for future reinstall.
Then the stall...
Well this proved to be more of a pain than anticipated. Though I knew and planned on the removal and cleaning of the vents sealant would be the main task on this install, relocating is proving to be frustrating. I wanted to simply reinstall the fan in front of the AC. Keeping it centered for air flow and more so the light it provides & proximity of 12v. The fan is our primary source of ventilation. However Im about 1" short of clearance. AC extends beyond 14" hole 'bout 2 3/4", vent flange 1 1/4". The hole where AC is 16" between rafters but has a block at one end to decrease to 14", I could swap block to opposite side, shifting hole 1 1/2" away from rafter. Still an inch short and the time to rework. Cutting the rafter and reframing if the roof was open it would be minor to reframe allowing this and kicking myself because I didn't see when I rebuilt the roof. ('Course we hadn't planned on reinstalling an AC).
More than likely it will end up in front of ac but shifted to the side. Works but will be in reserved space for planned addition of solar panel. Possibly solar panel could be in front of AC orientated as existing panel if I put the vent beside AC. Errrr.. Perfect space for panel unusable because of an inch, hindsight. Didn't really want panel across the front because of the air it will see from nose. Just stuck going around and around trying to figure a way to make the undoable possible. Anyway conclusion, cant, is best I can accomplish at this point is locating vent so as to get best possible /available space for solar. Problem is I need to figure it out while the AC hole is open to get the12v wire where needed. Also lid needs to be replaced Update-Fantastic sent a new lid!

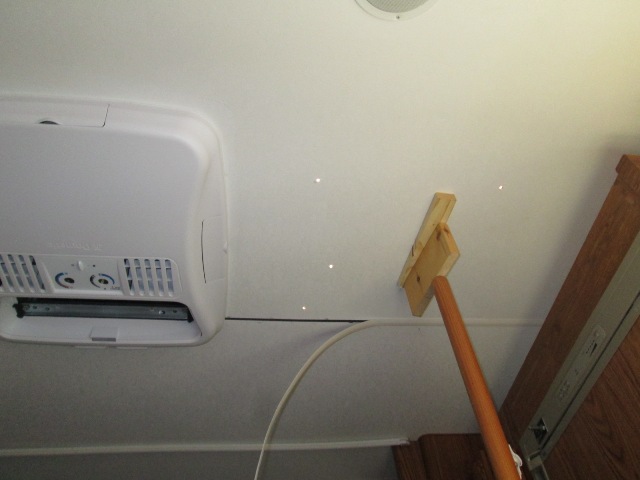
Moving right along... Reconnect short piece of 12-2 wire from AC connection box in ceiling to tie in AC. I also extended the 12 v wire which is tucked behind rafter toward front right corner. Still unsure exactly where it will go so added 36" which will reach either location I have in mind. Cutting and sealing ends just in case it gets abandoned, IE move vent elsewhere and don't use. Im pretty much ready to set AC-'cept getting some help and its 95°, a hot day here is 80°.
Did pick up some eterna bond tape. Im not trusting the AC seal to seal old vent holes. Might be fine but Im seeing the 32 holes from vent as decreasing sealing width of the AC gasket. Cheap insurance for more sealing area. Some folks use caulk to plug holes. Local RV shop sells by the foot, picked up 72" of 4". Cutting in half to 2" width for sides and back but front 4" cut in arc so hopefully slight edge might divert nightly dew away from front of AC.
Wow, fail well not really but, last piece wind caught and folded over itself, pulled as quick as I could but wrinkled corner. Naturally the front edge. What's a person to do. Ours slopes to the back from in front of AC. Overlapped the pieces. All probably unneeded.
Ready to set the AC. Ill cut new hole & reinstall vent afterward. Decided beside the AC, but not second guessing where its going to end up. Mounted beside AC will leave 4' in front of vent holes to start of nose slope & 5' width across. Should be able to fit small solar panel there, maybe- after all this thought bout it Im thinking of going portable. Ha:). Once AC set Ill mark out vent as close as practical (still room to seal vent edge), Cut hole and box in. Should be interesting.
Install the air conditioner
To be done, get the dang thing up there. Already did pre wire for both AC and 12v for relocate vent, moved antenna for clearance. Unless Im not seeing something, once square, set inside unit-clamping bolts-& wire. I imagine 30-45 minuets max to actually hook up and have running.
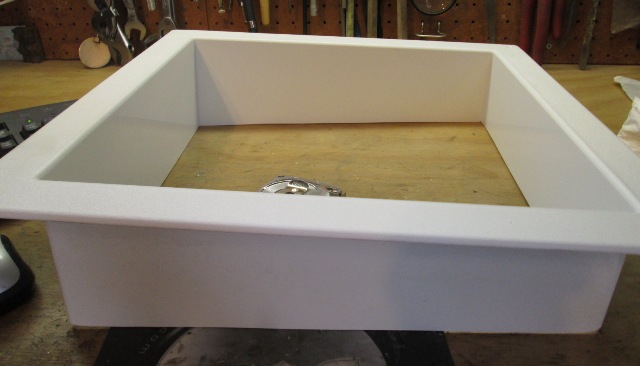
May have jinxed myself. Looking at parts this unit uses the hole in ceiling to distribute air, (most use a sleeve). So Im lining the (wood) vent hole with aluminum tape, 1 to seal, 2 to insure no moisture/condensation of wood.
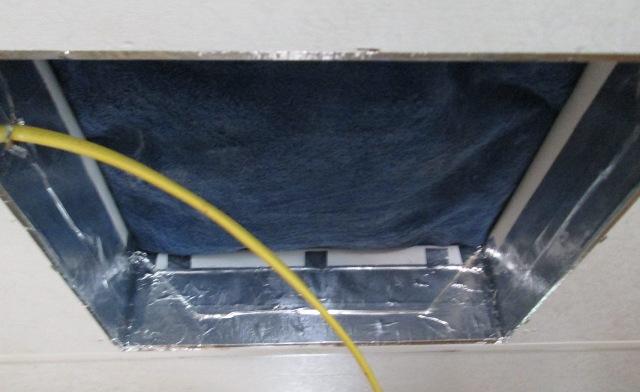
Lined. While in the long run it may help cool your camper having some cold air blowing in between the ceiling and roof space, I don't think I want that?? pretty sure.
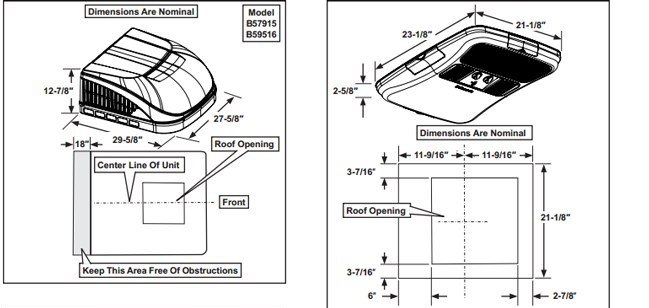
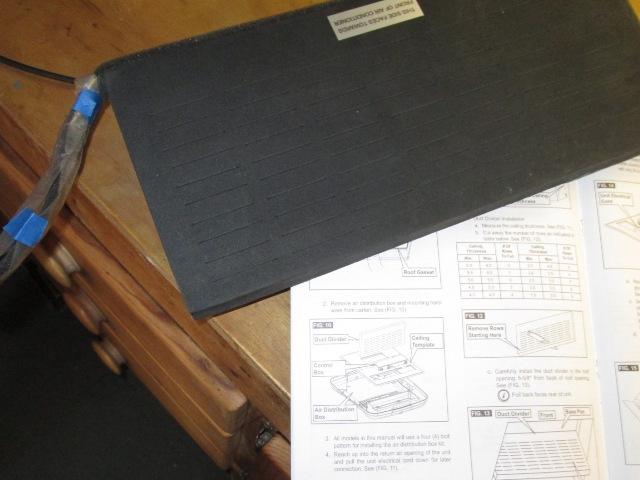
Second, it has a rigid foam divider that is trimmed to fit depth of ceiling. It is what channels cold air into the distribution box, also separates the AC output from the hot air intake. However it has pre applied sealing foam tape. Problem, the foam block is 14 1/2" wide + pre applied foam sealing tape. Recommended max width of vent hole is 14 3/8" square, min 14 1/8"?. No mention of trimming the width of block, and/or trying to peel off the sealing foam on edge to reuse if trimming needed? Ummm-what the heck. Wonder how many are trimming to fit height- only to find it wont fit width wise, cut off sealing tape..
I was able to peel back the sealing tape on one end, put some plastic on till block trimmed. Overall unimpressed with the interface between top and bottom unit. Mute if it works.
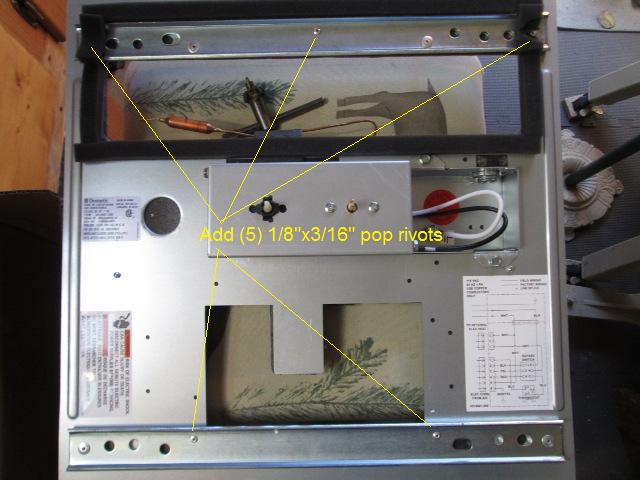
Getting a lot of transmitted 'rattle' between the mounting bars and tins so I added some pop rivets to snug together.
BAM!
Whoo whoo -up on the roof.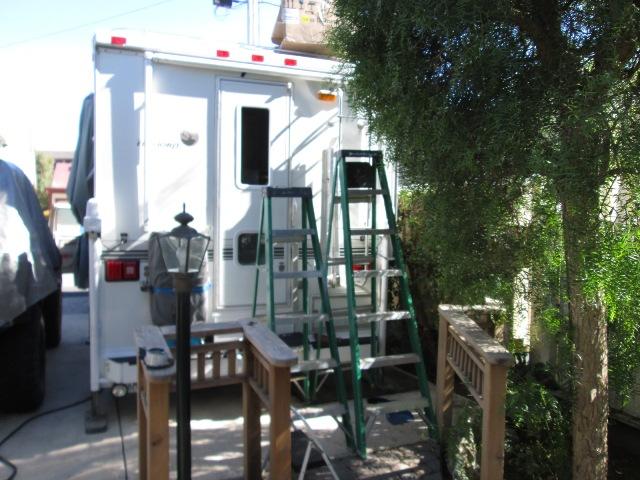
Not planned but 'accidentally' ended up on roof. I was actually in middle of loading camper to take it & AC over to friend s where we were going to use his second story porch. Railings are removable and the deck is 6" taller than camper. Carry AC upstairs and just walk on to camper roof. However I had to get the A C in camper. It was setting on patio. PIcked it up yea, it weighs a lot. Realizing getting thru the door would be next to impossible, once inside I would still have to dead lift up to bed. But it got heavy quick, set on railing of lil ramp handrail. Dead lifting from ground was the hardest. IF I can get to door I'll probably couldn't carry it all the way to bed. This is dumb. If Im going to be lifting this it would be easier getting up ladder than inside camper.
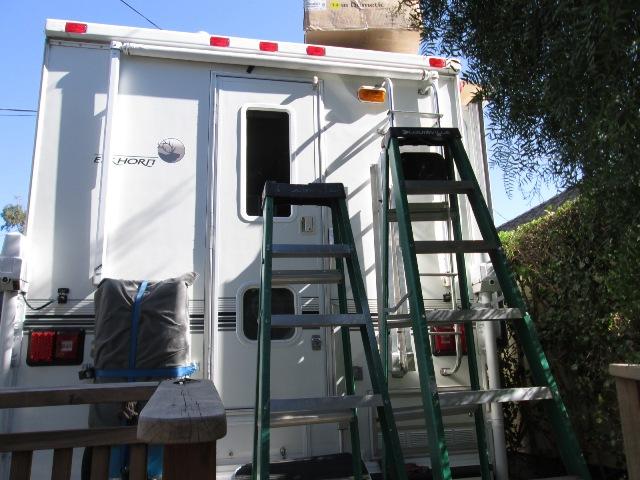
Not knowing if doable decide to try. Only other option at this point is to call Mike tell him to bring his truck to pick up AC. I wouldn't have otherwise attempted but getting in camper might have been a disaster. Had to try first. Went and got my 6 & 8 foot ladders. Lifted from railing to 6' ladder was a grunt. Got on the 8' and just drug it over, lever on top. Then tilting side against camper up while pushing bottom of box got it angled against the camper roof. One shove and it was on top. Amazed me, that was easy, Been setting on this thing for 3 days waiting to get on roof. Called Mike-never mind and told him what happened. I really don't recommend this at all -just got caught in the moment...This AC is also lighter than most.
But its on the roof. Laid a towel next to vent hole. Picked it up enough to place on towel. Once next to vent, cut side of box out, lifted AC over onto hole. Went inside- square it to hole. Wow, ready to set the inside unit.
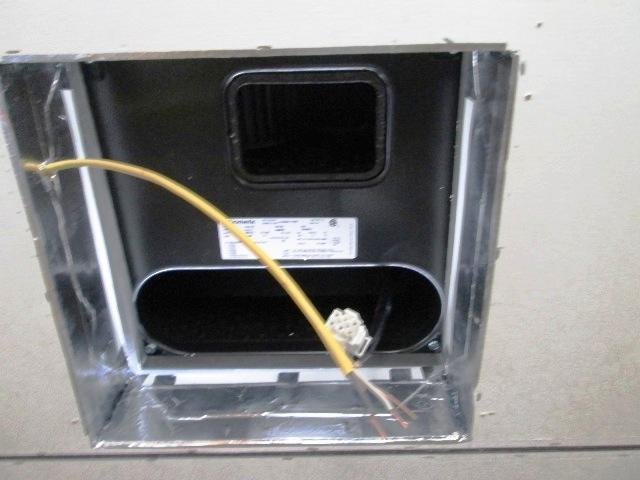
Dry lifting it into position I couldn't figure how 110v wire was supposed to get thru divider? Then realized this whole time lining everything out I was looking at inside unit orientation 180° off. Looking at picture above, this is what the divider block separates, output and return of AC
So my rerouted wire is on wrong end--err. Pull the wire and shove it back thru original hole. That's better. Loosely installed the ceiling plate, hooked up the 110 to verify unit works...One Of the things i forgot when setting AC on roof was I was going to pretest before installing. But it works! Recheck AC was square and tightened down the bolts to 30 then 45 Inch pounds- which took for ever Let it set went & did some other stuff come back and re torque. Due to compression of gasket did this about 4 times before it didn't move any more at 45. Ill probably recheck in a couple of months but don't want to over compress.
Double check wiring, seal it up, installed the inside air distribution box. I had pulled the ceiling paneling trim, Im cutting to fit against box instead of having it under so it sets flush.
Nice. Turned it on, run the temp down till compressor kicked on. A lot quieter than or old AC. Went in to the house- got a cup of coffee, walked back to camper...wow.
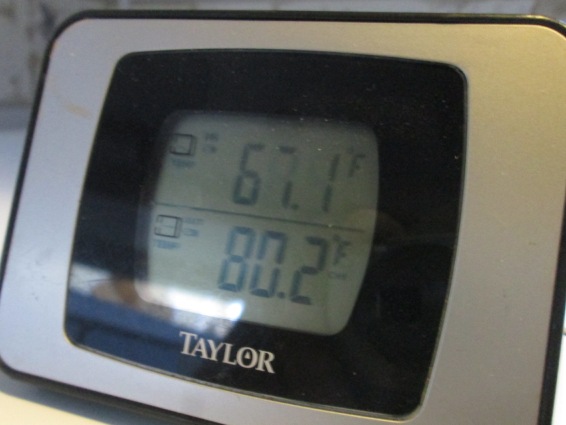
Maybe 6 minuets, temp dropped from 82° to 67°...Hokey Smoke. (The 80° is inside refer). The air coming out of AC I dint measure but its COLD. I ended up turing down temp, let fan run a minute then shut down. Stoked. Our previous Air conditioner never came close to the cold air this is putting out. I honestly didn't expect much from this unit. So we have AC again. I may load it up and drive over the hill where its in the triple digits to verify as likely we wont be anywhere to have reason to use AC till next summer. Unless its like the last few days here at home tomorrow- we've been having some record heat.
Not only does the AC fit in the space we had on roof, saved couple of hundred, 20# lighter- it WORKS. It is tall though. It looks taller than it is because its so short, but at 12+ inches it is still a tall unit. But all things & compromises considered were happy.
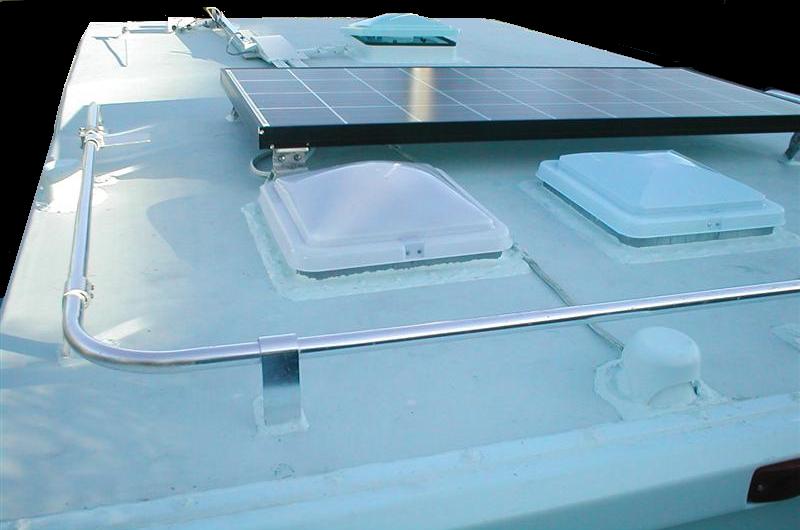
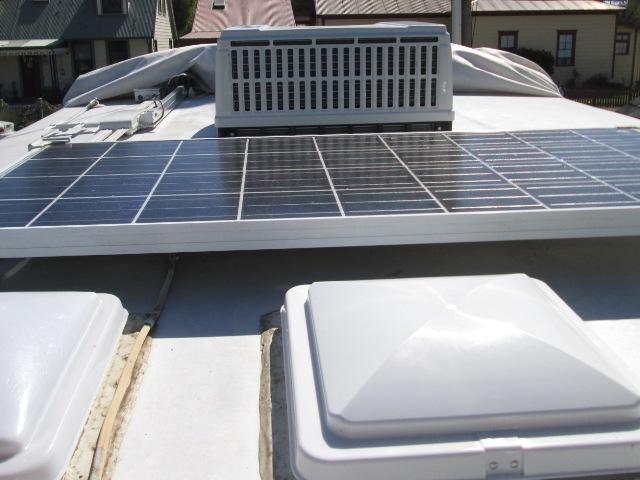
No pics yet of on the roof-campers covered and a lot of wind. (Ill add later) I will note I now have 10 1/4" between AC and solar pander, before, with narrower panel, I had an inch. Though taller still should see no shading plus I can get between.
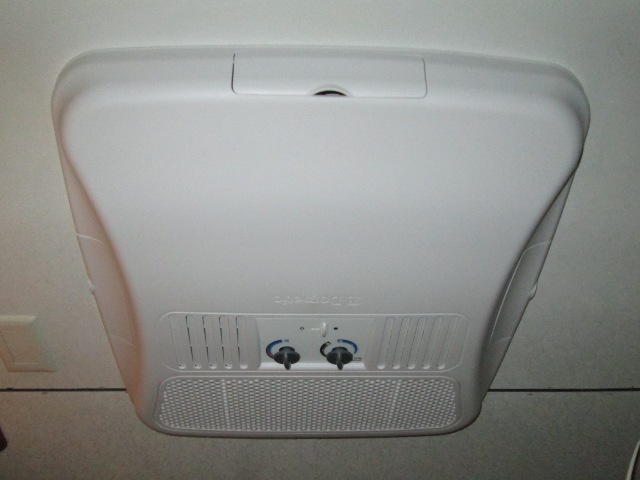
One minor detail, couldn't tell which direction knobs were pointing. Do have a small bump that acts as pointer but you really have to look and its difficult,. Once knob turned not sure which direction to go.
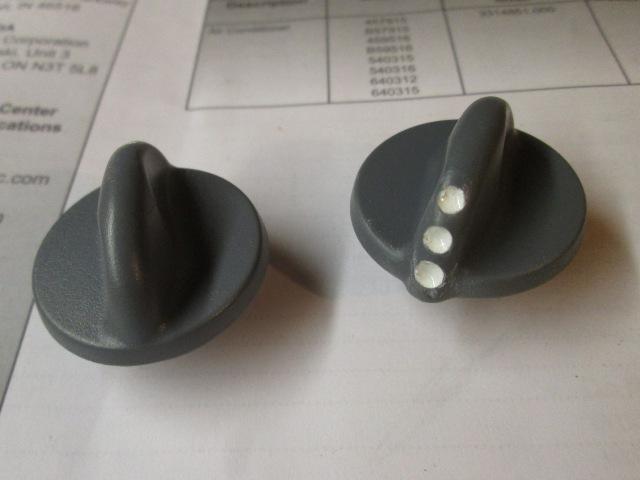
Took to shop dremel a few dimples and filled with paint- that'll work...
Oh pics from roof
Amazing how much an extra 3-4" seems when its is on the roof...
And the area beside AC where vent is going. Tomorrow Ill mark out the new hole to reinstall the Fantastic Vent. Hopefully get installed.
But we've got AC!
Little later, removed the shroud. Painted all the screws and sheet with some zinc, painted what cold be seen thru the grills black (not coils & condenser). Painted the base white, the black base bugged me. The vinyl stickers just didn't need...
Reinstall the vent
-
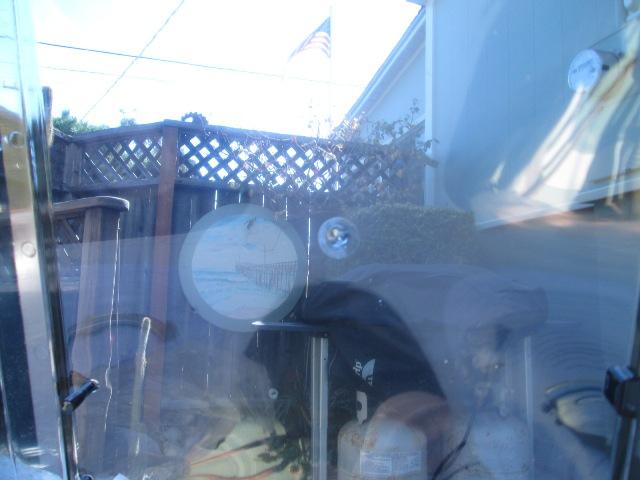
Im watching the flag..breeze is off the ocean so we may get to the vent. Yesterday-it reached 104°- hid out in the shop all day.
2 days later...
Finally cooled off. pulled slide out. Not sure where to start. Obviously from the roof. Locate beside AC, but as far away as I can. Originally was going to place as close to AC as I could but decided structurally I need to leave as much material between AC and vent as practical and still have vent fully exposed when slide out..
Biggest task though is locating between the rafters. There's approximately 15 1/2" space between rafters, need to have hole centered between so I can build or box in hole with 1xs. Anyway placement rather important. Used a 1" butterfly bit about 3" back from where I thought each rafter was. Measuring and slowly cutting in both directions toward front and back rafter until I had a 14" slot that was centered.
Guesstimating side distance from AC I drilled a 1/4" hole all the way thru both roof and ceiling but a couple of toward where center of vent will be, I just wanted to see inside the camper where Im at. Inside I measure form the 1/4" hole, mile of room. Starting 2" closer to ac from drilled hole measured toward wall. The vent will be about 14" from wall or about 7" inside or inboard of the slide when extended. Think were good.
Didn't get any pictures of this process, bit of a brian teaser trying to ensure hole where it needs to be, square to everything else. Opened my slot between rafters at rear rafter toward the AC to get start edge. From that measure over 14" along back rafter, drilled another 1" hole a bit inside that, verified rafter location. Scribed a line, its about 7/8" from rafter edge, jig sawed a 14" line. The used a square drew line at AC side. Drew out the remaining lines. I drilled another hole at the front right corner to verify my drawn square hole is same 7/8 from front rafter. I assumed the rafters wouldn't be parallel and one end I have to play with the thickness of material when I box in. But it was dead on. Cool, Jug sawed out remaining edges of hole.
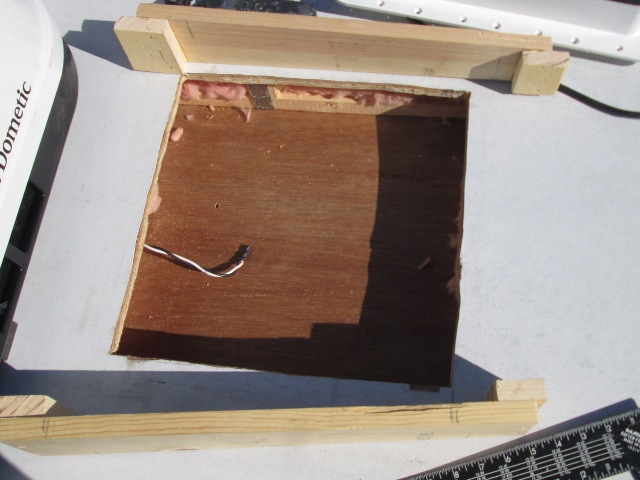
Took me about 2 hours to get hole cut. But I think its good. Boxing in the hole with 1 x cut to match. The roof slopes toward outside wall about 3/4" inch in the 14". Cut angle to match. The front and back run past hole about 3" each side. Glued and stapled block on each end so I have something to butt and staple sides to. Placed a pole and block inside to force the ceiling paneling tight against rafter. Liberally applied glue to all contacting surfaces of front and back box pieces, and then added some more glue. Slide the pieces in and stapled to rafters, (once all pieces installed Ill staple roof to box, inside Ill staple ceiling after hole cut).
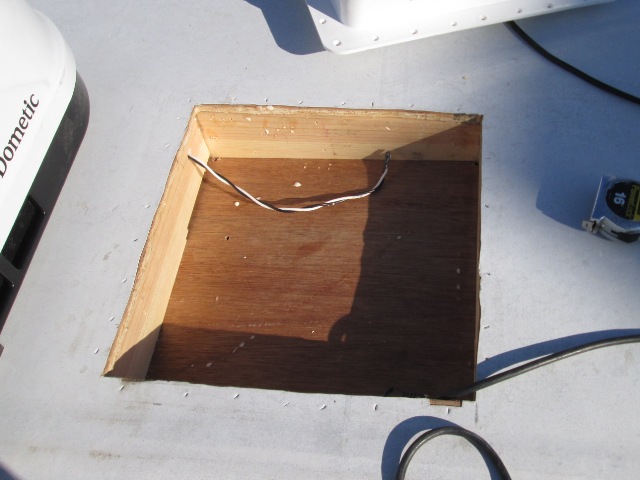
Cut the sides, glued and stapled the sides to blocks. Then stapled the roof to the box. Almost forgot to retrieve the 12volt leads...Dooh. Drilled 1/4" holes just inside the corners to get placement inside.
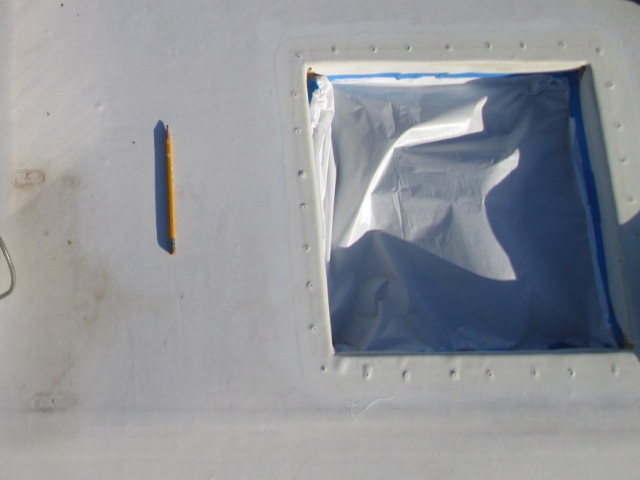
Scribed my inside hole.
Yes- We got light! I was unaware when planning this the roof slope and inside ceiling flat and having the 'space' between angled. Hope its not an issue when I install the inside trim sleeve.. .
Squirted some more Gorilla glue between ceiling panels and box, stapled to box with 1/2 crown stapler.
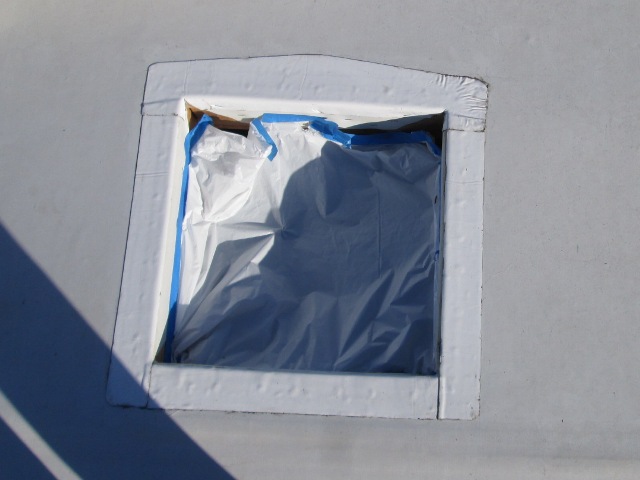
Back out side, with the lid removed placed the vent, predilled all the holes. Laid out butyl tape, sat on roof and screwed down. Put the lid on. Just enough time to pick up tools. Quite a bit of butyl oozed out, but as its late didn't clean up, hopefully trims off easily tomorrow and hadn't stuck. Was going to wait to set the vent, good thing I didn't, heavy fog last night.
Just hope I don't have mess with the excess tape setting overnight. But vent is in.
Day 2- details
First is run around the vent screws snugging again and then trim the excess butyl tape. Using wood knife dipped in water. Then inside remount the fan controls. I will need to trim the inside trim sleeve. Trim the ceiling panel plastic trim. Clean up camper..Later Dicor caulk the vent and its screws once putty done oozing.
Wired the fan, reinstall the control plate. Custom...actually its an 1" in 14" slope. Stuck trim sleeve in the vent hole as tightly as I could, then scribed against ceiling, to be sure. Transferred that line from top edge. With a block of wood on stool, scored thru using utility knife. Used file to smooth and round edges. It goes in ok, was concerned because of the slope.
. Found the knob after an hour, funny how stuff grows legs. The fan works, well like it always did, pretty dang good. With vent done, loosened the AC shroud to get the ceiling panel trim under it to mark. Cut reinstalled. -clean up the camper.
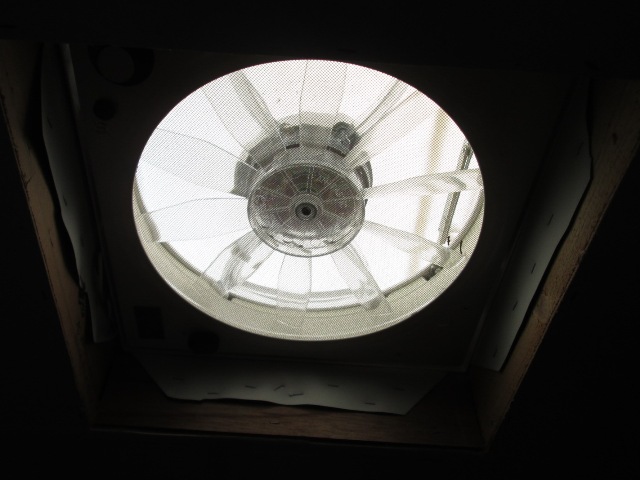
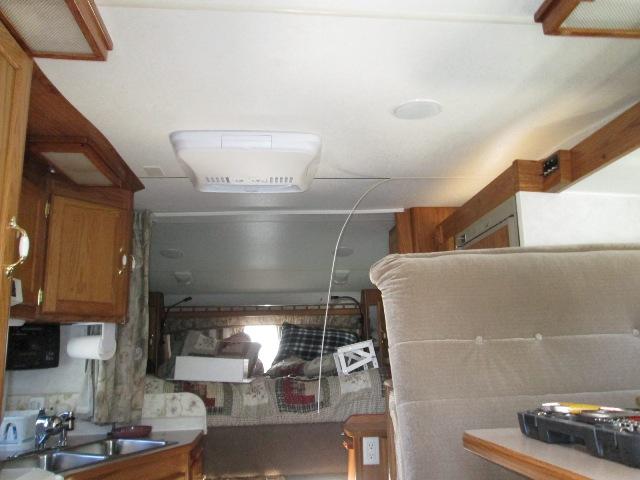
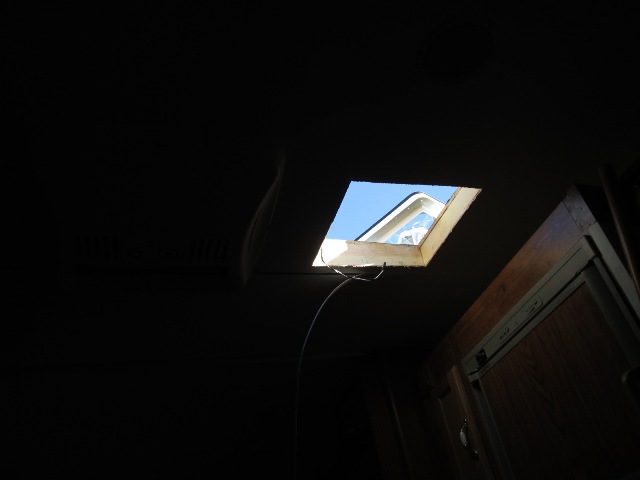
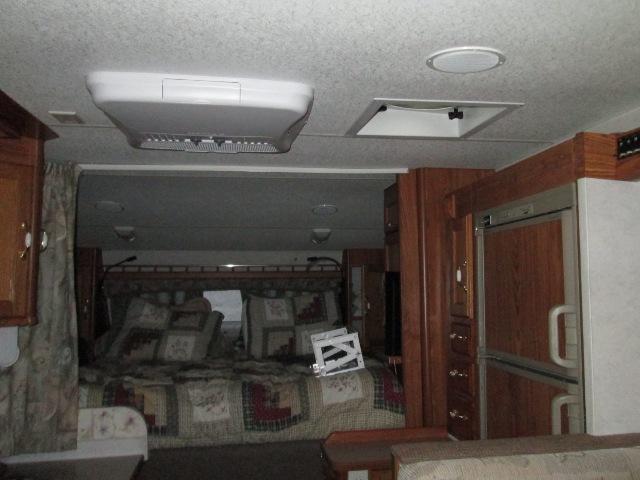
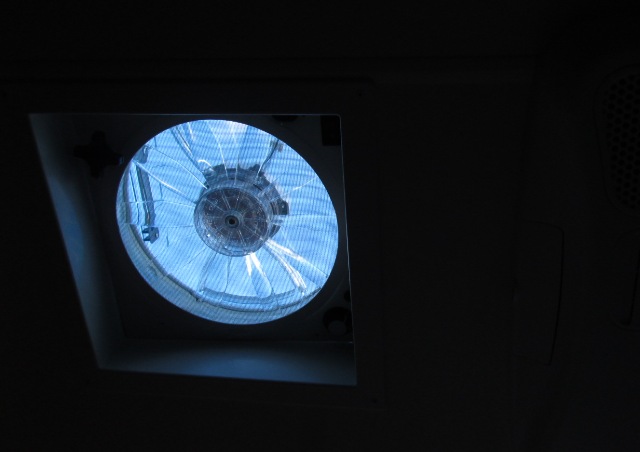
Learn something everyday..suns going down buttoning up with the lights on. I turned the lights off as its getting pretty dark in the camper and I wanted to show how much light was coming in the vent. I did not know under low light the camera automatically slows the shutter. I have 3 picture this was the least blurry. Any way,, this picture was to capture how much light.
Cool...we now have an air conditioner again for those rare occasions its needed, and reinstalled Fan-Tastic Vent that is our primary air control. The added light in center of camper has always been appreciated since it was originally installed. Moving it to & replacing the rear vent would have been a lot easier and retain its main function, moving air in or out. But the light (and removing heat) in center of camper made the effort worthwhile for us.
Just for grins I unplugged the camper, turned on the propane and started the generator. Want to verify that it runs the AC. And it does-quite easily. When the compressor kicks in it does rev up but not as much as the micro wave causes. Oddly considerably less than the old AC. Curious, Im thinking that because of the difference in the cold out put and how much less the Generator revs up to run the AC that our old unit, though not used that much must have had some issues. Mute -its gone, but it always caused the Gen to spool up to full bore and was never really that cold.
Done.
-
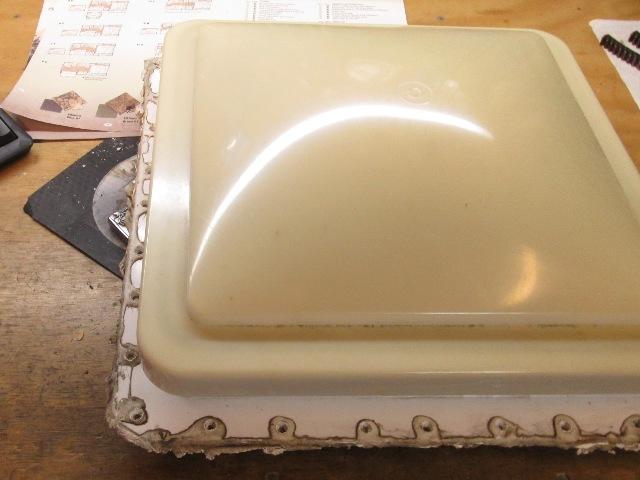
New lid came from Fan-Tastic Vent!
I had contacted them because of the sunburning of old lid. Its starting to look quite brittle however I couldn't find same color ,clear with blue tinge. So called Fantastic. Come to find out the color I have clear isn't available directly and because of the part number I gave them he said mine obviously was an OEM vent. Meaning some mfg had it made for them-that it was sold retail was unclear, possible bought at auction of and OEM supplier or camper builder that closed it doors. Anyway he said it is still under warranty and would ship a new lid!
I wasn't expecting that. Awesome!
Looking thru the new lid. Its smoke, though I think of smoke as gray, this has a blue tinge,- its pretty clear. Nice.
Swapped it out, They had also shipped a new lift arm? Not sure why but swapped it out too..
Really wanted to show vent but light coming thru washes out. Getting closer camera filters light but cant see camper...
Light is a bit filtered even though its clear, enough to see the birds and clouds. Liking it a lot. But cant say enough about Fan-Tastic Vent.
New lid, this is little later after caulking the flange with Dicor self leveling, and painted the base of AC white.
Dicor caulked

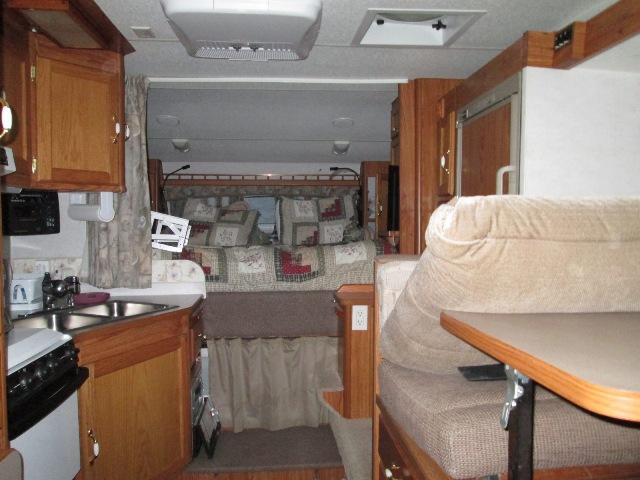
And lastly view from the bed. Oh yea-more than worth it. AC for those rare occasions, like trying to go to sleep and its still triple digits inside camper. And our Fan-Tastic Vent re-installed.
Back to Ourelkhorn Camper Modifications page