Add door to hide wood& trim storage area on top of cabinet.
- Thought I was done with shop cabinets. But getting ready to toss old wood bed frame trim removed from house....
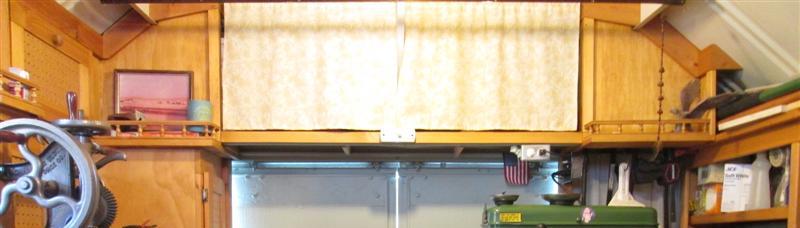
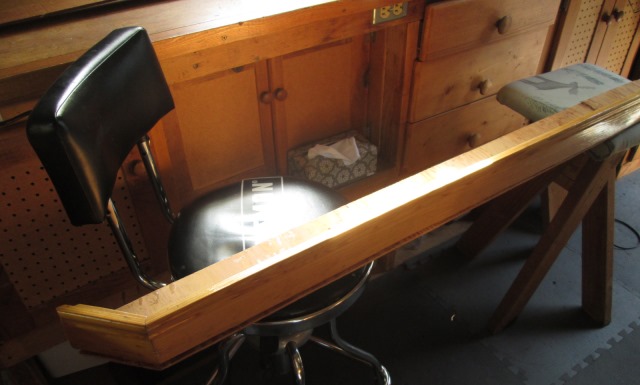
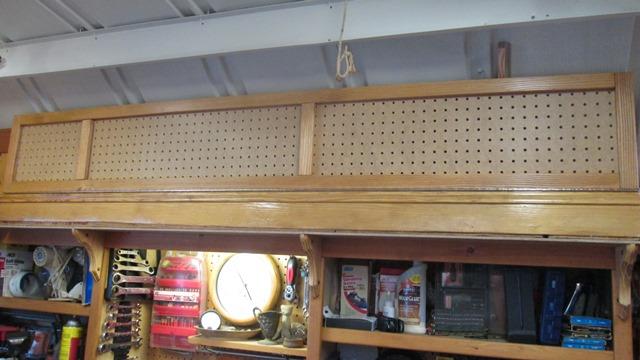
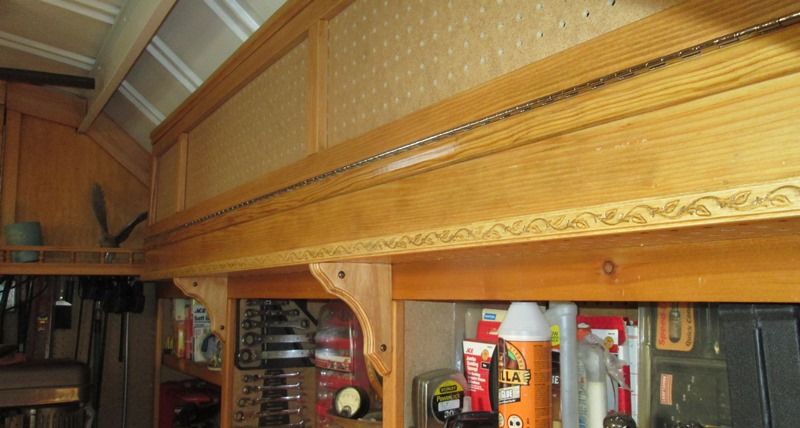
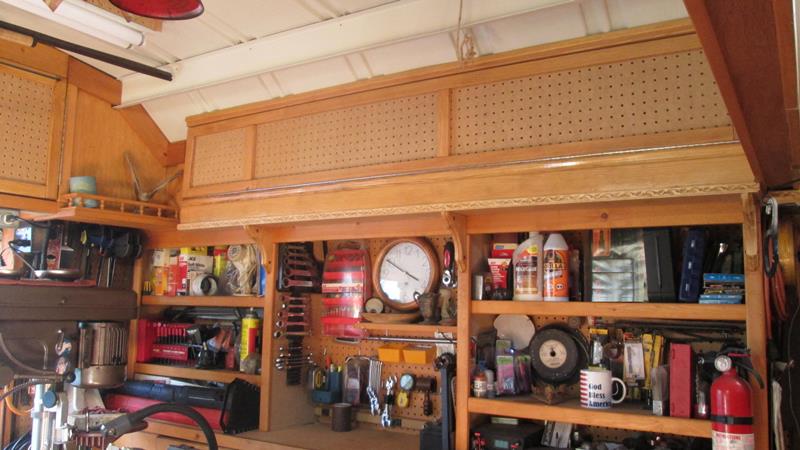
Shown at the right, one area that has always been eye sore is on top of side cabinets. I store miscellaneous pieces of long wood trim and some other stuff up there. I had made allowance when I did the shelf over the main door to continue on around but wasn't worth the effort.
Later when I changed the curtains on the overhead shelf to doors, it still wasn't worth the effort to address top of side cabinets.
One of its better days, the amount of stuff up there varies. But its always a pile.
Always saw a long flip down door, but every time I look at it, other than doesn't seem worth the effort as mentioned is actually attaching doesn't appear as simple as it seems it should be. Mostly the sloped section of roof adds some challenge. Going round and around on how it could be done I end up pulling everything done and rearranging to be less cluttered.
Recently two things occurred that caused me to revisit. Minor remodel of living and bed rooms in house - shop is full of some good but leftover trim and molding and not enough room to store. Also and primary motivation is a removed trim piece from previously built in bed frame that's standing in shop.
Nice piece I had done many years ago, but assembled and finished material couldn't be reused for much.
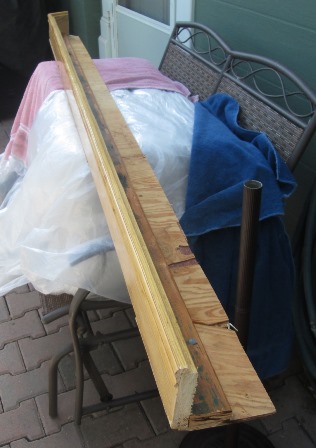
Took outside to dissemble to throw away but couldn't.. its is same color as shop woodwork, always in need of some 1X4. So took back in shop. I was going to pull everything from top of cabinet and place at bottom of pile.
Raising it up to bury at bottom of storage 'pile' all of a sudden it became apparent. This piece 'fits' the face of cabinet like it was built for it.
From the overall length, to the angled left end that would tie back to existing front cabinet. The lower plywood base is correct length to staple to bottom of cabinet top overhang. Hokey smoke. Extending the face 5" out and 4" up would increase useable 'shelf' area by 4", 4" taller face further out would make top & clutter less visible from floor. Basically just staple it to cabinet as is...
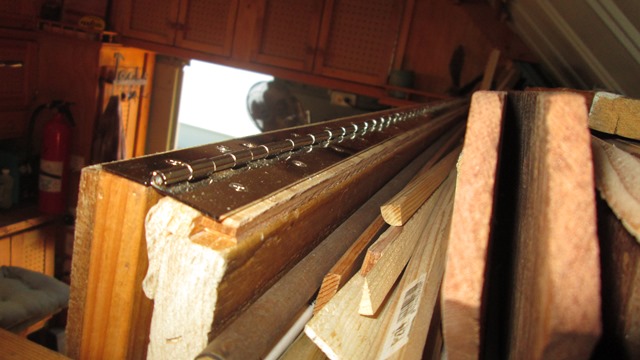
Well except...Looking at it- Decided by placing a strip behind the crown trim would give me a level surface to mount a continuous hinge. To which a simple 1x2 framed piece of pegboard of which I have scraps to do Id have door when so inclined to pursue. Wow-only because its alluded me for so long and never thought I would do, to have it all but ready-to-assemble pieces kind of amazes me. So Another shop cabinet project.

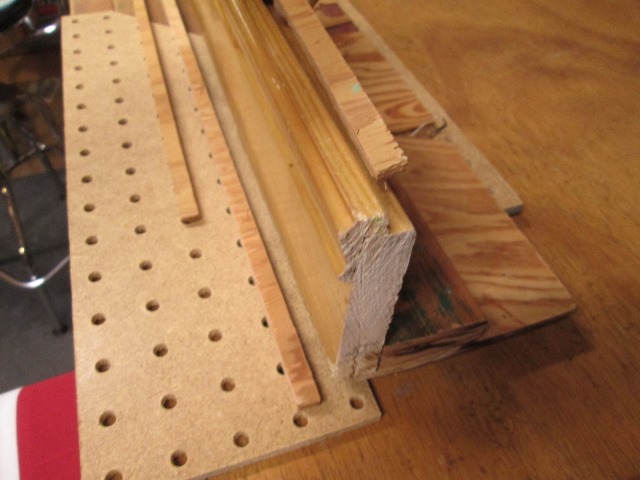
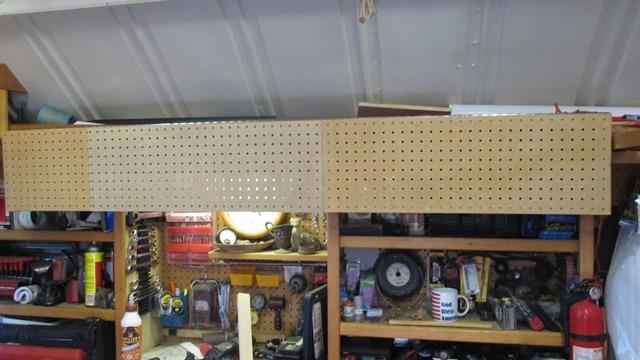
Cut filler strips for top. The very rough bottom plywood I painted flat black. To which Ill add pieces of pegboard to cover. The 'new' face board will be divided in to 3rds to match cabinet vertical s. It will sort of match existing cabinet in appearance but mostly to give a place to fit/seam scraps I have. To the seams Ill add support brackets to cover.
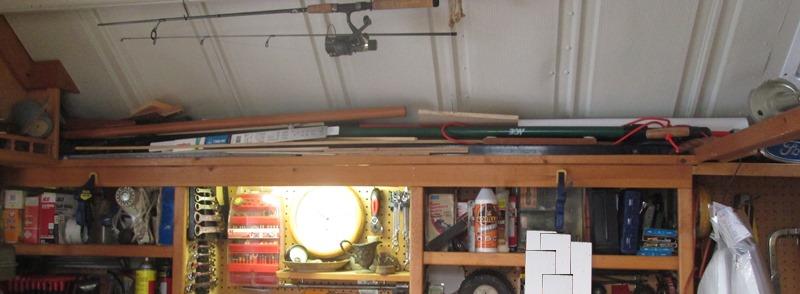
Glued and stapled the 'new' face board to underside of cabinet top overhang. Pretty nice. Could have stopped here but went ahead and made door, again matching verticals of cabinet that allows hiding seams of material on hand.
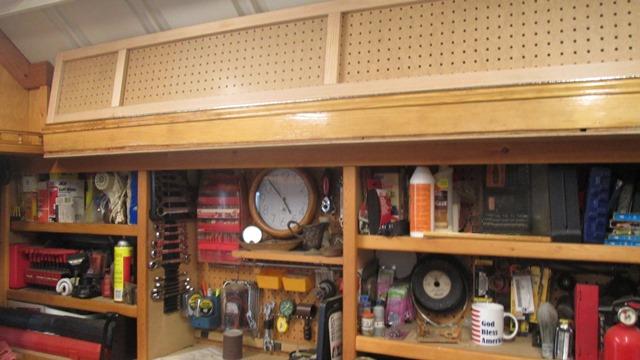
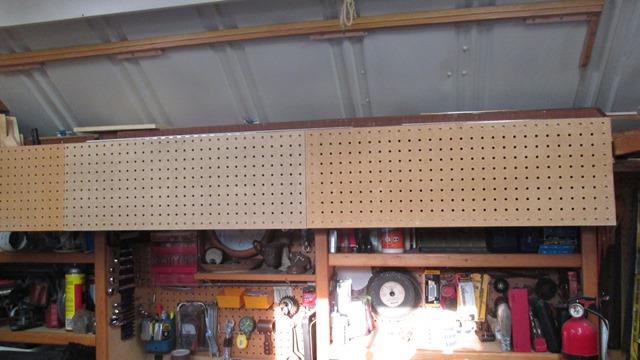
Think this is going to work. Setting on pre installed piano hinge...still pondering stops at roof took door down to stain. I had cut extra verticals to put between the wide divisions but think it looks better without them. Toss up, would have been 5 equal smaller squares which looked good but busier, less to stain so they got nixed
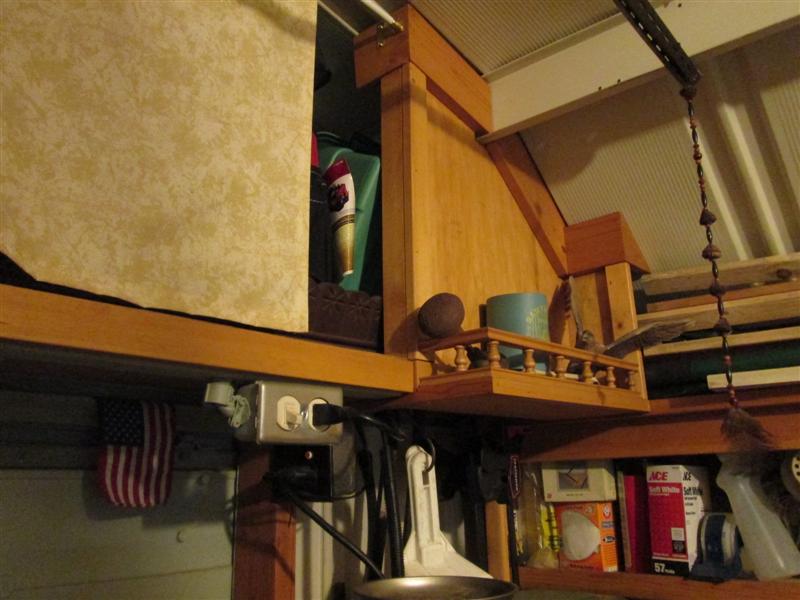
Door hung, odd clampage holding in place but got it. Also see the pieces I got to use up. I hadn't realized how much just adding 4" face board, albeit 5" further out which I never thought of, obscures sight of objects.
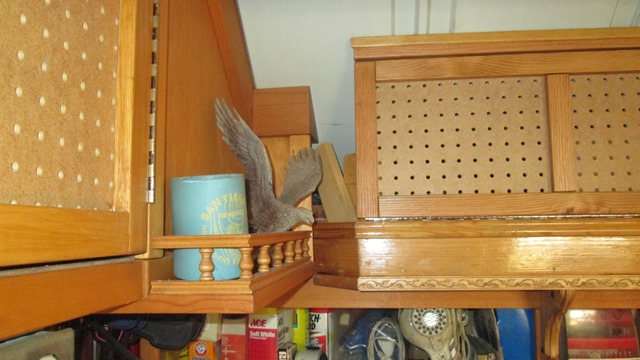
But this is the path we've chosen so continuing on. Went to Lowes after deciding not to make brackets to see what they had. Small wood corbels 4 7/8" deep at top. EXACTLY the distance I have under shelf? Also some 1/2" lattice trim to cover raw edge of ply & pegboard.Walking out they had some embossed 1/2" trim... hmm...in a moment of weakness burnt another 5 bucks. Corbels came with hangers but simply screwed thru from back side of cabinet face boards, then screwed into from above thru face bottom.
Doing everything but, finally tackled the stop. What I came up with was full 1x2, attached blocks to screw into ceiling panels (building has a roof). This just fills space between door and ceiling and to make it 'look" like frame. To it was going to add blocks to serve as stops but because door is thicker & attaching ceiling blocks are at angle- when door closes it rests on the attaching blocks. Done. No additional parts needed- that was just luck and too easy.
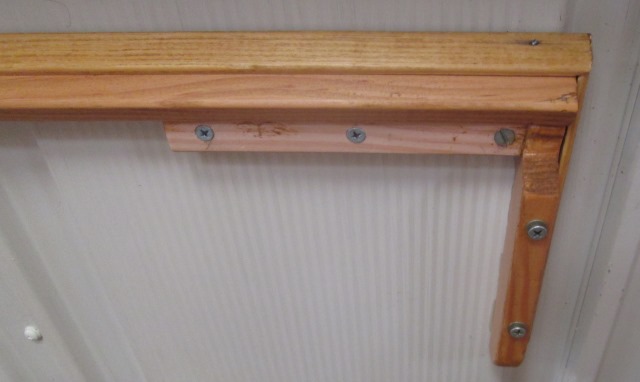
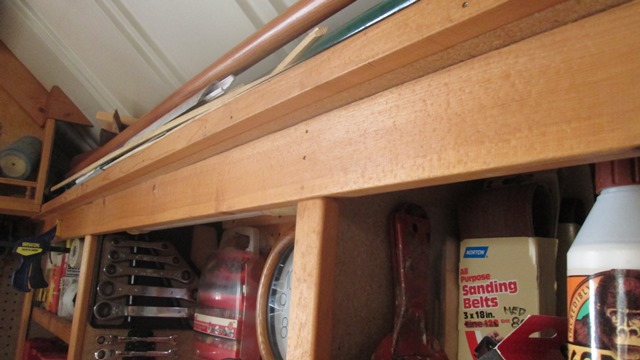
Just detail of block at right end Wanted to wrap the corner with top trim a bit. This end stays open to allow really long material, to lay and continue on other cabinet when needed. Should mention, though new door is only 6', material can be inserted to the left 20" behind cabinet. Normally material cut offs are less than 8" so this works well. Right end needs to be open to get in/ out and or as mentioned utilized for 8'+. I have 12' overall across, though unless it can bend max is about 10'-6".
Installed the embossed trim..jury still out. Its nice though. Easy project that almost built itself-at least not much thought on my part. Just kinda fell together. Few details to work out...
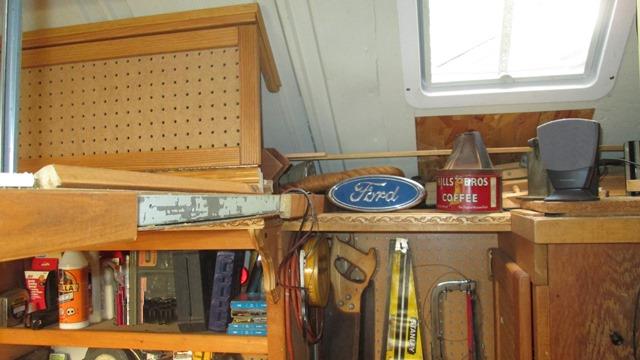
First is the right open end, though this is bent over the bench to see. As mentioned it needs to stay open but likely I will continue the 1x4 face board (kinda hidden by cross beam and another roundtoit, face board on cross beam that got cut while back) to corner cabinet following profile of open shelf. No door, just the face board, stopping looks funny to me. Plus sitting at work bench this is what I see, hence the 'treasures" they help, face board would be cleaner... a round-to-it.
Second, also a round-to-it is making fixed panel on the left side to close, probably like existing stub panel. That and another piece of the embossed trim, ran out. Continue under existing shelf and cabinet face board to front wall so a continuous line across wall. Just a visual thing, should help tie together.
I want/need to add knobs but i keep seeing something mechanical, bit more creative than all the other simple wood knobs. Possible that might double as latch, maybe controlled opening as doors flip over 180°. Haven't given much thought to it. Mainly though, even though latch not needed as door is over center of hinge barrel, it stays closed, I want a positive catch just in case. More than once pounding stuff has walked off shelf. Face board should help with that but don't want door falling open if stuff get against it. Which leads to couple of gotchas..
Stuff can and has rolled forward enough to catch hinge, back of door as it swings closed. Only thing I can think of is add a full length of lattice or section of luan, maybe even cardboard, but something higher to back side so stuff cant get caught between hinge leaves.
Second is the overall height of added face board. Simply can't see behind it. Standing on single step stool that I use to use and sets beside welder no longer enough. I have another small 2 step stool that works for retrieving small items but it has no place to live. Where it was stored isn't ideal for frequent use...details. Plus reaching sideways from it is dangerous. Its rear legs are a bent hoop-too easily rocks on corners, reaction is to jerk straight which applies more force and stool spits out from under you. Easily addressed but another project. Welding on straight sections of tube with feet but still don't know where to store it....So first I will fix it, should be anyway or tossed, move some stuff to store it. Then add handles and positive catch to door. Pick up the round to its when they seem worthwhile. Details
Not sure why I added page- I like projects like this, wasn't planned or on the roundtoit- nothing pressing, just made itself available. Pretty stoked results, got to reuse previous efforts & time spent on old bed frame instead of tossing.
Back to shop mods & additions section
Back to Our shops home page