over head cabinet- Part 2
Continuation of adding the overhead corner cabinet, 'fixing' the resultant space between shelf and new cabinet. Adding a plug & light, face bar, some trim and address shelf/ cabinet "Corner"
Did you ever have a project in the back of your head-been wanting to it forever, always seemed a bit impractical so never did, occasion arises allowing you to do it, came out better than you imagined-
and you hate it...
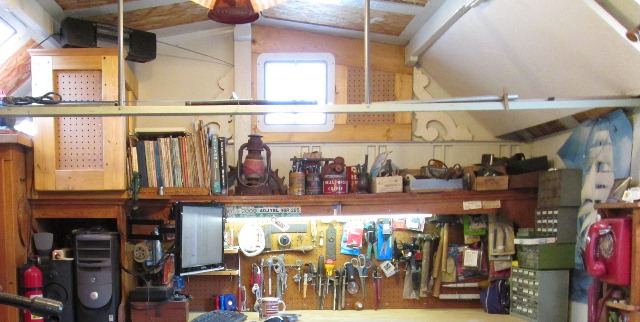

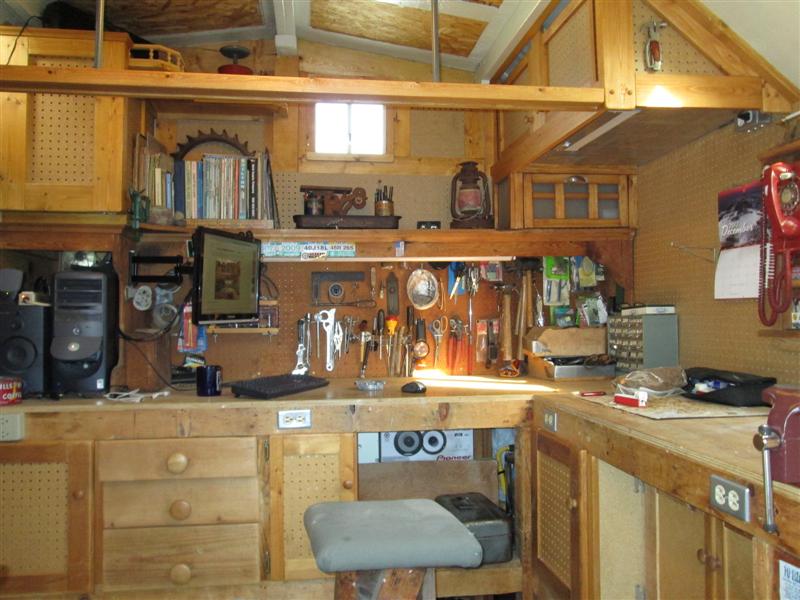
On the roundtoit, added an overhead cabinet where the foam board was and cover remaining metal wall surfaces with pegboard. Also cover the strip above back wall shelf. Finish/cover some original leftover splices and other wise ugly details from the shop rebuild. The cabinet, I've just wanted to add for some more storage.
'Hate it' is a little strong however once completed-just bugs me, a lot. One is white wall now covered, especially back- it just sucks all the light out of the shop. Pictures above are night and day but in the daytime its even worse. I guess because the light no longer reflects off back wall. Plus the overhead cabinet creates a shadow, corner of bench is just in the dark.
I'm going to add a small light under cabinet to address but the single biggest thing that’s bugging me is the way the overhead cabinet goes over the back wall shelf. I don't know why, either the back shelf needs to turn and run under new cabinet or the cabinet should have turned and had door facing forward-. Every time I go into shop-other than the lighting issue is that cabinet and shelf corner. I end up starting at it. Also, though minor the cross-shop metal spreader channel stands out like a sore thumb against all the wood
I have some trim work around pegboard to do but until I address the "Corner" issue I'm not doing. I'll add the light and face the cross bar-maybe something will come to mind.
1st the light.
I want to add a plug under cabinet that a new under cabinet light can plug into. In the corner under bench is a junction box, there is a feed to outside plug I can tap. Run new romex up and over to added box.Sounded simple but required lying on my back on the middle bench shelf and twisted around corner. Wow, that was after unloading the bench. Literally painful-Not fun, kicking myself the whole time because had I done this before adding cabinet and covered walls would have been a 15 minute job. Hindsight, but romex run, plug is added. Simple, just get a light fixture & plug in.
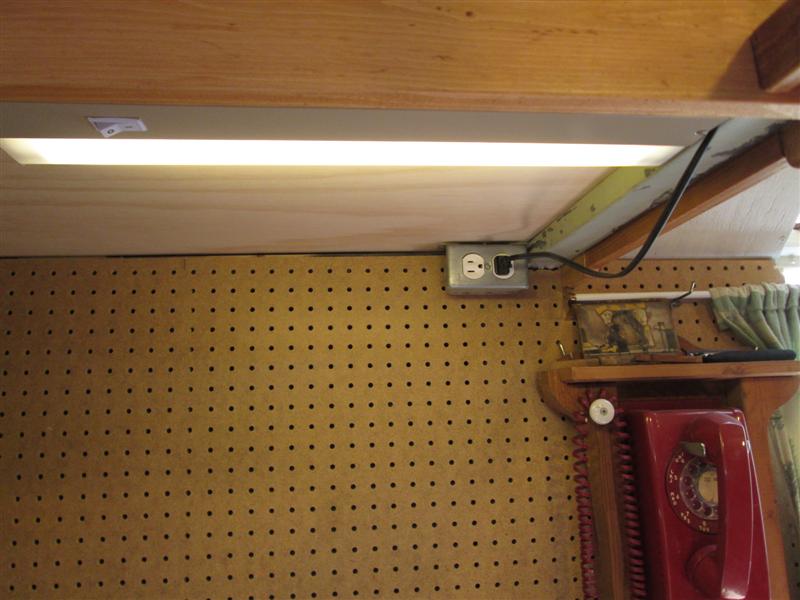
Got light up -but had to take down & paint. Powder coated 'white' but actually was green against the switch and lens. Its only 15 watts but does give the needed light in corner. Plug will come in handy for fan at window. I also saw, as all my plugs are on bench face, that adding another plug on pegboard at opposite side of window would be nice for soldering irons. Haven't finished this mess and already another project. I'm also seeing adding either some old tin or maybe some decorative ceiling tin to under side of cabinet
Wrapping the shop cross beam
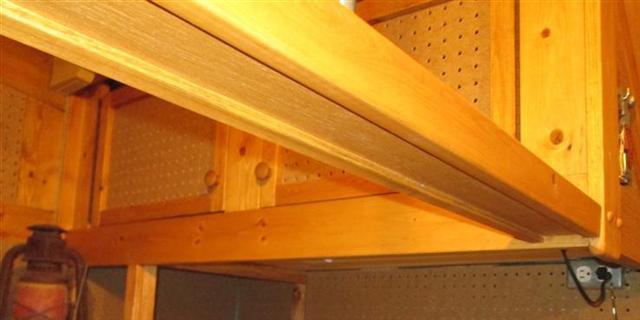
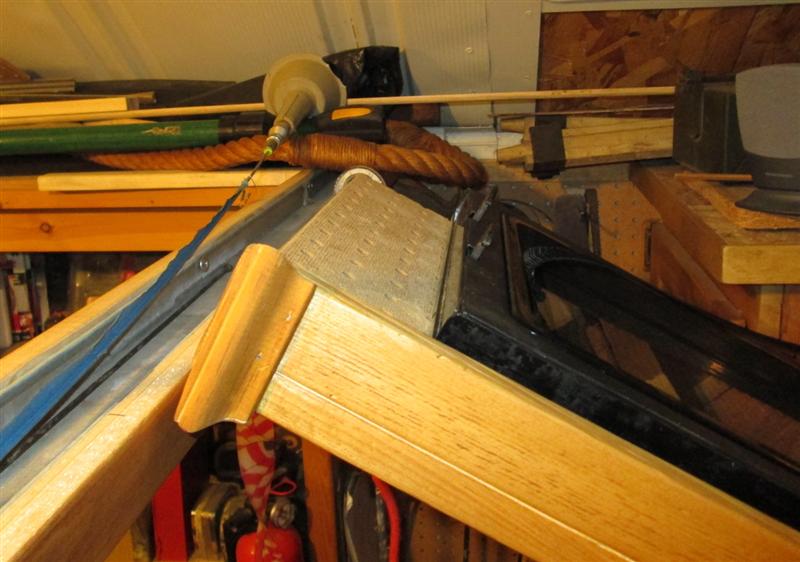
Still pondering the "corner" decided to wrap the beam. Cut a 3/16" groove back side of (2) 1x2s, attached one to side of building cross channel beam, slipped in a piece of 1/8" Luan then attached other 1x2. that was easy.
Nicer I think-still hanging in space but less an eyesore. The metal vertical ties later Ill either face with 1x2s or a dowel, possibly wrap with jute twine or rope.? Round toit
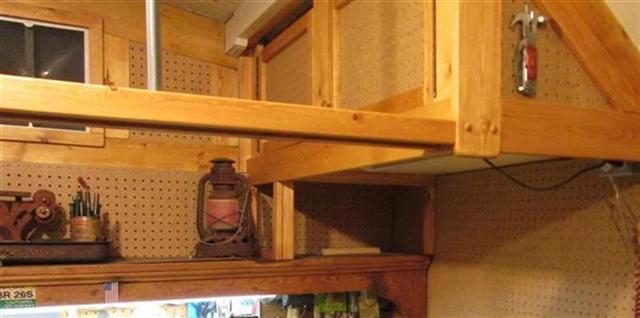
The "corner"
In picture above I actually already started. Had a few ideas. primarily extend the shelf to go under that cabinet. However I don't want, at least as large as what I'm seeing on the pegboard. What I decide was facing the edge of shelf with a door. It will close off that corner I keep looking at, give me some more hiding storage. But as I progressed it dawned on me using something other than pegboard for door panel I might get some more reflectivity and actually make something to 'look' at. Seeing many options to be a bit more creative I went ahead and framed out for door until something gels.
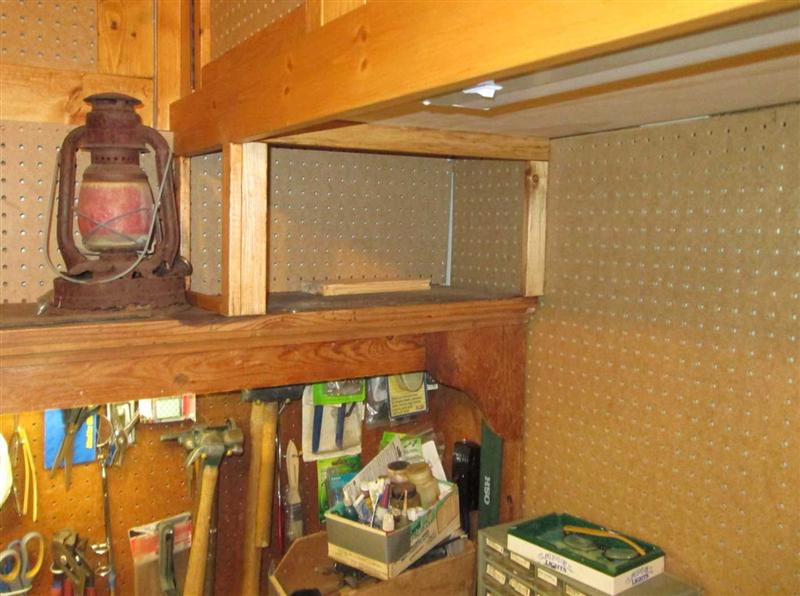
Wow-once this was up-it looks a 100% better. Not sure what it is-tying the 2 offending pieces-creating a line dividing the space instead of looking at corner. Bizarre, However I'm stuck on making a door but I could have stopped here. After a few pages of scribbles I ended up starting a quasi "Craftsman" styled panel door. I have some glass that will hide junk inside but also add some reflected light. I have very little glass in the shop but this will be out of the way.
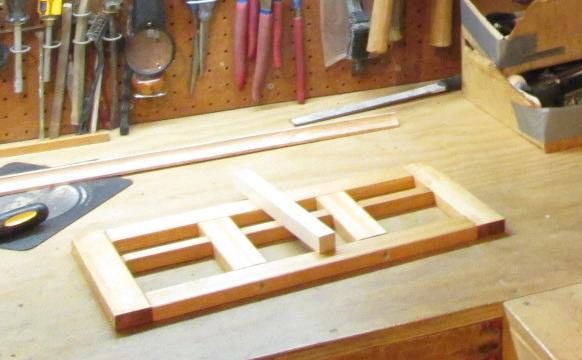
Laying out pieces of wood till I had spacing I wanted the plane changed. I was going to router the wood pieces to inset glass and front edges for decoration. As I am simply not in the mood and the amount of work I'm just going to install large piece of glass flat to back. Instead of routing edges for design I was then going to add 1/4 round inside edges for trim but nixed that idea also. This project is just become never ending. While the 'craftsman' style door would be a fun project its way over kill for the shop & unjustified. Hence the term quasi-kinda looks like something but isn't.
Simple pieces of 1x2, assembled and stained. As resultant framed hole isn't square I need to shave door a bit to fit. Then Ill mount glass..
Welp that didn't work. Got the door shaved to fit hole. Had a piece of glass, actually door window from camper that was replaced. I was going to use it, Machine privacy glass-would have been cool. However after scoring I couldn't get it to crack. Hammering with cutter ball, even tried on edge of bench to snap it-no go. Laid a towel under it and started tapping it some more-man this glass is hard-almost like- you know what its tempereBAM!. Literally exploded in the same instant I realized it was tempered glass. Shop is covered in glass. Amazed with the force that was released when glass broke. Entire sheet in a million pieces. Oddly any of the pieces if you handle they continue to break apart. Anyway-now I need some glass, after I clean the shop.
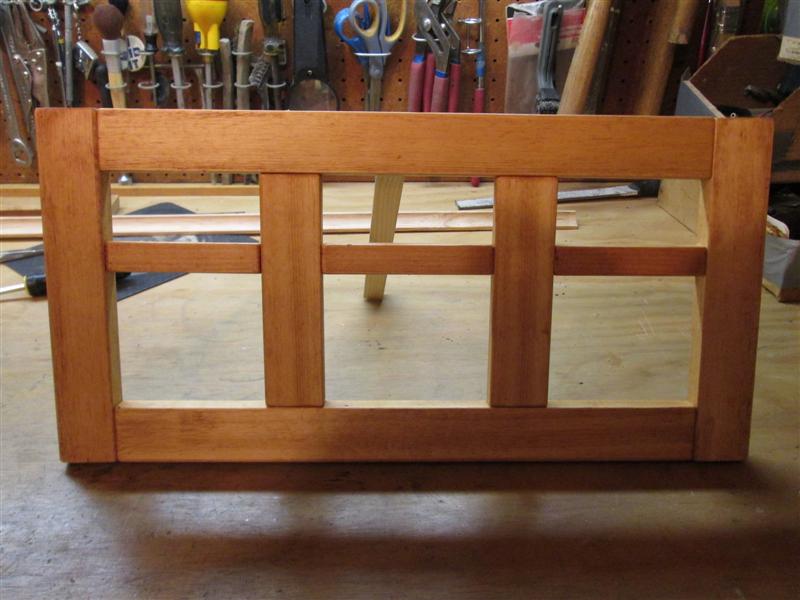
Decided using glass for door wasn't such a good idea in the shop. Scrounging around found and cut up old fluorescent light lens. Same effect, can't see thru it. I'm making side panel using same plastic to get light inside of cabinet.
And done, the plastic lens is nice-light entering also from side. Now to find or make some new trays to fit inside. When laying out I was getting impression of '40s craftsman style - now it reminds of old hypothicary cabinet. To the point I'm looking for a nickel finger pull. Maybe some metal label frames. Funny stuff.
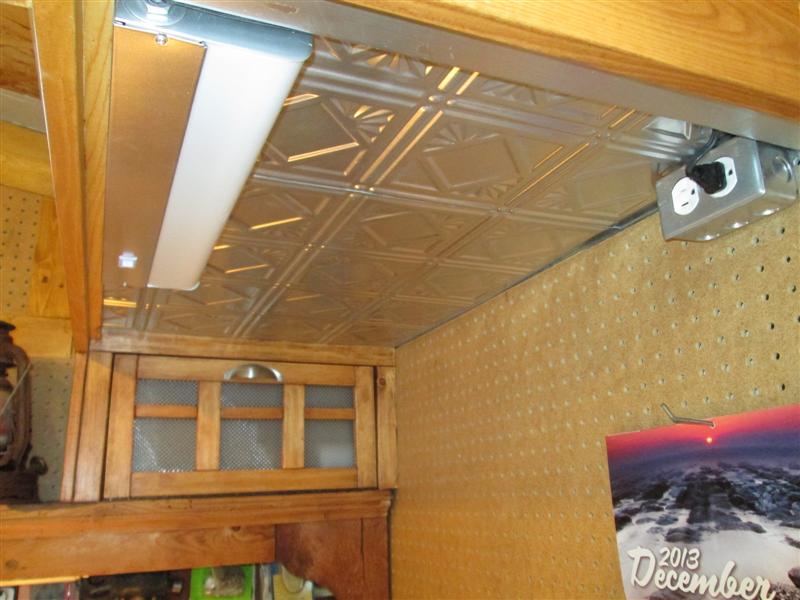
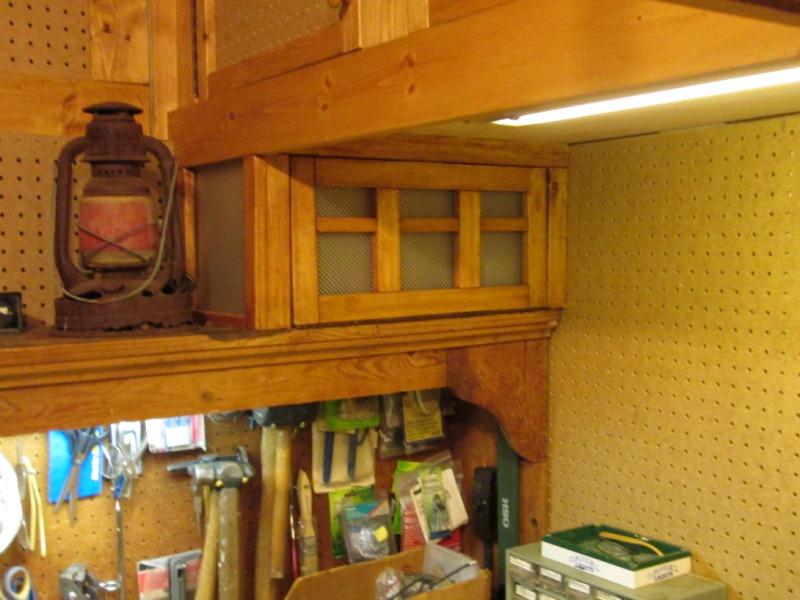
And found a handle, but also I asked about some ceiling 'tin' that they used to have on display. Was thinking doing underside of cabinet. would help with light. Well what they had left was in the loft out in the lumber barn. Got last 2 18"x24" sheets they had for $10 bucks. It was a dark bronze finish. Painted with some aluminum paint-also dropped the light again to repaint aluminum.
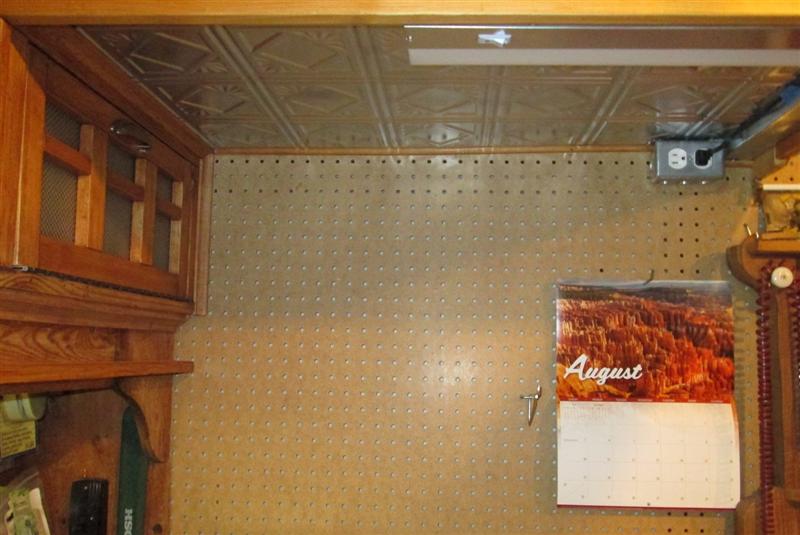
Cool!. A lot more light, just looks cool. Little trim around pegboard-done.
Finally done. Last thing, as I have some trim left over is addressing the main original light under bench. Replaced the 36" that quit with a 48" fluorescent-the 'box' is deeper so setting at bench I'm looking right into it. another day..
and fix my oops...
Few days later I went to open my over cabinet on the left-Opps. Door wont open it hits the newly wrapped cross beam..fix on its own page.
Back to shop mods & additions section
Back to Our shops home page