Add doors to shelf between cabinets over door.

Added over door shelf over main entrance doors sometime ago. I made simple curtains to hide the clutter. Worked but really didn't like them plus being 6'+ off the ground curtains kinda hard to open. At any rate having 'extra' material from adding pegboard behind drill press (twice) I'm using to add doors to this shelf.
Original shelf install, and added pegboard behind drill press source & how I ended up with extra material.
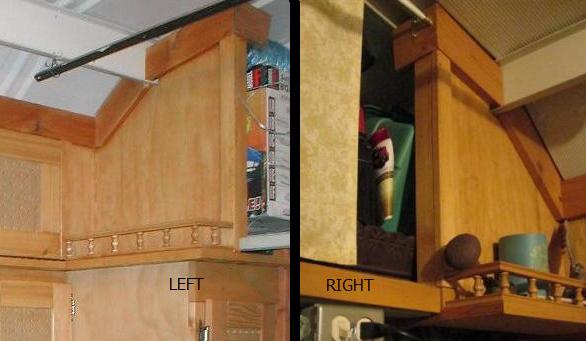
Anyway few years ago when I originally built cabinet on left I extended to ceiling and turned the corner a few inches toward over door side. Wasn't sure what I was going to do at the time as shelf Wasn't there, only the metal cross bar. Assumed this would allow tie in. Later I when extended the cabinet on the right side I matched the left side, mostly for symmetry, but thought would allow tying together in future if I decided to add the shelf between and want to add doors. When I finally built the shelf between, these " tie ins" cabinet 'wings' were used to attach curtain.
I made allowance just in case but I never really intended to make doors, even though I've always seen them. The curtains worked but hated-then i ended up with some 'free' material so revisiting. I've pondered this often, I mean seems whenever I'm just hanging out in the shop I end up eyeballing this shelf, trying to 'see' how doors could be easily added, but just alluded me, If it were easy would have added doors from the get go.
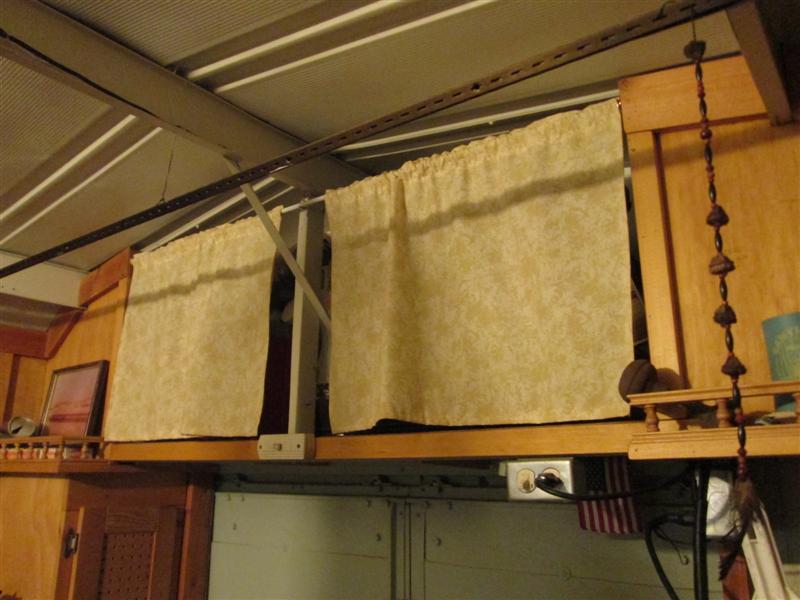
One is the center ridge rail, second is the ceiling pitch, third is the turned in ends and forth is the center support. I assumed top frame for doors would follow slope to center, somehow tie into ridge beam. But nothing really to attach to and the ridge beam is 5" deep. Both ends, though turned inward are just kinda hanging there, they are not attached to ceiling. The center needs to be covered but attaching to top frame-? not sure. I might use something wide enough to follow ceiling pitch and hang down past beam depth. Even IF I could build frame, getting it flat and not twisted so doors set evenly an issue. Everything is at different elevations and distance from wall. Doors themselves whole different issue, though thinking swing down due to ends & center not lending to hinged doors. Too many things affected by the other, why I usually turn away. Scratching my head I'm looking at the curtain rod....uhh- no way...
Umm...The curtain rod spread. When one end is flexed the rod moves it whole length due to the end attached to the cabinet 'wings'. I added a center hook which sort of keeps tops of wings stable, well enough for curtain. But IF I added a cleat to both ends, ran a spreader across it would tie these end together, attaching at middle to vertical structure would stabilize--REALLY?? So I got scrap of 1x4, and held up - -Ill be dipped, aligning to 1x4s at both ends, a 1x4 is almost flush to bottom of ridge beam. I never saw that. I assume Id be piecing at center.
Hokey Smoke. Everything just solved itself and fell into place. Run a 1x4 straight across, matches ends, it will tie the 2 ends together, attaching TO the center vertical bar keeps them from moving independent. Center verticle1x4 attached to metal vertical can be attached to top spreader with cleats behind and to shelf with cleats. Leaves SQUARE holes for doors which can be hinged anywhere. Good grief- all these years I kept seeing the same issues over and over- and now I realize because I kept applying the same design-not actually looking past how I saw doors being added. One of those instances where 2 or 3 guys bouncing ideas probably could have come up with a different plan within a few minuets.
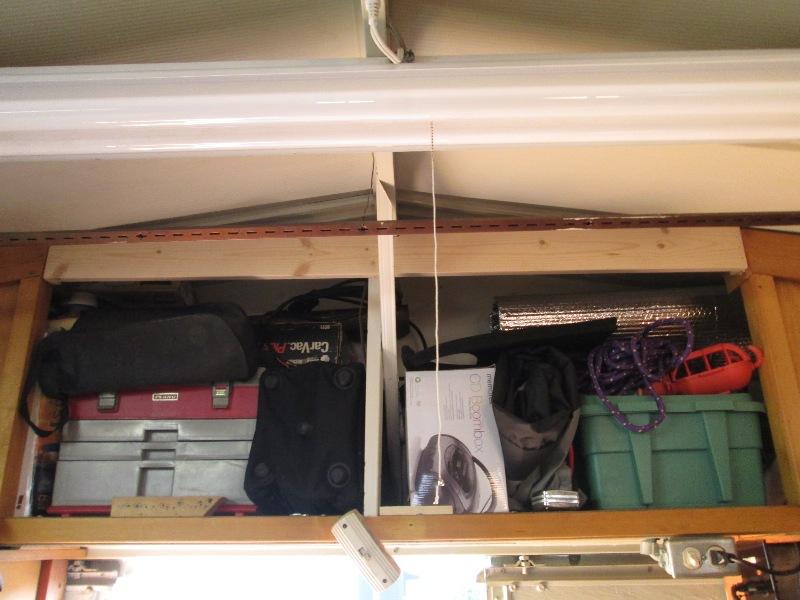
So simple...glue and staple 1x1 cleats to existing ends, glue & staple 1x4 top spreader across. Run screws from back side thru metal vertical center bar into 1x4 spreader. Ends virtually do not move but Ill add some metal brackets at ends of 1x4 attaching to ceiling to ensure. (Piece of slotted metal in front of shelf is actually about a foot out-deceptive and not part of anything)
I looked at this longer than I can relate. Just amazes me, that I hadn't seen before, astounding. One simple continuous 1"x4" instead of complex wrapping of ridge beam, weak piecing to follow slope, that wouldn't have stabilized ends, allowed hanging doors- and more. Now I'm seeing several different options to add doors. Having the top sloped area open will not contain heat from south/west wall. Only for myself but trying to shove that square peg into a round hole for so long, that it actually slipped in... For all intents & purposes this project is done. I mean I have to do it but its all down hill just making stuff. Several different ways to finish. Framing was major block I've been leaning& pushing against for years, now that its gone I'm having to pick myself off the floor, its not there. I just keep looking at this..so simple-wow
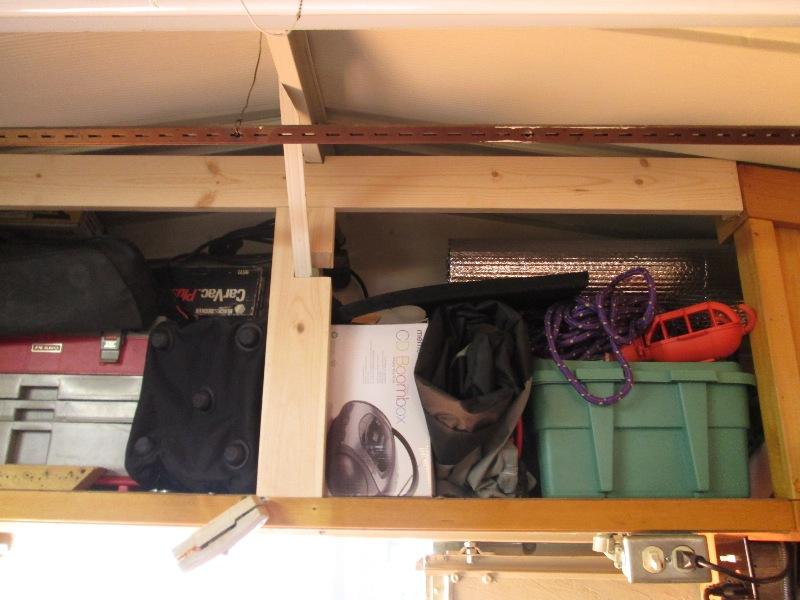
Attached center 1x4 vertical. Glue & staple cleat to shelf, glue &staple plywood block to back of top 1x4. Notched to slide over angle gusset, glue & staple vertical 1x4 to cleats. Screwed thru backside of center metal bar into backside of 1x4.
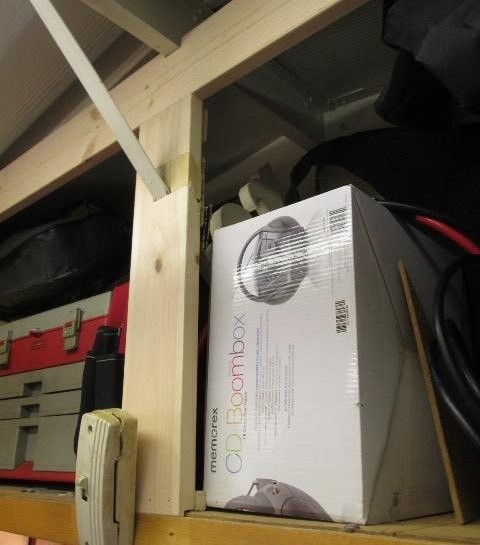
Cut small block to fill the notch. Glue & stapled plywood backstop then glued and clamped in the filler block. Easy peezy.
Giving some thought to doors. Have 4' of piano hinge. Some 1x2s for frames and pegboard for panels.
Single swing down doors each side was option 1 for access, less to make, however drill press on one side and coat rack under other wouldn't let fully hang down.
Not enough room for single side swing doors, hit light. plus intrusion into floor space
Double doors each side real option 2. Inside or center doors would be access problem though. Plus I'm not sure that ends and center vertical true to each other. I'm would be amazed if they are. Wouldn't allow for 'flat' fit or alignment of doors when closed.
So I'm leaning toward option 3, two small bi folds swung at ends of shelf. Swing out of the way for full access, keeps weight not so cantilevered, wont protrude into shop area when open.
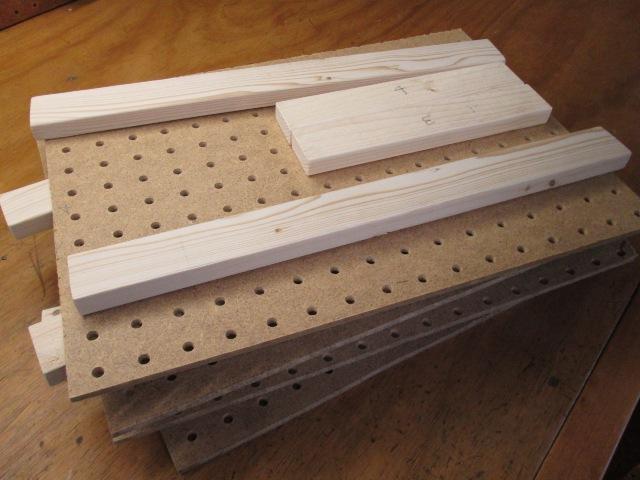
And pile of doors- some assembly required. Simple as it gets, full size panels glue & staple to face frame. Because I'm using 1x2s stronger and easier than routing recess and making actual panel doors. I did realize as opening requires door to be inside, not on surface, Ill need to attach either something inside of frame. Because there bi-folds it will require more than a simple stop...details.
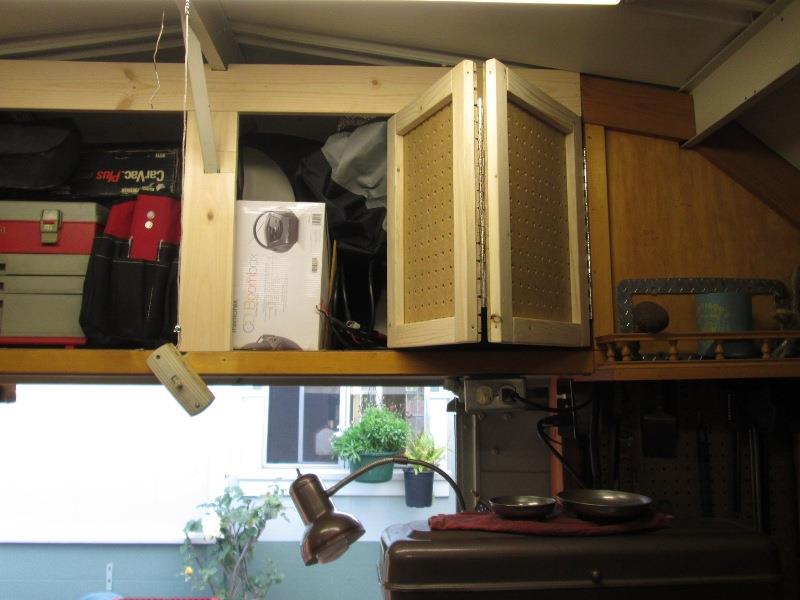
Doors assembled. Mounted right side, then took it off. The right side opening is 1" wider than left side. So I made the right hand doors 1" wider...umm both of them. So pulled the pegboard loose off one door, pried off one end, carefully cut top & bottom pieces 1" using a back saw and last 1/8" with utility knife, managed to not cut the pegboard. Trimmed off an 1" of pegboard reglued and stapled the vertical. Took longer than making the doors.
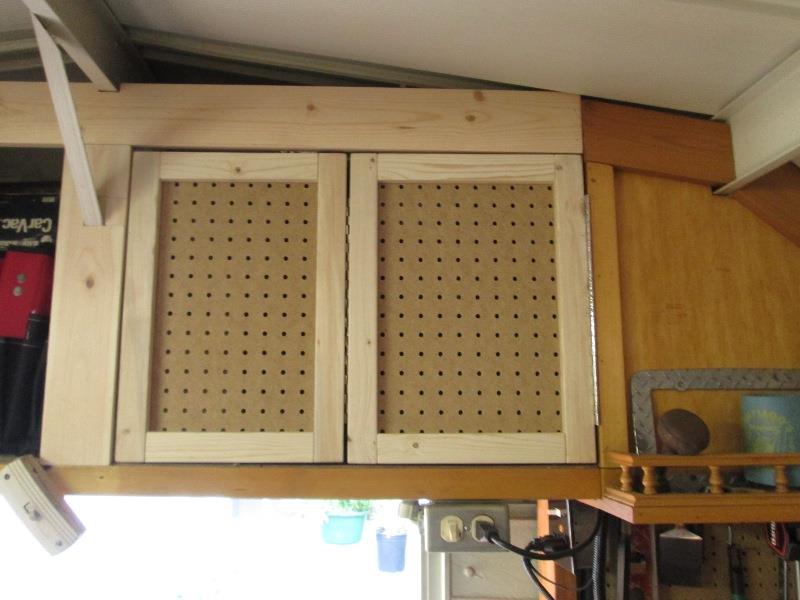
Picture doesn't show but right top of doors mounted all the way up on right corner, still hits at top left and bottom is setting on the frame. So much slop in the piano hinges ridicules, I can move the door at left edge up& down better than 3/8". Err. Pulled all the hinges, stuck in vise and peen all the barrel leaves.
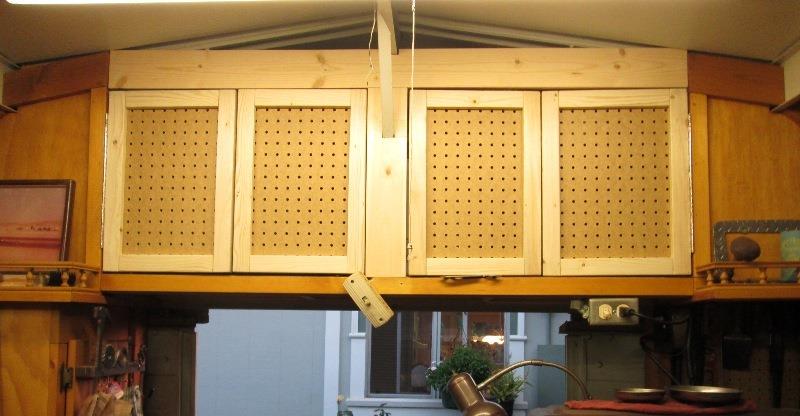
Finally mounted. Nice. I had hoped to stain but not finishing tonight. between My Fubar and silly hinges burnt up all afternoon. tomorrow pulling the doors and stain off, stain the frame. Going to try to make a filler between to frame and ceiling.
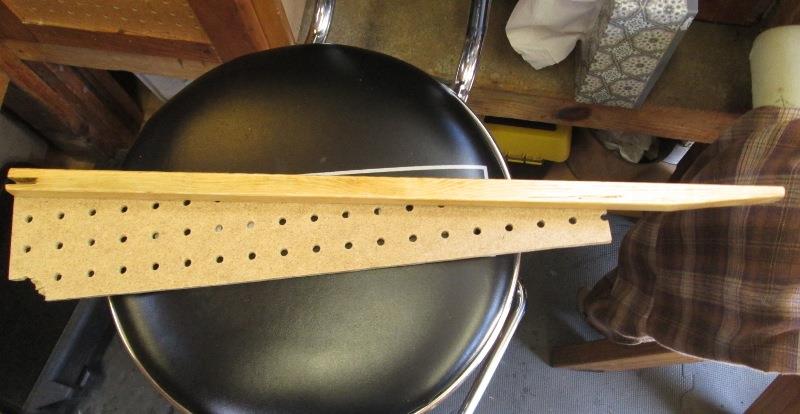
Next morning got the doors off and stained. Tackling the filler while they dry a bit. Simple piece of pegboard, split some 1x2 to trim top. A lot of on & off, trimming to fit. They are glued and stapled to back side of top frame.
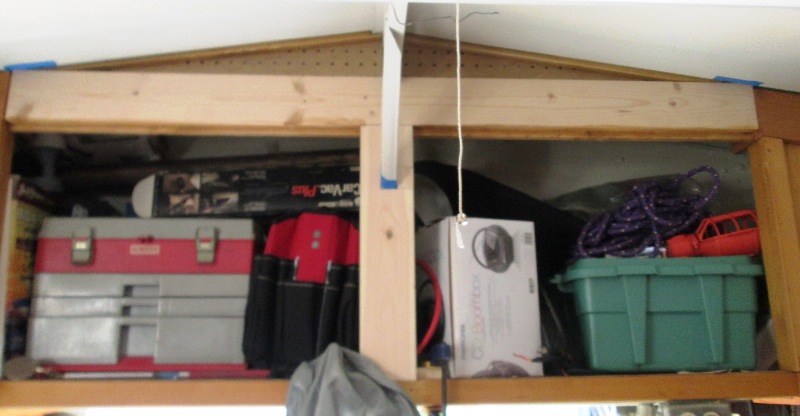
Whoo who. Wasn't sure if I could add the filler-pretty tight-I like it.
Then backstop for doors. As they set inside of frame, ran a piece of 1x behind on the top but not on bottom. This will guide the doors when closing. Add small1x2 blocks either side of center vertical for stops and then added small pieces of 3/8 ply for stops between door halves. Ill try to use magnetic catches at center, if doors door don't set flush Ill add another between halves-made the allowance though Id rafter not, trying to keep bottom open as possible for pulling stuff in/out.
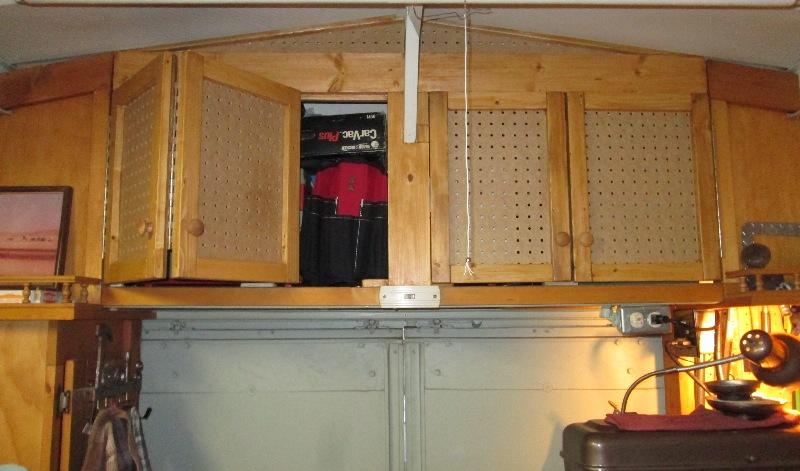
Stained the frame. Installed the knobs and mounted doors, I should say remounted. Installed the right doors-wouldn't close. I had drilled for the hinges 'before' adding the stops. The stops are attached to 1xs, the doors are 1xs PLUS 1/4" pegboard. Minor-just not thinking. Redrill, all is well or 3 times a charm...?
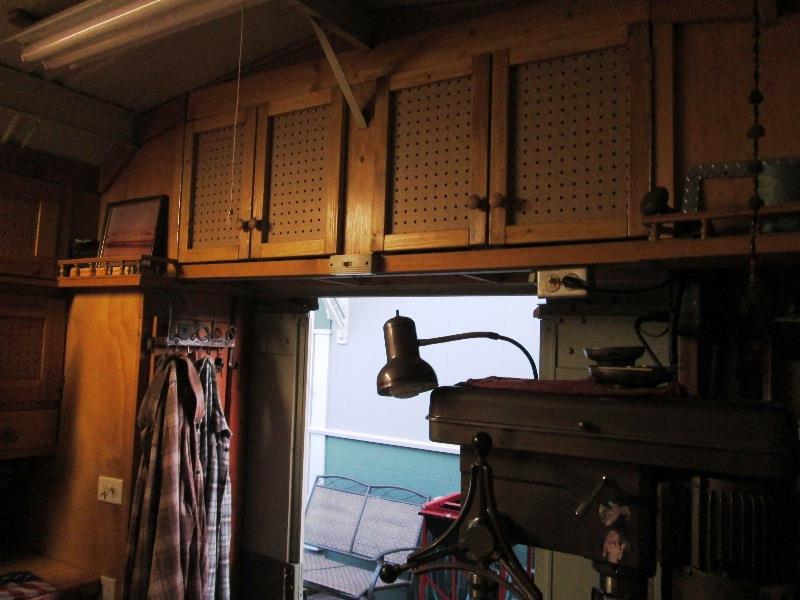
Nice-no more curtains. I wouldn't have done this intentionally but actually looks better than flush frame to frame, That'll work.
Remounted the inline switch for overhead lights, centering it on what now is 'cabinet'. Always worked but now looks a bit funny on face of 'cabinet'. Margaret suggested a brown one. Swapped it for a brown switch. Err, still looks wrong. Digging thru box of electrical stuff found an old double decora switch. Hmm, be nice, control the 2 overhead lights individually, get rid of the pull chain cords. So moved switch from face to underneath shelf. Added some 1xs to underside to contain the elec. box for 'new' switch.
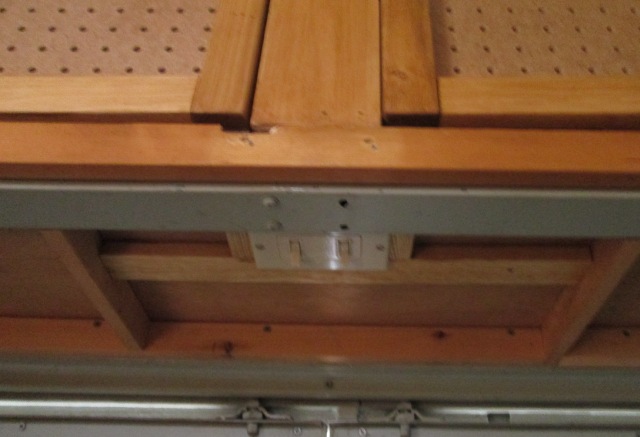
As this got a bit involved, as of yet unfinished, wiring details continued on different page. I'll need to come up with some trim to cover all the screw holes and mouse hole. That and pull all the stuff out of cabinet. I was too lazy to remove and kept shoving stuff around while working on cabinet. Disaster, course I could just close the doors...
Back to top of page
Back to shop mods & additions section
Back to Our shops home page