Building 6" mini chop saw for small items....some modifications required.
Out of the box-this section. Observations,cause to modify..
Mics. Basic assemblage of grinder stand notes
The switch box Build switched rheostat speed control box
Rework 7/8" arbor flange Allowing use of 5/8" disks
6" guard Rework grinders 4 1/2" guard to 6" installed on stand
Vise 'equalizer' Simple bar to clamp short items and storage hook
Zero clearance insert Making table insert to better support material
Spindle wrench Thin wrench to lock spindle instead of the button
Observations ...Limitations and short falls, things to be done: Cutting at angles, material wider than 3/4" falls out of single pass cut range, Maximum material is about 1" at 45°. 3rd: A biggie-Vise will not clamp material at 45°.
Stumbled on Northern tool had small angle grinder stand on sale for $20/free shipping.. All the reviews/videos etc of using this,most recommend a dedicated grinder due to setup time. I have several nice grinders but not giving up there normal use. Harbor Freight had small 4 1/2" angle grinder priced at $10..cheap enough to try- so for 30 plus I could have a small cut-off saw. Seems I'm always whacking off small items and usually by hand due to smallness. IE cutting bolts, small lengths of rod, flat bar etc. A mini chop saw would just be handy (but not enough to buy a nice one). Ordered the stand and then went to new Harbor Freight store here locally.
Once stand arrived took about 20 minuets putting it together, adjusting and piddling with it. Ya its a $20 stand, but a lot better than I expected. Getting blade/grinder square a bit wonky but functional. Out of the box it is useable, but limited.
Sold under many brand names there are basically 2 styles of these holder stands- what I received from Northern, a Klutch brand and the style Grizzly sells. The Grizzly costs 5/10 dollars more but functionality the same. It has pressed sheet metal base where the Klutch is cast iron. The Klutch has a screw vice, the Grizzly is a clamp vice. For $5 toss a coin. I went with the Klutch because of the cast base for weight,, and cost. The Grizzlys clamp vise would be nice but the flat base surface is the only reason I would try. The Klutchs cast base has a ribbed surface, which is nice but problematic for small items. Plus and minuses for both.
Few initial observations quickly led to realizing for this to be practical some modifications are needed. So my $30 mini chop saw became a 'kit'. Primarily- Not much blade cut depth with 4 1/2" disk. Maybe 2" under blade but grinder nose will only allow partially cuts. At full depth 4 1/2 disk passe table only 1/2" Looking at others reviews/videos it became apparent the 4 1/2" blade leaves a lot to be desired. Videos I seen many have converted to 5 or 6" disk. However they also were using them with no guard, reaching over blade to turn grinder on & off- just. little room for error. The Klutch comes with what's called a guard, IT IS NOT. More of directional control for the dross, sparks and debris, Its plastic and should be used WITH the grinders guard. I really enjoy working in the shop and plan to continue for quite some time. Will be making a 6" guard.
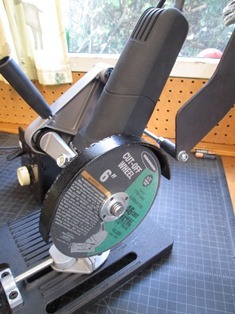
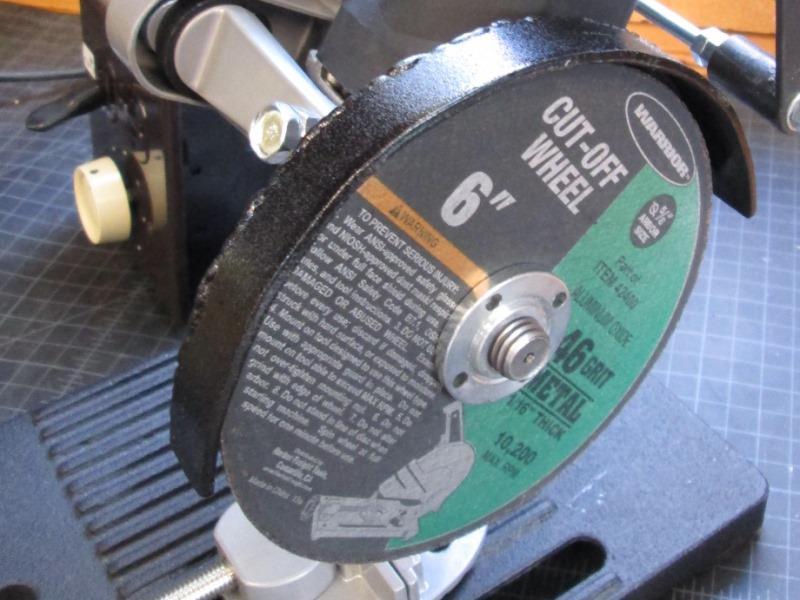
Picked up some 6" cut-off wheels. I also picked up another $10 grinder to have spare motor but primarily so I can cut up one of the guards to make a 6" guard & rework one of the inner spindle flanges to utilize 5/8" arbor. I can use either 5/8" or 7/8" arbor disks, 4 1/2" up to 6" disks. Heck just the extra handle paid for it-small but the last handle I bought was 10 bucks.
So that's where were going, modify the stand to address few Issues and wants, modify one of the guards into a 6", adapt a drive flange to allow use of 5/8" arbor. To the whole assembly I'm adding a remote switch box with a rheostat to adjust/slow down grinder. Especially with the 6" disks-the grinder, HF #60625, is rated 11,000 RPM.
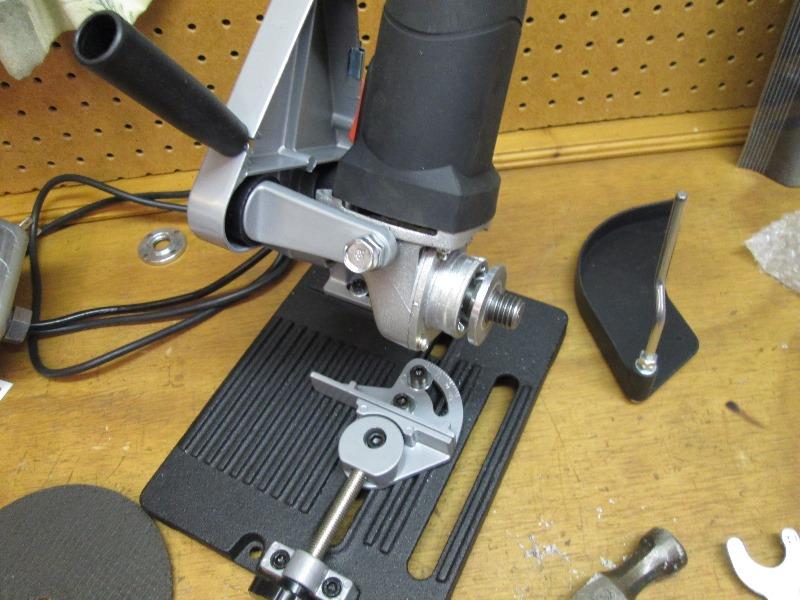
Assembling grinder stand per instructions few items that work better.
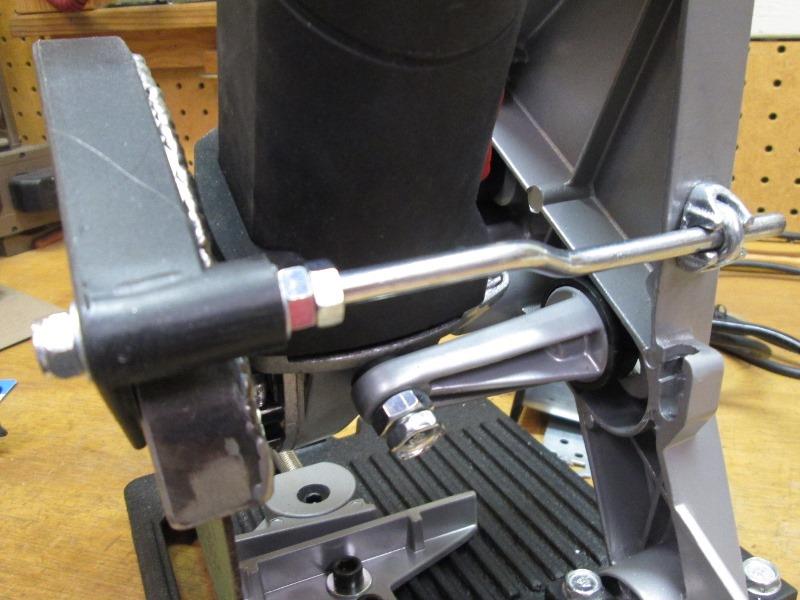
The adjustable stabilizing bolts

The 10mm adjusting stabilizing bolts just stick WAY out. I was going to cut and re slot but simply swapping position minimizes this. Also the Klutch unit doesn't supply the 10mm nuts and washers shown above on outside of body. The bolts have nuts that when inserted thru body capture them but the bolts can wobble around. Nutting from outside pulls them tight so 1, they wont loosen after adjusting and 2 they stay straight.

Use the 10mm nuts from extra mount bolts if not used and washers. I used an internal spacers. As the 2 stabilizing bolts have different rubber feet, one flat one angled, on the H/F 60625 grinder swapping bolts also fits profile better.
The Pivot pillow block

On mine there is a LOT of slop on the main body pivot. At top/handle end of grinder it would wobble side to side almost 1/2", so blade doesn't stay square. This is my only real complaint with this stand. Unfortunately the 2 bushings that insert into body and pivot rod rides in, are soft plastic. The OD of bushing and ID of body they insert into don't match/loose, as is ID of bushing and OD of pivot rod, just loose fit. Compounded by soft plastic that yields, wallowing both in the body cavities & the pivot rod thru the bushing IDs, just sloppy. Short of finding bearings, nylon or even oil lite bushings that fit, short term I cut shims from milk carton. Placed either side of body, really tightened it up-don't know how long it will though.
Then there's the silly clip to hold cord. 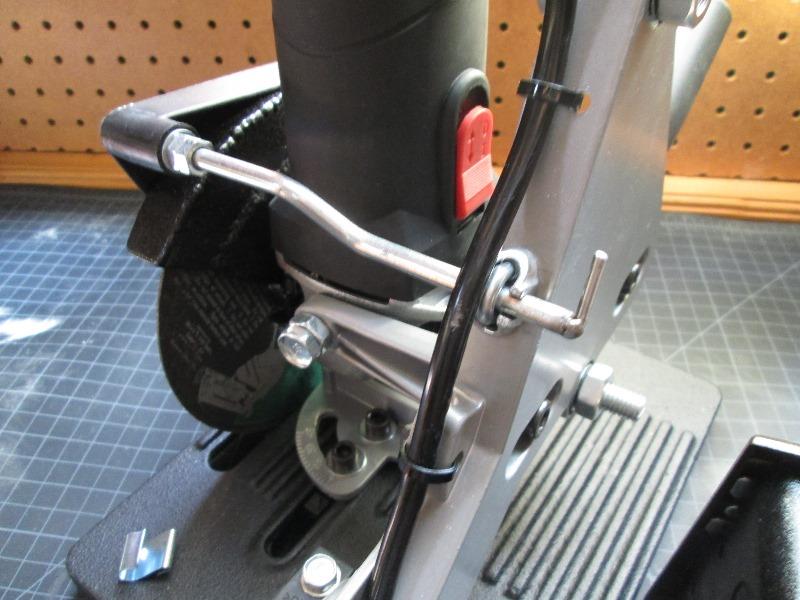
Keeps coming loose, drilled a hole and unused guard rod boss to run zip ties.
Last is making a thin wrench to slip behind for removing blade. Most common issue (other than burning up) on the small HF grinder is the locking button breaks, I have a feeling that many are simply reefing on spindle nut when tightening but simple enough to cut a slot (21/32"+) in a piece of flat bar. Actually would be easier to use than reaching up to push the spindle lock button.
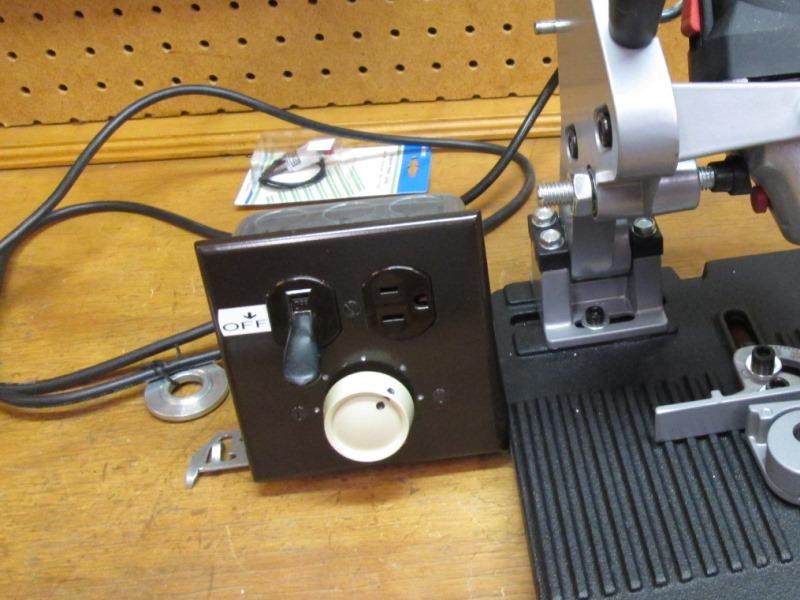
The Switch Box
Purpose
Not using the switch on grinder, it will be parked in "On"
Have easy access to on/ off switch
additional receptacle
rheostat to adjust grinder speed
Other than reaching the switch on grinder a bit awkward I want power going thru rheostat with an easy slap to off switch. Because I have stuff on hand on I'm building box. (You can buy speed controllers rated at 15 amps for under $20).
Used a duplex nail on box. It will be self standing, tilts a bit. With one side of nail on strap slid under grinder base keeps it positioned.
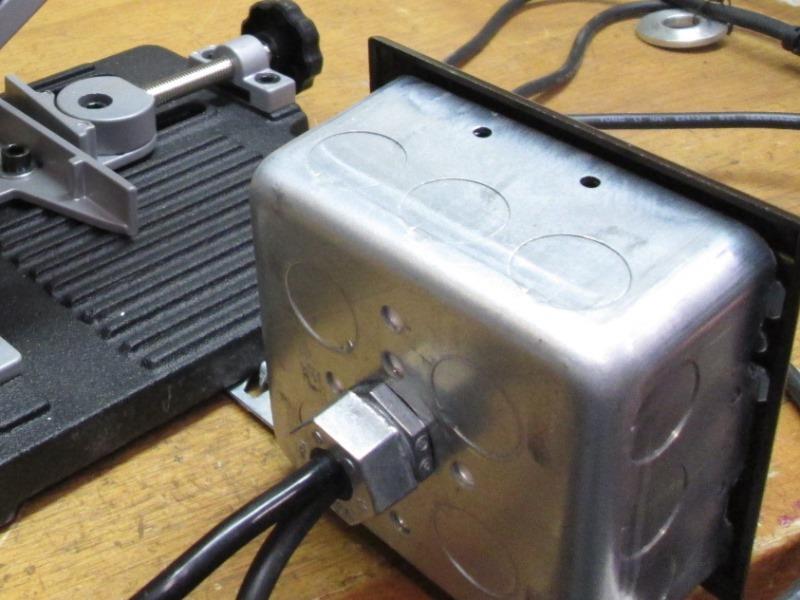
To the box added a gland nut on back that power cords pass thru. Used aluminum tape inside to seal holes
Using combination switch/receptacle and a standard push on/off rotate light dimmer switch. Dimmer is rated 5amps-grinder is 4.3 amps. Wired 3-prong pig tail to receptacle (always hot). Internal jumper feeds on/off switch. Connected one lead of dimmer switch to on/off switch out. Cut plug off grinder cord leaving about 2', connected its hot lead (black) to remaining dimmer lead. Tied all the (white) returns and grounds (green).

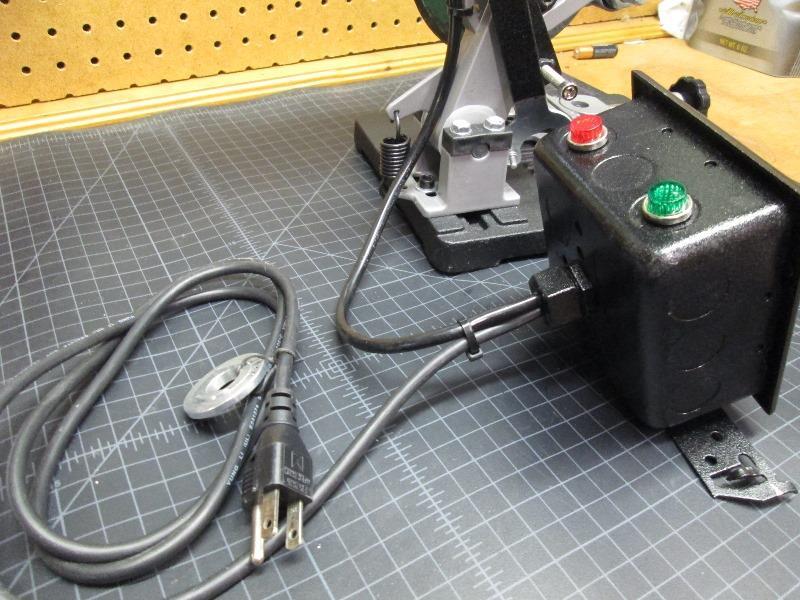
I ended up adding pilot lights. I saw that if that if the rheostat or grinders switch off, after turning on main power at the switch and grinder didn't come on I might end up checking (without turning off main switch) the rheostat or grinders switch..., meaning grinder would start immediately, not when ready to cut. So added a large red pilot that's on when box plugged in as visual box is energized. I add another green pilot that comes on when main switch turned on-signifying grinder should be on. If it is not means either grinders switch or rheostat off- (Really means "turn off main switch dummy" before fiddling around)
FYI Seen someone Ebay selling similar home builts for $43? DONT- Crazy & pointless, you can buy a pre made 15amp, fused, switchable controllers for less than $20. Sad cause I know someone is buying... If you bought parts to make one less than $15 and only rated at 5 amps ($5 5amp light dimmer switch, 75˘ plate, $8.00 combo switch/receptacle, $2 for a nail on duplex box). If you don't need extra switch and receptacle a single 5amp dimmer in box or dimmer controlling one receptacle.
Anyway pilots to visually see state, slap on/off switch, an extra hot receptacle for whatever might be used near. Likely down the road Ill add a fuse or breaker to box, also slip a spacer behind rheostat so cant be accidentally turned off. If not for wanting to slow down grinder, a foot pedal would have been more effective. Note this, using light dimmer rated at 5 amps/600 watts max will not work for larger grinders. If 5 amps or more, inexpensive ±$20 speed controls are available. Harbor Freight has one rated 15 amps, on/off/variable speed switch with a fuse.
Modify inner flange to use 5/8" arbor disks
Now that I have slowed down grinder to use 6" disk need to allow fit. Grinder is set up for 7/8" disks, but more readily available 6" disks have 5/8" arbor. As mentioned picked up another grinder to rob parts. One is using extra inner flange, modifying to use with 5/8" arbor disk.
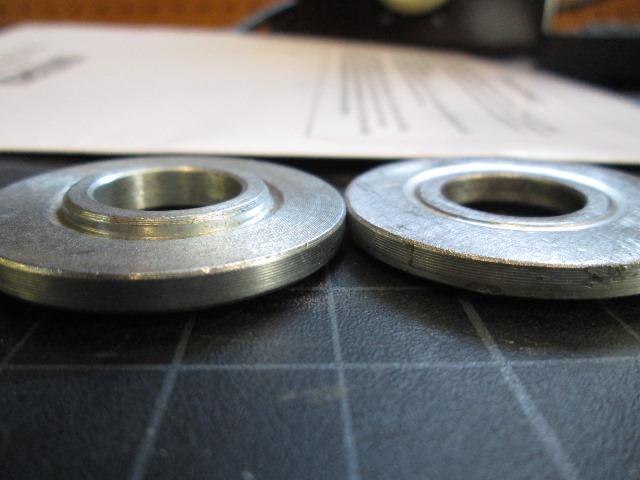
Modification is simply removing the raised 7/8" OD portion on flange. Modified flange shown on the right. Removed bulk of material with grinder then finished using flat file. The outer threaded flange is already flat one side with 7/8" raised section on other side.

Factory unmodified flange to use 7'8" arbor.
Modified shaved flange exposing 5/8" arbor to center smaller holed disks.

Stamped drive side of flanges. Option to use 5/8" or 7/8" arbor Type 1 (flat) cut-off disks while still ability to use Type 27 (dished) grinding wheels.
The main reason buying the second grinder, want to try to make a 6" guard from the 4 1/2". Not sure I can without ruining so want spare guard just in case.
The included plastic shield that comes with stand is NOT a guard.

Parts. Cut off the perimeter from 4 1/2" guard using a jig saw. Used torch to heat a piece of flat bar and formed to about 6 1/4" ID. Scribed flat bar profile onto some .045 sheet. Cut the inner circle so I could lay pieces together

Laid up. Originally was going to cut filler sheet to match OD of flange piece but decided it would be easier to just lap. Plus I can clamp to cause outer fill piece to bow to continue the slight taper. Will require a second weld row inside.
 Clamp one more time before cleaning up remaining paint on all pieces. The hard part became obvious, Placing 3rd clamp in center to form filler to match cone shape of flange side I realized centering the 2 pieces off. No pictures but I ended up tacking the filler to flat bar. Mounted the flange to grinder, install 6" disk, then held in filler piece with flat bar and marked. Good thing, I was a mile off-had I welded it wouldn't have fit.

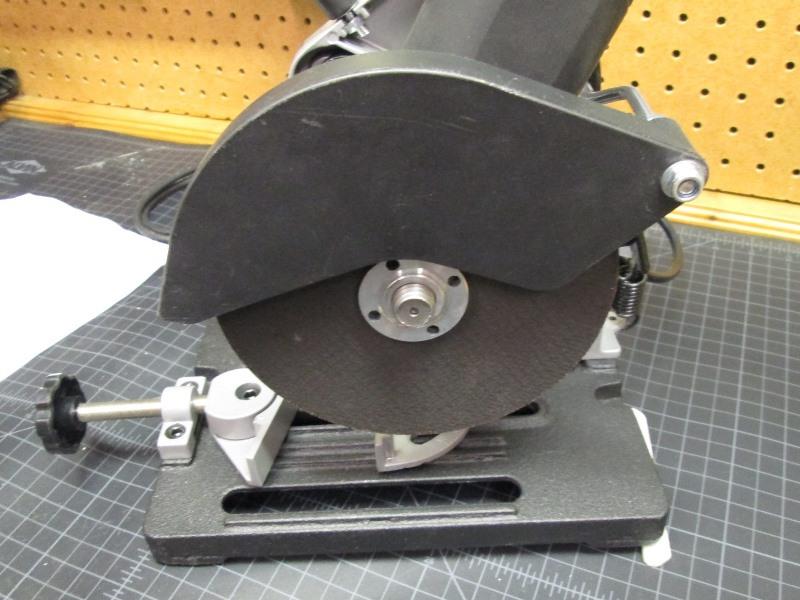
And welded, well about 500 tack welds.

Was going to grind it out but just painted with some textured black. Also was going to cut and weld a 1/2" perimeter lip to outside of guard.
Decided though to utilize the supplied plastic spark shield, would be more effective directing sparkage, easier to get blade on & off. Just flip it over to set on the new metal guard.
To get plastic shield rotated to forward edge of guard I needed to move its mount point up. Used an 1/8" cable saddle and u bolt. Slight filing of saddle to mach diameter of rod but worked well. Cut of about an 1 1/2" of rod that stuck way out past mount.
Lot of things I don't like about the little vise. A lot of slop, needs a quick release but for now its clamping small and/or short items which this little saw will see a lot of-its purpose.

Tightening anything less than 2" long, where item doesn't reach past center of adjustable jaw it just rotates. Needs to be addressed, short of sticking some material of same thickness at opposite end of vice.

Cut a short section of flat bar, tacked on a M6 nut.

Threading the cap screw in or out, matching thickness of what ever trying to clamp keeps vise jaws parallel. Nice- Need to make one for the 14" chop saw, though use angle. Often sticking multiple pieces getting stuff clamped. Never occurred to me.

Welded a pin to guard rod to hang the equalizer bar and pin wrench
Now were done. Well except next time I have welder out tacking on a piece of flat bar to top edge of the 'equalizer' bar. It tries to flex when clamping short items. Should have used angle. However much force is used to clamp small item in vise, that much force is applied to the span at other end of jaw, flexes. Details...
Update:done.

Welded on piece of 1/2" to top of equalizer bar. For 90° (0°) chops of short material-works perfect. For 90% of what this cut-off will be used for- done.
Did directly lead to addressing second issue or second part that limits cutting short items and that's the ribbed deck and unsupported material.
Making zero clearance throat insert
Commonly done on table saws etc, is using a zero clearance insert. This small stands deck has a fairly large opening, Unsupported distance between ribs is about 1 1/4",
,
..
I'm just seeing easy to pinch blade

But on short items its the leverage.
Had been thinking of completely redecking base with a piece of thin plate. But a piece of flat bar to make a shoe or "zero clearance insert" to fit between ribs under blade would work. Only require cutting 1 slot. hmm... On the rountoit.
And done!
Lot of ways to do, 1/8"x1 1/4" flat bar notched to fit between ribs would cover slot, however would still leave 2 ribs between blade and vise. Removing the 2 ribs would allow a 2" wide length of 1/8" plate to fit between outer most rib and vise rib. A little more work but have a completely flat surface to clamp short material...

So ground out the 2 ribs between vise and slot. Also ground down part of the vise boss so plate can extend under and be captured by vise mount screw. Could have notched plate.
Remounting grinder, use grinder to cut new slot. Thinking it possibly could lift plate added few countersunk screws with nylok nuts underneath, defeated grinding off the boss, oh well.

New thin kerf slot.

And flat work surface!
As mentioned, one of the items prone to break on these small grinders is the spindle lock button. Instead of waiting till it does, though more due to the fact just not easy to use with grinder mounted, made a wrench.
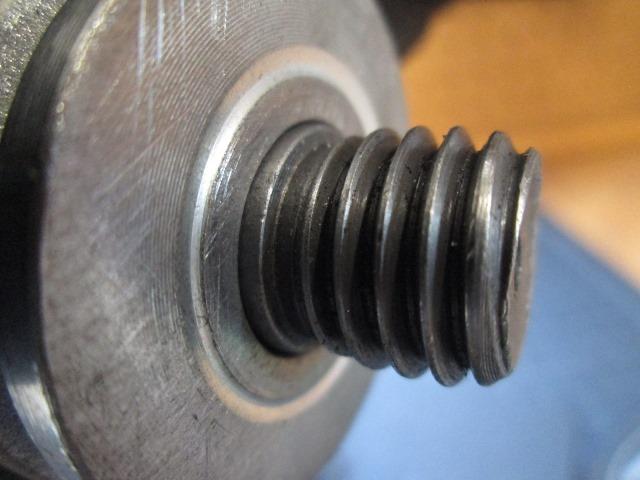
The spindle has flats that thin enough wrench could be used, its what the inner flange sets on to prevent spinning. However inner flange only slightly engages, maybe a 1/16", leaving almost 1/8" exposed flats. Between back of inner flange and grinder body is 3/16", plenty of room to slip 'thin' wrench behind and enough flats on spindle to grab.

Cut a 5 1/2" length of 1/8"x1 1/2" flat bar. Drilled 5/8" hole 3/4" from one end (I measured ±0.66" across spindle flats, somewhere between 5/8" and 11/16", close to 17mm. So I used a 5/8" bit.). Then cut slot form edge to hole. Used a file and taking little bits at a time/checking fit till it slipped over flats. Drilled hole at other end to hang.

Fit...

I was right as far as using. Much easier to locate flats with the wrench than reaching up behind grinder (on stand), holding button and trying to locate lock position. Certainly a lot more positive
Things that need addressing. Ongoing- this section goes for ever as I get time addressing to make using easier.

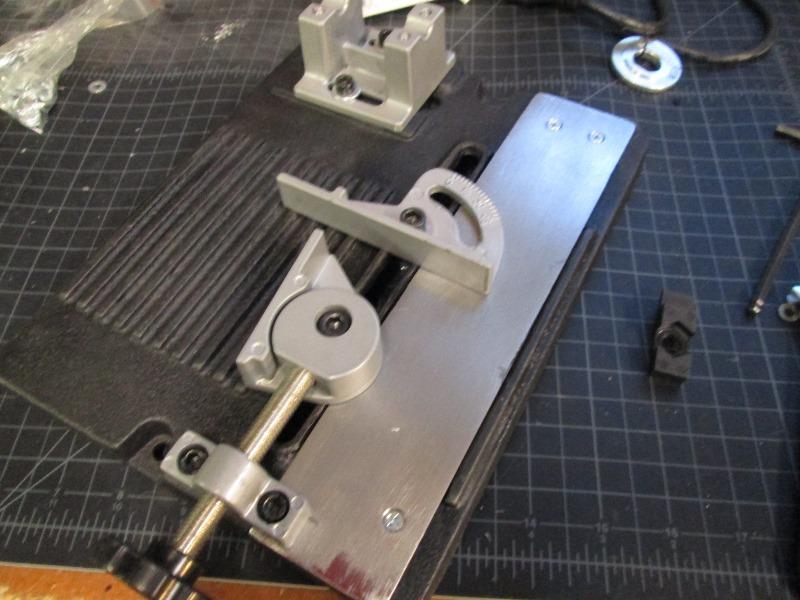
Primarily adding a secondary screw and extended vise jaw for positive clamping at 45°.

Second is replacing the 2 pieces underneath that hold upper vise, and replacing the bolts with 3/8" shoulder bolt for non-slop rotation. Due to the 2 piece mount, (plastic pointer that captures upper bolt and undersized square nut for lower bolt) vise cant be tightened enough to resist force of the screw clamp. At any angle upper jaw tries to return 0. The undersized metric bolts allows the vise to flop around better than 10°(with pointer setting at 45°). Impossible to adjust by loosening screws to rotate.
Continued on page 2... Making the auxiliary vise clamp, replacing bolts and making one piece mount for upper vice
The Kit. 20 minuets turned to all day- oh well something to do. If I can modify something to work better, easier and successful then why not.
Back to Our shops tool mods section