
Sander below needed to use while back, carrying outside realized I forgot stand (normally set sander on bench, carry stand outside 1st) so sat sander on garbage can that was handy while I went back into shop for the stand.
Sander fell off...virtually destroyed it. Incorporated mods below onto new sander with some changes-primarily when spacing belt cover I hinged it. Made belt tensioner, revised motor bolting. Back to new sander
Picked up a simple inexpensive "cheap" H/F combo 4"x36" belt /6" disk sander #97181. Handy-using the heck out of it for various shaping needs. Not for any kind of precision work but it works. Couple of nit picks and modifications to make it better for my use.
- Split into sections as stuff added to this page, mostly for my own reference.
- Original setup and few modifications. Add motor alignment bar for easy belt tension adjusting, lop off body casting, rotate power switch
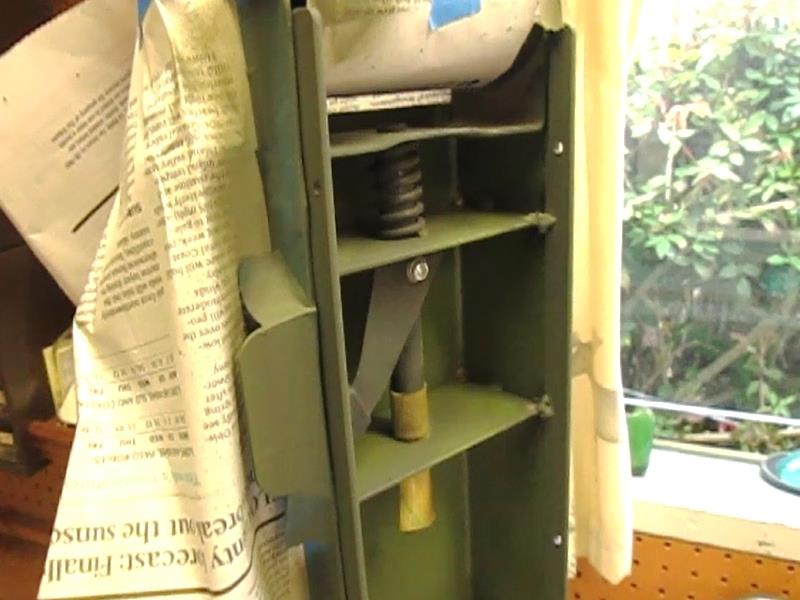
- The stand
- Increase motor venting to help cool
- Drill out air port for more vacuum- subsequent rewelding of port as belt ground thru cover
- Revisit lack of vacuum spacers to add 1/2" more clearance between belt and cover. w/Video
- Rework sanding belt fence to use wing nut, add guide for self alignment when fence mounted. w/Video
- Add vacuum port adapter tee allows vacuum attachment with belt horizontal & disk connected at same time. w/Video
- update to vacuum port adapter update to update/ add pvc ells to route vac adapter tubing
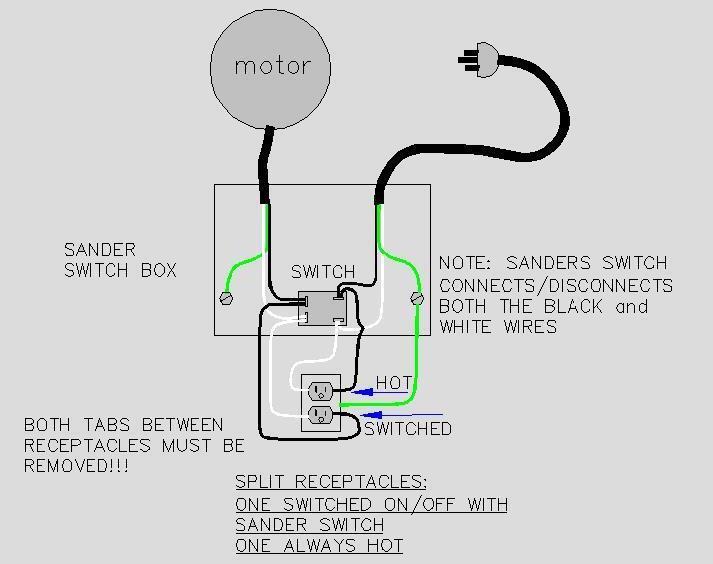
- Add 110V split receptacle1 side switched to turn on vacuum w/sander, the other hot for general use.
To set table use a tri square, maybe 'metric' degrees are different but if you square table to sander at 90° then rotate table to 45° mine is about 2 1/2° off? so useless. However better than sticking drill with pad or hand belt sander in a vice.
If you don't use a vacuum while wood working, remove the lower plastic from 4"x36" belt. Dust will collect in it, really bad if you use for wood & metal (think sawdust + sparks =Fire). Actually if you don't have vacuum- removing the rear vacuum plate all together allows for quick change belts.
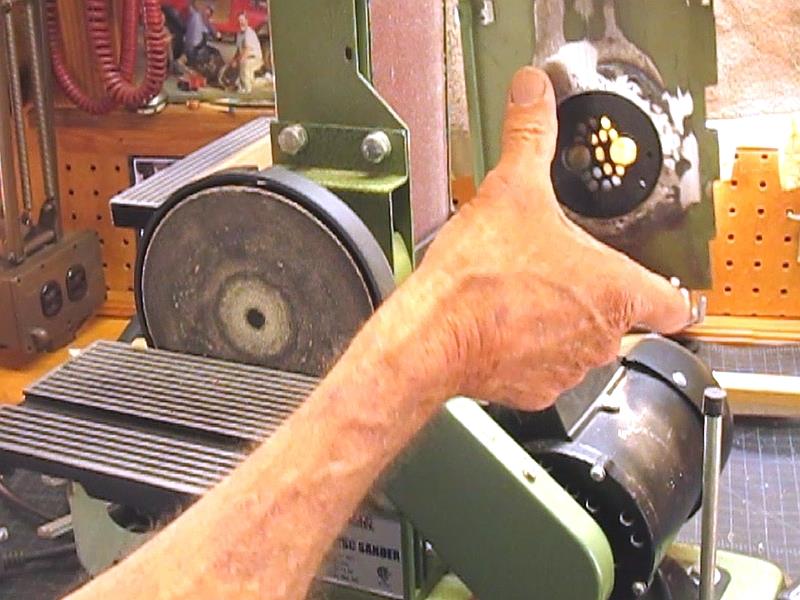
The 6" disk uses self adhesive disks which I've never appreciated. Grit changes just a pain and as often as not sacrifices disk when removed. Conversion to center screw or velcro would be nice. Check disk set screw OFTEN. I don't use a vacuum -(though on the list) but I look at the disks air plastic guide as a guard so installed it. Grabbing the belt with hand will hurt a lot- hitting edge of disk will slice, a lot.
- Couple of mods
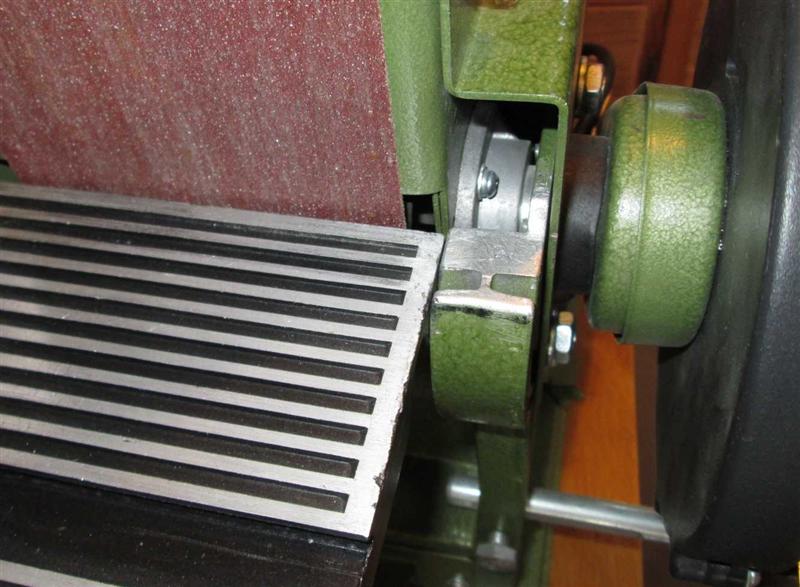
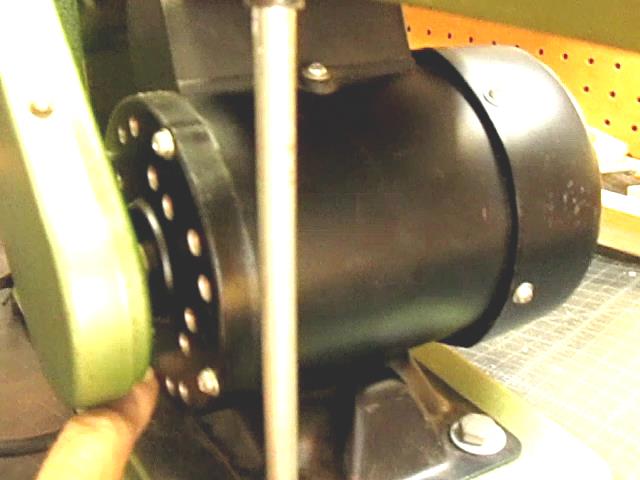
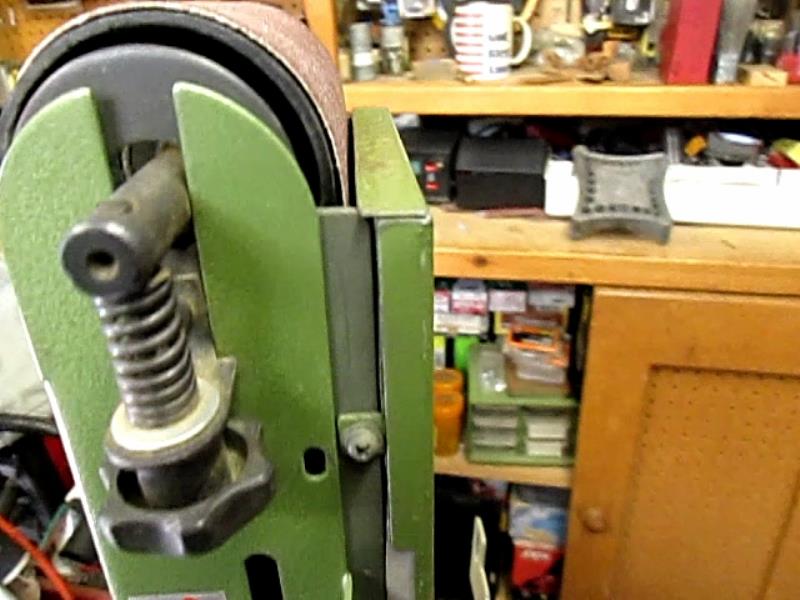
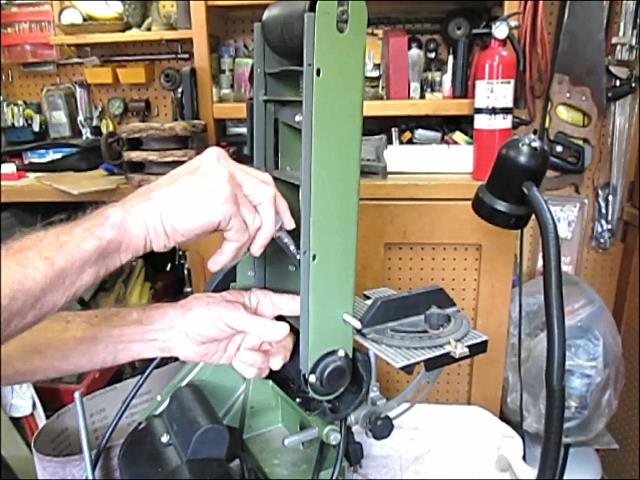
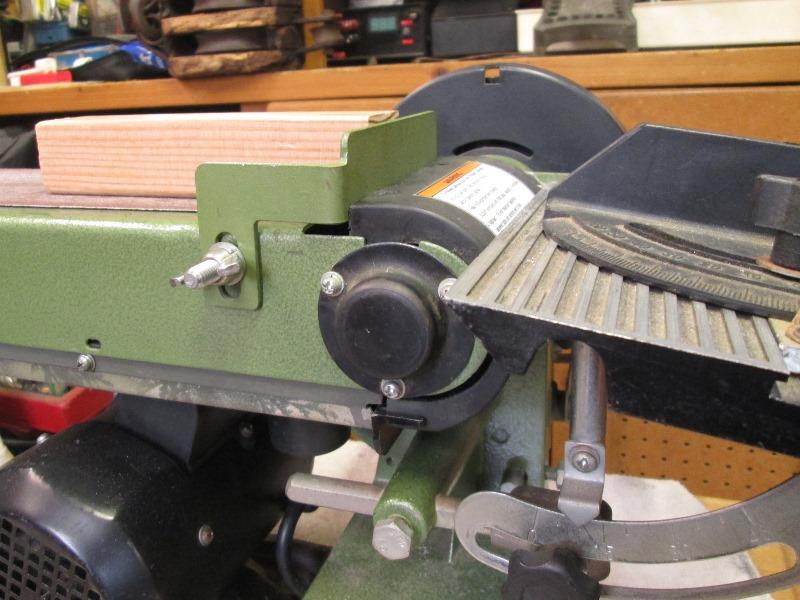
Mine out of the box one of the motor flange ears was bent. Bolt thru it was only caught by a thread. Obviously dropped BEFORE it was assembled. Bizarre . 60 mile trip I just disassembled and flattened. On reassemble, aligning pulleys and tension the belt with the 4 way slots and 4 loose bolts/nuts was almost impossible. So I added a piece of flat bar to side that aligns motor pulley to sander pulley. I can easily loosen/tighten to adjust belt tension if needed. Simple, used belt rest rod and small nut bolt at other end.
Video of adjusting drive belt and pulley align..also setting up disc guard if using: 10 min
Instructions list under maintenance but #1 is adjusting drive belt and checking pulleys are parallel to each other (co-planer).
Belt too tight sander wont start, too loose and material easily causes belt to slip.
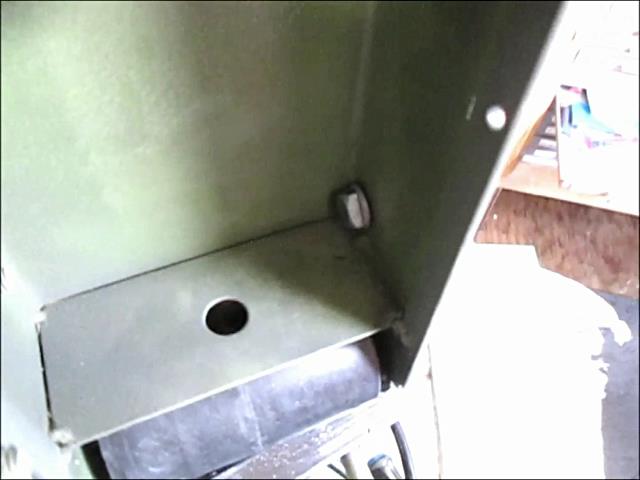
Sander has allowance to use table under belt, which is how I use it, vertically with table, but its almost like an afterthought. Travel across the belt face is limited. I removed some of the body material to allow sanding wider (up to 6 1/2") material flat on table, shown above. Other than that, to use table you must remove the supplied stop, and bottom air plastic. (unless table to belt is at 90°?). Not an issue for me as I don't have vacuum or use horizontally.
If supplied stop were used I cant imagine how it doesn't rotate down and sand the screws. But maybe it works, however...When I get around to it I'm remaking stop to use if needed, which I'm sure occasion will arise, horizontally. .update: addressed below
All in all, the 6" disk is nice for quick material removal though small area. Good speed for most stuff. The belt is a bit slow and easy to stall if you hog on it. Its paid for itself in so I've no real complaints. Got exactly what I was expecting, It is junk but functional-especially given the price, its intended use-works. I got a heck of a deal so jumped on it. I paid more for stand.
Speaking of which...
Back to top of page
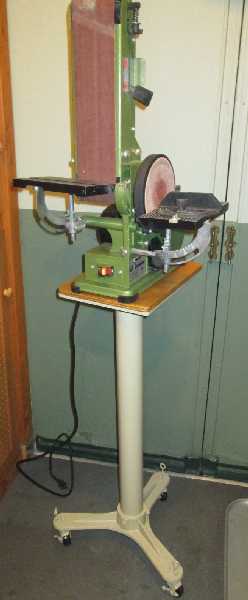
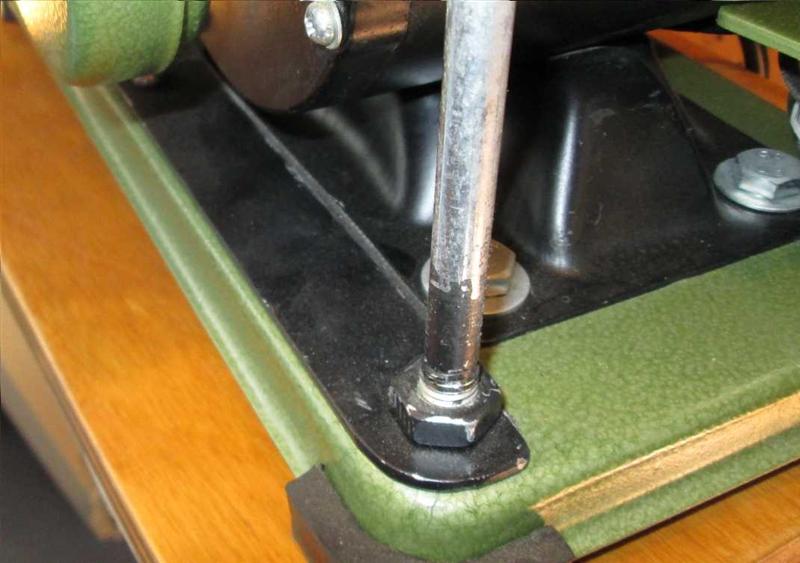
Picked up grinder pedestal-68321 for the sander. Some very necessary mods to it on its own page, specifically how its assembled, HF Stand on its own page.
Painted it. For not wanting another project spent good part of a day playing with this. But kinda fun & worth the effort. I use this thing way more than I thought I would.
When/if I take it apart to make the horizontal stop I'm also going to add handle across the top of belt. I've seen them on better sanders and I always grab top of belt to adjust angle. Just a piece of round bar bolted to one side. Sooner or later I know Ill end up grabbing it when it's on. When those mods are done Ill update this page.
Back to top of page
- Motor Heat
Motor has internal fan but all the air comes out its cover. To get air to move thru motor, disassembled and drilled the aluminum end bell with (16) 3/8" holes. Helped a lot
Back to top of page
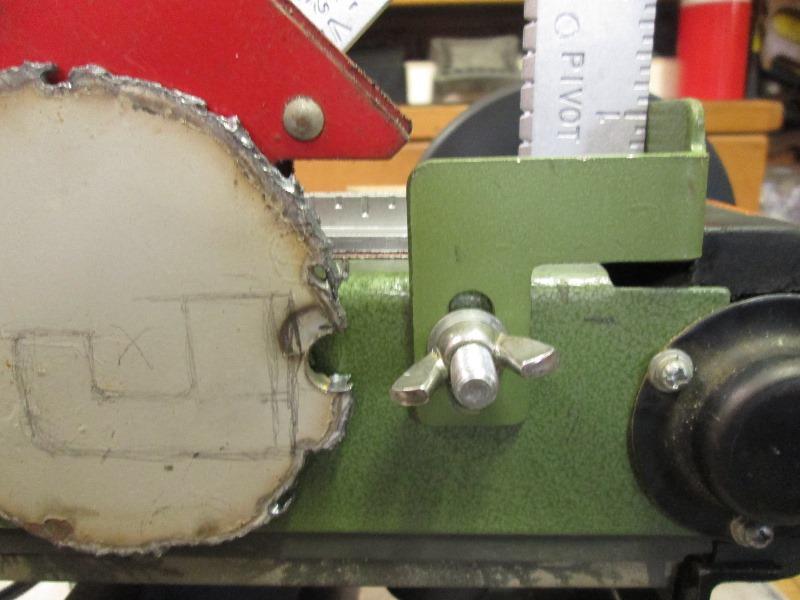
- Fix first attempt to increase vacuum flow (2018):
Makes sense- however DON'T I did -FYI.
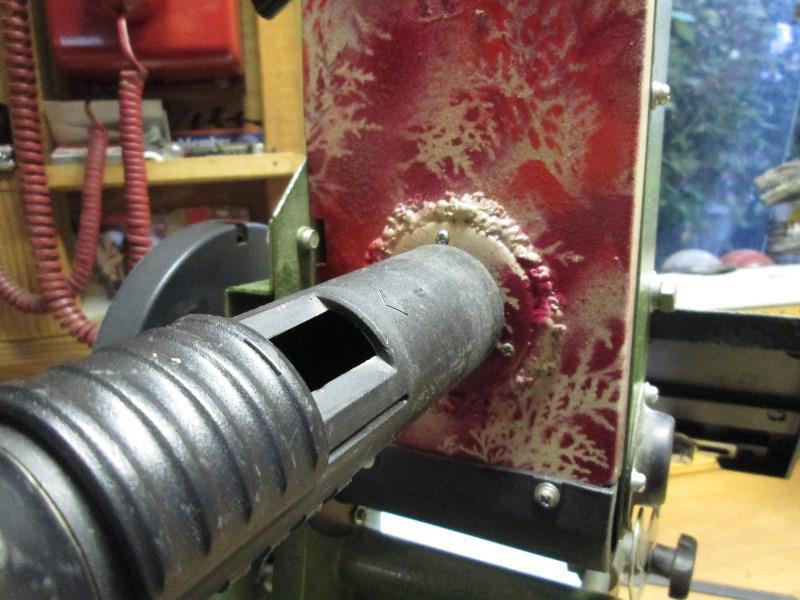
I had to reweld back plate where air attachment port screws on. I use shop vac with the sander when working with wood. Air restriction though due to rather small holes on tube not very effective for drawing dust and also makes the vacuum work too hard.
So tried opening up the port as others mentioned. When vacuum attached to opened up port the volume indeed is increased- not only does it suck more dust with additional holes- it also sucks the belt. Causing it to eventually sand thru the sheet metal.
After opening up port I had to use fitting on vacuum hose that allows control how much draw thru sander without restricting vacuum motor. Which adjusting where belt doesn't contact returns to almost no dust draw, or back to where it was before opening port. Only real cure is to bend up a deeper back plate or add spacers somehow. (readdressed and fixed below)
While opening up the port does work to draw more dust, unless you have a means to control air don't just open up port. If reading this with intent to add holes to port do it incrementally....
Back to top of page
- Increase ability to run full vacuum
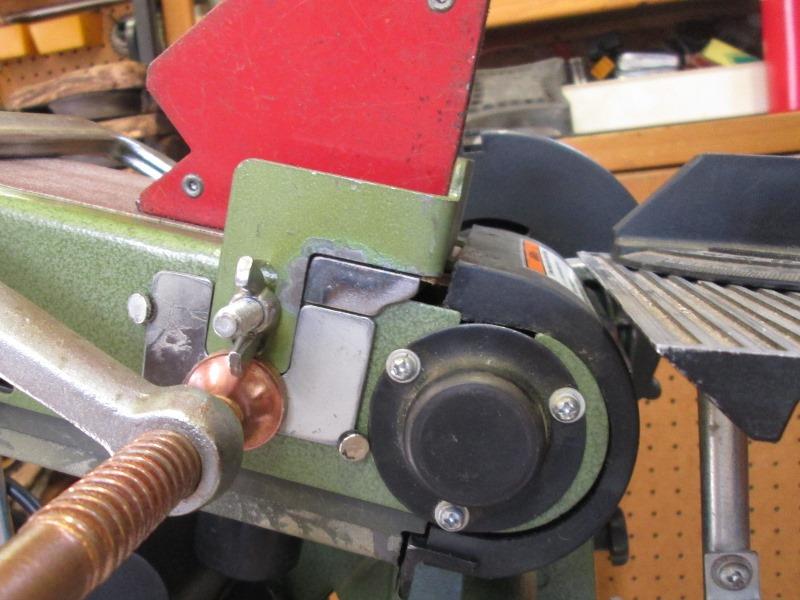
Address lack of adequate vacuum and tendency for belt to grind thru cover...Had already fixed once due to belt grinding thru cover. Using vacuums remote that allows controlling amount of air, its turned down until it almost draws no dust but it's still grinding thru cover. Decided to fix
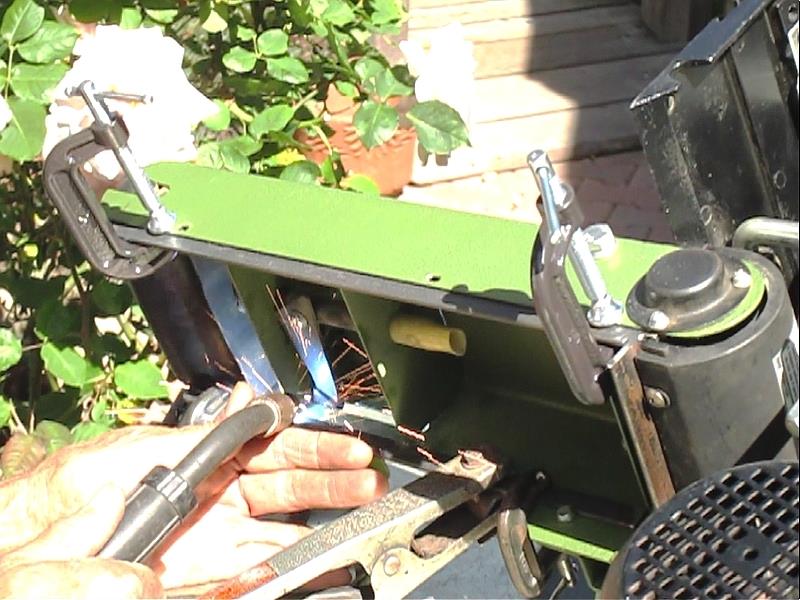
Add spacers using 1/2" flat bar to space out rear panel to have full vacuum without sucking belt into cover. Tack welded to ribs inside body.
Flat bar drill/ tapped to match cover spacing and painted. Cover will set shifted over to left so its tabs on right side are inside of flat bar, left side tabs are outside of flat bar.

Screws on right side go thru f/b into covers tabs, screws on left go thru cover and thread into f/b. Bottom of cover use to tuck behind and attached to lower plastic, added small length of angle that screws to plastic. Bent the bottom of cover so it sets on and screwed to angle.
Also notched and folded top of cover to close up gap
Tried making video while doing this, 30 minuets but shows a bit more detail....all in all though works awesome and can run full vacuum!.
Video during modification..30 min
Link if embed doesn't show
Back to top of page
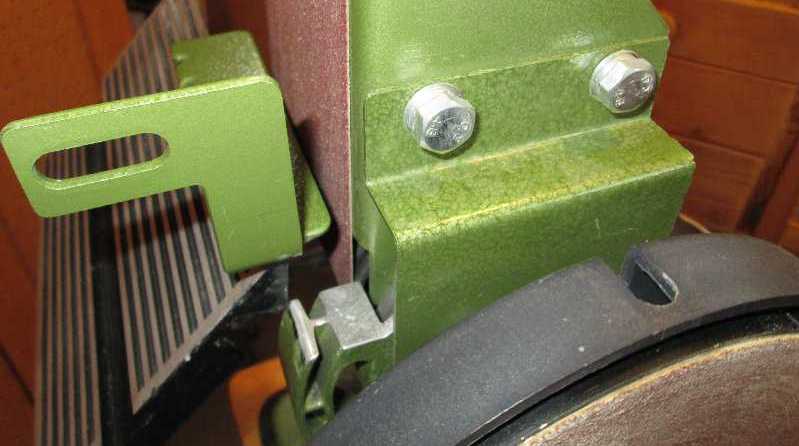
- Mount belt fence
Threading in 5/16-16 bolt from inside machine. Used a lock washer and loctight. Material is fairly soft so don't reef on bolt.
I ran a tap thru existing metric thread but it is not needed as there are only a few threads and 5/16 will thread easily.
Mounted. I use a vacuum for dust control and the plastic collectors. Intended is screwing the fence to plastic collector (black half round), However the fence bolt tabs are just slipped under for easy removal/ installing, doesn't need to be attached to use.
Works well, however have to fiddle with fence so it is square and above belt. Making a guide to bolt to sander body that will locate the fence, so just slide onto bolt and cinch down.
 Welded piece of 1/2" flat bar to fence for additional support, cut out guide. Clamped ensuring fence above belt and square, then drill/tap body to attach guide

Never understood the way this fence originally mounted. Now just slide fence onto bolt, tighten wingnut. Guide sets it square and about 1/8" above belt. Fence rests on added 1/2" flat bar and within guide cutout, also restrains from rotating.
Video during modification..20 min.
Link if embed doesn't show
Back to top of page
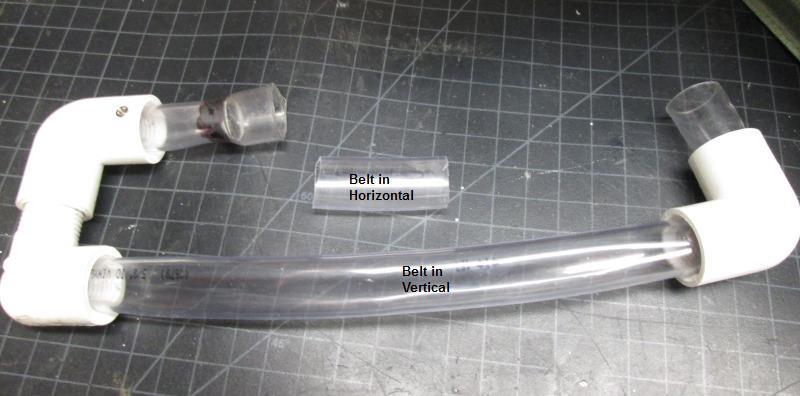
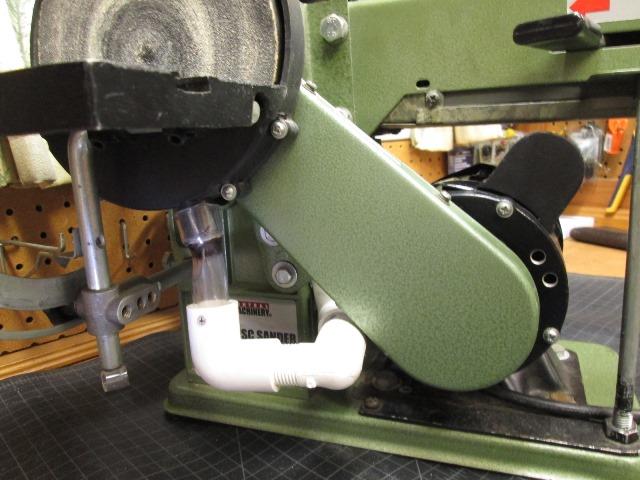
- Add an vacuum port adapter
Stumbled upon an adapter that fits sander belt port, center outlet that fits my vac hose and has 3/4" outlet for disk port. No more swapping back and forth.
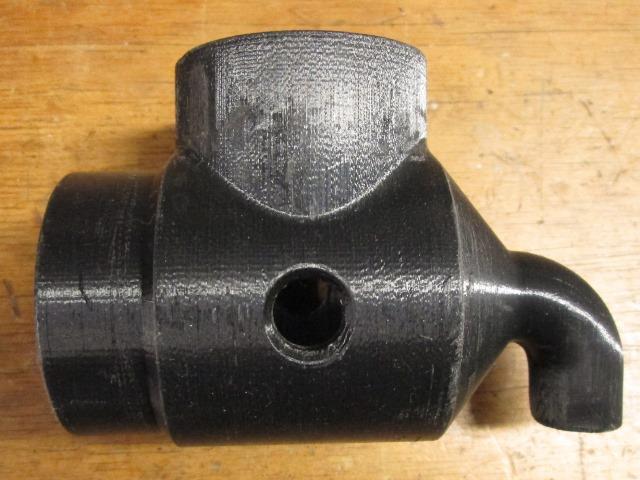
Some modification required but it simplifies. Basically a tee that a young youtuber is 3D printing and selling on Ebay. It allows plugging in vac hose when belt in horizontal position.
Note it has 1/2" holes on sides. Purpose of these, along with an internal restrictor on center outlet, is to limit amount of vacuum so belt isn't sucked into cover on stack sander. As I have already modified my sander to allow full vacuum, I plugged the 2 holes and cut out internal restrictor.
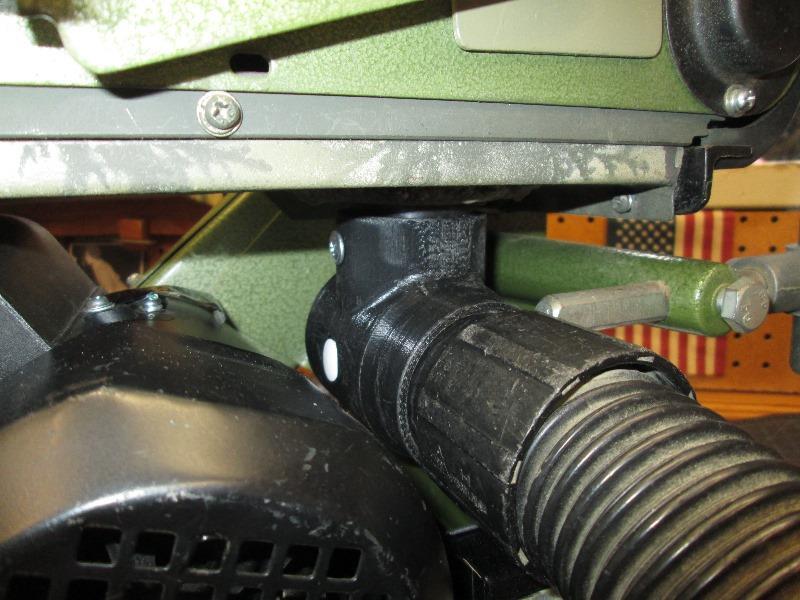
The tee requires removal to swing the belt arm as it hits motor capacitor. To address I cut off about 1/2" from sander port to allow tee to fully slide up closer to cover.
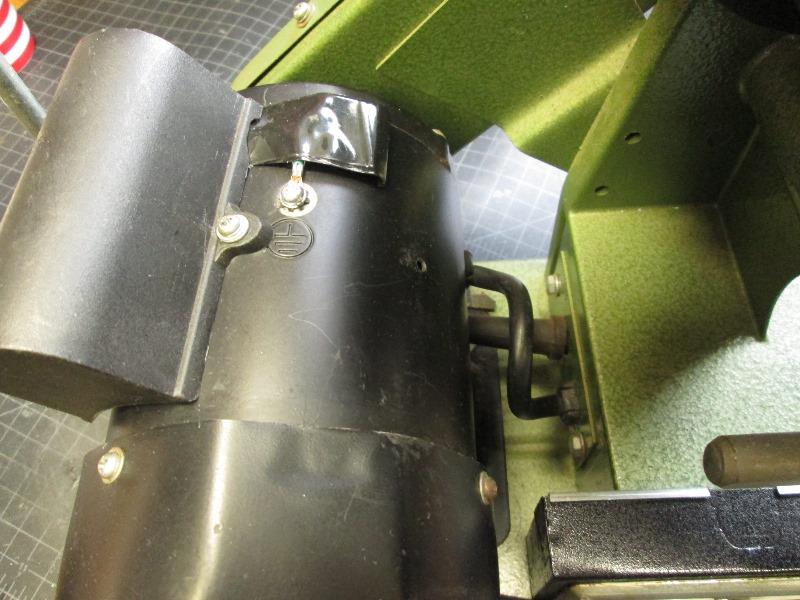
I then relocated motor capacitor by rotating away from the sander. Wires on capacitor were long enough to rotate and reuse existing single screw hole in motor. Temporality added the plastic to cover wires. Next time I have welder out I'll tack a small piece of angle to cover wires and another small piece to capture the other mount ear (not shown) of capacitors cover.
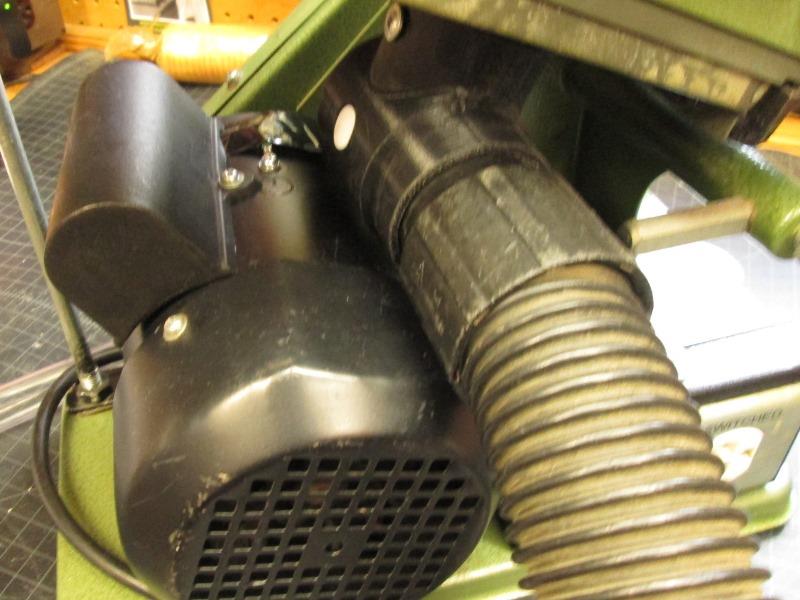
Now the belt arm can freely swing with tee attached and no interference I added screw to hold tee onto port.
Last was adding the hose to tees outlet and to the disk port. I used 3/4" x 5/8" id vinyl hose. Heat ends with heat gun to stretch and form to the outlets. Its about 24" long. This works for now and my normal vertical use. TO-DO For horizontal use and to relieve the bends getting rid of big loop- is pick up some insert elbows as the tube just wants to fold. When done I'll add pictures. Planned is short piece of hose attached to disk port with an ell, a short piece of hose attached to tee with another ell. Then 2 pieces of hose, one short 1 long to fit between the ells depending on if belt in horizontal or vertical position. Though I primarily use in vertical position which this works don't like the big loop.
But this tee works well. A lot simpler just plugging in vacuum hose
Video during modification..10 min.
youTube Link if embed doesn't show
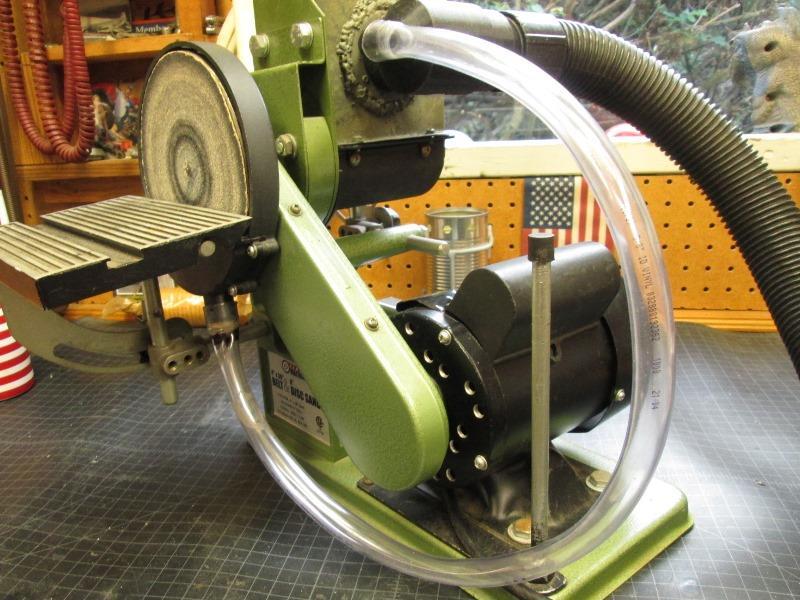
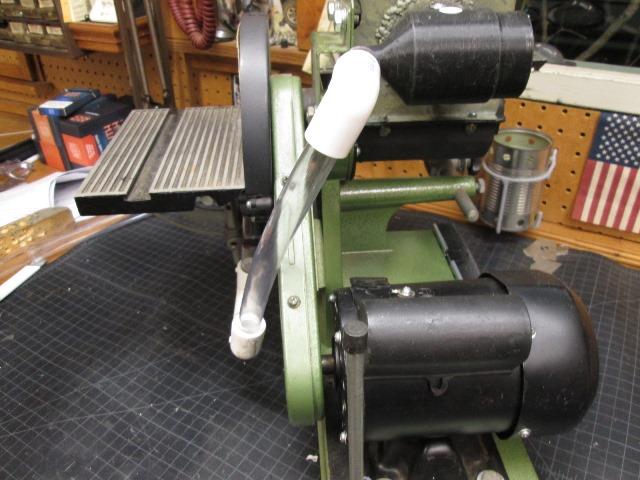
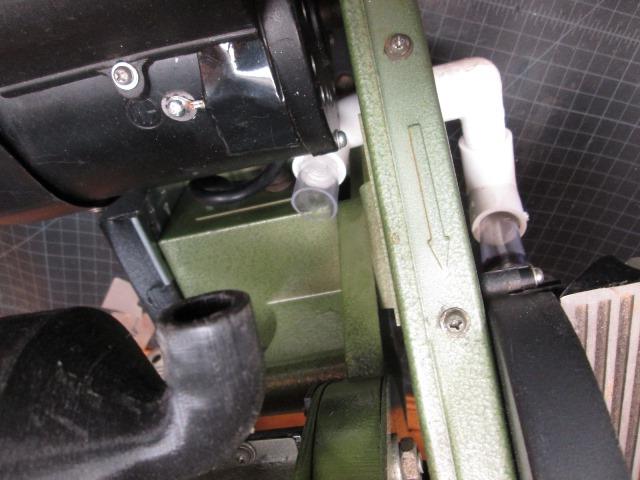
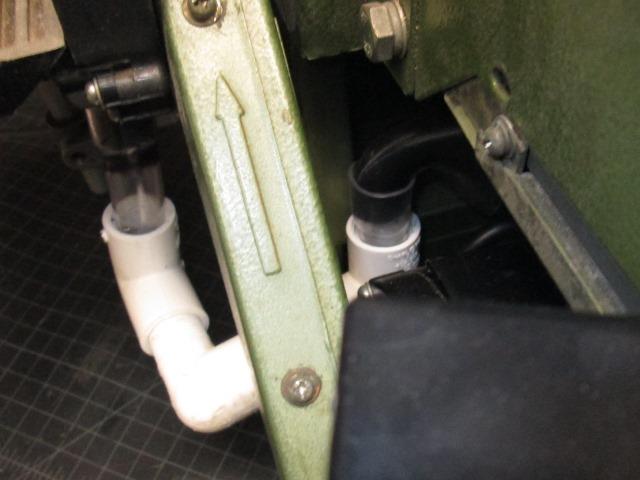
- Add ells to reroute adapter tube
The 3 ells making the bends. One ell plugs into disk port, the other onto tee adapter. The hose between is changed for belt position, rotating street ell.

Fittings and tubes for belt in either position and disk port attachment. Totally gets rid of hose kinking.
The short hoses that slide onto ports are fixed in ells with small screw to contain. The street ell loosely threaded into disk ell. Tube between street ell and belt ell simply slide in.
Normal for me is using belt in vertical position. Easy to show routing
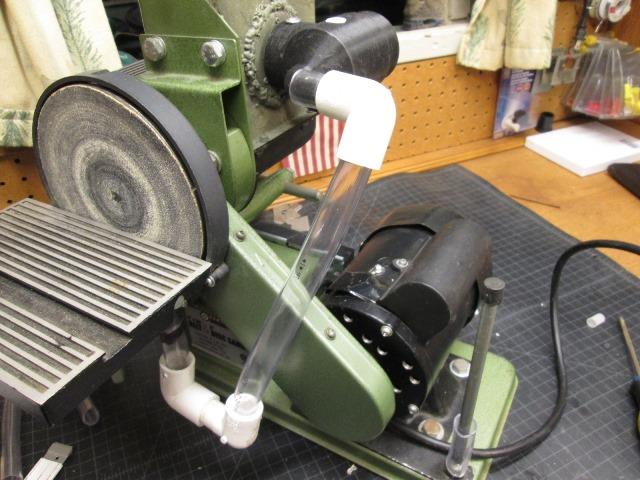
Long tube between ells, street ell rotated up..
Nice direct connection, gets rid of the long loop I was using.
A bit harder to show connection with belt in horizontal position..
Long tube swapped to short tube-street ell points in...
..to go under belt guard
to make connection to belt port adapter tee.
Back to top of page
- Add split AC receptacle
Had an old shallow Legrand wiremold metal box, box full of receptacle and old cover and other parts needed. Mostly package of Noble 523H piggyback female with male tab connectors. As the sanders switch switches BOTH the hot and neutral wires, tapping it to feed new receptacle. Piggy back off incoming line & neutral to feed hot side of receptacle, and the switched output line & neutral to feed the other receptacle. Clear as mud, but doesn't change way sander is wired, keeps the common (neutral) and hot separated.
With parts on hand located easiest place to mount- side of existing switch housing.
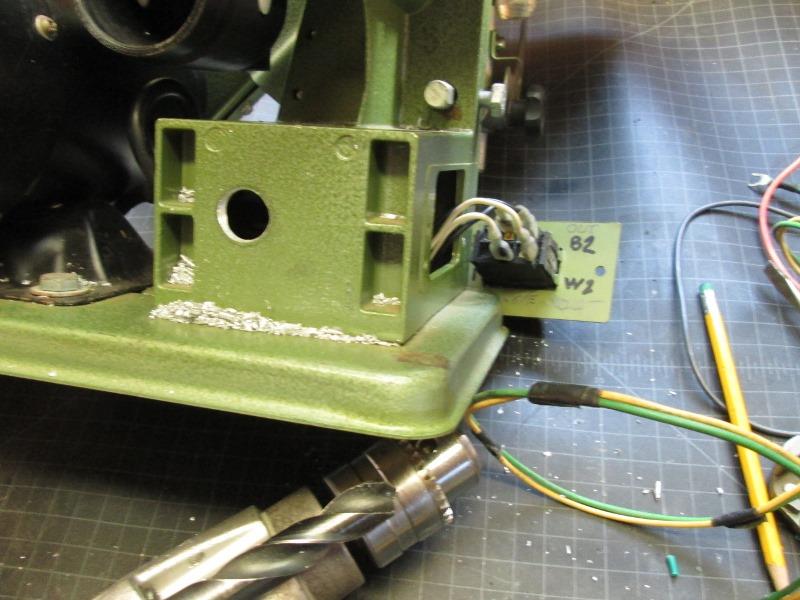
Bored a hole centered to match receptacle box mount plate hole on back.
WIred leads to switch
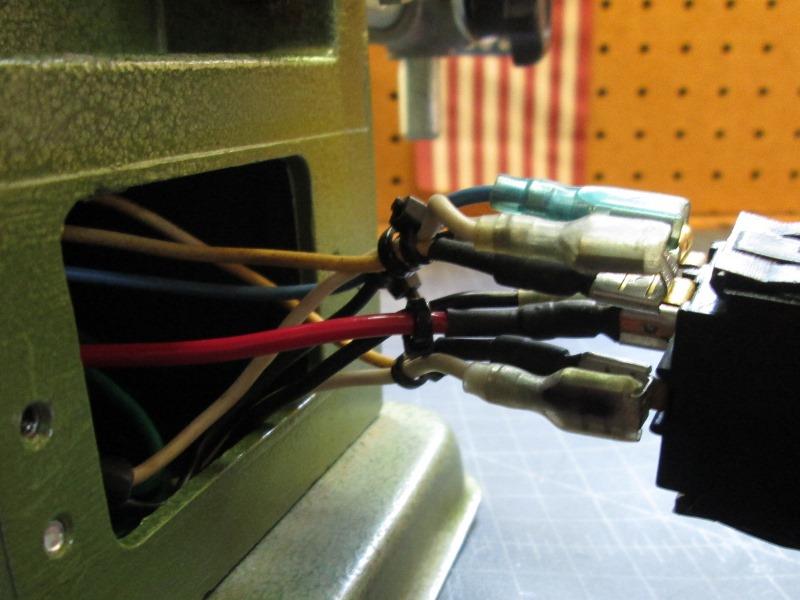
Az a lot wire... tied matching pairs together, used red for always hot lead, blue for switched hot with appropriate neutral wire zip tied to it. Unneeded, Mostly so if receptacle needs changing or the next person that might be inside here, might have a chance not mixing wires.
Ran new leads thru hole.
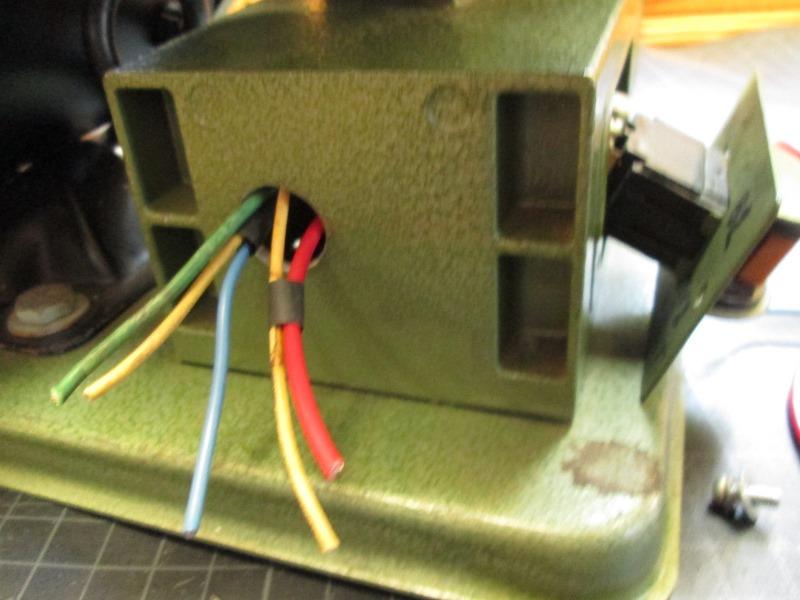
Same thing tied matching pairs together with heat shrink.
Mounted box mount plate match-drilling plate and housing.
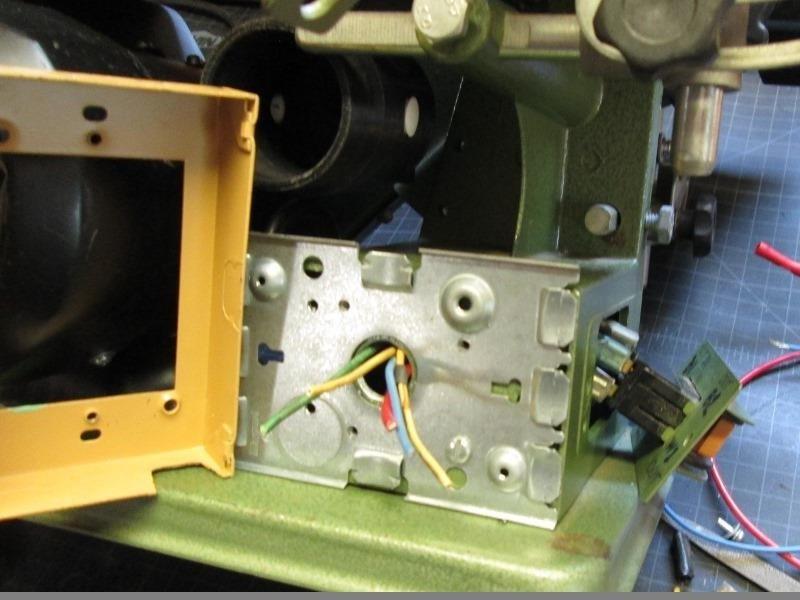
Tapped housing 8-32, mounted plate.
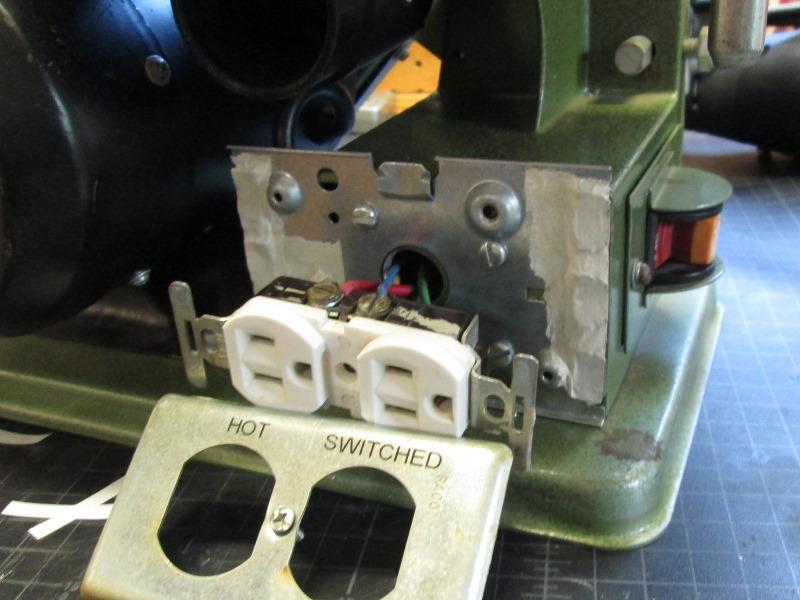
Wired in receptacle. As the receptacles ears can pass thru the box front hole, pre-wired before mounting the box-much easier. Label cover
Painted the box mounted, screwed down receptacle.
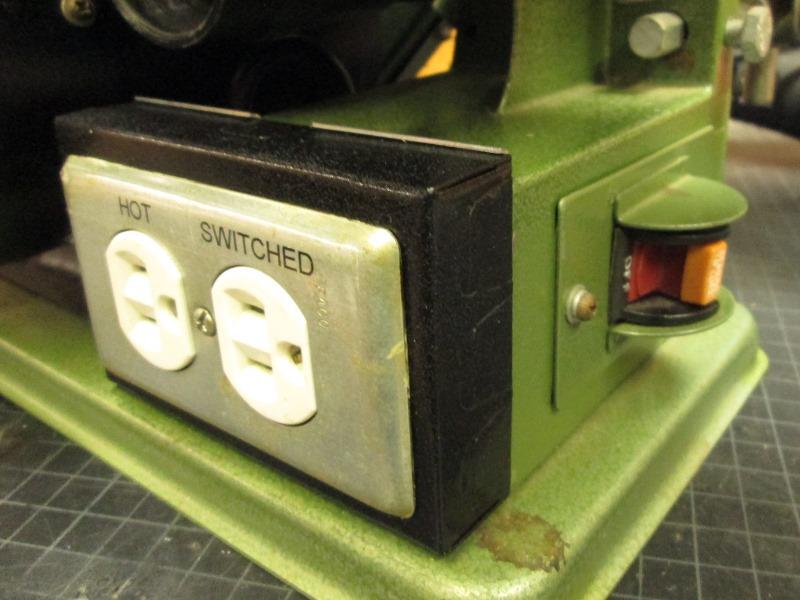
Nice-auto vacuum on -no other step needed. I've added receptacle to several other tools, table saw, grinder stand- etc. Simple convenience not having to run another cord to wall receptacle when at a station using one tool.
Back to top of page
Back to shop tool mods
Back to Our shops home page