Add Florescent light fixtures, replacing single bulbs
Shop has 2 single bulb porcelain ceiling light fixtures. Use to only have one. I had added another and moved existing one to get better light but still a lot of shadows. Plus single bare bulbs walking around trying to block sight of bulbs. Unless working on something either unscrewing one of em or just turning off.
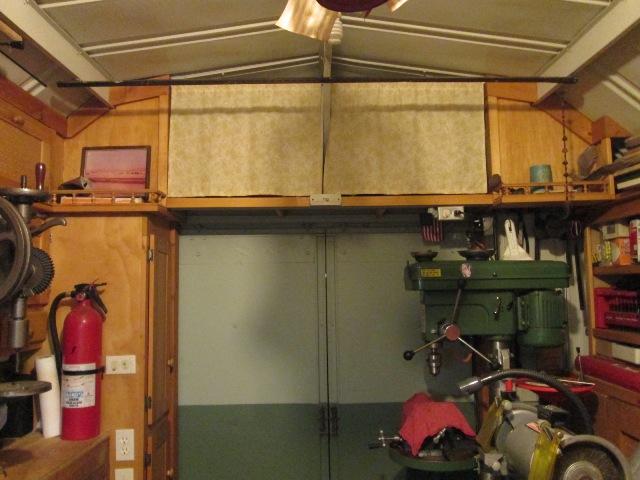
You can just see the one curly cue (off). You can also see the shadows. Even with both on, the small concentrated light sources just created more contrasting shadows. blazing like little suns
Changing them out to fluorescent tube fixtures has always been on the list. One of those round-to-its that never seemed worth cost though. I had one 4' double tube that I was going to add over workbench, then I thought about mounting in center of ceiling. Better but still be shadows when at bench. As I couldn't make up my mind I was waiting to get another. Then a friend recently swapped out his (4) 4' double tube florescent fixtures for LED fixtures, the LEDs are nice! Asked if I could use his old ones otherwise he was recycling. 4 matching lights? yes.
So I drug them home. Looking at my ceiling wasn't sure where I wanted to mount. My first thought was to mount 2 at the outer ridge beams. Wasn't sure that would solve shadowing over bench, plus fixtures only have a 6" pigtail at end of box and require rewiring to reach center mounted receptacles. It might be easier to run new wire and boxes, locate fixtures where wanted then add new pigtails. Decisions. Definitely get better lighting but some thought required. So first decided to install one directly over bench. Give some more thought to ceiling and placement.
On to the install

Here I've installed first one over the side bench. This area is where I solder and wire, due to the window/ventilation and profuse amount of natural light. However at night this area is really dark, lights are behind me.
I started out just adding a pigtail and run to under cabinet receptacle where its small light is plugged in. Simple-Easy, just needs a switch. I was going to add pull chain to light but since the cord is draped, which I don't like and as both plugs are now used I still would need to unplug when I need access to plug. A better solution is in order.
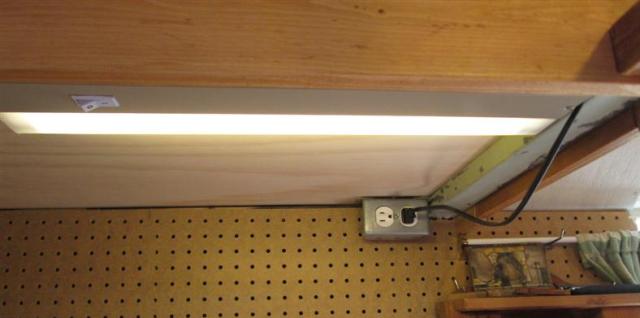
Looking at the small fixture under cabinet it would not be too much effort to move it over a few inches. Add another box with a pigtail to plug lights into, freeing up one of the plugs at back wall. Looking thru what I had on hand I found a combo switch & receptacle. Perfect, I can hard wire the new ceiling fixture thru the switch, plug in the existing light as it has a switch.
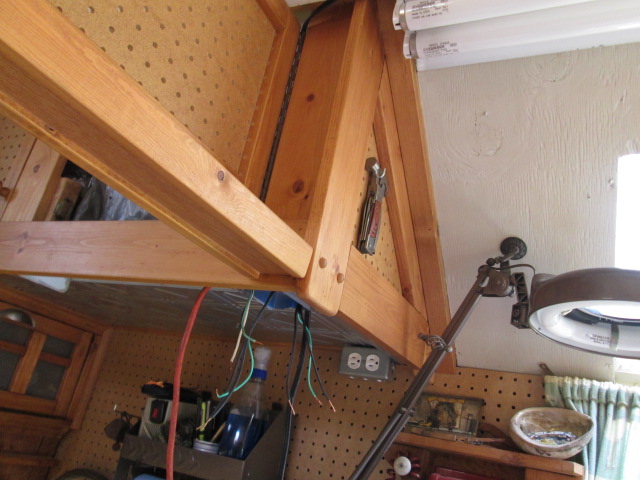
Moved the light over for room for small plastic box. Wire in the pigtail to new extension box. Getting ready to wire ceiling light to switch it occurred to me I could also hardwire the existing light inside-no reason to 'plug' it in. So opened end between small light and box. Split the feed, so hot to existing light, switch powers new ceiling light, and hot receptacle.

If I had thought about hardwiring the existing light I would have just used a light switch in new box- However now I gained a receptacle. Worked out sweet-
On to the ceiling lights
Simple-Add 4' fixtures to ceiling, but orientation puzzling. After installing the one over bench figured running perpendicular to ceiling beams would give best overall light spread. So bolted to bottom of beam. I added temporary blocks at ends to keep light from pivoting. Not sure- if nothing else Ill cut shorter blocks. Simple...
Minor modification for plugging in and mounting. Open up lights and add center romex clamp and add a bit longer pigtail to each. (they had 6" cords mounted at ends).
Then drill light housing to bolt to roof beam. I also remounted the ballasts closer to center to help balance. Then hold up lights, mark the beams. Drill thru holes in beams. Then nut & bolt lights to beam
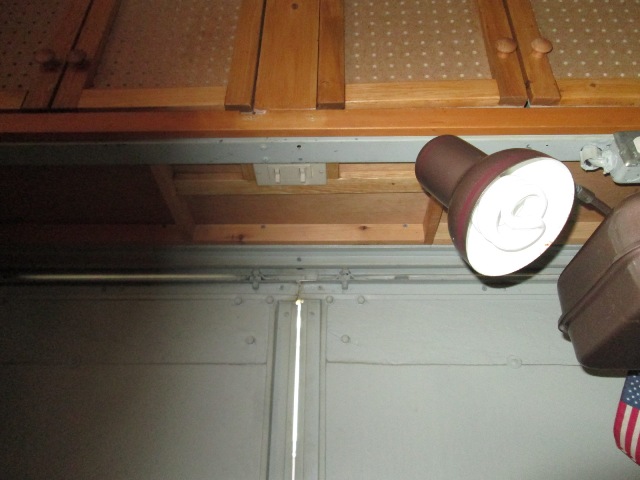
Screwed in adapters on existing porcelain fixtures. Briefly thought about deeper boxes and change to receptacles. Plugged in the lights (circuit is plugged into a switched receptacle). Hit the switch...

HOLY CRAP BATMAN!!!
This is after I added switches but shows all 4 bulbs going wow.
Wow, 40 watt bulbs times 4 shouldn't be 4x brighter than 2 100watters. Jeesh--just crazy bright. That's not going to work.
As both lights are on one switch I opened them up (modification #2) and added the chain pull switches so I can have one or the other on or both if really needed. Help a lot but reintroduced shadowing with the lights at either end of building....But I really only need 2 bulbs. Well I figured out what I need or what I don't- thinking I could pick up a couple of single bulb fixtures. Then I realized I have the parts. I could drive 1 bulb each fixture from one ballast-then I realized I could drive the remaining tubes form the other ballast...If / when I really need light. On to mod 3
So I pulled down the lights to do Mod #3. Opened them up and separated the wires from ballast to one tube in each fixture. Added (2) 5' lengths of 16ga 4 wire solid cable between the fixtures and connected removed wire to bulb holders of opposite fixture. What I ended up is the ballast in one fixture still drives 2 bulbs but there 4 1/2' apart or 1 in each fixture. Or more to the desired purpose, gives me the spread of 2 fixtures but with only 2 bulbs.

Well picture doesn't show but there's only one bulb in each center fixture that's on, plus I have bench light on. Main wall switch sends power to both center lights then control how many, 2 or 4 bulb with the pull chains. Works slick- good light, if a bulb fails still have same light spread by switching (driving) fixture.
Liking it, optional lighting. However within an hour one of the ceiling fixtures started humming. Then it really started humming. It wasn't annoying, it was LOUD. As only one did this I assumed it was just old ballast so open it up and swapped the ballast with remaining unmounted light fixture. That fixed it...for about an hour- what the heck. My wiring ?
I have some new electronic ballasts on hand. Reading the literature, checking wiring same noted they are good for 40 watts, 32, 34 or any combination. Hmm. The older ballasts have no wattage ratings other than 40. I don't want to install new ballasts if possibly my 'special' wiring is cause. I opened up ther previous light fixture I already had on hand. Its ballast says DO NOT USE anything other than 40 watt bulbs. Ahhh, well the fixtures I got from friend are obviously older- I'm assuming older than needing warning about the more recent energy saving bulbs. I looked at the fixtures and bulbs-sure enough, 2 of the bulbs which happened to be on the 1 humming ballast were 34 watts, swapped them for 40 watts. 3 days later still no abnormal hum. Too bad, have 10 of these 34 watters. Along with used bulbs friend had given me 8 more of the new 34s. Not worth the price of newer ballast though. However I may change them out, down the road mostly due to the heat though I dont know if the electronic ones run much cooler. Would save a tiny bit more power. Interesting but learning curve I didn't need
Then I added cabinet doors to over head shelf. In the process I ended needing to move the switch for ceiling lights. What I had on hand was a duplex switch. Though would defeat or duplicate the purpose of the pull chains i added, would be much easier to use. Did require some rewiring.
Disconnected wire to one of the ceiling receptacles. Ran a new wire from new wall switch to it. Nice. Stand there and play select-o light.
Other than hanging down and now functionless, they still work but duplicates wall switch. The pull chains are a bit annoying, to the point I'm opening up the lights again to salvage switches for use elsewhere if need arises. Lost count-4th, 5th I've opened up fixtures, but shops got lights!

Look ma-no pull chains. $8.00 for switches to put in the spare parts, .

Simple thing adding lights. Quarter to 9, pitch dark outside...Thanks George!
Back to top of page
Back to shop mods & additions section
Back to Our shops home page