Replace drill press motor bearings.
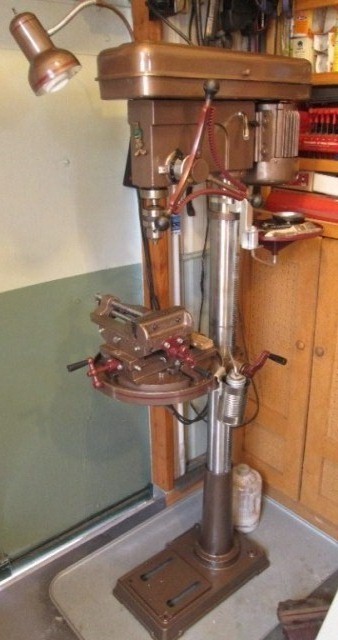
Well seems my 20 year old drill press rehab project wont end. Started out adding a light, then added a separate 110v receptacle on head. Decided to fix the loose handles which to turned into a complete cleaning and repaint of the drill press. Made a hanger bracket for the oil drain can. Pretty stoked with the way it turned out though wasn't planned. However after paint and reassembling initial startup of my "new" drill press was, to say the least, disappointing.
Something happened to the motor. I ended up pulling it to inspect because after I put drill back together the motor was really loud. Cant fathom what I did in repaint that might have caused it. In taking apart everything looks fine. Thought maybe something got inside while it sat outside, or somehow I managed to rinse bearing, didn't sound like bearing but def from motor? more inclined to think 2 days of sun just took care of whatever grease was left.
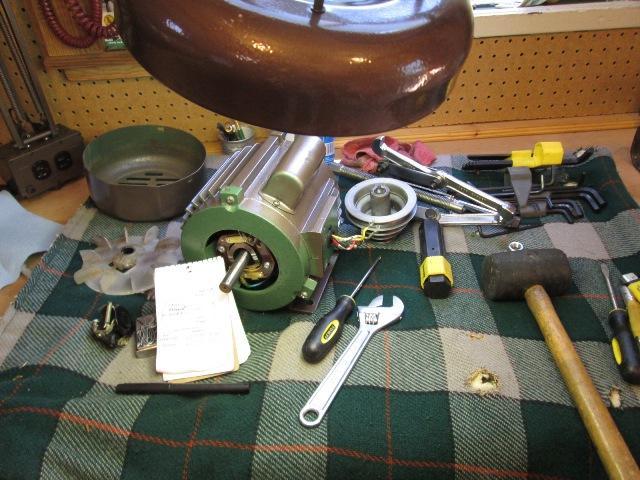
Dissembled the motor, everything looks fine-bearings don't seem bad. I cleaned & repacked them but made no difference. Made sure everything was clean & clear. But even turning by hand-just a scrape-scrape sound. Cant identify. Did get bearing numbers, ordered and in transit as Im at a loss.
Maybe wore and just reached the point that rotor is scraping though no signs of it. Works, just way loud. Too coincidental, it ran fine before the repaint. Noise though not a screech does become annoying to point all you want to do is turn it off.

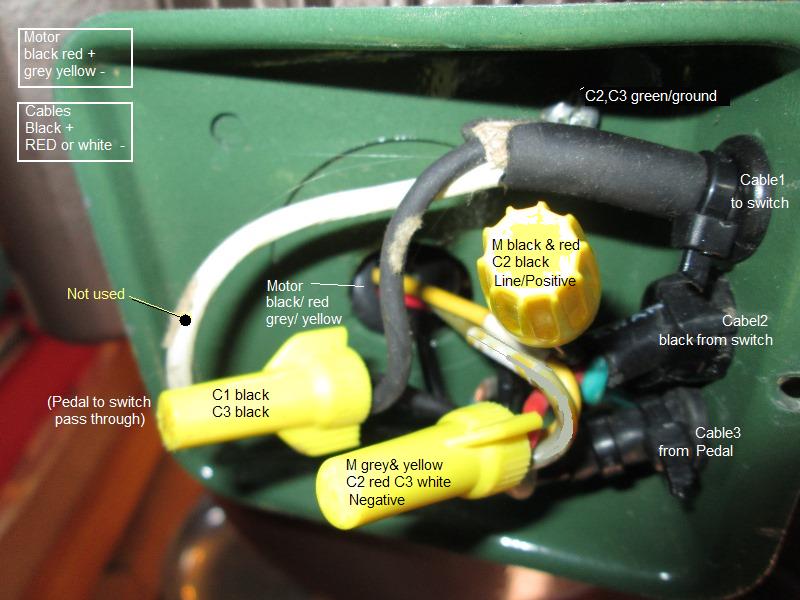
Mostly for my reference-just pic and record wiring
I did remount motor on drill to use until new bearings arrive. Kept turning it on expecting the noise to magically disappear. Finally gave up. Not knowing what is wrong -pulled the motor again to prep for new bearings. If bearing siezed (if the issue) or spun off center could end up replacing $150-200 motor. Not worth it.
Disassembly
-
These motors are pretty simple, just need a puller to take apart to replace bearings. All kinds of 'how tos' out there but briefly on mine...
First disconnected the wiring between motor and drill
Placed a couple of wood blocks under the drive pulley to support the motor.
Removed motor mount bolts, removed the motor and set on bench.
Mark shaft for pulley depth (though can be adjusted)
Use a 3 jaw puller if needed to remove pulley. Hammer will work if you can risk cracking the aluminum pulley.
Mine has a cooling fan, behind it is the starting capacitor switch.
- Remove the fan cover
CAREFULLY remove fan, mine single screw that clamps on shaft
Mine is capacitor start, I grounded each capacitor lead in turn to case then to each other to ensure no residual charge. marked orientation of the centrifugal capacitor switch then removed leads and then removed the switch plate.
-
Lightly tap/pry to get at least one end loose. Doesn't matter which end. Mine both ends moved a little bit but top would not come off. Lightly tapping with a block of wood on bottom (fan) end of shaft and the rotor slid out with top cap.
The top end cap though would not come off of bearing. I did try the puller, but it pushed the rotor shaft out leaving bearing in cap. I ended up having to use a drift to remove the top bearing out of cap. Shouldn't have been that hard, lucky I didnt crack cast top.
Used the puller to remove bottom bearing from rotor shaft. Cleaned everything, stuck the rotor in the freezer.
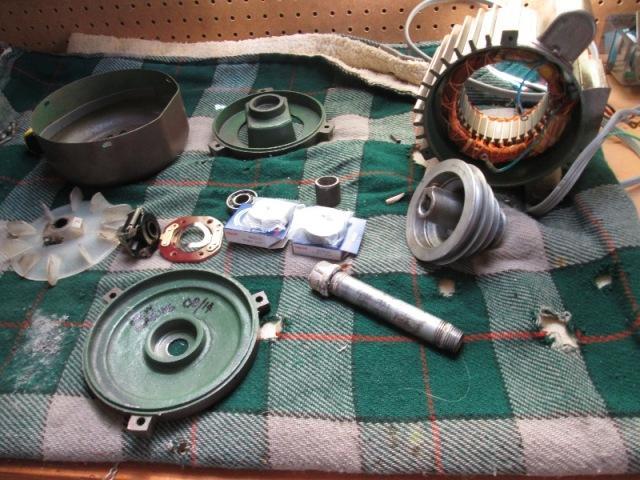
Plan is freezing the rotor, and heating the bearing to install. Because sometimes doesn't quite work, I made some parts so if I need to I can drive the bearings on. Bored a piece of 1/2" pipe to 5/8". This will work on both bearing using old bearings as spacers- if needed. Only as back up in case they stick half way, want to be prepared but I really don't want to be hammering. Problem Im seeing though is top cap so tight. Normally you'd drop bearings onto shaft, briefly considered driving top bearing into cap 1st, briefly. I instead used some emery to clean ID of top cap. Were some 'bumps' in machining but a lot of paint. I left rotor over night in freezer though a few hours usually good.
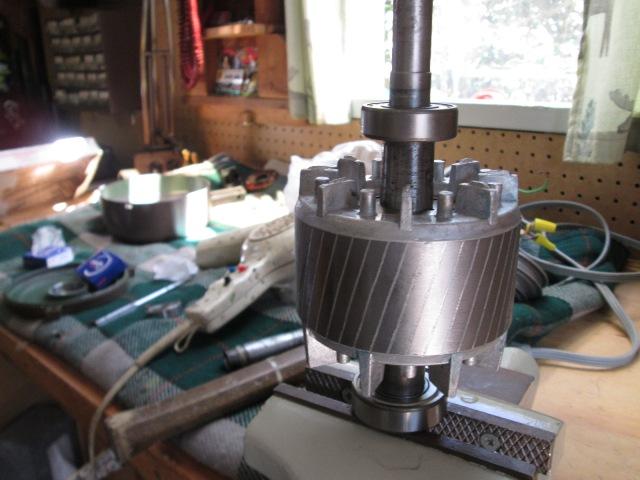
This morning going to install the new bearings. Used a hair dryer to bring bearings up to temp- ~160° in 5 or so minuets. Retrieved the rotor from freezer, rotor was at -22°. Sat rotor vertical and dropped bearing -it slid all the way home. Let it set a minute, flipped over and dropped the other one on. Cool, bearings just dropped on. Kinda odd when it took so much force using puller to remove. I think once temps have stabilized Ill heat the top cap, maybe wont be so hard to reinstall top bearing into it....
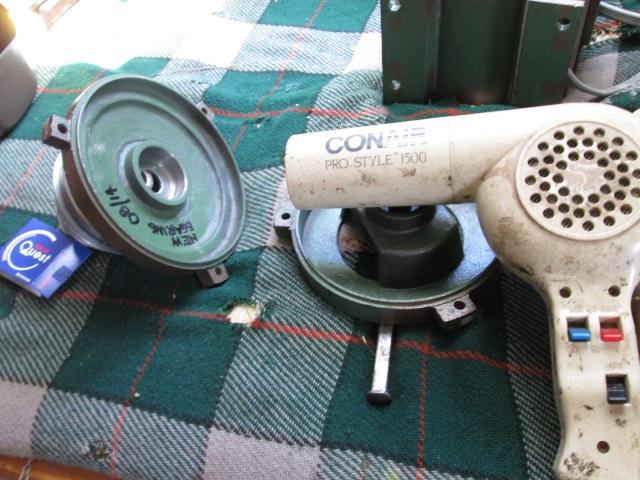
But checking on the rotor the cold is transferring to bearings, so sat up the top end cap to heat and hopefully take advantage of temp difference and it drops on to bearing OD....
Well went half way and stuck, though lightly & quickly tapped it down before temps equalized. Slid rotor & top cap onto motor case, reinstalled the case screws. Slipped on the fan side end on. Lightly tapped into place then used case screws to seat bottom bearing. As I really don't know if this is going to fix the noise problem I am testing as I reassemble remaining items.
With the rotor reinstalled, case ends secured, wired motor with a patch cord. Spun by hand then plugged in to bring up to speed and unplugged. Well its not scrape-scraping, but unsure. At least what I briefly heard was bare abel, a good sign. Reinstalled the capacitor switch plate. Tested again-same. reinstall the capacitor centrifugal actuator. tested same. Reinstalled the fan-adjusted the centrifugal, retested. A bit of whir from fan..but no change. Reinstalled the fan cover- no change. So appears-well wont say until its remounted on drill but appears 'coincidental' painting and bearing failed happened at same time...? Its by no means quite but something you can stand next to and work. Does spin forever compared to old bearings.
Real test will be back on drill...
-
Hooooly Cow..Bearing replacement fixed it. Wished I knew what happened. Possibly, as original bearings were open cage, just debris from sanding, blowing, paint dust? Who knows. Though cleaning and regrease made no difference. Doesn't matter now. Got nice low rumble of happy motor, mostly what Im hearing are the belts.
Just FYI, though you need to check yours if replacing, on my 1HP Taiwan Century motor, on my 1994 H/F Central Machinery 16 speed T-583 dril, motor uses (1) each;
- NTN 6202Z & NTN 6203Z bearings.These are shielded one side, open on the other.
I replaced with shielded both sides, no particular reason. If I knew these were going to solve noise issue I would have used sealed bearings.
6202ZZE Nachi Bearing Shielded C3 Japan 15x35x11mm Ball Bearings (bottom fan side)
6203ZZE Nachi Bearing Shielded C3 Japan 17x40x12mm Ball Bearings, (top pulley side)
Back to top of page
Back to shop tool mods
Back to Our shops home page