Rework & add LED side marker light
Recently when rebuilding drivers side rear skirt I thought might be nice to add side LEDs marker lights. Mostly to add a little instant gratification to task at hand. Decided not to though thinking be just duplicating taillights for side visibility, and drilling holes in my 'new' skirt. But after reinstalling the jacks realized the rear tail lights are hidden by jack & brackets. Also can't see truck taillights? -14 years later.. other than the reflectors at very bottom of wing I have no rear/side marker lights?Went and looked at lights. Most either require a large hole for plug or bezel needs to be screwed on from front. Found a set of Bargman 47-99-401 stud mount leds. They are small, 1"x2" with 3 leds. Uses a single 1/4"x5/8 long stud (bolt) to mount. The stud which also acts as ground, is attached thru mounting bezel, and the bezel is attached to light from the back side. No screws in front. Means stud could be changed to longer bolt to reach thru my skirt, or any length you want. Does either need a larger single hole or second hole for power lead. But as I saw couple of different ways these that might work I took them home.
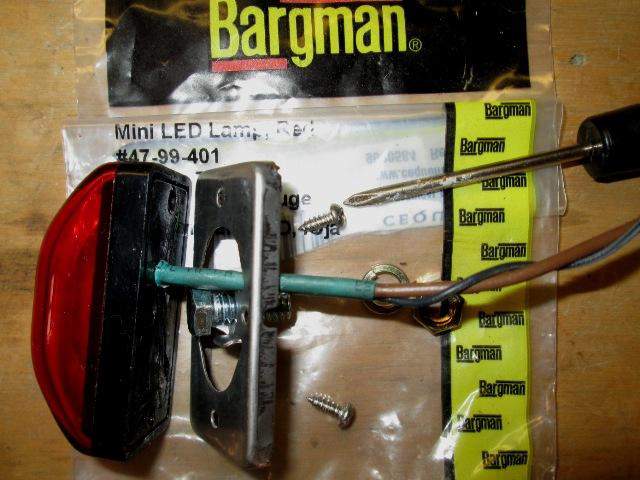
This one I've already reworked ( added black ground wire) but just showing how they are assembled. They lend themselves to options.
Im going to mount them at same elevation as trucks fender lights. Just on the inside of skirt is power & ground wire feeding the license plate lights, making for easy connection. At least drivers side. When I rebuild the passenger side skirt, depends what I find. I will either run wires across from this location, tap into right taillight, or I might find existing accessible wires open.
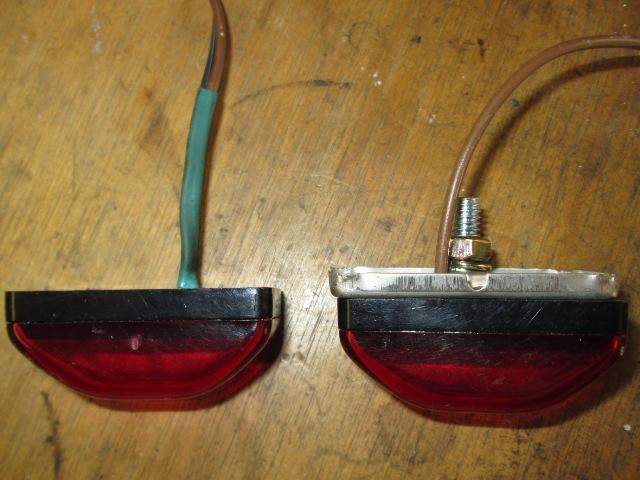
After & Before
Originally was going to just swap removable bolt/stud (shown on right above) for longer bolt that would go thru skirt. Would require drilling 2 holes, I) 1/8" for wire & 1) 1/4" for stud or 1 larger hole. Run a ground to stud (these use base for ground), hmm. I don't want to do either. Plus the mount, though nice and is stainless steel, would be hard to seal. Its just a shell and probably would cut into the filon. Sure wouldn't use on a painted steel surface. I briefly thought of filling base with hot glue to make it a solid face, which would work.
But it occurred to me, except for the ground I could 'stick' on. I just picked up some double sided molding tape. 3M super strength molding tape. Its awesome stuff. Could remove the metal mount base altogether and stick on the lights. Using the tape to mount, I could nix the stud & extra hole. Just need a ground. Light has a male spade pin that simply protrudes from light & contacted base, I could solder lead to that. So thats what I did.
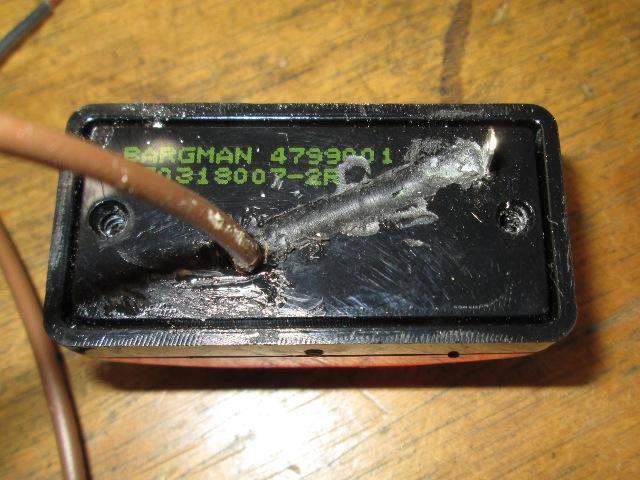
Used small ball on dremel to carve a groove between ground pin and power lead. Carefully, need a little more to fold the pin over and solder so it ends up flush. The circuit board isn't much more than 1/16" below plastic.
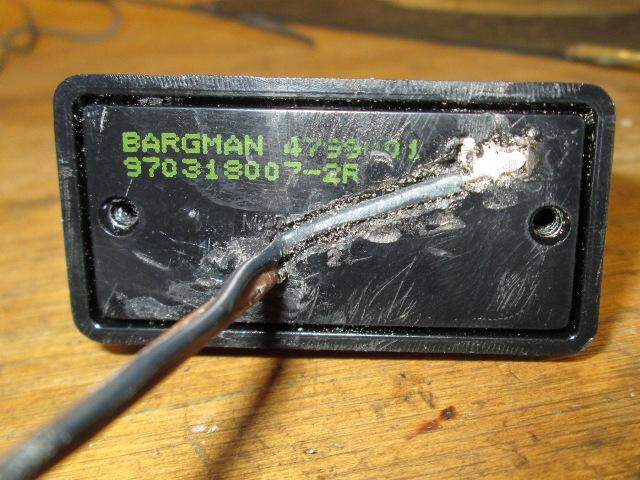
Lightly tinned back of pin, folded over a bit, lightly pushed on it with iron to melt plastic. Soldered 20/22ga (.06 O.D sheath) ground lead to back of pin (so it ends up on top when done). Super glued the lead to base in groove and about an inch up the hot lead. Shrink wrapped both, more super glue from shrink tube to base. Tested.
Hey still works! Used a bic lighter on the ground wire briefly and ensured ground wire sheath was flush, mini filed on the soldered pin. Now, using the tape to mount, all I need is a single 3/16" hole in skirt.
Kinda fun, a distraction from working on the skirt rebuild. When the skirt was finished loaded camper on truck to get placement for light. Not exact but just wanted more or less in line with the fender marker lights. If the design of the 7led Maxxima M36180R I used on truck allowed, would have been a nice match, But if I remember they used the pl2 plug and needed a pretty good size hole.
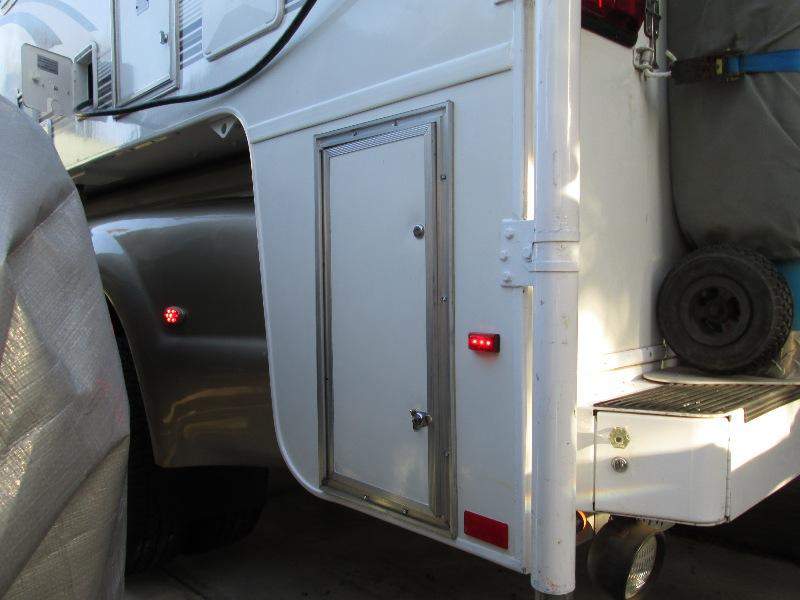
Nice is I can just see the light when backing up. Better visual than trying to see past glare of truck lights guestimating where end of camper is. Reinstalled reflectors, also stick on.
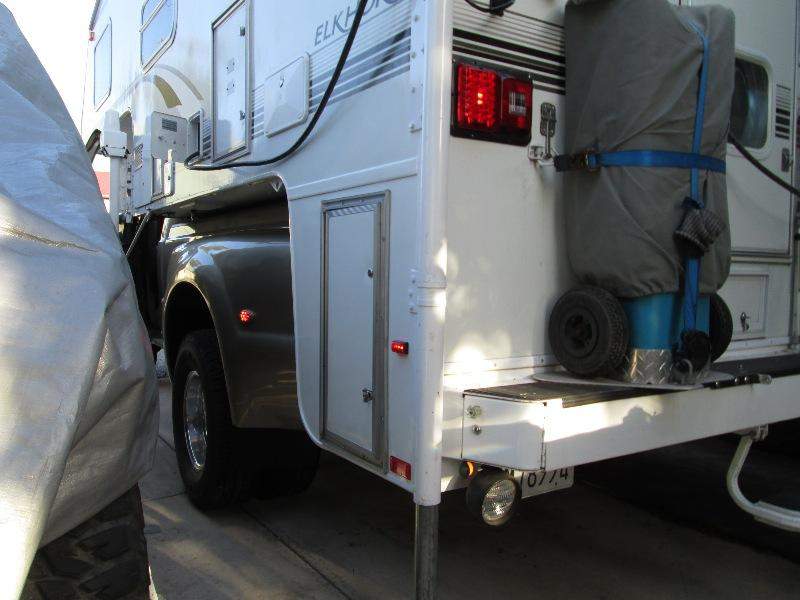
Anyway simple side marker light addition.
Back to Ourelkhorn Camper Modifications page