Insulating the camper 01/09
this will be an ongoing projectPart 1 Isolating/sealing
01/10/09-reattach 110v cord box to wall, caulk inside, wrapped with foam
01/17/09- seal propane box thru floor box vent and box, seal all pipe/wiring thru wall penetrations, holes,
Part 2 Insulating, wrapping & lining
01/22/09-insulated exterior surfaces of tin boxes (that protrude inside camper)
01/23/09- insulated interior surfaces, lined all the tins boxes, found another box, the generator box
Part one Isolating/Sealing the camper 01/09
introOn our camper, like most I presume to varying degrees, there are a lot of areas behind cabinets, wall penetrations that could use some serious insulating. Or paths that leads to other open areas, for example the plumbing in bath, pipes are not sealed-go thru wall that lead to dump box area cabinet. Lots of paths for air to travel. That and areas that transfer cold/heat like all the tin boxes, ie. 110v cord storage, propane bottle box, etc.
I've in the past spent a bit of time trying to separate, isolate some of the areas behind the cabinets. The one side of our camper is just cold. I used cardboard and divided the space behind cabinets into separate spaces. Thinking this would help with the air movement. It did a bit but not that much. It still felt cold. I also used tin foil crammed around pipes to seal.
We recently camped and it was 19 degrees at night, we had both cat heaters going-cold. Back at home ponder the heat situation I went to RV.net. There a fella "Pjay9" posted on RV.NET how he was using foam board to insulate the tin boxes. I thought what a great idea! & timely. Maybe what im feeling is just the cold being radiated off those boxes, causing the air to move. Which it does both. (link to article & photos on RV.NET)
Post on RV.net got me motivated, however when I started, discovered I had some serious 'prep' work to do....
Where to start 01/10/09
So I figured I could start & just do the cord storage box, with a free saturday I planned on just using some old blue sleeping bag pads for the chord box. If it seems worth while and after checking if I can access, Ill get some foam board for the larger boxes. It looked like its right on the other side where I should be able to access. 'Pjay9' put the foam from the outside inside the box, I decided to wrap from inside the camper so as not to take up space inside the box. Well its level with the floor, behind a little half walled cabinet. I pulled out all the cord, Went inside got down on floor, removed all the stuff out of the cabinet, looking to see if I could access to wrap... "Hey! I can see daylight?????"
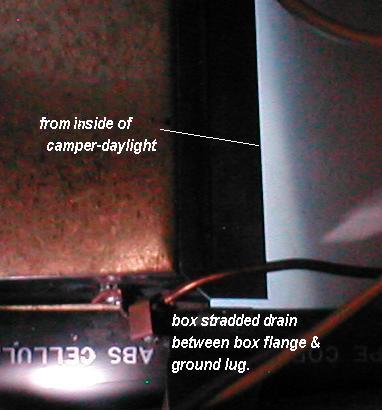
The problem. Lying on floor looking to back side of cord storage box,
Thinking in rolling up cord when storing I probably pulled box loose, I tried to push box back, wouldn't budge. So I removed the piece of paneling..to see why. There is a ground lug installed on bottom of box, ok... the lug is on this side of drain pipe, the box flange on the other side (bout 2 " from wall), there are no signs in the flange sides or bottom that it had ever been attached to the wall, only along top. There also was no caulking on the outside. So its been like this since camper was built...GOOD GRIEF. Either someone forgot to finish attaching box and then someone else installed lug, or the box had lug pre installed, bottom wouldn't fit against wall cause the lug hit the drain- and that's how it ended up, just stapled at top . I had never pulled ALL the cord out before, I never laid on floor and looked to back of cabinet...-Welp "There's the Problem".
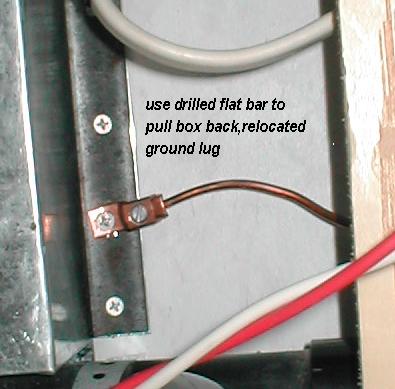
Lying on floor looking to back side of cord storage box, The Fix
Removed lug, box will go back now, I couldn't get a stapler back there so I drill 2 pieces of flat bar, screwed thru both side flanges into wall to pull the box back. Went outside to caulk, that was fun, door opening is a lot smaller than inside of box. Took bout an hour but its fixed. Relocated the ground lug. Wow that was a LOT of open air-no wonder it was cold..and I really WAS feeling air. Reinstalled the back of cabinet.
Back to top
Taking one last look after fixing cord box and turning light off, thinking good job!, that's going to make a huge difference!-Hey its kinda bright in there-There's light coming somewhere off to the side! Beside the cord box is the propane box. Its about 6" off floor. Yup, There's light coming in around the vent tube thru floor going to propane box.
Expanding Foam-I used expanding foam to fill voids around the vent tube. Inside the propane box, sealed the back side of the vent tube to box, and sealed box to wall. I was going to take pics-but that spray foam is just MESSY- once I started no way was I going to touch camera.
1/8" ply wood access door to shower plumbing, sprayed with what was left of foam-trimmed for snug fit.
I also used the foam to seal all the drain lines thru wall & floor holes in various cabinets. Also sealed other holes for wiring etc and sealed the holes where dump pipe goes thru bottom-it was huge gap (foam doest like upside down holes, have to back once sprayed or it will drop, . I've pretty much I think found all the entrances for air. Checked all cabinets, fridge etc. Last place I want to check is small metal box where camper/truck plug goes thru wall, but that will be caulk. I also need to caulk the hole where battery cables come thru its box, got a grommet put its twice the size of cables. Already got the one from gen compartment. Spent about 4 hours and I believe I've effectively isolated/sealed the camper from any outside air.
update: yup when wrapping batt box I could where camper plug wire enters-I can see a bit of daylight. However Im going to be adding some wire for refer/ ign wiring later so for now its ok.
So that's where Im at. My insulating project turned into a isolating project. This has gotten real wordy...Next, as I get around to it, will be get back on Insulating the tin boxes, the backside water fill where hoses attach, back side of outside shower box. Just wrapping, insulating stuff, primarily the outside of propane and battery boxes, backside of fill tube door, This will probably be an ongoing project, so Ill just add photos as I go. There are GREAT photos showing areas that Pjay9 used the foam board (linked above, I wont get that serious, but there's a lot that can be done without to much effort. (less you need to fill holes :) Every bit helps
That's it done with the hole plugging and foam--on to the insulation
Back to top
Part 2 Insulating inside the camper 01/22/09
Well I finally started the insulation effort. Decide not to use the foam board. Purchased 15' of 48" Reflectex (like bubble wrap alum. foiled on both sides) a bit cheaper & thought it be easier to work with, a roll of duck tape for sealing edges, taping to walls etc & 2 rolls of thin double sided carpet tape to attach to boxes, hold in place, at perimeters, butt joints and in the middle of large pieces.Started covering the boxes inside. I was going to glue but since its so cold I didn't want to be stuck inside with the fumes and it actually the double side tape worked out better. I cut pieces to fit, laid out the carpet tape, either on box or backside of insulation (depended on what would be easier). Then Id seal edges with the duct tape. To be really effective the edges of insulation need to be sealed. Obviously some places you cant reach, and since Im also going to line the boxes I did the best I could, anywhere I would have difficulty in sealing edges I cut the pieces to the size I could reach & seal. Then finish the area best I could seal all edges. The most time was spent trying to get small pieces of tape and seal edges that were difficult to reach. Other than that went fairly well.
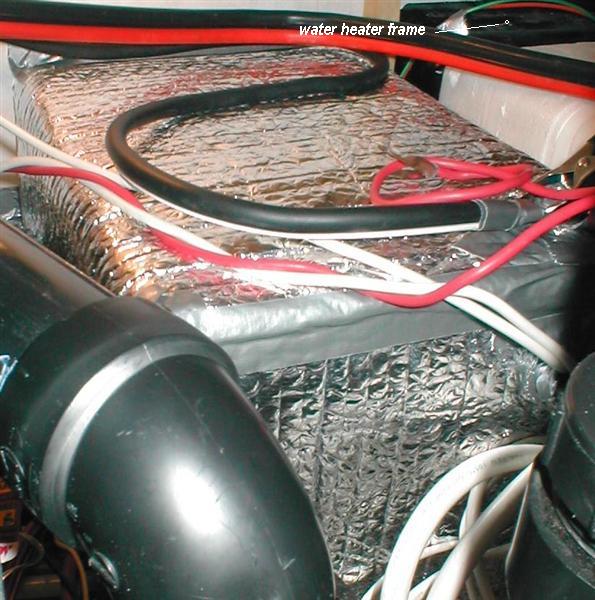
Battery box all sealed up-nice...think this is going to work. There's a 4" surround on the water heater-Im questioning how hot this get-Ill check-if it doesn't get too warm Ill insulate
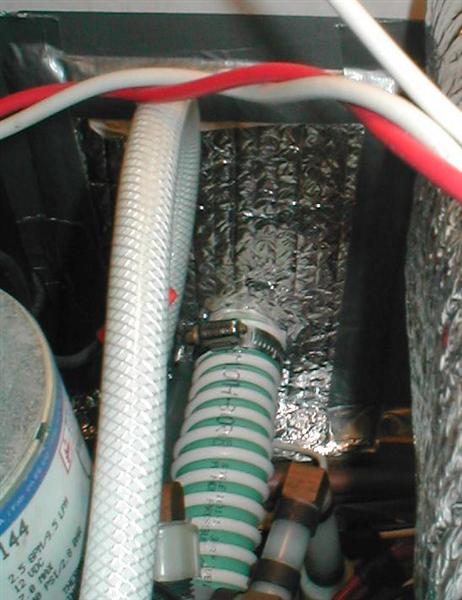
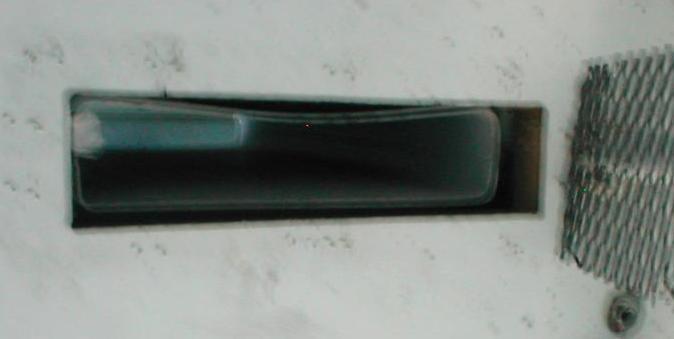
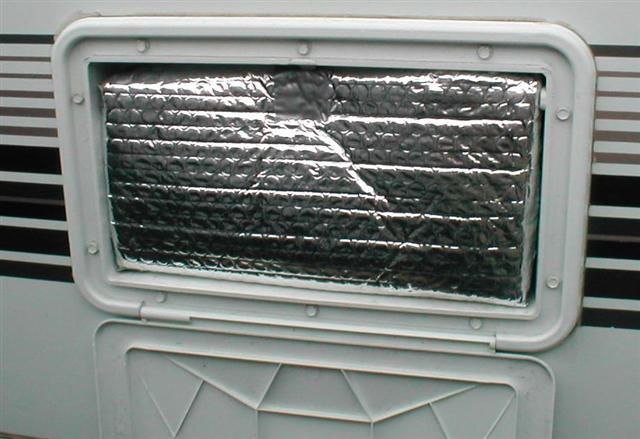
Back side of water fill. Just a thin piece of translucent plastic between us and the outside world. Used 2 pieces of insulation. Discovered when doing this and battery box, the vent hose has 2 major kinks. Project for another day, Ill need to remove power panel/converter to access. I use a piece of garden hose shoved down inside the fill hose, it stays there, so tank vents thru fill hose, fixing isn't critical, but now that I've seen it..., Don't know why they use cheap plastic hose for vent/drain lines, they always kink or collapse.
The propane box gets REALLY cold-lots of corrosion on top, so lots of condensation, huge heat transfer. The drawer slides even rusting, course there were 2 major air leaks. (The brown on box was old plastic tape)
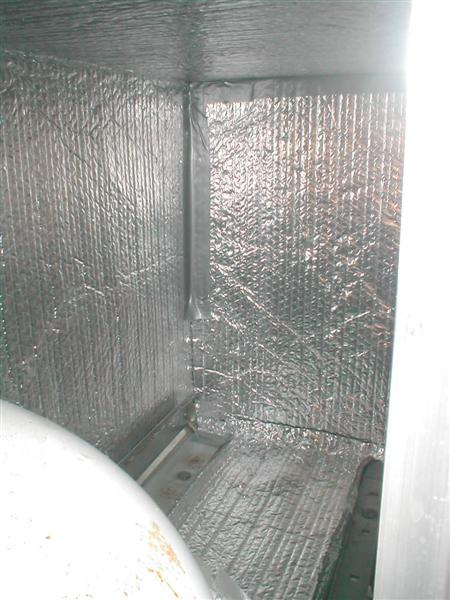
Another view of propane box. Fair amount of space on sides. Drawer removal allow access. There's also a small cabinet on floor, box sets bout 6" off floor. I was able to wrap box pretty tight except at exterior wall-I cut pieces large and shoved against walls trying to seal. The foil does conform a bit-it'll have to do-plus again I am also going to line inside of boxes-
The propane tank box all wrapped up. I put 2 layers on top even though Im going to line inside. The access was large enough I was able to seal top.
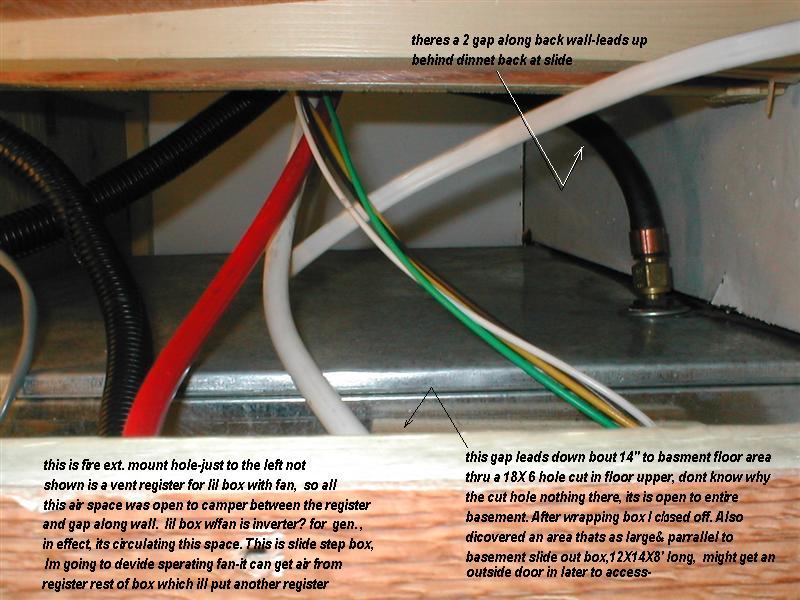
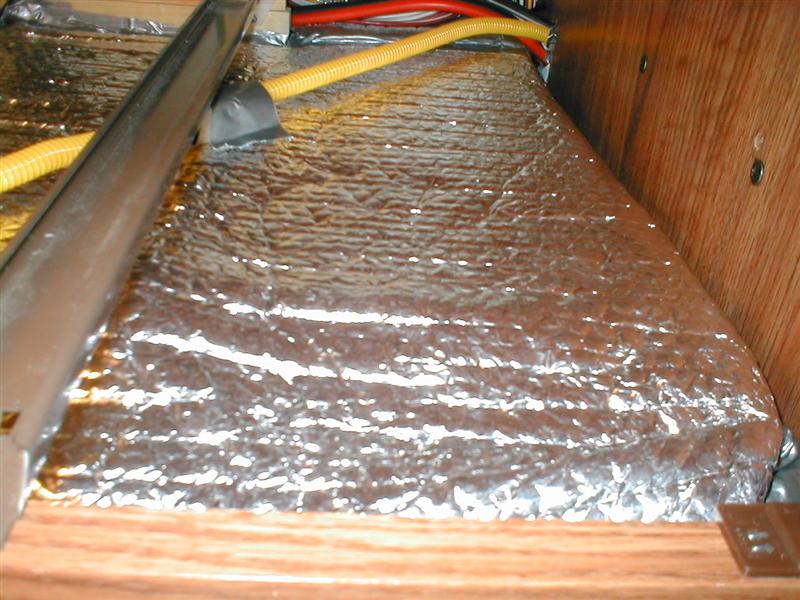
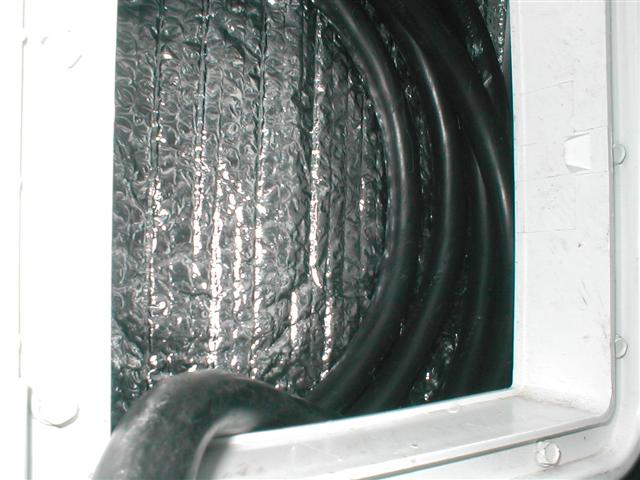
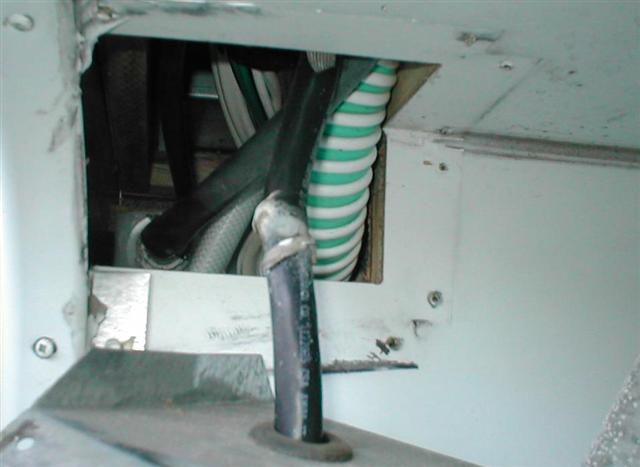
I had previously found that gen box was exposed on other side of fire ext. mount. Saving this for last-I remembered just seeing the box-I opened up expecting to just add a couple of pieces of insulation. This turned into quite a big deal. Not only was the entire top and side exposed there were several open areas to basement space. I spent about 3 hours in this area alone. See pic. Lots of open areas to fill. Another huge source of cold air. Will also help A LOT with sound from gen, as gap along the back wall led directly inside to living space.
The step box to slide is full length, where fire ext is mounted. The interior of the box is divided in half, which when you open the flip lid, one side for storage, the other half is box for wiring, inverter etc. Im going to cut lid in 3/4, I can move the divider enlarging the storage side and put in an other register to vent the inverter.
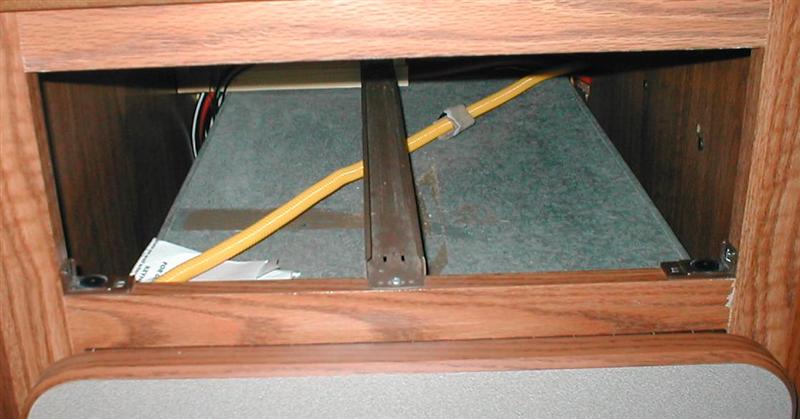
The biggest surprise was how much unused area there is in basement. Even the top of the gen box-huge area. I could easily use some thin plywood to enclose top of gen box stopping at wiring-put a door outside, big enough to hold bbq etc.
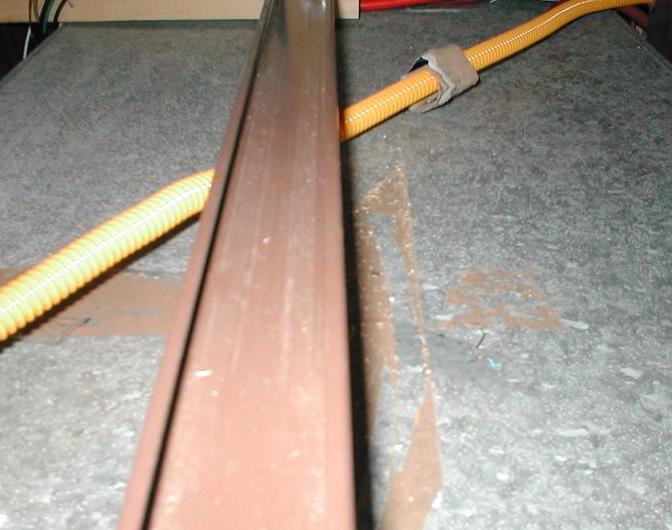
Then there's the area along side the basement tray. As noted, full length of camper floor, its huge. From outside it looks like there may be framing, but even if I could only put in a door half the width of area it'd be enough to store fishing poles, collapsing ladder-wow. If the framing is not next to existing door I might be able just to use a wider door. This is definitely on the round toit list.
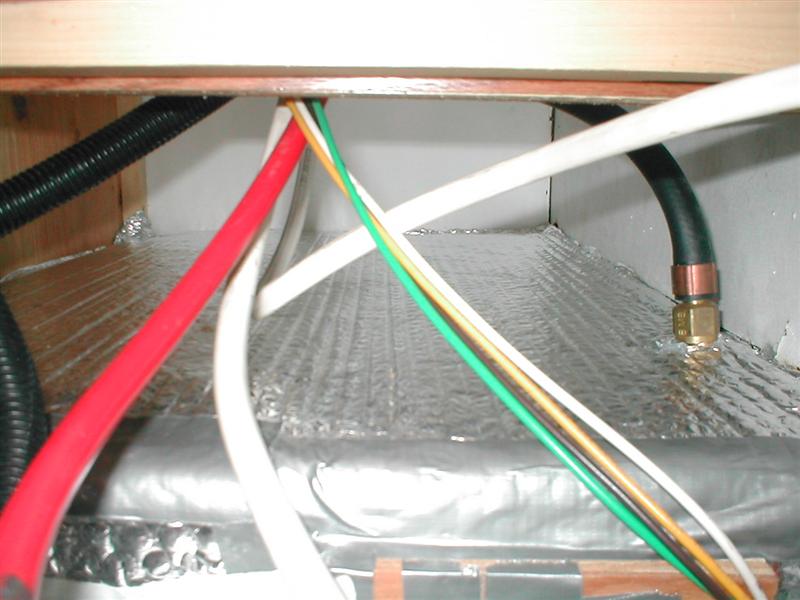
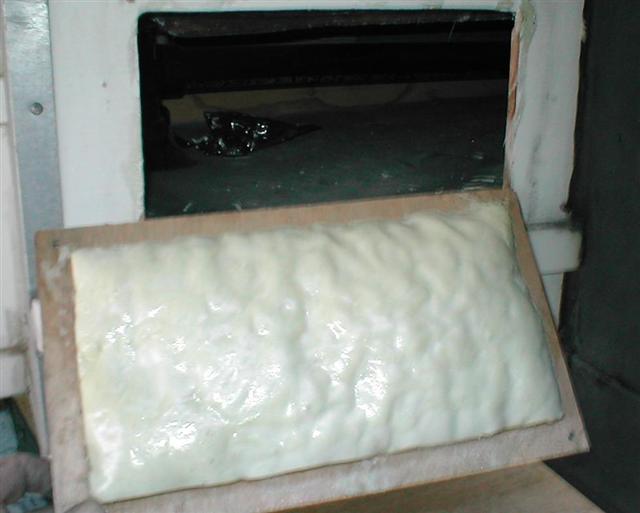
Generator box isolated, insulated & sealed.
very cool-this has too make a HUGE difference. The only thing I haven't done is under sink. There's some large areas up around under sink that lead up behind shower walls, I need to fill. At that time I'll wrap the outside shower box. The outside shower hose retracts to inside the camper thru box. Im removing hose and plugging hole-need to check if it can be reinstalled from exterior side, if not 'they' can take a bucket shower. Keep the hose & head in a bag and store elsewhere.
Back to top
Part 3 Insulating (lining) the tin boxes 01/24/09
Well after doing the inside, lining the interior of the tin boxes from outside was a breeze. I'm going to pick up some 3" alum tape and cover all corners/edges.
Line the cord box, yet to do is reline with some plastic or something so as not to tear up the insulation.
Line the propane box, used lots of double sided sticky tape. As Im going to use the aluminum tape on the edges I didn't get to serious about sealing exposed edges. Also Im bending up a couple of wire hoops to insure ceiling doesn't sag. One of the places that I probably should have used glue. For now I just laid pieces of insulation in bottom. I may foam it because of the slide tray. On a warmer/drier weekend.
Line the outside shower box. Well actually just made a small box that fits in. Going to add a gasket to door. We never use this, 'cept on occasion I turn it to flush -dead end water lines. My 1st thought was to pump it full of foam, but ya never know, plus there's the plumbing.

Lastly lined the battery box. As its a continuous piece up the side over the top & down + its so small it cant sag onto battery. There are terminal protectors and the handle also.
The tape? There's obvious water getting in the box. Box is vented by the door being shorter than the frame. 1/2" gap at top 1/4" at bottom. The tape will help get water out and keep it from blowing in till fixed. It can still get air. This is a dumb design. It works but it leaks, Im going to make door taller so water cant run in. Put 2 small lovers in door maybe, Possibly eyebrow drip rails. Figure something out. I've never noted this before. However the camper is usually covered so keeps the rain from blowing in. When camping or traveling and its raining never had a reason to check batteries. This is now priority one. The Propane box door uses the same design, but the gaps are smaller. If a good fix comes to mind Ill apply to it also.
Welp that's the end of the Insulation turn isolation project. Probably 95%done. A few items that'll be round toits, foil tape, under bath sink etc- but I'm sure will get picked shortly. It did bring up a couple of items that need immediate attention, door leaking, kinked vent hose. And a couple of opportunity s to create some more storage space.
All in all a worth while project, if only because of finding and fixing 3 major air leaks.However Im sure insulating the tins & sealing all voids and air paths will help a lot with heating, the gen box also + noise. Cost about $60-which next trip out will be a few degrees warmer / longer requiring less heat...ya definitely worth it.
Update:When I started the wiring for adding a relay see relay page I wanted to run wires thru camper main plug box. I noted earlier (see above) I could see daylight where the main cord came inside. I didn't insulate at that time cause I knew I was going to start wiring soon. But when I removed tin box outside -wow! there's this HUGE hole. I insulated and sealed after running wires. I also found the kink in the water tank vent hose I had noticed previously was accessible from this hole-who knew. If I ever need to remove water tank I now know its thru this hole to access vent and fill hoses.
Back to top
Back to Ourelkhorn Camper Modifications page