A place to sit
I finally came up with an idea so we could lounge in the camper. The dinette seats, though comfortable are not designed for relaxing, watching TV, certainly not for dozing off...Ive been pondering this one for a while, I kept leaning toward replacing with recliners but that wasn't practical. I would lean the dinette cushions and put pillows above but still really wasn't comfortable. One day i started looking at it again, just playing with different cushions, trying different things then realized if it were 1 big cushion....I happened to have a piece of 1/4" Plywood-some old cushions from an old bolt together couch, made of rolled 1 1/2" foam, about 24" X 4' long when unrolled. I also had a bag of batting left over from a speaker project.
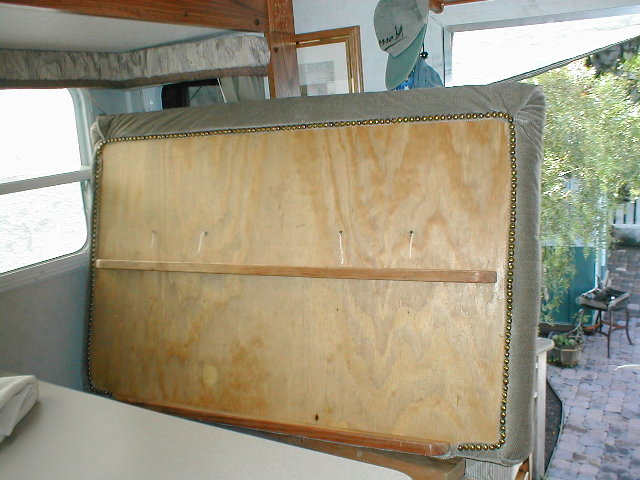
I cut plywood to width of Dinette and at a height to catch my head. Laid some pillows against-yes this will work! I added 1x2 at bottom for setting on dinette cushion and one at middle above top of dinette cushion height at full tilt. These also stiffen the plywood. Sanded all nice & smooth and shellacked
Using my recliner at home as a pattern for the shape of the cushion I cut & layered foam together using spray glue. Its the contour of the back that makes it comfy so take your time, pics don't show it but its kind of a "S" shaped profile. Difficult part was cutting foam at angle so when layered there were no ridges. Cover shaped cushion with a layer of batting. The batting really gives that pillowy feel. A pain to work with.
When I finally got the shape right I picked up some fabric. I Sandwich a layer of batting between the fabric and an old sheet for backing together, (Sewing machine really liked that, this is where project almost went out the window) I ran stitches across fabric just to give it more of an upholstered look and keep the batting from shifting. I was copying my recliner. It has 4 buttons in squares that makes it kind of pillowy. Plan was to do 2 sets of 4 centered each side (but when I got to this stage plan changed). Stretched fabric over plywood and stapled. This wasn't as easy as I thought, I had to removed and restaple a couple of times because as you stretch & staple it tended to move, so keeping it square to the plywood was challenging (second occasion project almost came to a halt). Picked up cool tack strips to cover staples. I then added buttons. Gives it a nice look plus it pulls the fabric into the low areas. Makes the cushion poof but there a pain, so I just did 4 instead the 8 I originally planned. I can add later.
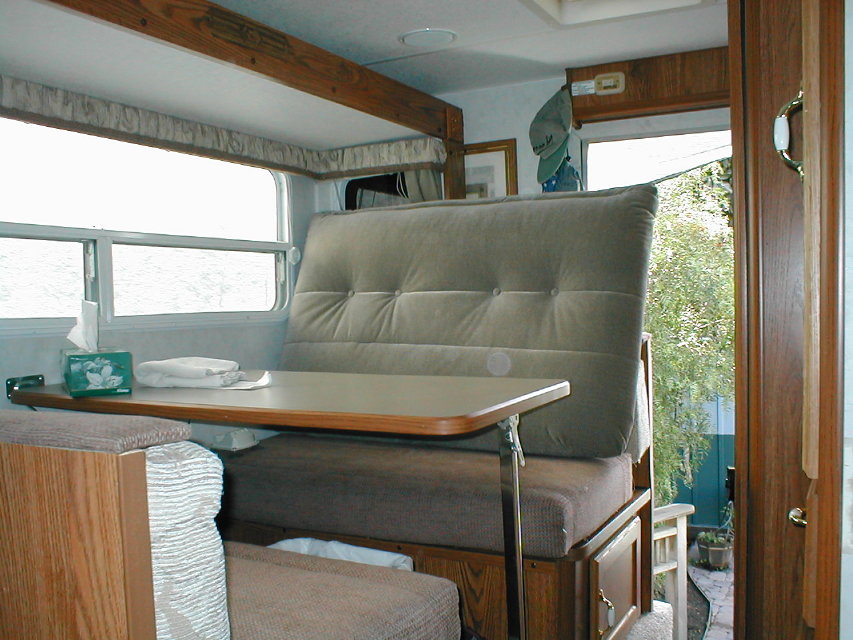
When I finally got it into the camper, tilted to just the right angle and set in it...ohhhh nice.... but it wasn't that comfortable. Felt like you were going to slide off. Making a few trips back & forth into the house and looking at real furniture I figured out it was the dinette cushion bottom being flat and fairly solid so your bottom doesn't sink down.
I simply placed a 2X4 underneath at edge of cushion, laid 2'x4' piece of 1/4" plywood on top - wala! Puts bottom cushion at about 5°. Not only does the cushion roll for your bottom it raised the edge to support under your knees. Ohh...now were camping! Ideally I could make a better bottom cushion but it still is a dinette , as it is I just stand new cushion upright and you can still sit upright for eating or playing cards etc. It doesn't weigh 5 lbs so its easy to switch sides and if we need to make dinette into bed it will stand out of the way on cabinet beside main bed.
The slideout is in when I took these pics plus the cushion is usually on opposite side of Dinette table-so it doesn't hamper any walkway space as it appears in the pictures. You can also see the button cords, I left extra in case i need to tighten or adjust if I add more buttons..
All in all this was the most difficult & frustrating project Ive attempted on our camper. The only reason it got finished...was the result I could see in the end. Which is a rare motivation for me. Most things I do, I do simply because I enjoy doing it and the end result is just justification- not the end result that motivated me to start a project. Most projects that seem like work or just a pain, no matter what the end result, don't get started. So this one was a test-but its the one I enjoy the most-every time we go out.
Also cut the large cushion a bit shoter and round the top corner. The other seat made small angled support for the back cushion and wood wedges under box top to slope bottom. Used the original front seat cushion to make headrest for rear seat. Back to Ourelkhorn Camper Modifications page