Modify curtain valance boxes
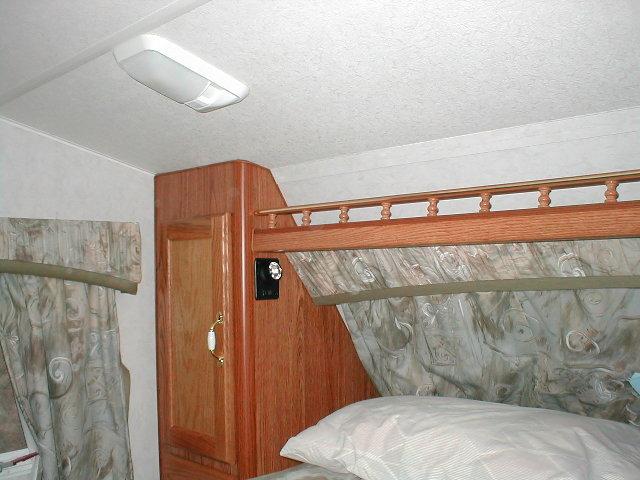
Finished installing cabinet door with replacement mirror I climbed up in the bed to open corner cabinets. Every once and awhile I check for dampness.Opening the doors on these 2 corners cabinets they hit the window valance box. They will only partially open. Something we've dealt with, never think to fix when home. But as I have time decided to finally address.
Removed the screws holding valance box to wall. Simply moving the boxes over an inch helps, but if I cut them shorter I could get more. The curtains are about 2" from ends of boxes would be easy to shorten box allowing to move away from cabinet and still have curtain centered on window. Also they don't need to protrude from the wall as far as they do.
I could also cut off the foofoo scalloped ends that I just hate, had done this on the dinette windows.
So out to the shop they go.
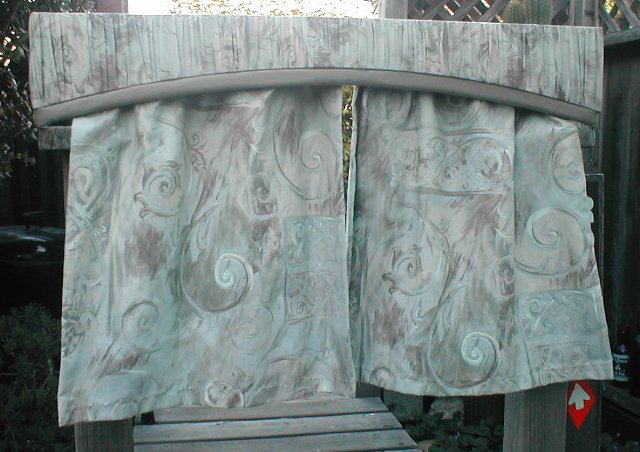
Just a Just a before shot in all their foofoo pointy toed glory. Sorry, some folks must like these boxes but I don't. Period, I don't understand, they cut into the view out window and just look silly to me. The only reason I hadn't changed the scallop on these before is it's a bit time consuming, but I have a lot of that now. The added door clearance makes it a worthwhile effort, Cleaning up the foo-foo just icing on the cake.
So plan is too shorten box length 3", cut the depth so stick out from wall is 2 1/4" instead of 3" and to cut off the scallop.
The boxes are actually 2 boxes made of 1/8" luan. The inner box is wrapped with a different material, kind of a trim. It is screwed to outer box. When I reassemble I'll just tape the material to luan where it's folded over, stapling the 2 boxes together will hold material. Currently the material is stapled, literally with a hundred staples.
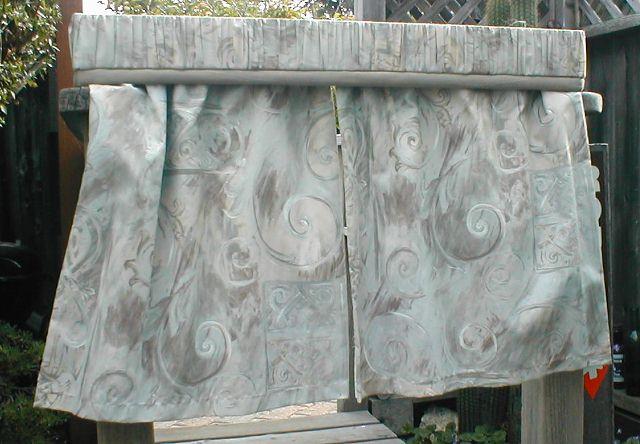
Removed the staples to access the luan, because of pleating I wanted to leave one side of material attached. Cut off 3/4" from top & sides of outer boxes to sit closer to wall. Trimmed 3" from one end on each outer box & inner box. Cut faces straight across deleting scallop on all pieces. I need to make one new end piece.

Got them cut, this is when Margaret came out...Guess I should have mentioned my intent....
Got one back together. Quite difficult getting the pleated folded back over. More difficult were the corners. These boxes have no structure. The end pieces until reassembled (after wrapping) just kinda flopping around.
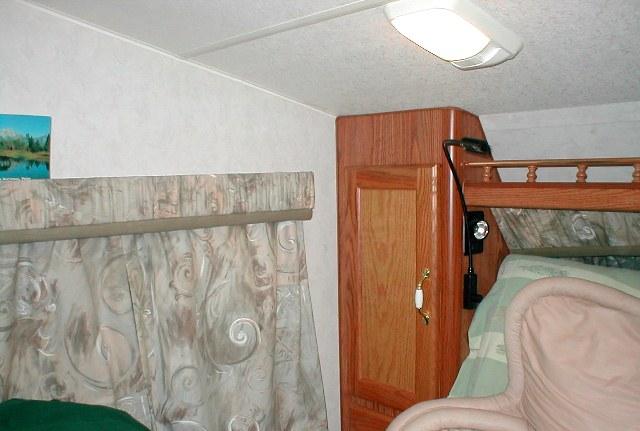
Reinstalled. Though I didn't take a pic on how much (or little) the door opened before, now both will open to 80-85 degrees where before it was maybe 60. What you can tell in the pics is though the after pic is at a straighter angle and the distance to door is still greater. Gives an idea how much more they will open.
Last bit of foofoo is the main front window. I had taken valance down quite a while back to lean it back. It was pointing straight down. But it won't be for a while. Thinking out loud here but I want to try to make an inside window with some plexi glass to help with the sweating. I'll fix the valance at that point, though it may get removed entirely.
I'm thinking after the window is dual paned, I may try and add another one with a spreader between the cabinets, create a back rest that we can still get light thru.
Or I may actually build a false wall with another plexi window to add a couple of inches of insulation. The front nose wall is the coldest in camper and we lean against the window so a back rest would be good. Extra air space & insulation would be good. Combining the 3 ideas hasn't gelled yet. Maybe next spring.
(update 2013)--well I had to replace broken front window. (see window replacement). Since I had everything apart I added what we are using now as a 'headboard". SImple straps but keeps us off window. (see headboard page)
Back to Ourelkhorn Camper Modifications page