Add PWM speed controller switch to Stove Hood vent, replace motor
- Intro This section and what Im doing
Adding new PWM Controller to hood panel
Fail videoOld motor just got louder
Replace motor and fan blade
Success!
Primarily to slow down & quite fan it also adds variable speed instead of 2speed it had. Additional plus is fan will consume less power at slower speeds verse stock. Factory switch uses wire wound resistors that decreased voltage to fan by simply burning off voltage as heat to slow fan down. I had added earlier to try to slow down and quiet.
Having just finished adding a PWM controller to our Fantastic Fan and stoked with the results I realized this might actually also solve the atrocious stove vent.
There are as many ways to wire in PWM controller as there are PWM controllers.. Just how I did ours. I had to undo/redo stuff I've piddled with over the years so convoluted. For most a very simple retrofit. Disconnect existing power & ground wires that lead to motor at source (campers vent switch/ ground wire) and reconnect to PWM output terminals. Run new wire from power & ground source to PWM input. Done.
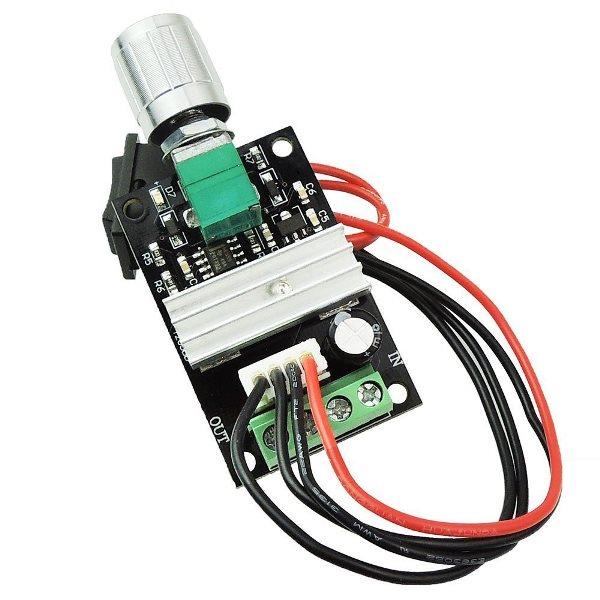
I used A RioRand 3 amp unit mostly due to better than average reviews, cheap. (motor rated at 1.2 amps) I had bought this when I purchased the one used on Fantastic vent to be sure one of the 2 would work. So it has reversing switch, which for stove vent unneeded but already had. You can just shove inside someplace or as i did solder the wires to fix direction or order correct one :). -for as long as link lasts Amazon link 3 amp PWM
This is on a basic single speed stove vent. I had modified previously adding resister and second switch to convert to 2 speed. This PWM switch Im using has an off position on the controller output but I'm running input thru stock on/off switch for a positive off, I don't want to see even the slightest millivolt energizing the board.
Note: duty cycle rating if shown, lower rating is how slow it will go, IE 10-100% means all they way down 10% power still applied. Some PWM controllers have an off position, on the output. Some rated at 0%-100% can still apply millivolts when fan appears off.
I'll start by adding this was a fail- the original motor is 17 years old. Slowing it down it only got louder..Ill add comparative videos at end.. Anyway ended up replacing the motor and fan blade. Newer motors are considerably smaller and fan shaft is also smaller requiring new blade. Old motors case is 2" long, the new ones are about 1 1/2" .
Once motor changed out the results were amazing. Noise level well its just not- at full bore the amount of air moving is loud but not obnoxious. The new controller, being able to adjust air verse loudness pretty cool. More amazing is the amount of power it doesn't use. I'm showing 0.5 amps at full bore., down to 0.1 with motor slowed down and vent door still opening (pushing air out).
Installed results to follow
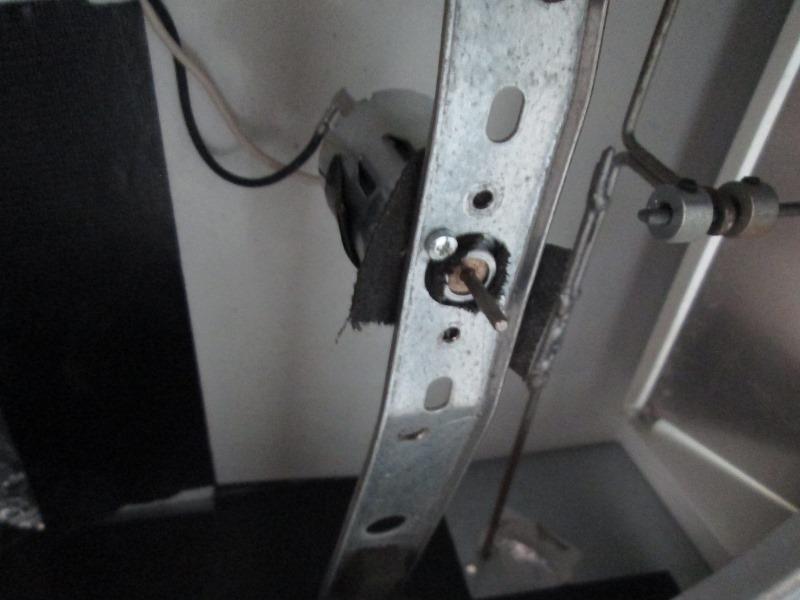
So first I dropped the hood front panel. Removed old 2 speed switch I had added. Then pull the fan blade to access motor, wires and resistor. Removed the resistors. Ran new wires from motor that will go directly to new PWM controller. (again step most wouldn't need). Positive AND negative MUST go directly to new controller. There can be no common/chassis ground after the controller to motor-it wont work.
Power (from existing switch) and a ground go to new PWM switch input.
- Modified controller
Decided I didn't want loose switch behind panel so unplugged it from board. At the 4 small contacts for reversing switch plug I soldered jumper from 12v in to motor out terminal. Solder the 12v - in to motor terminal (or the 2 inner contacts together). Doesn't matter which as long as the 2 terminals on left are connected to 2 terminals on right.
NOT THE LARGE TERMINALS AT BOTTOM.
I cant imagine anyone doing this but FYI
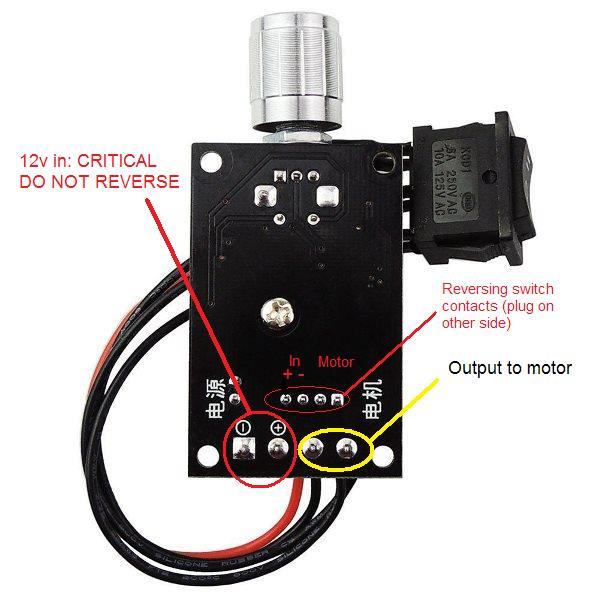
IF you do this and motor spins wrong way just reverse leads to motor.
- Mounted
 Far left is new speed controller, as I added to existing square hole I had to make a small filler to mount switch. Otherwise simple 1/4" hole. Replaced the chrome knob with old black one I had.
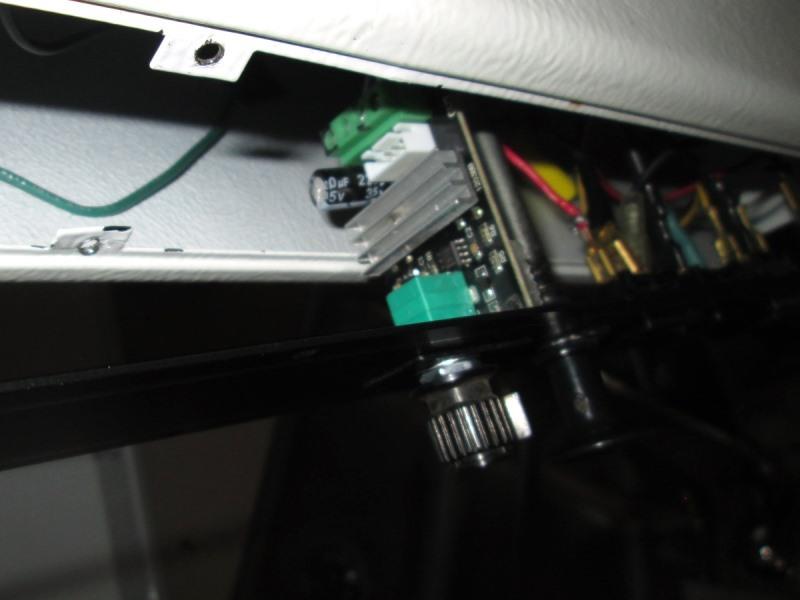
Little board is a good fit.
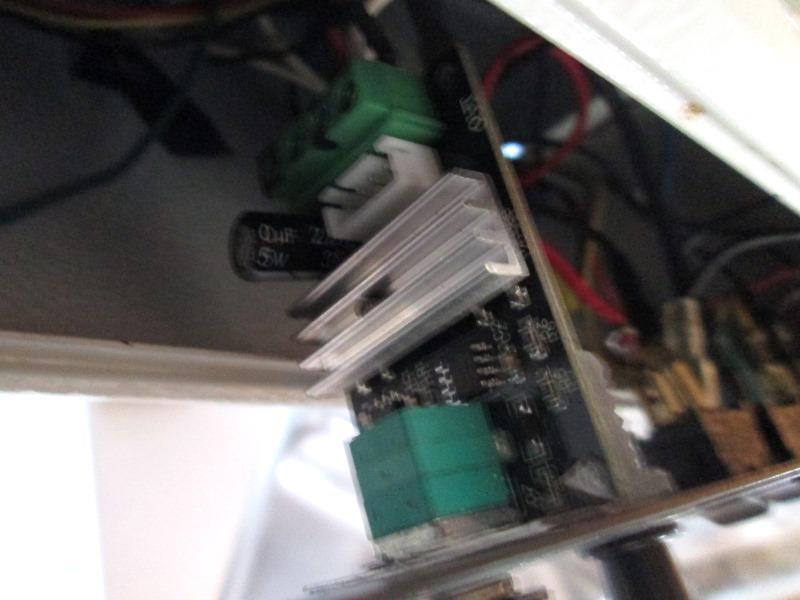
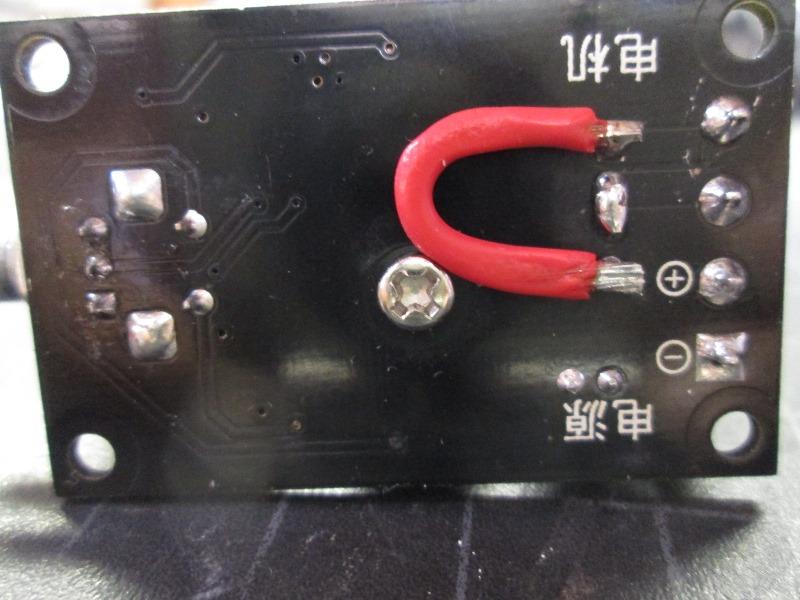
Nice fuzzy picture, when inserting wires into the terminal block, again ENSURE 12v in polarity correct, but lightly tinning the wires make them much easier to insert, also more positive containment.
Great anticipation to finally NOT hear the motor, turned camper power back on. Turn on the fan switch, in disbelief played with the speed...
Fail, drat- slower the motor is turned the Louder it gets....worse by far than it was. I guess at full or 3/4 speed of old switch was fast enough couldn't hear the rattle of bushings...whole housing is reverberating
Short video. PWM controller on camper stove vent-FAIL
Link if embed doesn't show
New motor on order....
- Install new motor and fan blade.

Motor and fan P/N
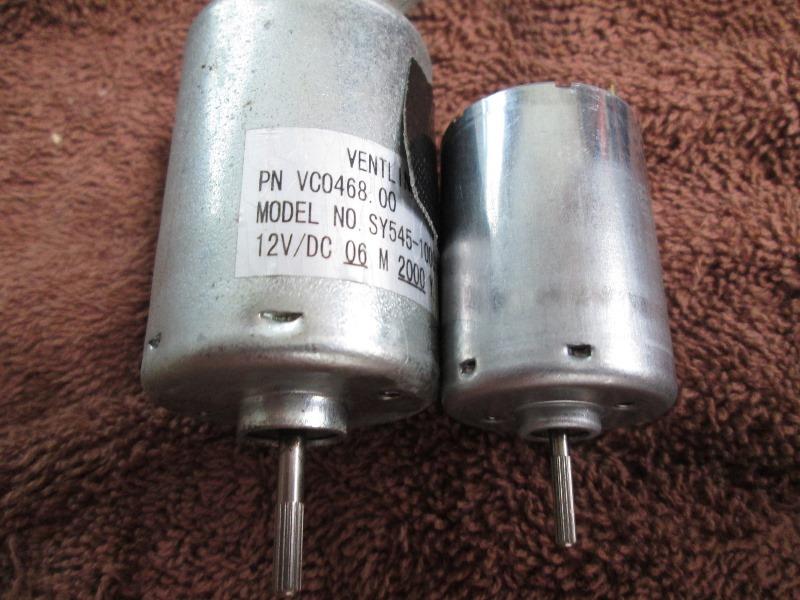
New motor is considerably smaller (1 1/2" long verse 2" long) than old motor. Shaft is also smaller diameter so a new fan blade is needed. Not sure what year motor changed but if yours is 2" long you have old style. New motor, sold as kit comes with a small piece of flat bar to use as drill template as the mount screws holes are different so you'll need to redrill hood motor bracket.. Also comes with new wires
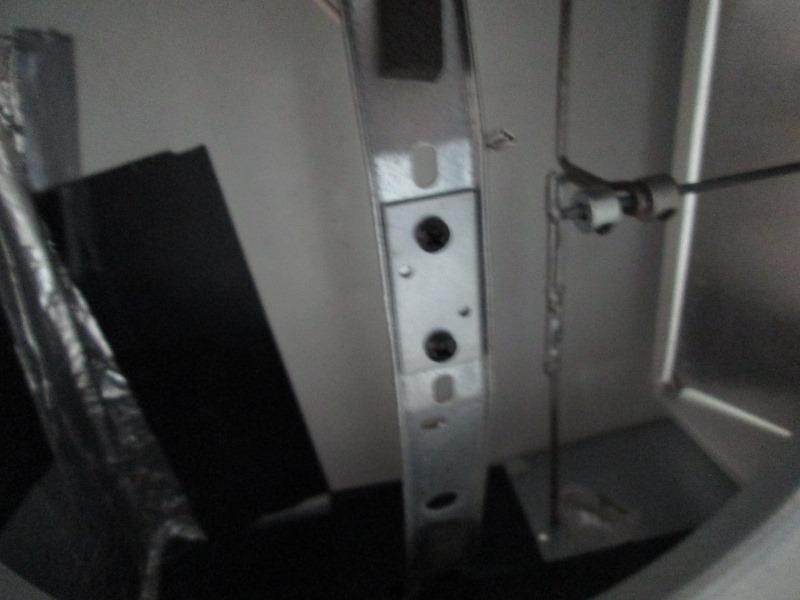
Looking up into vent hood heres the 'drill template' screwed to mount bracket. Not sure why but a lot of folks think this is a mounting bracket? It is just a guide to drill the new holes. A 3/32" drill bit is used thru the 2 small hole, then use an 1/8" bit to enlarge.Then template is removed. Pretty simple other than drilling upside down-use a sharp bit
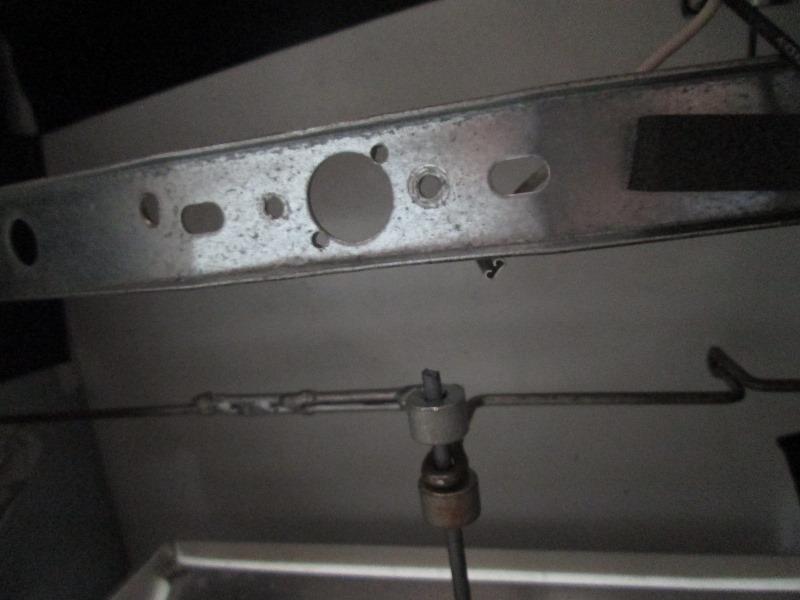
Heres new holes are drilled- really close to center motor shaft hole. So close I used a 7/64 instead of going up to 1/8, just saw it breaking out.
Mounted new motor, I used some old cloth friction tape to deaden any vibration. As the connectors on new motor and included new wires are smaller I removed existing wires and ran new wires back to new PWM controller.
Turned the 12v power back on-with hesitation turned on the fan Switch. SUCCESS!!! Done, Well soon as I get a replacement fan blade-seller folded packaging and warped blade, like 3/8-wobbles to say the least. But proof of concept-Stoked!
Something so simple. Folks have been doing this for a while, adding PWM-it works. Video Of working quiet fan and ability to slow stove vent.
Link if embed doesn't show
Pretty happy, would have been nice not needing to replace motor but the lower power consumption along with the efficiency of PWM controller amazing. Due anyway. I would add, even with dead silent motor, the 3 blade fan by design at full/high speed, is going to be loud. That's the amount of air its designed to move. New PWM allows slowing down so the roar isn't painful down to comfortable level and still move air. Only other option is finding a 7" fan blade with 4 or 5 blades. Don't know one is made. It would be quieter but also move less air.
Bottom line if we burn toast can evacuate same amount of air. Just cooking or oven on, we can have fan at a adequate speed while playing cards at the dinette without grinding our teeth. Nice will be in morning when boiling water, evacuate the steam without the roar.
Back to Ourelkhorn Camper Modifications page