Portable 100 watt folding/portable 'suitcase" solar panel
-
Portable plug & play folding 'suitcase' solar panel turn custom rebuild. (Or how I bought an off the shelf unit to build my own with the parts...)(or started one thing ended up something entirely else...)
Update:2016
This page documents the orignal purchase, some issues out of the box, fixes and mods to it, my system and other stuff.
Quite convoluted and most gleanable information may be lost wading thru it.
But after 2 years of actual use- adding this portable solar unit to our system is second only to the orignal solar panel addition as far as mods & upgrades to camper. More than one occasion it has been sole source of charging batteries, ususally due to parking under trees etc. Though I would reccomend roof mounted panles as primary for any system, adding the portable and its capabilities to system has proven priceless for us.
Going Portable solar
Whoo Whoo-new panel arrived
New panel fail--bad wiring/ ineffective connection box glands
Fix the wiring, then took apart rewired deleted panel controller
Testing reworked panels
Adding frame reinforcement to corners
Piddly stuff, add drain holes, pad protectors, caulking frame to glass
Final wiring, adding cord options
Testing voltage drop of new cords
Added a fuse & switch before controller
Installed!
Stored-
Conclusion
Decision to add portable solar panel
-
Adding another panel to our camper has been on the list since we first added solar to camper 2006. When system initially set up was with the allowance for 2 panels at 100+ watts each. Controller is a 30 amp, added combiner box etc. But simply due to cost started with one panel. A 130 watt Kyocera, puts out ~7.6 amps, average 2-5.
In my opinion, yes expensive, but if you camp in an RV off grid, relying on battery power, single best addition to our camper. To this day I am amazed when looking at the meter. We do have a generator, rarely is it used for charging now (though do let it run to put back what it took to start.) Our 12v use is minimal, so is the single panel. It does keep up with our needs, keeping the batteries above 12.2v at the end of evening but its right at the edge. Middle of summer it will reach float easily but generally day to day average unless were in full sun were starting the evening at best 12.7. If conditions put us in camper during the day, even being frugal-takes an effort to keep from dropping. I set our original panel up with a 4-way tilt. During the winter months it can change the 0.3 amps to 3 amps charge rate. Simply because its on the roof makes it a pain though.
Long story short- Planned was another roof mounted panel matching the current panel, in wattage and size once extra funds became available. Mostly to increase the input and faster charge times and to truly get closer to fully recharging the batteries. Ready to make the plunge started researching panels again. But parameters have changed compared to original thoughts.
Over the over the years actual use has brought out more to the forefront issues other than lack of wattage input. Primary being shade. When we situate camper always trying to insure rear and panel will get at least a few hours of sun or due to available spot just deal with what we can get. Second is winter/low short sun. The panel tilting can greatly compensate for both, but unless batteries are really hurting I don't bother. Lastly an additional roof mounted panel will need to be on front of camper. Marginal at best-would add input but as I wont be adding tilting option and not avoiding at least partial shading (when controllable) camper.
The use of a portable panel, though an expensive option, started to seem more & more practical, would address these issues. Allowing to chase the sun,especially during the winter. Parked under or panel blocked by trees, portable might be able to find sun. Being angled instead of flat and ability to point at sun- could actually see more amps from smaller panel than our current roof mount one. My last justification was if it really gets old setting up portable unit I will hard mount on roof or make the allowance. I have a spot picked out. Just remove its controller, tie in to my existing controller.
Other note for consideration is we have a mounted panel, setting up additional portable is not mandatory. If my only source of charge, I would be hard put to buy portable verses fixed always there, always working hard mounted panel. Conversely you could start out with portable-realize the benefits of solar then plan for hard mount and for its convenience, verses me starting with hard mount and planning for portable for its abilities...
The Renogy name and their 'suitcase' folding panels started popping up & I checked out. Nice looking units, I like the arm setup, black anodized, come with a protective case-complete with its own controller wiring etc. A bit pricey compared to cheaper units but the features and included items, not too bad. You could easily make your own though. They offer 60 & 100 watts folding 'suitcase' panels. Seriously looked at the 60, just less weight & size but opted for the 100watt. 30# still manageable, still folds to a small enough size to be easily put away and simply more amps. There are larger units available (& cheaper)- but handling size, weight & storage I nixed.
Back to the top
ITS here!
-
Recently they went on sale so I bought one. It arrived in 2 days! whoo whoo-time to play.
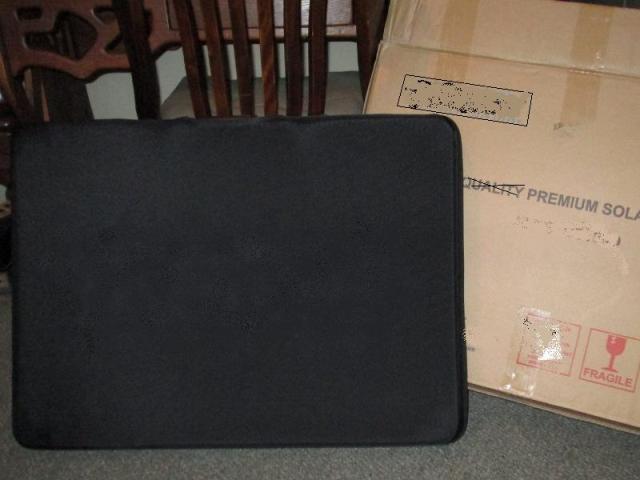
Could have lived without the branding but its a really nice case. Heavy woven fabric outer and soft inner fabric, has semi rigid plastic between that is heat formed, I assume, to shape. Haven't figured out how to get rid of the bright brand name as Im not advertising for these folks.
Set up in the living room, my first impression- nice. Preliminary inspection was I like it. Quality of components seems to be well made. The controller is on a swing plate allowing to read once panel setup. This is recent change in panels design and wasn't sure if included on the unit I ordered as picture showed the older style, mounted to back of panel. This swings back up and velcro to panel back once setup. The controllers are not water proof so I may add a small shield or something.
Looking at the included hook up wires not too shabby, though I had already decided to replace the battery clamps with a hard wired lead from battery with an Anderson plug. Then I can just plug in the panel once set up. Overall really stoked with our new panel.
To see what it can do and check out controller I hooked up to truck battery...Wow the controller has all kinds of features. With the panel setting just inside of garage so it didn't get wet started playing with the controller. Its raining cats& dogs, sky pretty dark. I was getting 12.8-13.1 volts. Scrolling thru the controller menu, decided to turn panel a bit more toward brighter sky and controller went off. ?
And the whole point of this page...I wasn't going to add much other than "I did it" but some issues with this particular unit compelled me to relate. Because at this point, hooking panel up, it all turned to poop...
First let me say this isn't bashing, though I may vent a bit, I am truthfully going to relate what I found. Do not misunderstand, I WOULD by another unit from these folks, but knowing what I need to look at. The overall appearance, functionality and construction is good. Likely my first enthusiasm helped me get past the secondary deflation and overcome the faults. As everything else surpassed my expectations, the discovered problem caused me to not immediately box up and ship back. Possibly mistake but I assumed what I discovered might likely be present on a replacement unit so decided to address. Though a bit miffed, it may very well be mine was a fluke or one off, maybe it was 4:59 On Friday, who knows it happens. I have never seen or heard any negative comments about these units but as Ill relate this one had problems.
Back to the top
Not alls well on the home front...
-
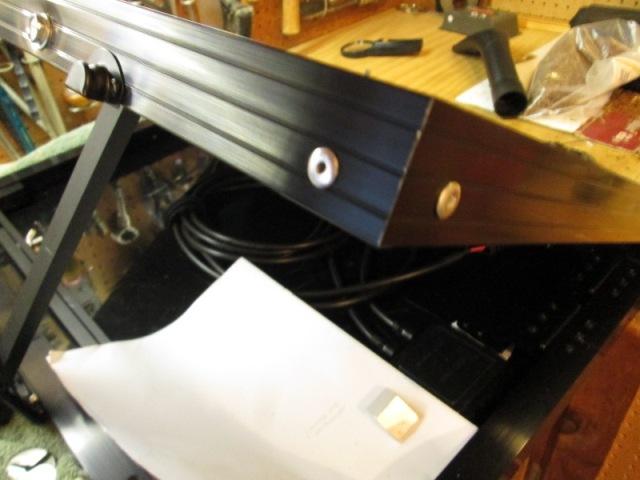
I didn't take many pictures before this turned to poop, wasn't planning on documenting a plug & play unit. When the controller went off I repositioned the panel and it came back on. Didn't take much to realize moving the panel, moved the tray cable, and less to figure out it was wire where it entered into the panels connection box, wiggle & controller would go on off.
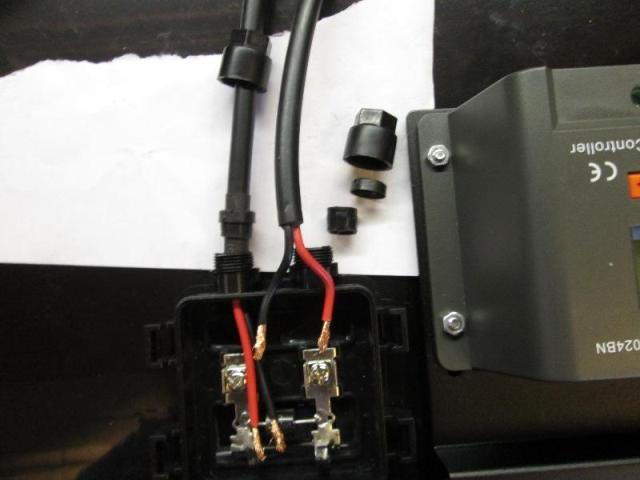
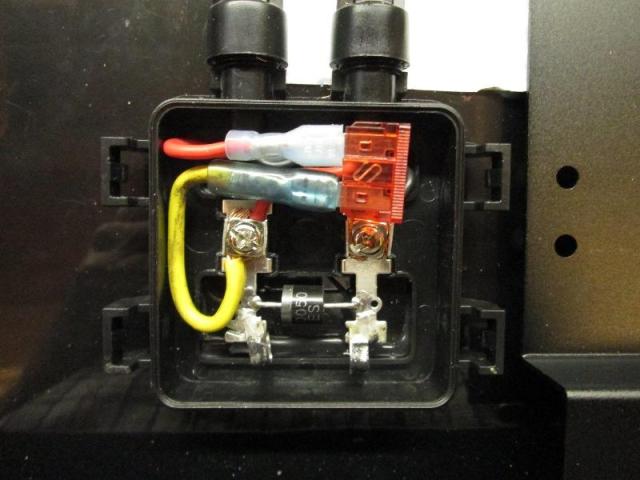
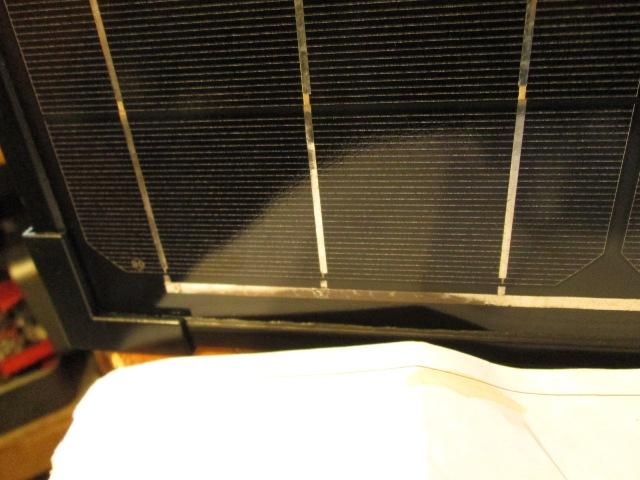
Picked it all up and took to shop. Opened up the connection box cable to battery cable entered
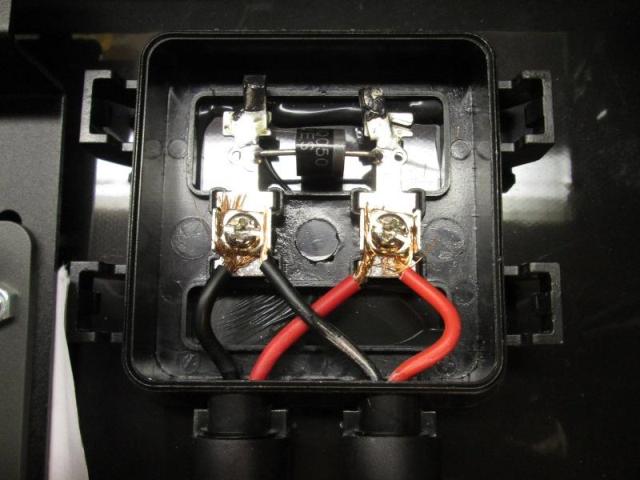
Pics don't really show second black wire from left is on TOP of the screw plate, not underneath nor is it attached, I took several pictures-just doesn't show well.
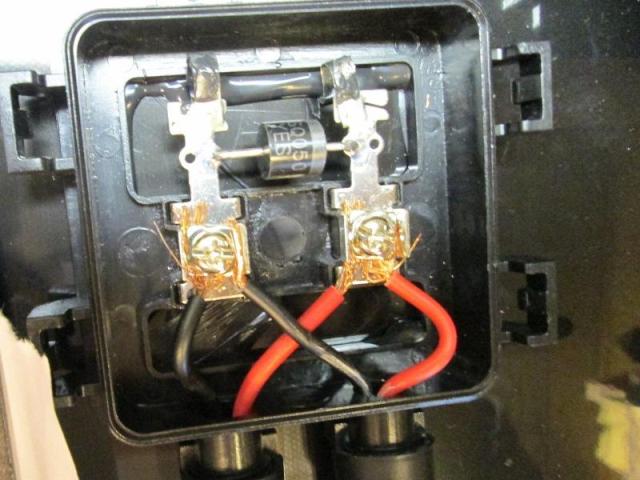
Kinda see it better in this one, wire is just laying between the screw head and side of terminal. I had a hard time looking past the fact the wires that were attached were so by only half of there strands? Well first though was just unconnected wire-simple fix, and I'll tidy up and CORRECTLY secure the other wires.
Then it occurred to me other than why, was how? Cable goes thru strain relief caps that both contains and seals the wire entering the connection box. They don't do either. Wiggling the cable outside of box wiggled wires inside and the connection. errr. Removing the screws the wires simply slid out. Also mean they are not even a little water/moisture tight. This is where the real fun began.
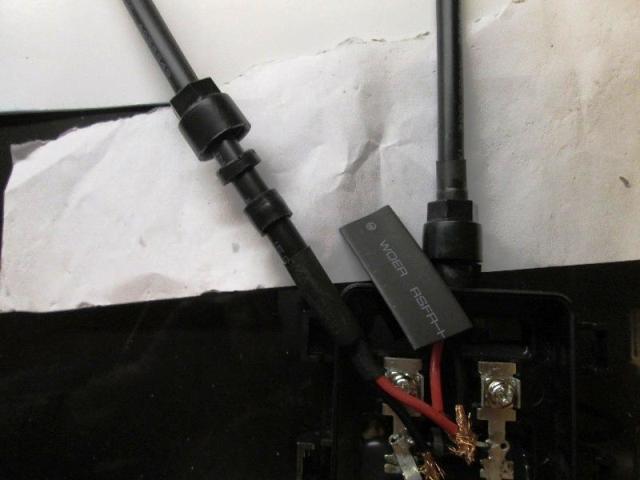
I got on line to see if others noted these issues, "Chat" window popped up so I related what I found. Was asked to send pictures to support. I did. I didn't hear anything back but it was after 5:00. In the interim, looking at the strain relief closer, I realized the either the caps are either to deep for the very short thread sticking out of the boxes or the threaded section on box is too short. Or the supplied little rubber sleeve that should compress is too short. When the caps are bottomed out doesn't even come close to compressing, anything. In case you are unaware, a wire that enters an electric box where connections are made are mechanically restrained, so that any movement is NOT transferred to the connection. Also if that box is outside in a nice watertight box the mechanical restraint also seals the wire going thru so water etc cannot pass.
How it goes together. You can see how short the male thread on box is compared to the cap. The compression ring and sleeve are probably a good 1/8" when cap is bottom out, zero compression, zero sealing or restraint.
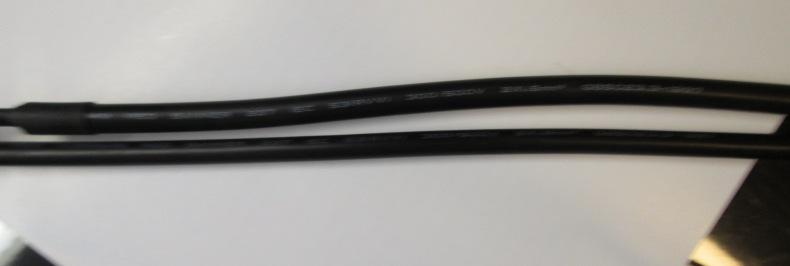
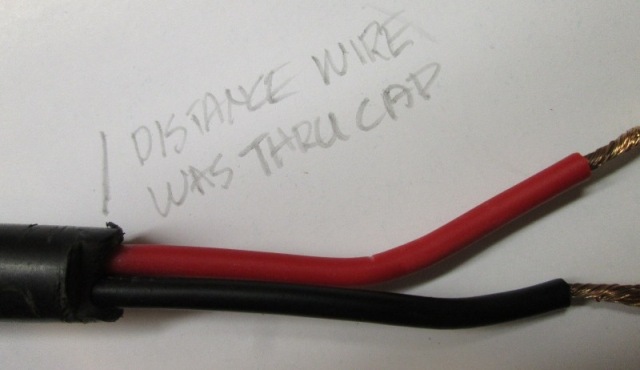
The cables, though same size wire, same marking on sheath, the OD of sheaths different sizes, 0.350 & 0.295. The 2 smaller ones that weren't sealed or restrained, but what I also discover the other wire is too large to go thru cap, its ID is 0.335. Looks like someone used a pocket knife to par down the sheath just enough to stick in cap. So it was un-restrained also.
Really?
Back to the top
Fixing wiring- removing the controller
-
All in all a very simple fix, though I shouldn't be needing to. And why Im not returning for another-everything is bitchin except for the final wiring. I would assume the next on would/might be similar-maybe not, but this will be fixed before it even got returned if shipped back.
- Utilizing parts I had on hand, I could have cut off the now unused battery clamps from the short leads that has inline fuse. Attached it to combiner box. Hardwire the extension cord to campers controller, Then output would be fused with Anderson plug no fuse inside connection box). Extension Cord could be stored in camper compartment instead of inside panel. Could have..
- Or better with another set of connectors, have the cord plugged at both ends, plug on panel and plug on lead from camper, would allow when panel next to camper, plugged in direct verse using cord or use extension when needed. Which I may do but with another set of connectors, not cutting supplied battery clamps off.
- Because; As I was writing this a plan gelled....Keep supplied battery cable clamp section intact. What I am going to do eventually is set up the extra controller with quick connects on its in and out put. Once I add connectors to extra controller; For those unseen rare occasion that might arise; It will also allow plugging panel into the extra controller, use to charge truck, neighbors battery or whatever, much as it was designed. Or should I have failure of campers controller I can use the suitcase independently to charge camper. Or better- just try to sell the controller and all cables.
- What I am doing now is put short lead with quick connect on panel output. Hardwire a lead from existing camper solar controller with quick connect that will reach about 4' outside of camper. Quick connects on both ends of an extension cable. This will allow using panel with extension cord or direct when next to camper, allow storing the cable in camper. Options.
I have been in contact with retailer. There response so far was selling me a new unit at a substantial discount. That would be fine- However as I got this to work, I'm not possibly 'fixing' another unit, I am proceeding with my modifications. I do not know if allowance will be made for me keeping this questionable unit-some discussion going on, could use some help with wiring etc so even a credit to their store would be nice. But I don't know, time wise Im proceeding.
But to sellers credit, even though Im not utilizing they offered to make good with another unit. SO that's in their favor. If warranties is a consideration these folks 'seem" to be good for their product. What will become of my circumstance I don't know. Honestly, though sending unit back, getting another for a lot less is hard to turn down-Im impatient. Plus seems silly to return something I can /did fix. Whether that counts unknown, and since Im absorbing they may just ignore me. And they did...well in the long run. After initial offering lower priced unit, when I said I would just keep and fix they offered wire that I need, which actually surprised me. But as they only showed the tray cables (stiff single wire) I asked if instead they had access to the generic quick connects they use (NOT Andersons) as some of these are not interchangeable between brands. Never heard back, last I heard from them. ?
Oh well...but a simple "No- were done or thanks or we don't" or a lead to source would have sufficed. I don't expect anything at this point, panel is mine as is warranty. But to just ignore?..Maybe me but customer relations would have at least followed up- I shouldn't need to re contact. Course when I originally contacted thru the 'chat window' and explained the issue with the strain relief caps on the junction box- fella said he didn't understand "I'm not entirely sure what you mean by strain relief caps"? Maybe the "suitcase panels" are a side venue....
My fix on the smaller cables is simple add another piece of shrink tube to increase the OD a bit. It worked well. Kind of see the step of additional shrink tube on the right.
Looking at the larger cable (note wire is same 1.5mm, sheath is just thicker) I thought I could enlarge the ID of cap a bit to accept larger cable. But after a lot of thought since Im in here...I have decided to remove & not use included controller or the rather short 15' 15ga (1.5mm) wire. Instead run panel direct (through Anderson plug) to my existing controller on camper. Also increase the wire gauge. Mostly because this supplied controller isn't water proof-- this is not a fair weather solar panel-indeed rainy days when it will most be needed. That and typically you don't want long run of cabling between battery and controller, the controller should be mounted closer to battery. Will put most of the long wire run on the higher voltage side, between panel and controller. Will be one less controller to monitor, we can see everything from inside camper. Plus, though doable and often done, Im not getting a handle on multiple solar controllers, this will just be simpler. Albeit expensive since I already bought with controller.
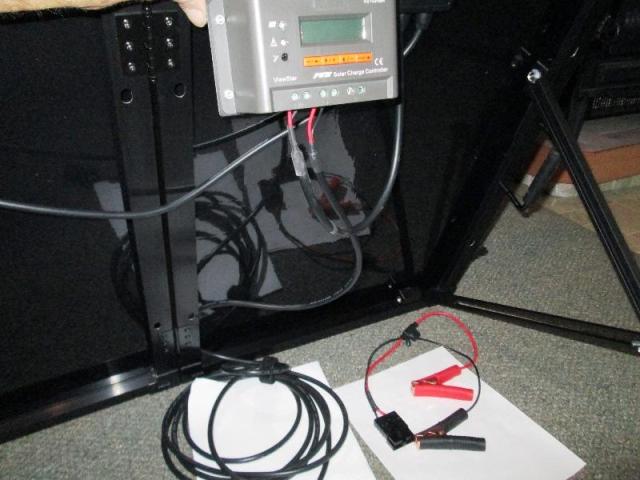
So rewired, removing the wire that went to controller from combiner box and removed the controller. Removed the wire that went from controller to camper and connected to panel combiner. Because of the length of cable laying on the ground I added a 10 amp fuse to protect the panels. If this were to get mounted on roof the fuse would be removed.
But now Im stuck for the moment. Need to pick up a short piece of cable to run from my campers solar controller to rear compartment. Ill pick another or rob the supplied Anderson from the included battery clamp wires. I will add another 7.5 fuse at battery end. Then I can simply plug in the panel to campers existing solar controller when wanted.
- Options:Update: after the fact, above is what I did to get up running for testing. However it has since occurred to me..what I could have done, options and what I finally did do.
I inserted the above because there is a multitude of ways this could be wired to make use even easier or more flexible. When I finalize wiring Ill add at bottom of page.
Testing
-
At any rate to test the panel worked (still, after fixing) I sat in bed of truck. I don't have pictures of my frankenstein wiring but manage to get the controller temporarily back in the loop utilizing jumper cables piece of romex another jumper cable...BUT Pretty stoked! was getting 5+amps. Let it charge the truck a while till it reached ~13.1 volts.
Verified it still works, Now for the REAL test. Suns getting low, camper in shade, I want to see & test the point of getting this portable. To catch low sun or when camper in shade etc and still have solar input (plus the additional amps when both working).
Set the panel in the sun near camper. From the campers existing solar controller I added 2 pieces of short wire from the solar panel connection. Using the supplied battery clamps from new panel clamped them to the added wires. Roof mounted panel is at zero amp input, batteries at 13.1 and dropping (stabilizing, solar was in float). Now new panel is directly connected to campers controller along with the roof mounted unit. Plugged the new panel into its extension. WHOO WHOO.
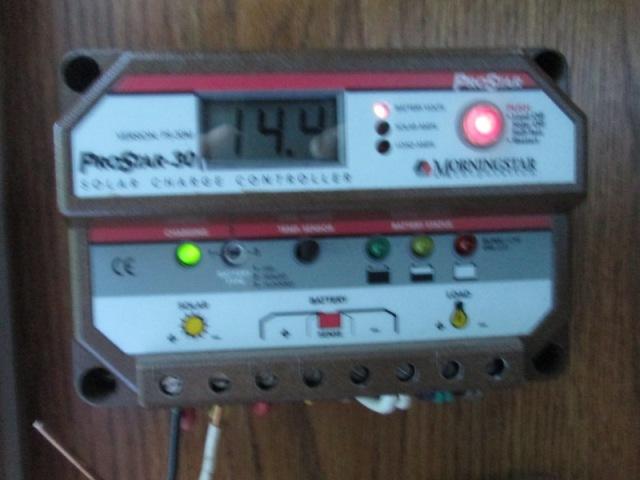
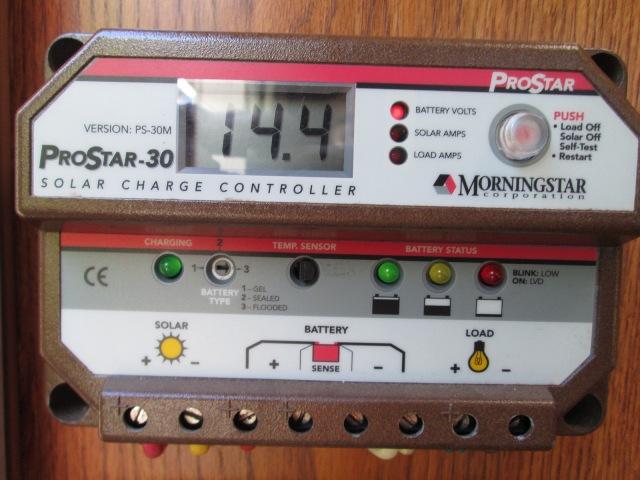
Fuzzy picture but its 4:00 December 8th, central CA. Sun will be going down in an hour. Im getting 3.1 amps@14.4v! Turned on a fan and some lights, camper is still showing charge. I verified nothing from roof panel by disconnecting it.
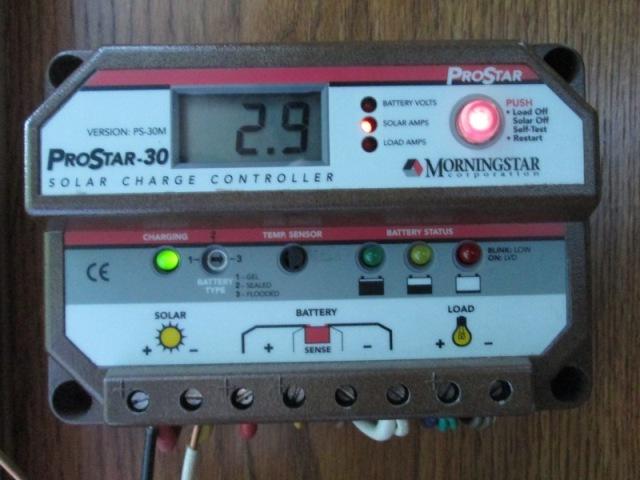
Solely on the portable still seeing 2.9amps. Being flat and shadowed by neighbors house, the roof mounted panel has been at 0.0 amps since about 3:00.
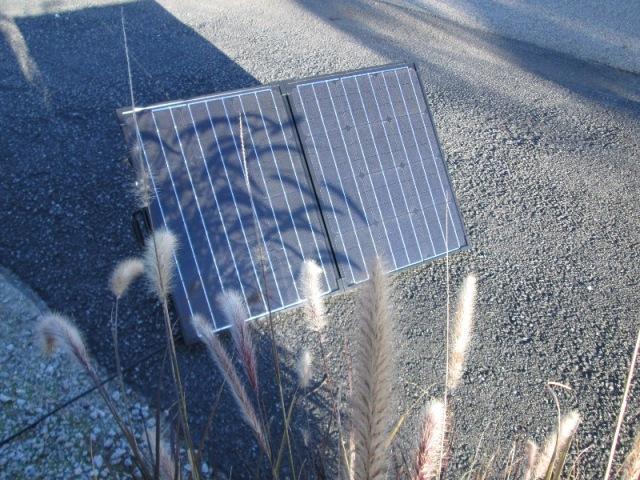
As the sun dropped light to new panel filtered/partial shade
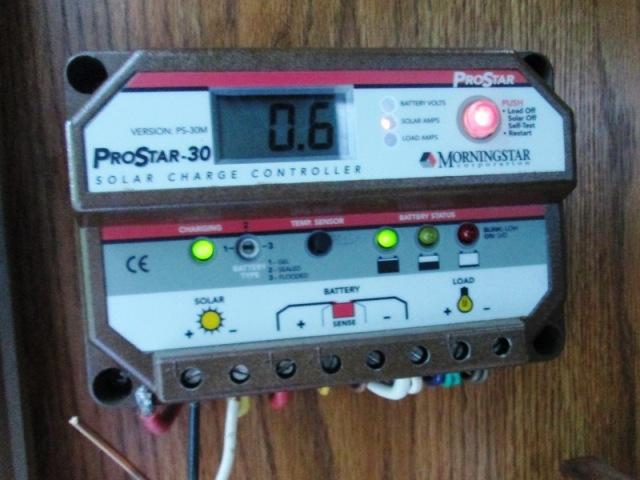
...as the sun dropped still saw 0.6 amps for another 30 minuets! This is what I wanted to see. When the camper is shaded or sun low still getting some amps by setting up the portable panel. Truly Awesome. Plus potential of 240 watts or nominal 12+amps.
Back to the top
And the frame
-
Reinforcing the frame for future possibilities. Having the opportunity to be close & personal with our new panels, started looking at the frames. I am considering, down the road, some simple way to hang panel on side of camper on occasion, so that if we walk away it doesn't. So far nothing has revealed itself. But I want to strengthen the frame.
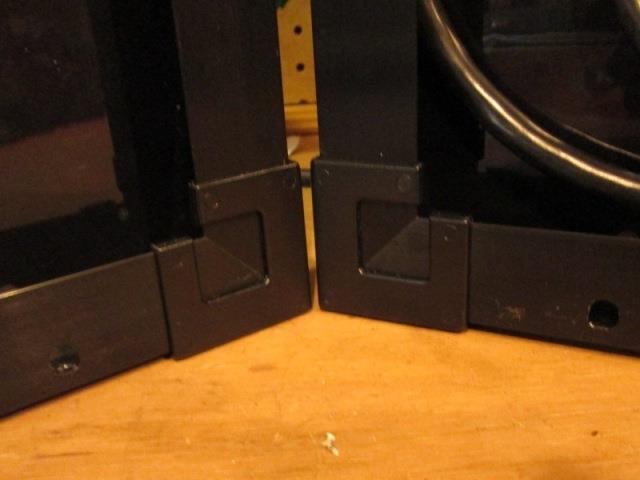
The frame is basically a U shaped aluminum channel, mitered corners, typical. There are corner protectors on the corners that warp and clip around the edges of frame. I assumed they also hold frame together. Which they do I suppose a bit, I thought metal, but they are plastic. I removed one to see how frame assembled...Umm there is no mechanical joining of the frame pieces? HuH?
Well I was wrong-
When I drilled the holes to add my corner back ups the frame was solid, 1/8-3/16 thick. However After the fact and below was finished I started to drill drain holes in bottom channel, its hollow!. Soooo- in corners its solid, however away from the corners its hollow which means double wall, so apparently there are solid corner pieces pushed into the hollow extrusion, much like a screen door. Cool, thought frame was relying on frame glued to glass. So my concern about the frame completely unwarranted, below is what I had done.
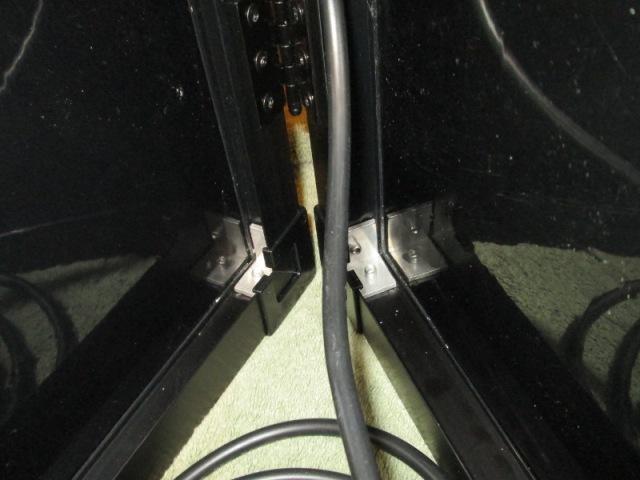
My panel-my time- Im mechanically attaching together. As there is no allowance on the aluminum frame extrusion for screws etc simple fix is riveting thru frame into added inside corners pieces.
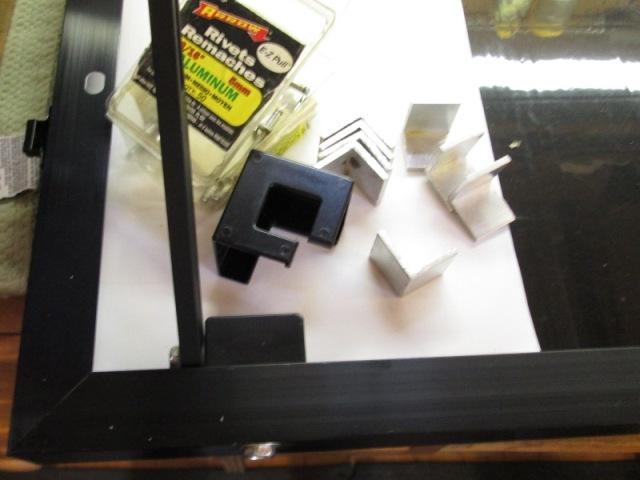
Cut 8 pieces of 1/8"x1"x1" angle 1" long. This will leave about 1/16 between edge of added angles and frame edge at glass (or 1/8" from glass). Drilling thru frame and angle then rivet corners together. Plastic corners will need to be on top of rivets so Ill removed and counter bore back side so they set flush.
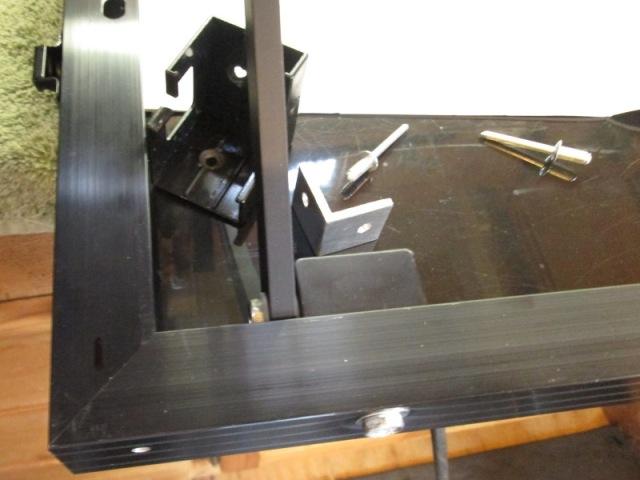
Drill thru the plastic marking the panel frame with 3/16" bit. Remove the clip take to drill press and counter bore back side with 7/16" bit. With plastic removed finished drilling thru frame with 3/16". Then place and hold angle piece behind, divot angle with drill thru frame, take marked angels to press and drill with 3/16" thru. Place drilled angle inside and rivet with 3/16"x1/2" al. rivets. Snap the plastic back on. Because this is freehand I did each corner complete.
First one riveted, sticking camera in side I saw rivets barley catching so drilled out and switched to 1/2" long rivets.
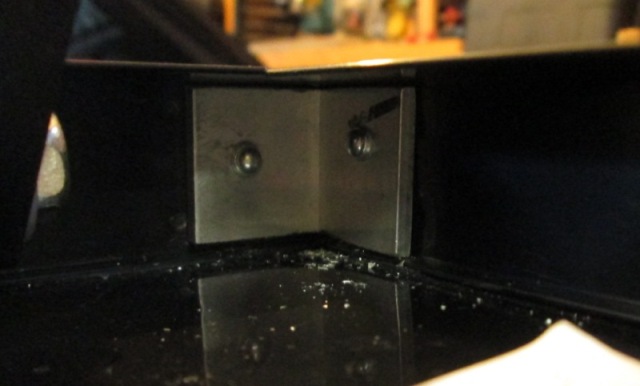
Riveted corner with backup angle inside.

Inside corners between panels propped open to access edges. I did find without controller mounted, swinging the mount panel for it fully over it hits the plastic corner and will snap it. As Im not using Ill drill out rivets and remove.
Finished. I cant imagine anyone else doing this, but IF for what ever reason you remove the plastic corners, Push in against the outside flat of clips to push the lil arms inward away from frame edge, then from under neath roll off the clip. They actually wrap the edge of frame, pulling straight out will break the tip off. Few of the pics show ends of the plastic arms of corner pieces. Really all the corner pieces do is save the case from getting snagged, simply screw to frame if you break.
Overkill? probably, however its done. I am also going to brace the top outside corners because of planned alternative mounting option. Rivet a small piece of flat bar at 45�. Still pondering how to hang and secure panel and have it still fit in case. Could be as simple as hook & chain. ...details.
Back to the top
Back protection, drain holes and sealing frame to glass
I didn't like when swinging the legs back inside the ends hit back of panels so while I was here added some foam pads. Especially the bottom ends of legs. Also ground & rounded ends of wing nuts so they cant cut the panel backing.
I am drilling a few small holes thru lower frame of both panels. Mostly to aid getting dirt etc out and drain water. Well if your reading this, you know I discovered the frame is hollow with inserted joiners in corners, negated the purpose of the frame stiffening...,however with possible planned hanging of panel it didn't hurt. Kinda stuck on the drain holes though, if I drill thru I will be introducing water in between, hmm so Ill need to drill from side toward glass...
And done, 3 holes each panel along bottom and I didn't break the glass! Used a small round file to open bottom holes flush to inside of frame.
Next I am caulking the entire face of frame to glass. The front face of frame is not sealed to the glass, 1/16"x 3/8" gap, it will hold water, dirt.
And caulked out. Removed all the plastic corner pieces and the adjusting arms. Used a small tube of black silicon. The front came out really nice, and easier than hoped, no cleanup. Cut tip to not quite an 1/8", holding at 45� to frame gap and glass, just surprised me. Perfect little 45� bead sealing highly visible front perimeter edge. Don't usually get so lucky with caulking.
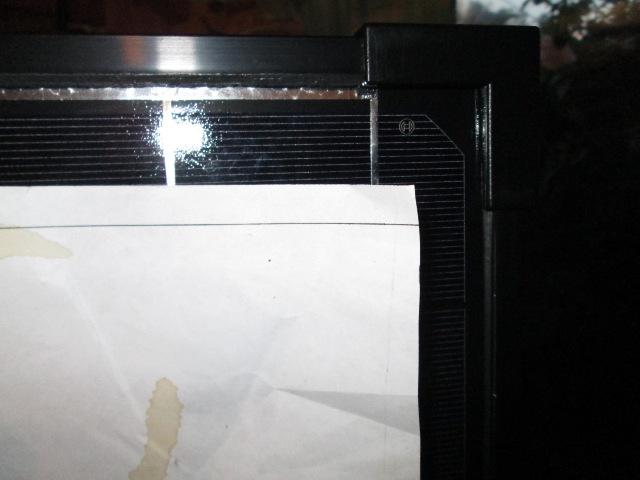
Oh well trying to show the bead, looks like a small rubber seal. The line on paper is how far I could insert, anywhere around front. Im sure there's a reason this is unsealed? but it would hold a lot of water.
The back not so lucky...its a mess

Looks worse than picture, just no access. I only sealed the bottom and sides of glass to frame. The back was maybe 50% sealed, sliding the paper around. Also sealing around my added corners, thru bolts and bases for adjusting arms. Trying to keep water out of hollow extrusions. I did not seal any of the inside top, either the corner pieces or frame to glass. Think if any water inside frame-in the sun it could sweat out.
It may or may not matter electrically if the panel is sealed. Again this is strictly for when I wipe down to put away, not have water setting inside frame.
Lastly I removed the handle and cut the spring leg, reinstalled. The handle is spring loaded, no idea why. When you let go of handle it snapped back with quite a bit of force.
Back to the top
Final wiring of camper
-
To be done. But what Im doing & why...
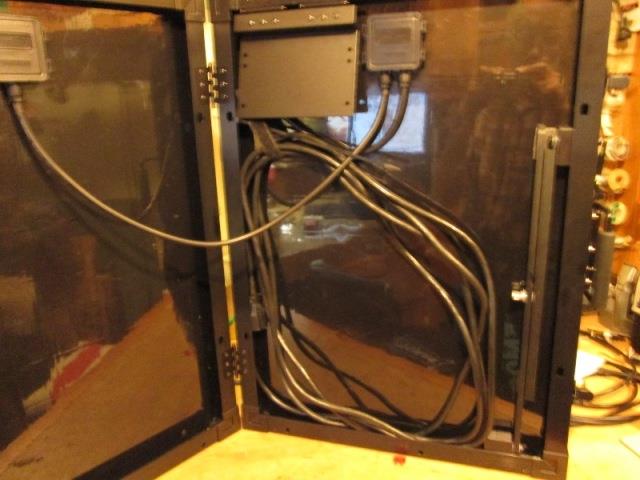
Since I removed and am not using supplied controller I also decided to rewire with longer, larger cable and option. I started but the rain also did. I did manage to get wire from controller to outside cabinet. It reaches and extends out bottom about 18", though plan is to have plug inside. Took 2 hours to run 9' ha. As I want to both increase the distance I can get from camper I also wanted to use larger wire to compensate. Price wise cord least expensive. Found some very flexible SJTOW 14ga extension cord. But some compromises made.
I can see how this should be wired. But for what this is, cost/practicality I cannot justify to do "correctly". At minimum I should be using 12ga wire. But as (1) I can not get to roof mounted combiner box without adding 20' of wire.(2) Controller will not accept another 12ga or larger wire in conjunction with the existing 10ga from roof panel. I would need to add a terminal block or combiner box inside. I can fit 14ga directly to controller
Then bulk, 12ga up starts getting bulky, heavy and expensive.
At 14ga (2.08mm) I am marginally better than using the included tray cable 15ga? (1.5mm) , but I also am between panels and controller verse controller to battery so at higher voltage side which helps. So all things considered, calculating the "loss" using 14ga will be less than using 12 or better, both on ease of use, less "loss" on my wallet, and certain less loss if I cant get panel in the sun.
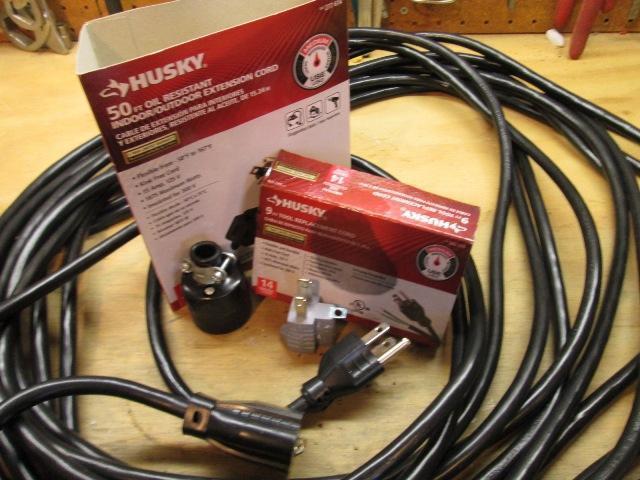
So with that justification I picked up short tool 9' replacement (with male end) cord to run from controller out. Another 50' cord to cut, run from panel that will plug into camper and one 110v female receptacle. To offset initial cost and to set up Im currently using the attached 110v plugs.
Eventually Ill swap all to some type quick connects (andersons). The campers cord will get shortened to 7', and connection to it will be inside cabinet. Cord from panel will get shortened, though long enough to reach camper when I can set it beside, 6'-8'. With a 20' & 30' extensions cords used as needed.
For now, Worked out lengths, the 50' I cut to 30' & 20', attached the 20' with female end directly to panel for now. It will plug into the male end on camper. Add back the female end to 30'. that'll work for now. When I change to quick connects, Make or buy short cable, a 6'-8' or so pigtail attached to panel (not storing wet muddy cords inside panel).
What Ill end up with is: when I can set panel next to camper, plugged in direct be about 12'-15' total wire, with panel setting about up to 8' or so away from camper. Have the option of additional 20', 30', or both for up to 50' distance from camper. Yes sacrificing potential power for longer cord runs but alternative is zero power.The WHOLE point of the portable. Reaching the sun. Only real issue is connections on ground. Probably something simple like tupper ware boxes to moisture proof plugs when extensions used in rain.
Back to the top
Testing voltage drop with new cords
-
Curious I did some preliminary tests to see how I was effecting voltage with the long cords. What I found surprised me.
Panel in the sun 20-21 v unconnected. Early hazy December morning. Hooked up controller to small scooter battery with the 15' supplied 1.5mm tray cable. Hooked up panel to controller with attached 20' 14ga cord. Seeing about 14.4 after initial hookup, battery was down to 10.5v so let it charge awhile. @14.4v/ 4.4amps. Once battery was showing close to 12.1 controller showed 14.+v @3.9 amps. Amp readings tapered off pretty quick, stabilized at +/- 3 amps.
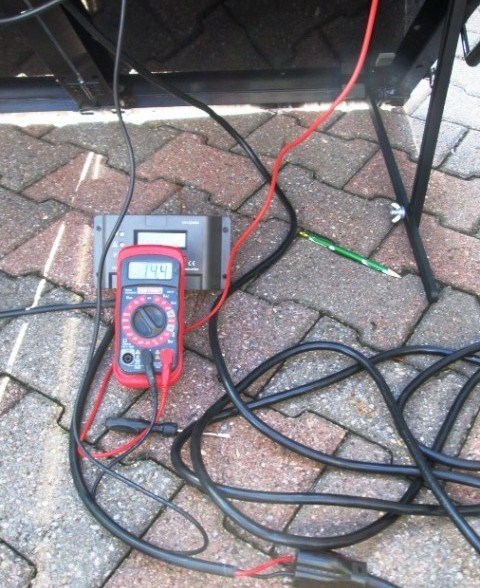
My highly scientific test set up, this is with 20' between the panel and controller. Multi meter is direct to panel. Controller via the short piece of cable is inserted into the end of 20' cord coming direct from panel.
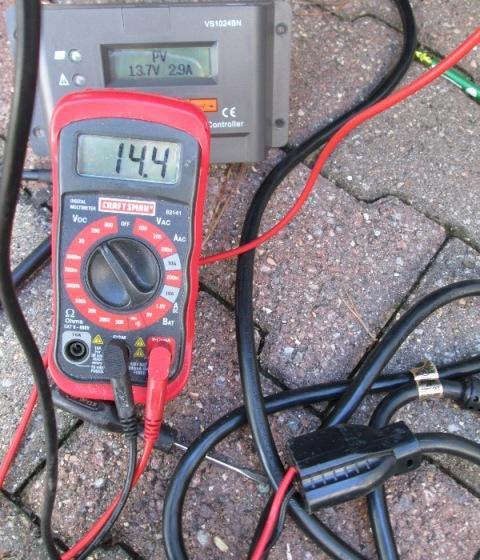
Panel showing 14.4 volts, controller reading 13.7v. which I verified with multi meter. So about +/- 0.8 volts loss difference
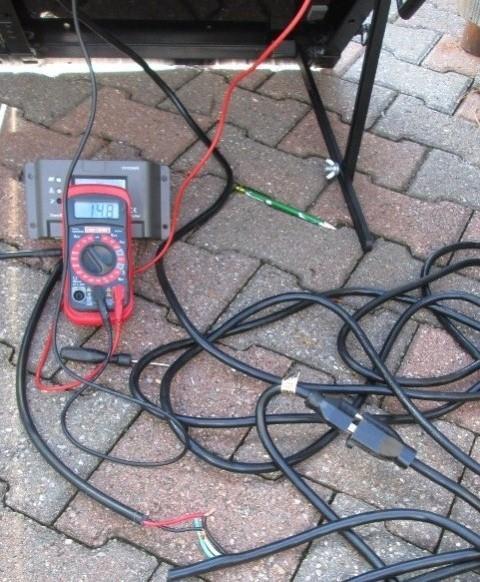
And 50' between panel and controller. Removed controller feed from 20' and tied to end of 30' cord, plugged 30' into 20' that's coming from panel.
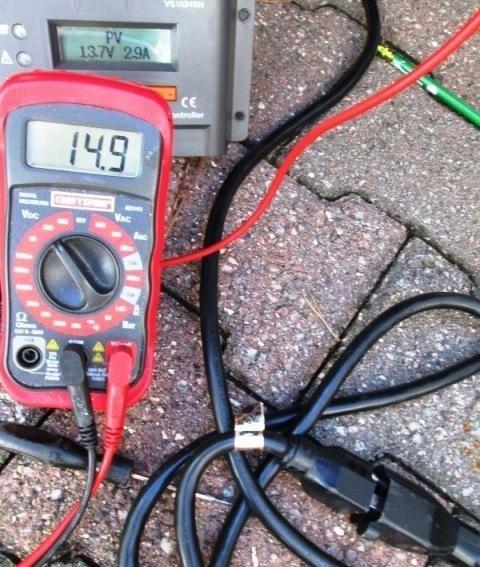
Adding the 30' cord between 20' and controller (50'), additional 0.2-0.4v drop , Panel reading 14.9, controller @13.7 (no difference in controller output volts or amps! Still @2.9amps. So with 50' about +/- 1.2v loss.
Did this dozen times and checking with multi meter, 20' or combined 50', difference in readings or multi meter was 0.2-4v. Have some light clouds drifting in & out so seen at varying panel voltages. (IE when panel dropped to 14.4v with the 50',the controller showed 13.2v). The difference in cord lengths was consistently @0.4 volts. Which is what I wanted to see-I assumed adding the 30' would drop a lot but 0.4 volts? However though I do have voltage drop of about +/-1 volt drop with the 20', +/-1.2v with added 30' (total of 50'), it works. I don't have much (wiring ) into this, 10ga would be optimum-12ga better though if I decided to redo.
I removed all input cords, hooked up the controller direct to panel with 18" cord. (like it came from factory). Controller showed about 0.8v increase, or still 0.2v drop difference between measuring directly at panel and input terminals of controller? But with a 0.2amp rise of out put to batteries. So yes shorter is better. What did surprise me was the resistance between controller and battery thru the 15' tray cable. This was consistently another 0.5 volt drop. So the wire it came with is undersized, well for the lower controller output voltage side. In fairness it does go thru a quick connect, battery clamps and in line fuse..Though it wont be used, it does give me reason to consider replacing the remaining 1.5mm short piece that goes between panels.

So I did. I have the wire to spare, while I don't really think the 30" between panels will affect-since Im here other than time...Completely rewired with 14ga. Did require drilling out the strain relief caps to accept the new cable but they do clamp the larger cable nicely.
Removed the controller, swing mount panel for unused controller, and all it associated wiring.
Bottom line though certainly not optimum-adding the 50' cord between panel and controller doesn't 'kill' charge from panels. The 20' is acceptable. AS new panel will be wired direct to existing camper controller ( where the main focus when I sat up WAS voltage drops and minimum wire lengths) its voltage drop to batteries is less than 0.1v. So once connected, real numbers should be better. Especially once I add the quick connects and shorten the wires for next to camper use.
Back to the top
Fuse & switch
-
Because of the wire handling and possible shorting, adding fuse before the controller from out put of portable. Even though I added a fuse at the solar panel in case stepping or otherwise cutting cord, on the controller side this might harm both controller and/or roof panel if there was a short. Adding fuse inside small light box cabinet below controller.
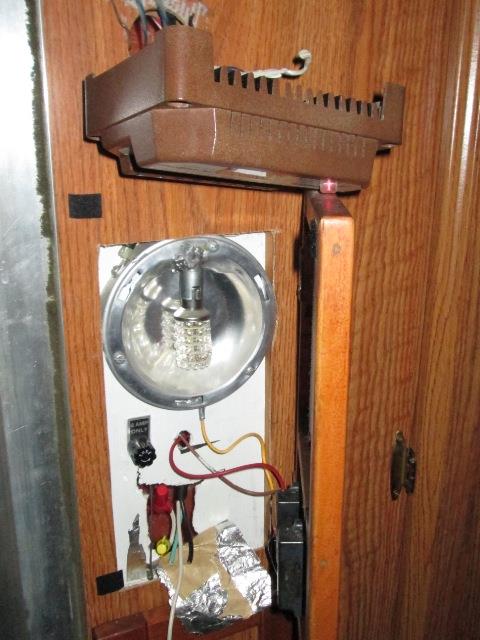
Snaking wires just not fun. I had to fish a wire up to pull wires down because the new added cable wasn't visible below. (The hole is where the original light switch was, 12v wire connections in our camper are made inside wall instead of boxes to my disliking). Disconnected new leads, tied to the fish wire from below and another to be brought back up to ends of wire and pulled wires into where fuse will be. Cut power wires about 18" back. I'll solder leads from outside lead to fuse, then reconnect leads going up to controller. As I don't have access to back side, made a panel to mount fuse to, Twice. Kinda nice, double duty as making a cover for that hole has been on the list for a long time. Decided to add a switch, not sure why.
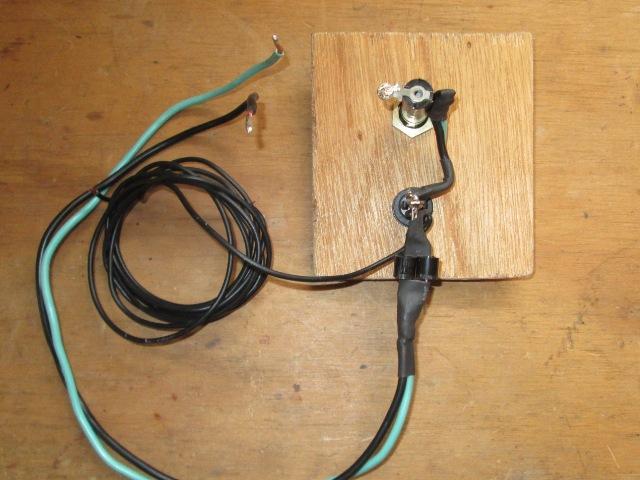
Twice because the switch I had on hand had an LED pilot. Thought that might be kinda nice-visual for energizing lead to panel. But because the load side of switch (powering LED) is going to controller input, it is also the hot connection lead from roof panel at controller, LED would always be on. To make work I soldered in (2) 6amp diodes in parallel so pilot only comes on from external panel. Worked well until I put a meter on it and saw almost .5v drop thru diodes. More than the 30' of wire? I Paralleled diodes to ensure passage of amps. Generally a bad idea (don't use to 2 diodes in parallel expecting to run 'more' amps) though these, mine are each rated above load so shouldn't be problem, however it also allowed enough voltage (x2) thru to let LED slightly glow when off. Duh...
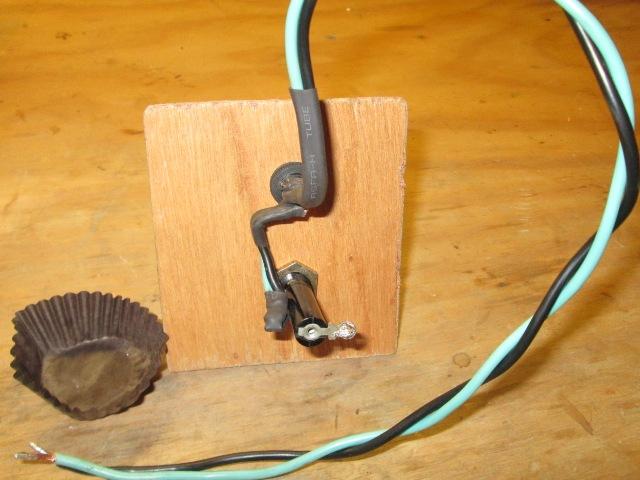
It was the voltage drop that caused me to nix the pilot. De soldered, removed the diodes and pilot ground. Thought the Sees candy would make a nice presentation - but I ate it.
As the cord I have is braided internally, before I snake back up Ill twist the uncut white return back on before shrink tubing it and pulling it back up to controller. I will add, in case not noticed, when I replaced the short panel to panel wire with the 14ga I decided to add the green wire to the black. Since it was there-figured Id add to positive path, so 2 +14ga leads. As the return is still only one wire don't know that it does anything but every open break the green & black are soldered together. It does meter less resistance. Wonder if that also contributed to my finale lower voltage drop than tested? Don't know -it was there so I used, Im sure Im breaking a code somewhere :) Just need to remember when I swap to andersons to continue.
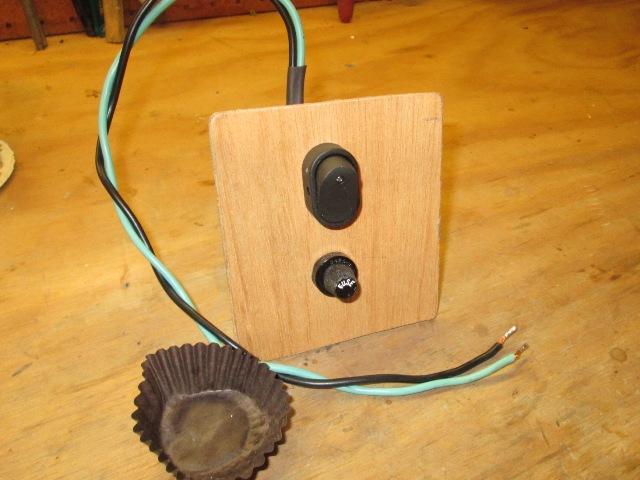
Done, lead from outside cabinet that portable will plug into goes thru 7.5amp fuse then switch and then up to controller. Had to label since the 2amp light fuse is..I meant to get a picture of the soldered outside lead to fuse holder (don't have enough pics on this page. Using a pair of needle nose bent the solder tab at 90�, slid some shrink tube over wire, solder leads to the holder, slid 1 piece of shrink tube to cover solder joint, then second larger piece over end of holder sealing it to wires.
Nice finally got that hole covered. Though now, as Ill probably be opening the door more often, is the other roundtoit.. replacing the switch leads with some spiral wound flex cord.
Mostly all this is to document & add pictures for me to figure out what the heck I did down the road and why. For everyone else Im sure this would be a plug & play addition, just check the prewired connections inside the panel junction boxes.
Back to the top
Installed!
-
Hokey Smoke....
Proofs in the pudding...Series of pics likely relate more. Set up new panel but didn't plug in. Batteries at 14.4v, 0.0-0.3 amp charge. I turned on bunch of stuff and bumped the generator starter couple of times to draw down batteries to 12.7v enough to show charge. Took some pics then hooked up new panel.
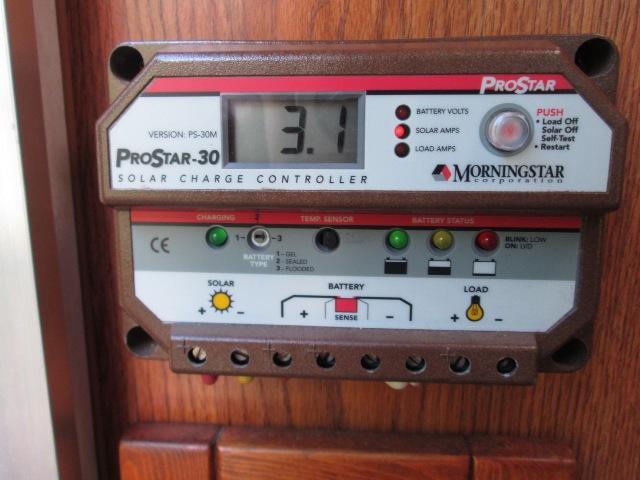
Above is the roof mounted 135 watt solar panel--best it could do, 3.1 amps. Late winter day Dec 16 though sun is bright, pretty low in the sky.
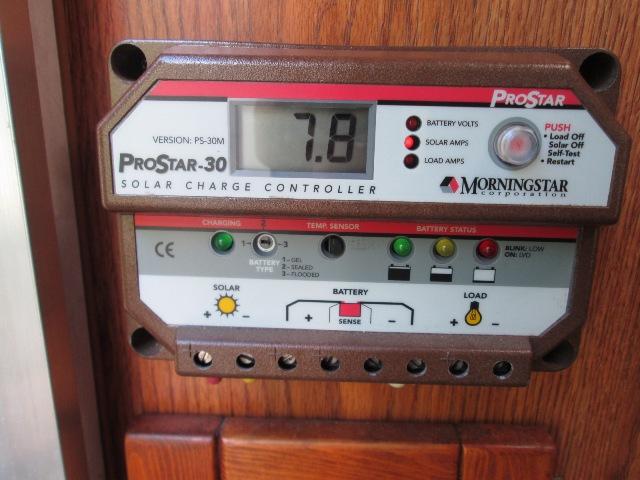
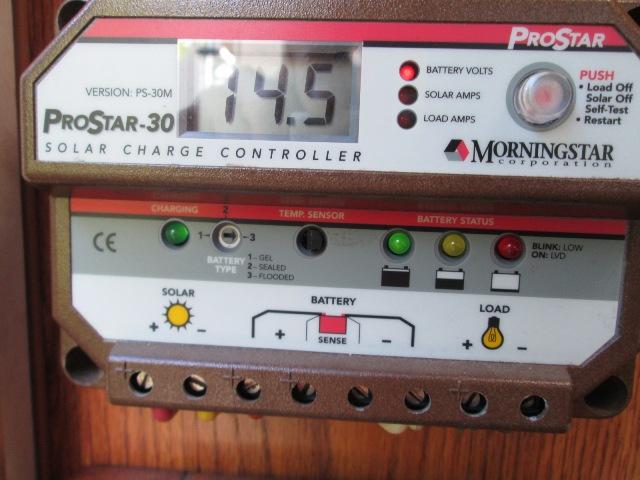
And plugged in the new panel- charge rose to 7.8 with new 100 watt panel plugged in. That's 4.7 amps! Roof still at 3.1amps. But seeing that 7.8amps, above the highest 7.6 we've ever seen on a summer day is pretty exciting.
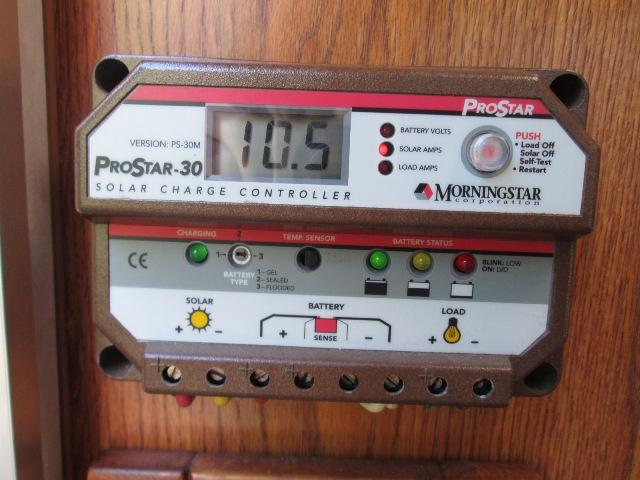
Enough to warrant climbing up on the roof and tilting the main panel and see some real higher numbers. Roof output rose to 5.8amps, portable still at 4.7amps for a combined 10.5amps! Wow is all I can say.
Though seeing these numbers really nice- more is the fact by simply plugging in the portable, increased charge from 3.1 to 7.8amp, verse climbing up on the roof-tilting the panel and it only rose to 5.8!
(That's tilting long ways- or 18" at one end so still pretty flat for this time of year. If panel were orientated westerly where I could tilt its width, likely see closer to 7+amps. Our panel is set up to tilt 4 ways but I use the same 18" arms so don't gain as much when tilted long ways-I just see to much leverage on mounts-'nother story).
As I don't tilt the panel unless we really need it this is pretty cool. But with the potential should we need it- both.
I cant hardly get numbers or pictures because 'dang batteries are charging so fast, I keep bumping the gen starter to force into charge.
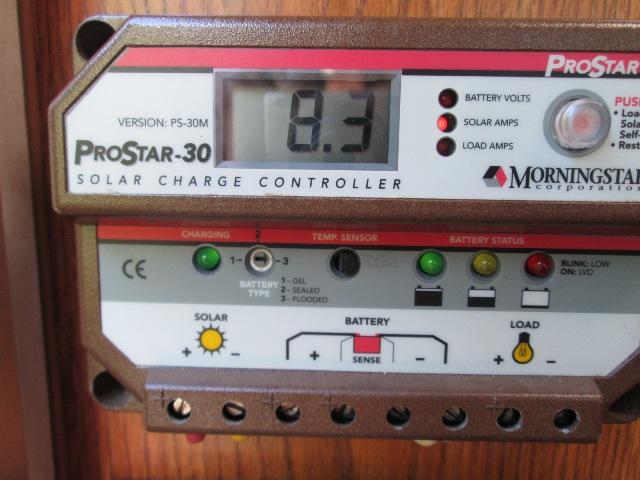
Then I realized I have quite a bit of stuff on, solar reaching regulation mode. Hmm so I turn everything off, let batteries charge a bit-they quickly were at 14.5v charge bout 0.3 amps. Then turned on everything in the camper, both roof vents, the stove vent, every light in the house...amps rose to about 8.5+/-. Turn everything off and amp rate immediately fell to 0.3. Which except for inverter & tv, what I guesstimated our use (though we've never run this much at once).
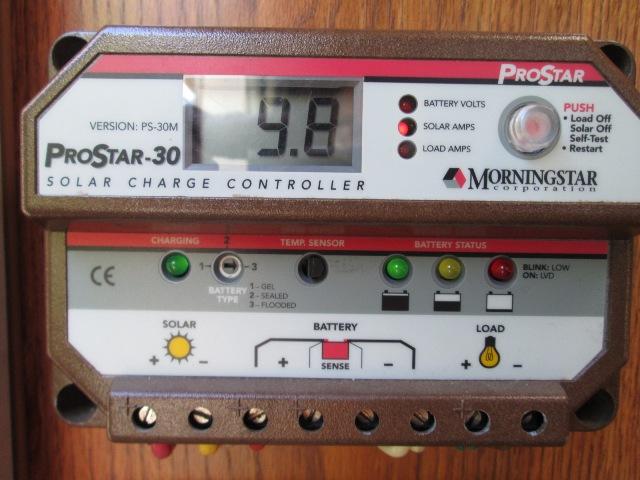
So I turned EVERYTHING back on, including the inverter, turned on the TV and sound bar, amps rose to 9.8. which is an additional 1.5amps.
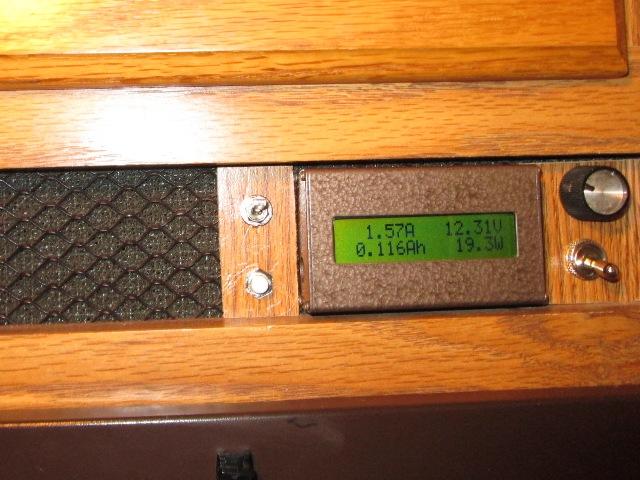
Which is what our recently added watt meter showed, about 1.5 amps to run inverter powering TV and sound bar. The watt meter is solely on inverter circuit.
So all in all with everything in camper on, burning up 9.8amps -the batteries are still charging!
Best & worst case scenario above but as we usually only see 3-4 amps average during the winter months this is promising as we also don't use that much. But even at lower numbers we now likely will generate more than we use.
Also I didn't mention during this whole time I was also adding the 30' extension between panel and camper to see the drop/ affect of 50' wire. It did not show-period-ever? Pre testing I showed about an additional 0.2-0.4 voltage drop. I can only assume 1.) the difference is in between being actually connected/hardwired verse my temporary testing connections. 2.) The drop is less than what controller can reflect. Either case, bottom line is the amp charge Im seeing.
I ended up cutting the wire going to controller, Adding another fuse inside before it and the external wiring and panel, just in case.
Back to the top
Stored-
-
One of the early considerations was where in the heck Im I going to carry. I assumed I would likely set on bed when traveling, get carried to truck when camped till something gels. If I get lucky might possibly set under dinette and get strapped to outside wall. But just peekin that wouldn't work, couldn't open cabinet. So may end up having to shuffle it around.
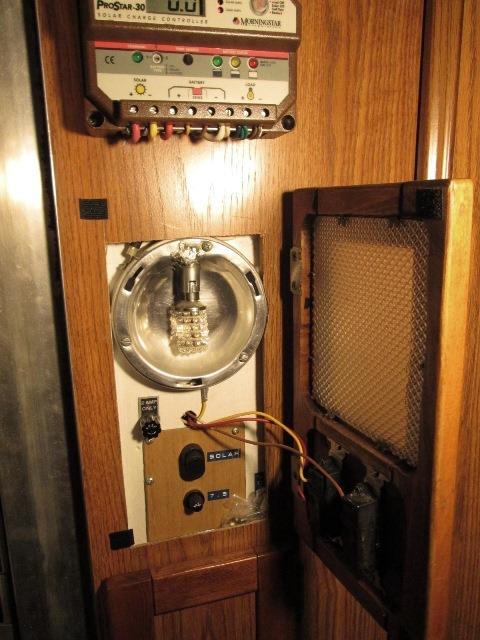
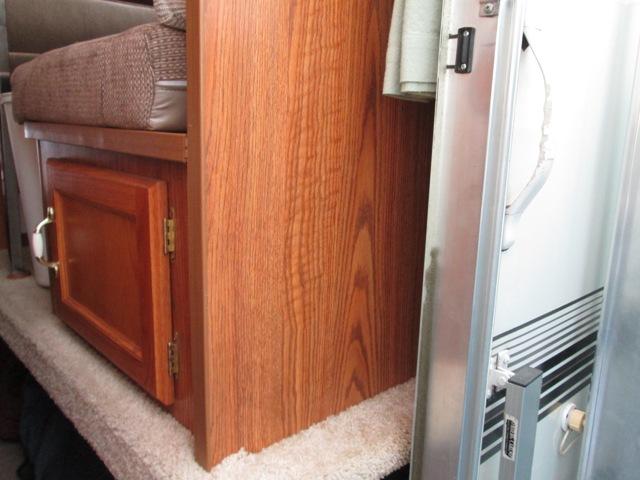
Carrying the unit back & forth to camper while 'personalizing', standing at the back door while working on controller, I kept noting the edge of floor of slide that extends about 4" behind the dinette seat back and rear wall. Currently there is a magazine rack attached there. When everything was finished, I started looking at this area again.
Stuck a tape measure in there, hmm sure looks like it might set on that ledge.
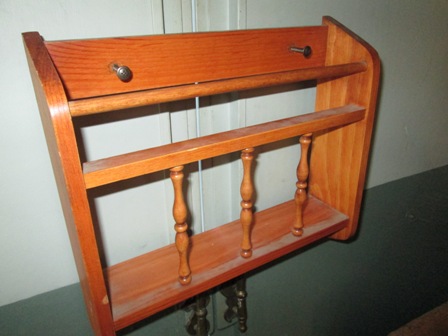
So I removed the little rack, it sat all the way toward back, attached with 4) 1 1/2" screws? Unwarranted as its pretty small box. I was surprised, never seen it before, all you could see was the open top and side plate, kinda nice. Need to remount somewhere, Margaret keeps all our maps etc in it.

Any way, sat the solar 'suit case' on the ledge-perfect fit. Slide will go it & out and case will easily clear, not interfere, so it can stay there when unused. Picture bit off but there's almost 2" between suit case & back wall. Like it was made for it.
All I need is something to secure it. Looking thru shop, have some old snap buckles and straps from old camper cover.
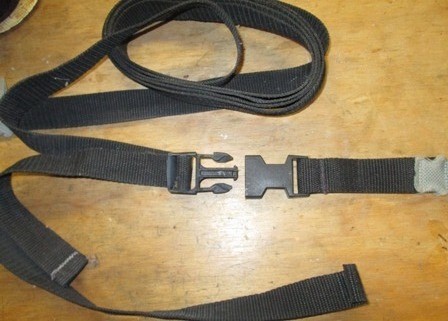
Short female end will be at outside so I can reach but its too short, buckle sets on corner of suitcase so I need to lengthen. Cut off the straps, sewed on new pieces couple inches longer so buckle ends up on face of panel. Folded over ends and sewed for screw pads.
Straps screwed to slide trim and back of dinette. Used large head lath screws with a washer.
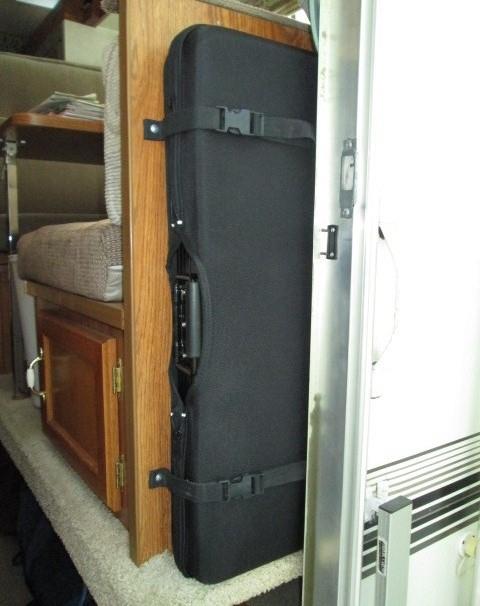
Nice-, be completely out of the way when not used, wont have to shuffle around. Easy access to deploy or store.
OOPS
-
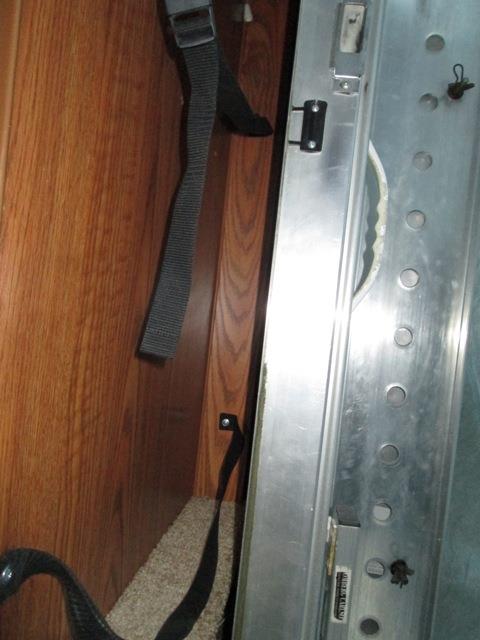
Thought we were done. Loaded up the camper. Door wont fully latch....
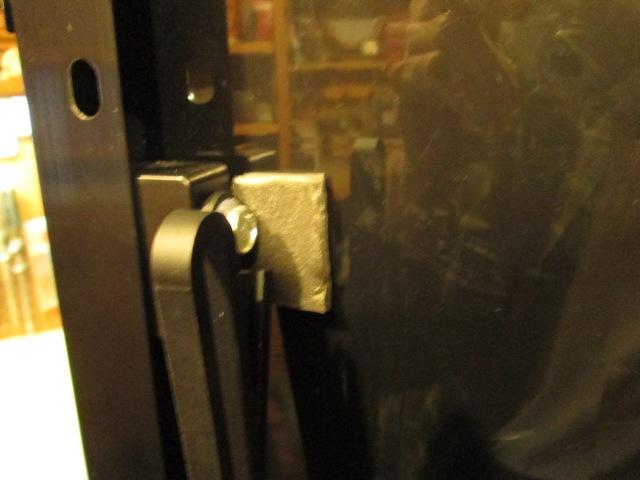
Took me a while, looking at the door & frame, what the heck, don't see any thing but its setting about 1/4" out unless I push really hard. Finally-wondering if it could possibly be the solar panel? So went inside, tried to close door. Duh, Yup the screen door pull handle protrudes inside quite a bit, hitting the solar panel case. Good grief.
As we wont be using the screen this time of year as far as door being open so don't need the handle. I assumed I was just going to remove the whole center section of screen. Deal with it later, but looking at it, had never noted, the inside pull is a separate piece. Cool, 4 little screws hold it on, simple.
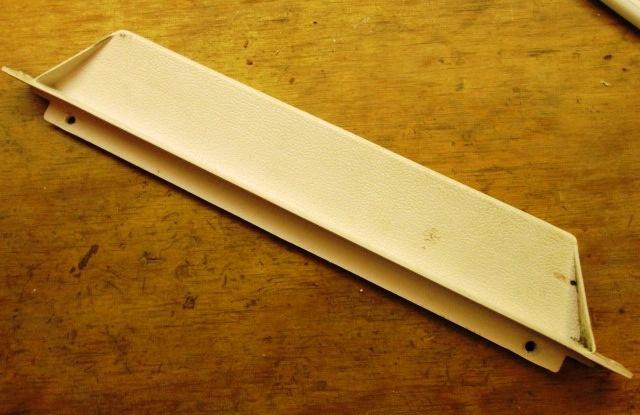
So removed for this trip. Took out to shop, looking at it needs to be bout 1/2" narrower.
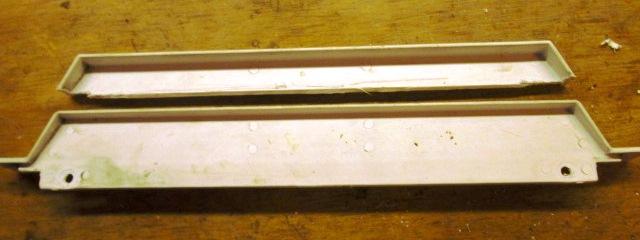
Flipping over it has 2 flanges, hmm, so I ran an exacto blade along the outside corner of center rib. Hack sawed the flange at ends. Little sanding, scraped smooth with back side of dull knife. Couldn't have been any easier unless it had a sign-"Cut here if too wide". Good as new!
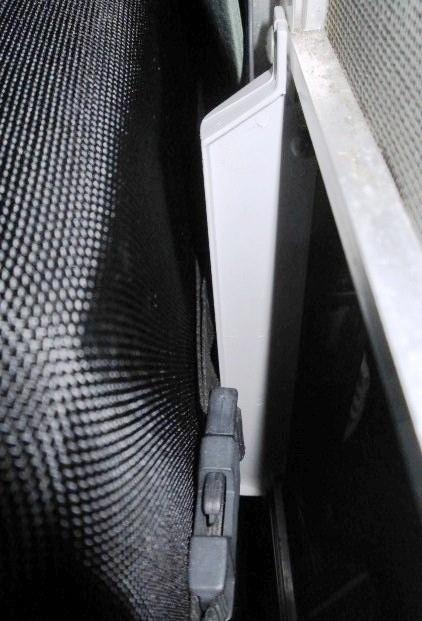
Everything is connected to the other...Surprised I hadn't noticed. Hard to see, but plenty of clearance. Now.
Back to the top
Conclusions
-
Overall I really liked this panel, the wiring issue as received is just a puzzle given the quality of the unit and components. Had it worked would have been a plug & play. But since I started working on it, cascaded into modifying to suit. Markified...
The frame modifications just my interpretation of how it should be assembled and possible down the road mounting. Though I've decided to not use the included controller its really a nice unit for what it is. It appears to offer a bit more information on what its doing and adjustability of set points etc. -though multitude of features not mentioned in manual. When I scrolled thru the screens kinda amazed. Nor is the option of the button battery-yes it has a place to use one, I assume to store settings when unplugged-again no mention of it.
Would I recommend this unit. Well... yes, with a big but. Like I said the overall quality of construction is nice, however due to the wiring issue with mine only with the verification of connections. That and generally better than some units, this portable (probably most) lacks in my opinion real design considerations for use in a camper. Specifically a truck camper.
One obviously is using in rain etc. Too many places this holds water, ( though primarily only a consideration when putting away). Access to battery. Our truck camper takes a bit of effort to access, battery clamps are really not a viable option. Though hardwiring the quick connect to battery with access to plug (& fuse) easy enough. Though getting outside with a door open? Having a non water proof controller mounted to panel? It is a bit protected when in use and probably be ok. However having the longest wire run between panel mounted controller and batteries is not ideal as far as loss, doesn't seem logical. So advise mounting controller in camper- hardwiring to battery, wire the quick connect to controller output then just plug in panel. Last is length and gage of included cord, just rather short to be versatile finding sun.
Everyones situation/needs etc will be a bit different, but all in all worthy of consideration. Worst case- your wiring may come in 'some assembly required' state, but easy to correct. This convoluted page should neither encourage or discourage you
Ill update this page later with some real world usage, but the ability to add more amps-place in sun independent of camper, following low sun in the winter catching those last few ray seems it will be worth the effort.
Back to the top
Back to Ourelkhorn Camper Modifications page