Replace camper water heater ignitor/relighter that continued to spark after lighting....
Not a how to, just what I did replacing unavailable factory reignitor with a Suburban unitThe problem:
Our water heater an Atwood G6A-7P, basically a manual water heater with an electronic "match" to light pilot. -after lighting the pilot the electrode continues to spark, though a tad slower rate. I would turn off the electronic spark module, because it would just continuously spark forever. This also occurred 5years ago. I was able to 'fix' then by simply cleaning. Corrosion any where on the ground path, or more probable on the electrode tip itself, tip of pilot tube, all needs to be clean & shiny. I would highly recommend that first if you haven't tried. I got 5 years of service. See water heater fix page.
However recently started its continual sparking again. No amount of cleaning would restore normal function. Tried running direct ground wire, even tried different electrode. Adjusting distance of electrode- needs to be no more than 1/8" away from pilot tube. Decided I got my 16 years of use out of it- time to replace. Only to find the parts are no longer available, electrode #93804, the module #93801. Nor could I find a recommended direct replacement.
Newer Atwood ignitor/relighters cost is almost a quarter of a whole new heater? That's dumb. The ignitor assembly, other than direct bolt on/fit is an independent universal part. It has no inter reaction with heater itself. These units simply added on to supply an electric spark instead of using a match, if pilot goes out it relights it. You can buy universal add on kits for heaters that are manually lit. Other than location of mounting brackets-shape of electrode same items? Why double the cost? If you have DSI or remote light heater that's different, ignitors do interface with heater but on basic manual heaters just no excuse...
As a matter of convenience I may have purchased factory replacement- if they were available. Since modifying likely why spend twice what its worth and still need to make fit? Rant over...
Suburban sells several basic universal kits. Simple 2 wire hook up, power/ground with electrode-wires and module. Functionally identical as what I have.
On to replacement
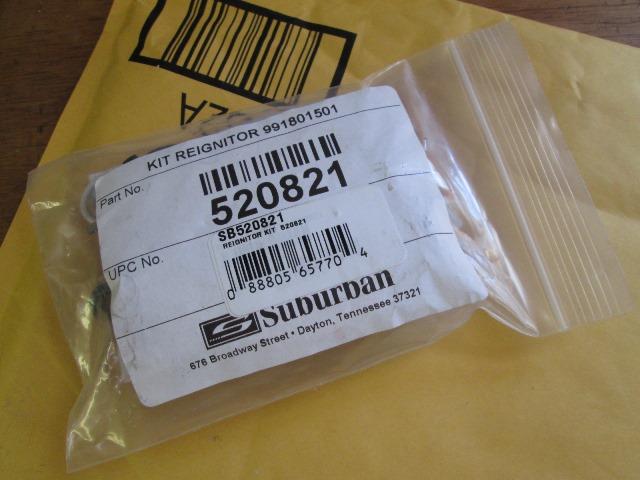
The replacement reignitor kit I used. There ARE many kits, I just picked one. Others may need less 'fitting', but unknown.
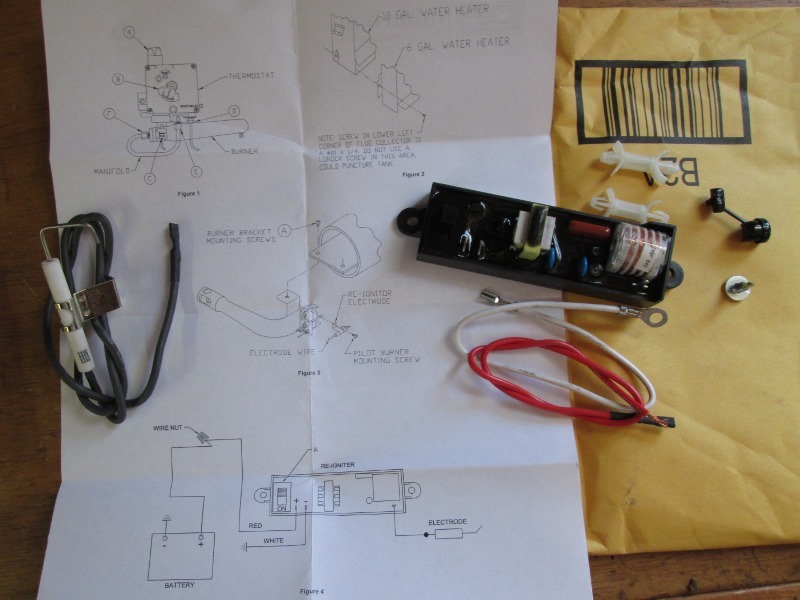
The kits are complete, including module, electrode with mount, wiring, ground screw, stand off mounts for module etc.
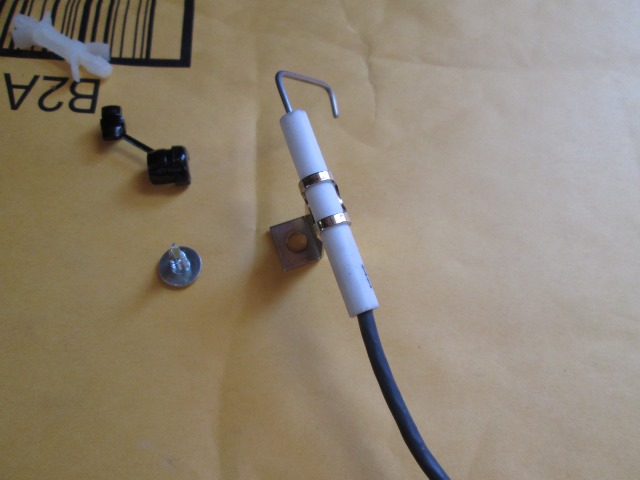
New electrode as it came, tip is considerably longer, mount not even close. Mounting the electrode and bending/reshaping to set correctly, placing electrode tip at pilot flame will be the only task. At half cost, worth the time.
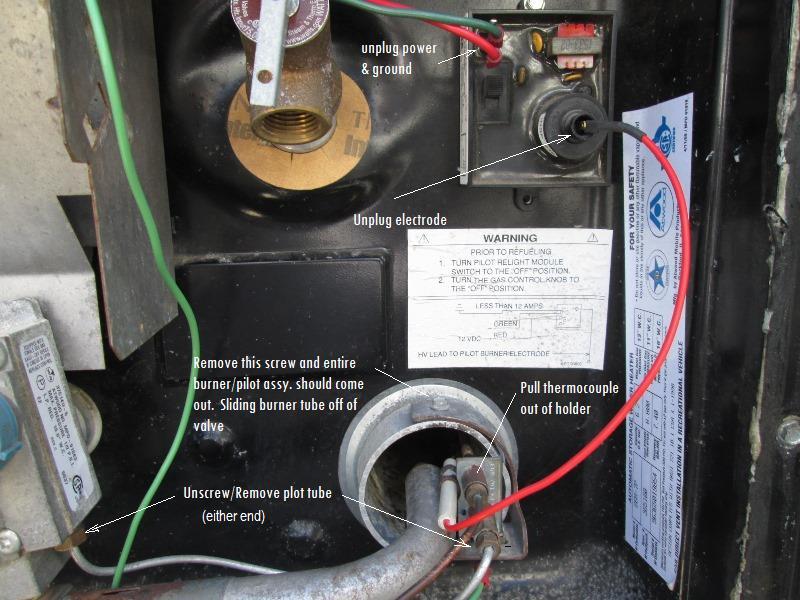
Decided easier to remove the burner assembly & work outside of heater. Just what I did.
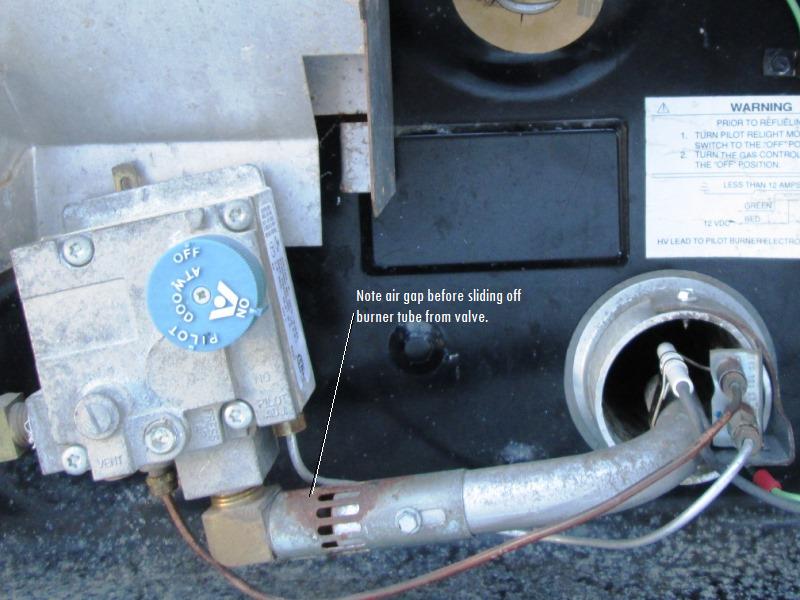
Note when sliding off burner tube the air mix sleeve may need loosening-just note its adjustment. Tube and sleeve simply slide over valve brass fitting.
I didn't get a picture of factory electrode or removal. Its simply screwed between pilot/thermo coupler mount and base.
Several pictures of bent/reshaped electrode tip and its bracket to end up with tip about 1/16-1/8 from pilot tube. Only relevant if you used same kit. Other than ending up with new electrode tip at pilot flame, approximately 1/16-1/8 from metal end of tube, only CRITICAL part is NEVER apply any bending force to electrodes ceramic housing. Cracking the ceramic will allow it to ground, rendering electrode useless. They are fragile
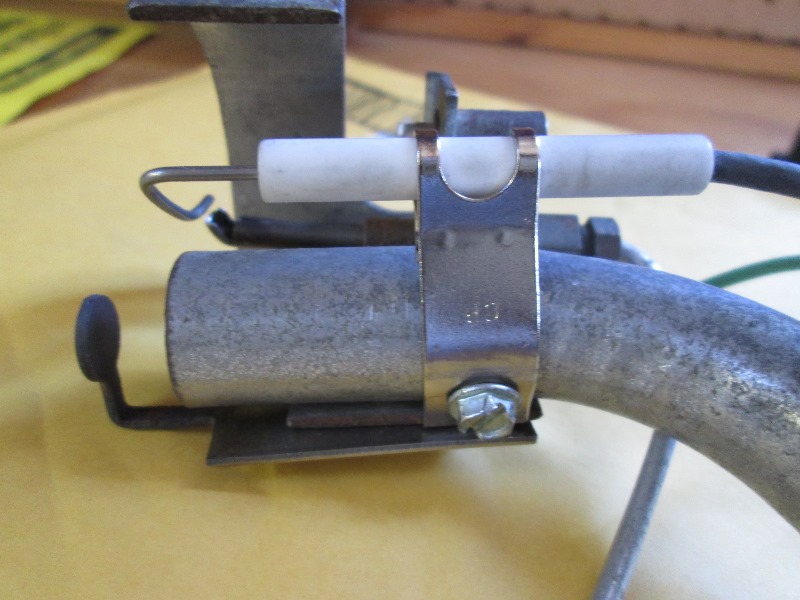
I rebent the new electrodes mount to set on outside of burner tube. I used 2 pliers-so as not to transfer any force to ceramic. Setting outside minimized how much I had to bend electrode tip and compensated for it being longer. Its bottom edge is also against base so mount can not turn. I honestly do not know if tip could be cut-. But this worked. Spent more time coming up with mounting than anything else. Drill hole for sheet metal screw into burner tube.
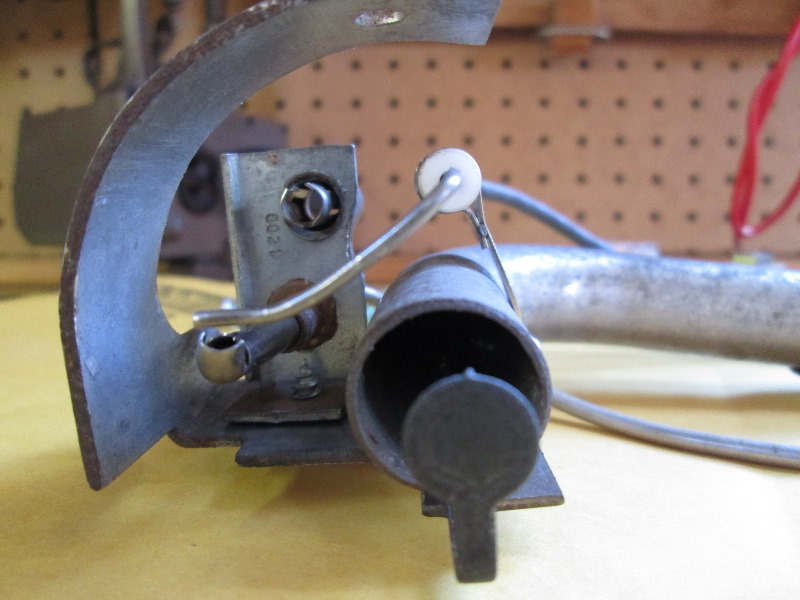
Viewed from inside. I straightened the last existing bend in new electrode and rebent so its sorta parallel to pilot tube. Again, using 2 pair of pliers.
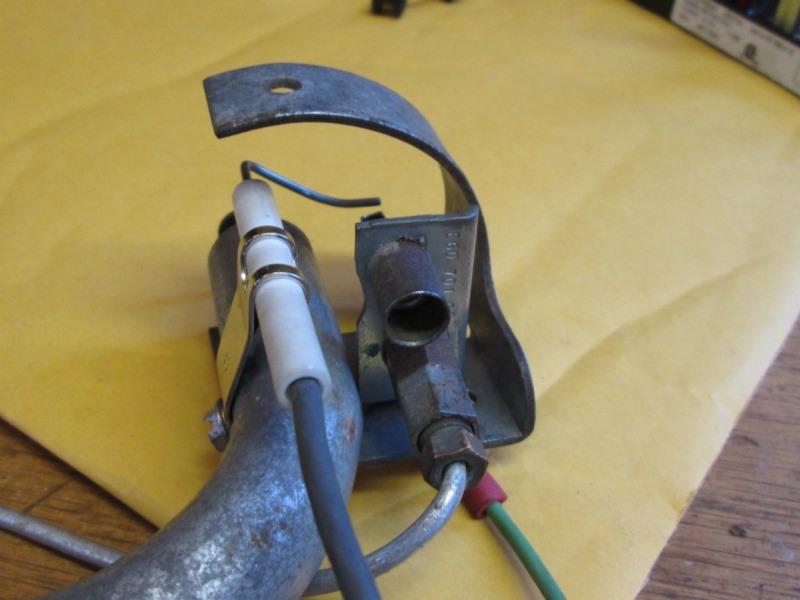
Viewed from outside. One bonus mounting electrode as I did, it will be easily removable without disassembling burner/pilot assembly.
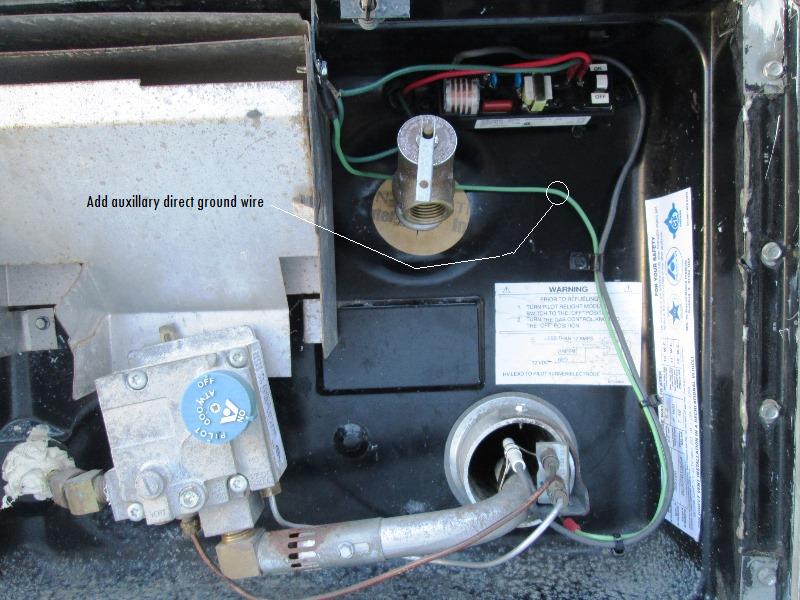
And remounted. I mounted the module up at top, mostly to oriented switch as shown. I didn't use the plastic stand offs. Before giving up and ordering new unit I had added the auxiliary ground wire. Decided to keep it as it bypasses the multitude of metal to metal ground connections (and possible source for bad connection) in the ground path. As the reignitor works by sending power to electrode and senses grounding thru the pilot flame, No ground/bad connection, it keeps sparking. Cheap insurance and in my opinion a better path-direct from pilot to incoming ground wire.
Tied up the wiring, labeled switch. Tested-works!
As mentioned not a how to, its pretty simple. Using Suburban kits allows substantial cost savings an alternative since factory parts no longer available with no replacement recommendation.
Made a short video of how it was continuously sparking and how it works now.
Atwood water heater continuous spark fixed
Back to Ourelkhorn Camper Modifications page