Easier Cabover bed access. 07/2017
Long page, split into sections or just scroll thru...- Intro- Wishes & fishes, what & why were doing. Making it easier to get up to cabover
- A plan
- Construction figuring out as we go
- Carpet wrap and install
- Opps Minor rework, step leg to tall, trim cabinet top for more vertical clearance
- Reinstalled, working
- Latches Securing step in deployed position
- 2019 Updates: moved to seperate page
Hook & eye Readdress holding step stored,
Assit handles Add handles for something to grab
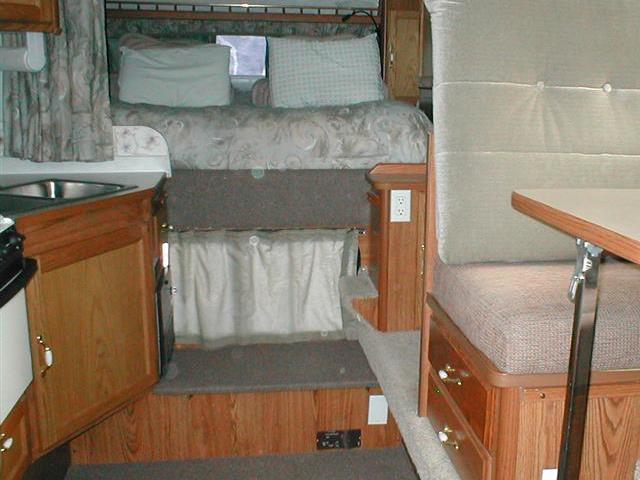
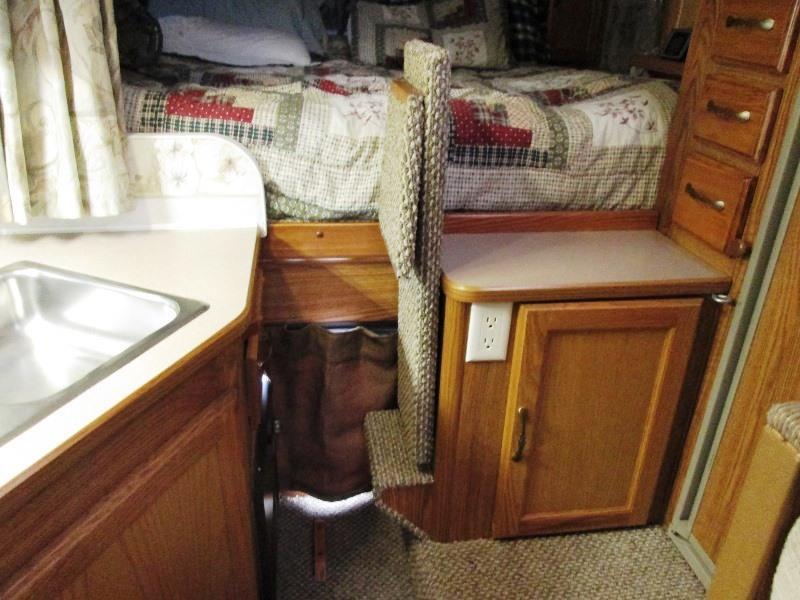
After replacing carpet in camper the idea of adding a ladder for easier access into bed came back up. Something have always wanted to do, make getting into cabover easier. Exposing the wood on wall under bed after removing carpet, ladder notion resurfaced. There is a small step to the right on cabinet. Getting onto bed, with left foot step onto water tank box, then right foot on the step and throw left knee onto bed. Its just awkward. Getting off more so, kinda have to scootch off bed until foot finds step.
Seems ladder would be easy but adding not. One issue is it needs to be removable due to slide room. Second is spacing of steps, third is the water tank box. Lastly is some form of hand hold. Right now kinda throw arms onto bed to help get up, getting down once foot on the small step try to place hand on sink counter to stabilize. We've gotten the hang of it over the years, second nature but as I said not getting any easier. So simply pondering.
There are many aluminum ladders sold that could be used, simple hook to bed or mounted with brackets for ease of removing etc but none offer any hand hold.
So what started as a ladder will be simple full step addition for the time being.
Just a comparison of space with slide in and slide out.
I just kept seeing a nice oak ladder. made a sketch,
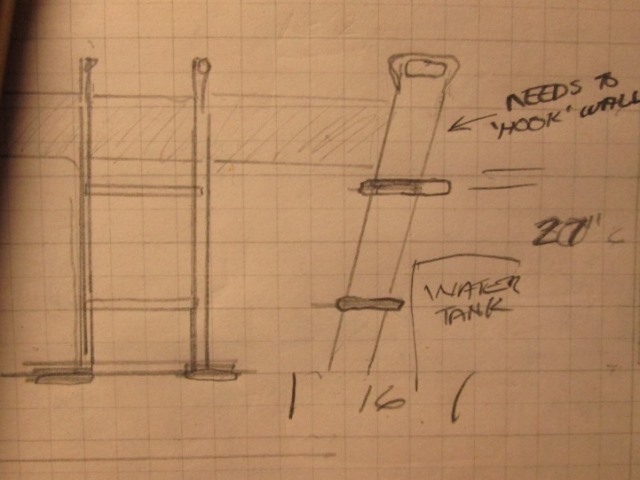
As nice as it could be visually, incorporate hand holds, wouldn't look like the outside ladder, still some issues. Solidified kinda what I envisioned but identified, deploying/securing, storing, weight. Mostly due to slide, just isn't practical, otherwise it's what I would do.
A plan
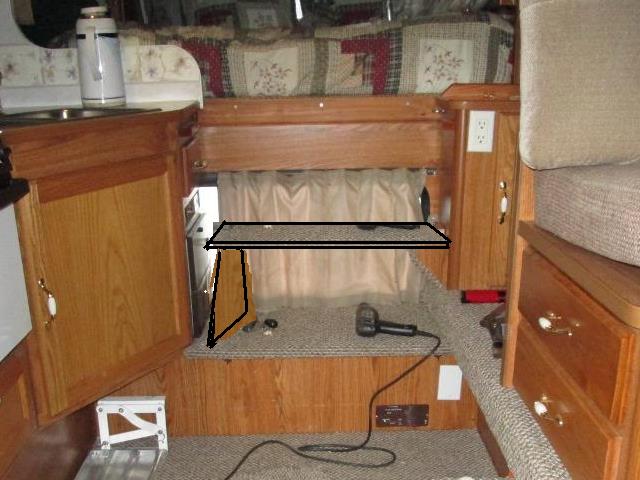
Sketching it out, -well, should look better than this hopefully but... the left side needs something to secure. Hand hold/steady rest would be nice, maybe counter top to ceiling wood pole. No, would interfere with TV when swung over to view from dinette. I'll look at the divider wall end of counter top for handle. Its solid 3/4" plywood. Might be able to do something- later.
Step would have to be narrow to allow stepping past to/from water tank box step. Folded out new step could set on right step old step so could use piano hinge. Piano hinge on the leg, probably a stop block on tank lid leg would set against then simple slide latch on the inside. Hmm have a couple of step stools, check about stepping past and height. Just seems adding a ladder should be so simple.
Construct...
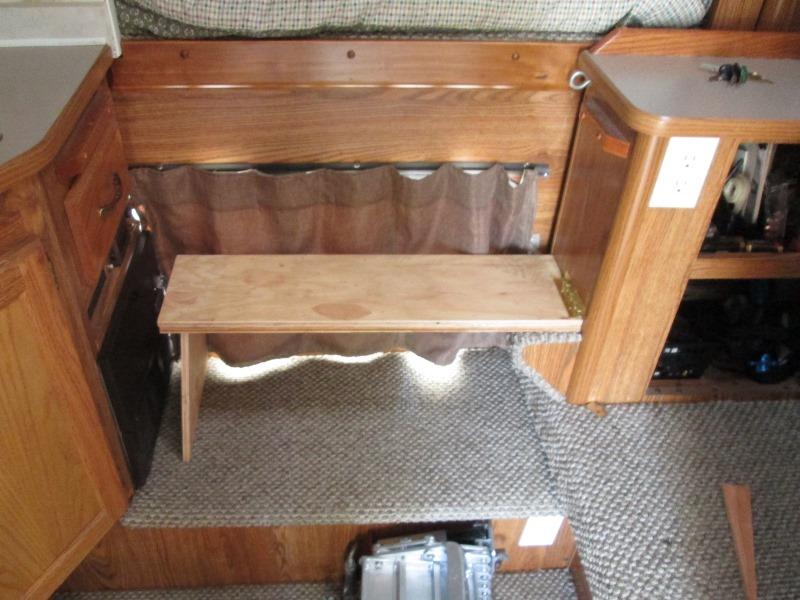
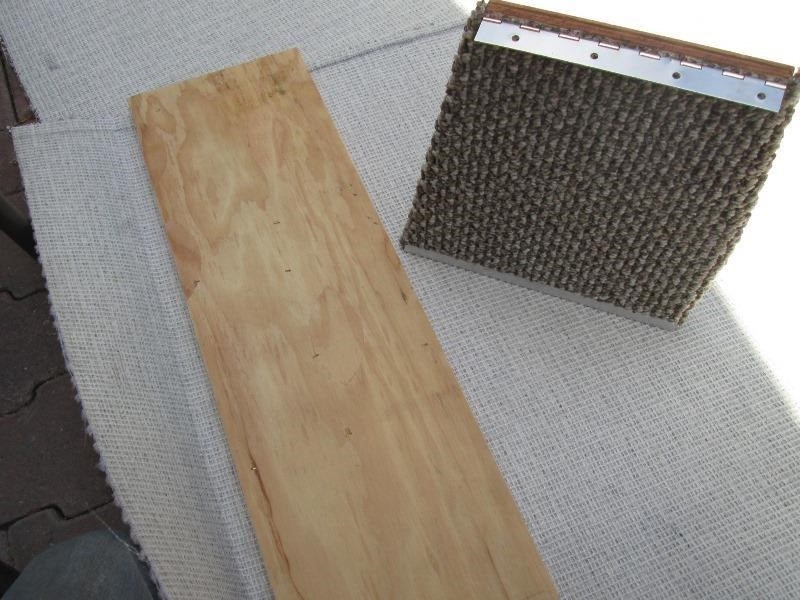
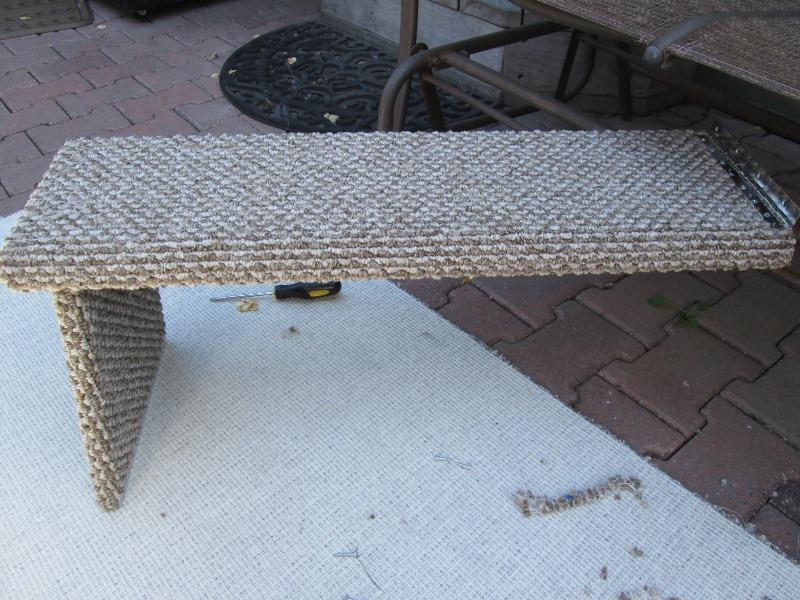
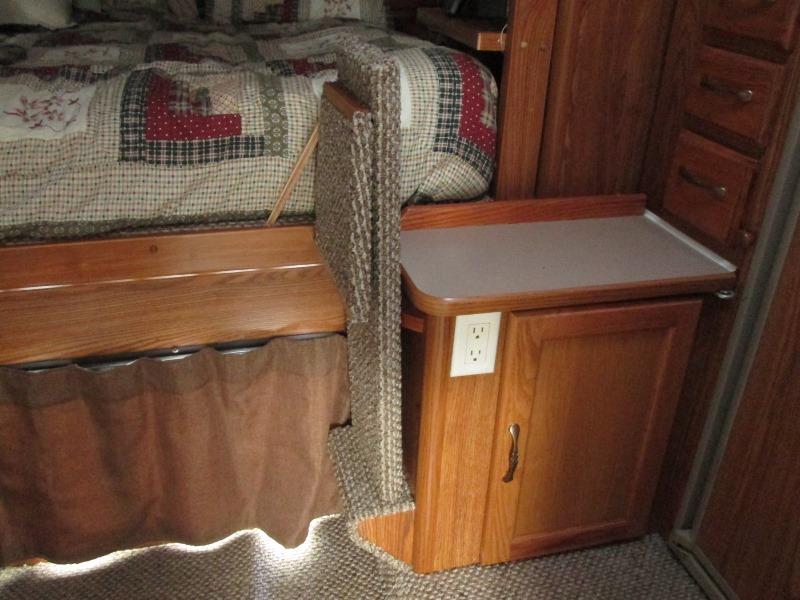
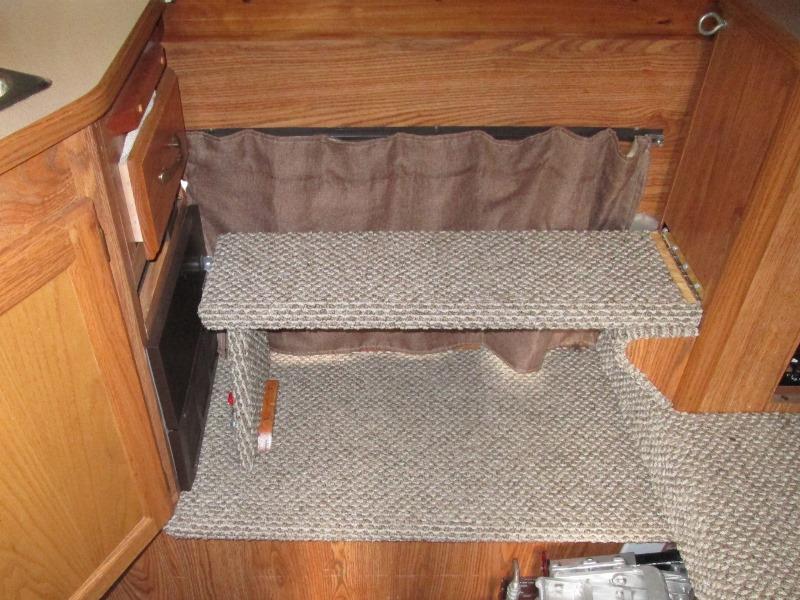
Height and depth of existing side step about right. Cut a 8"x 28" top, tapered leg is 8" at top, 11" bottom for more support, 10 1/2" high. Loosely sat up and appears may work.. Using 3/8" ply, doubled top. Cut top edge with 1/4x 45° chamfer, sanded round. Intent is to wrap boards in carpet.
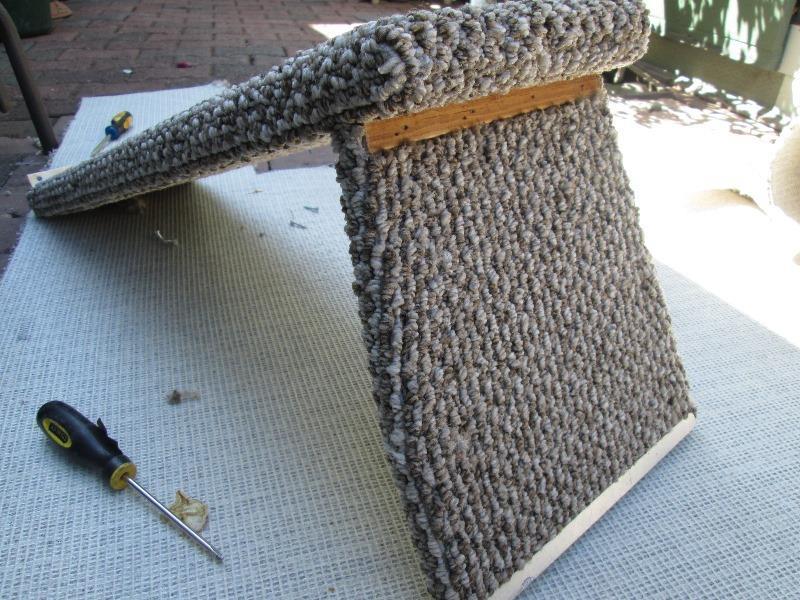
Hinged the leg to step, hinge on step not yet attached to cabinet. Tried using. Before stood on the water tank step, then placing right foot on side step, arms up on bed, then pushed up onto to bed. Kinda of one fluid motion, awkward and lifting weight with on leg. Now can step up on box then step up on new step with both feet, which put you over bed height. Way easier, also easier stepping up a step at a time. However- my first impulse when on new step was to stand up -bonk- and hit ceiling. Had Margaret try, she did the same thing. Habit of standing on water tank box before doing the right foot push...Once adjusting we both found easier, not quite the hike, just need to unlearn and relearn. Getting off the bed even easier as feet find the step verses before it was waving foot around foot to find side step.
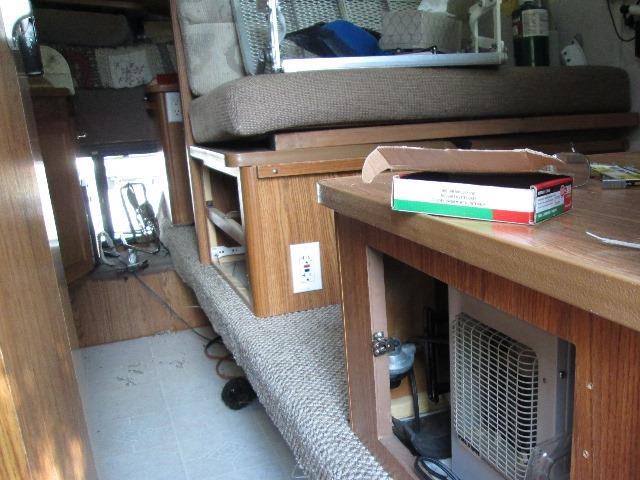
I did discover hinging step to cabinet a problem. The step and leg folded up right is about 2" thick. The old shelf block and over hang of top wont allow step to fold vertical, sets out at pretty good angle, about an other 2". For more width when slide in, block could be removed and re-trim the top which would free about 1 1/2" or more. More work but due to making more difficult to get on bed with slide in (packing/cleaning etc when at home) trimming cabinet top. Hopefully the block removed paneling behind block is ok. Simpler if wasn't for space, could just add a block on old side step and shorten new step to hinge from block. Then it could stand vertical, take up a little less room, oh, but then the side step, needed for when slide is in, couldn't be used- hmm guess that made up my mind, didn't really want to trim cabinet. Details...

Realized may not be too bad, looking at old picture this little cabinet is free standing though screwed to back wall. If top can be removed then is just slicing of back butt end instead of having to redo the outside edge trim...that would be simple
Carpet wrap & install
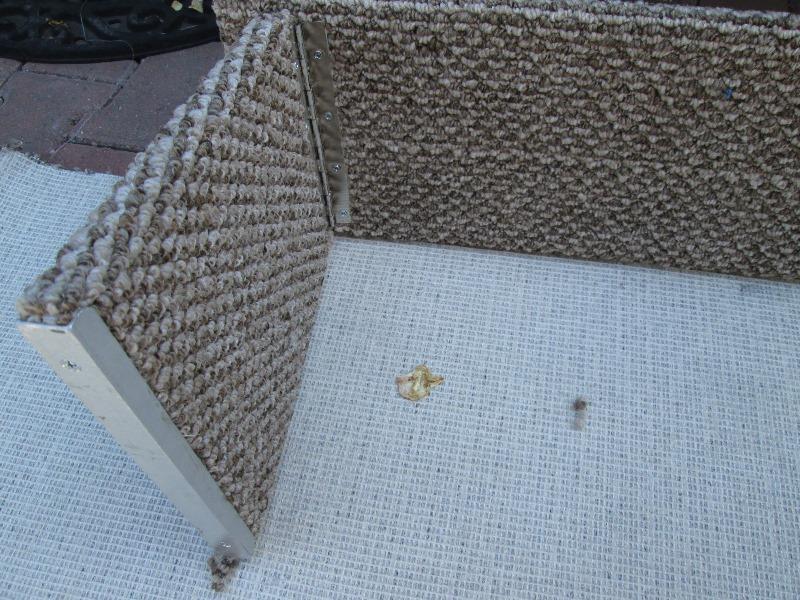
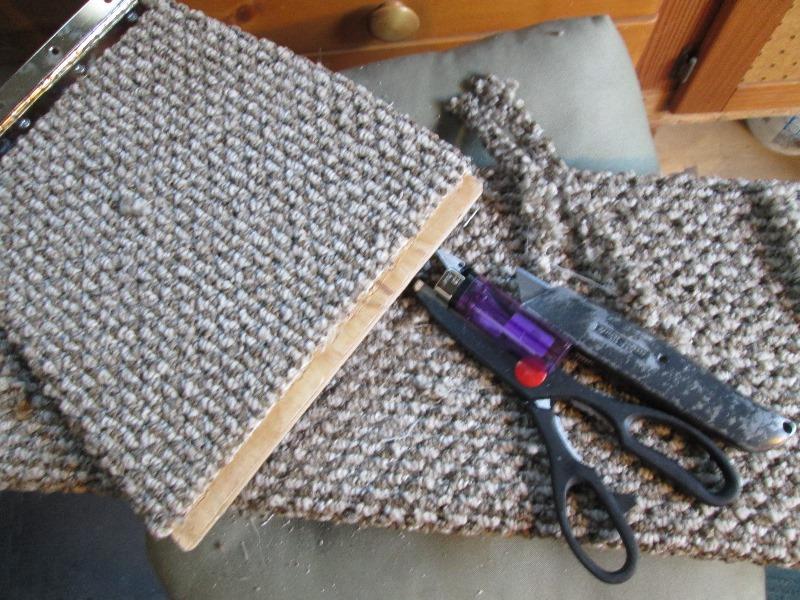
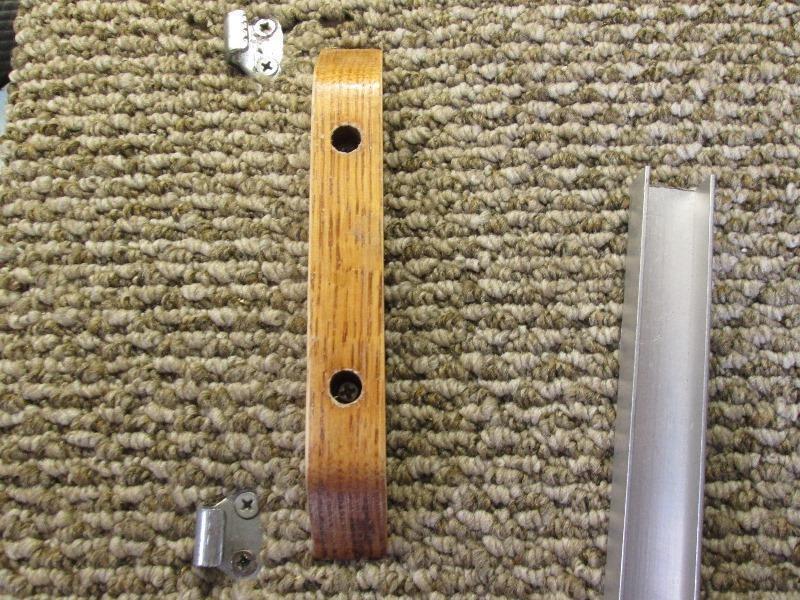
Got the leg wrapped. Because its cut at angle was the hardest. Ended partial wrapping and splicing in a middle section. Used adhesive and stapler. Bottom I had a 1/2" x 3/4" ID piece of aluminum channel, made a perfect base capturing ends of carpet. Plus gives a 1" wide foot. Top unwrapped to set against step, did add a 1/4"x 1" so screws didn't break thru. Screws for the piano hinge replaced using #6 x 5/8"
Starting the step, just too many gotchas. Was going to cut around hinges but securing face and back wasn't going to happen, ended just wrapping board without hinges attached. One end at cabinet hinge isn't warped, other end is folded like envelope, not fun.
Starting on middle of bottom side loosely staple, then folding over ensuring pattern straight across front continued, trim to meet butt joint. Several staples into glued carpet. Then tuck and folded the one end, not too bad given front edge is rounded over. Picture shows end of leg, front piece of carpet that wraps about an inch both sides. Filler piece in middle, gave me fits but this is what you'll see in stored position so pretty happy (lucky).
Was not going to carpet under leg hinge but couldn't figure how to make it look ok (raw wood) when in stored position so sat hinge on carpet. Should be ok as force is downward. Also, after the fact, hinge wouldn't have folded over flat as I discovered when mounting step to cabinet
Same on end hinge. Installed hinge under carpet but thickness wouldn't allow hinge to fold flat. Moved on top of carpet. This one will see twisting force so added screws between existing holes. Really didn't want to see this part of hinge, if I hadn't used plywood it could have been on end. Used Bic lighter melting threads and fiber to seal raw ends.
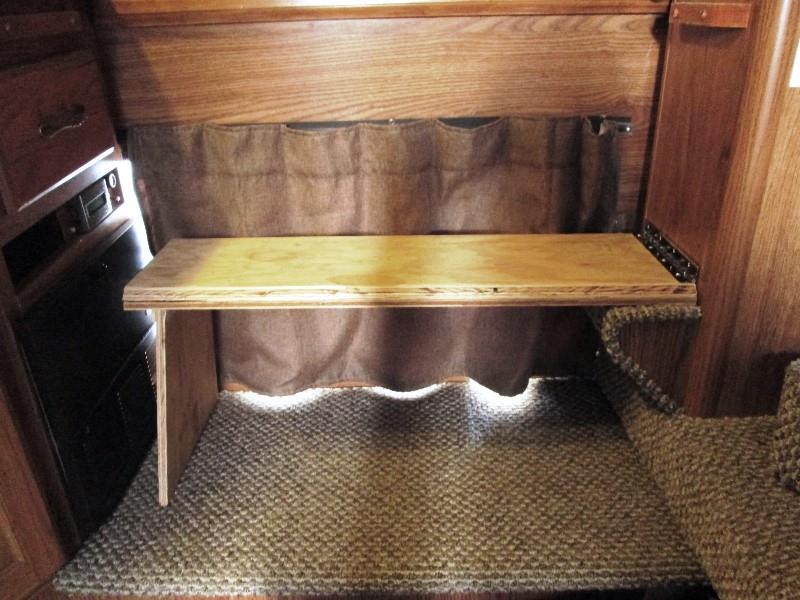
Overall, better than I hoped. if doing over couple of pieces of nice oak would have been better but I had all this stuff on hand.
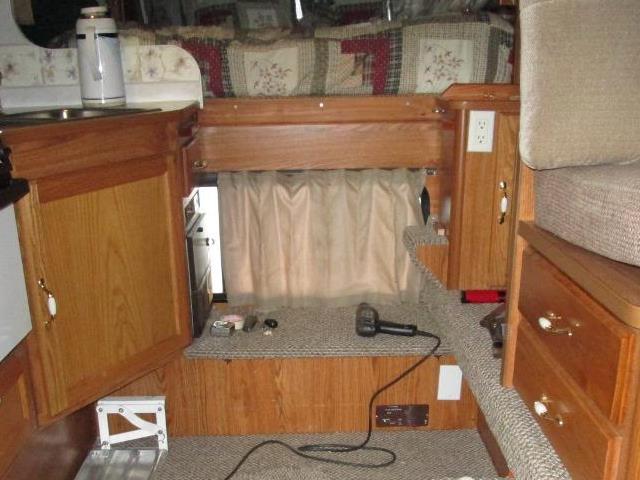
Took to camper still need to trim cabinet top but idea of what it'l look like stored.
Opps
Rework
Removed the leg, used razor and cut along base edge to remove carpet. Then removed aluminum base. Paused a minute before throwing on the table saw, I really do not want to re carpet this.
No help for it, slowly cut watching the carpet, cut within a 1/16"-saw didn't grab a string. Hokey Smoke, just shear luck. Re attached the base, reinstall leg on step.

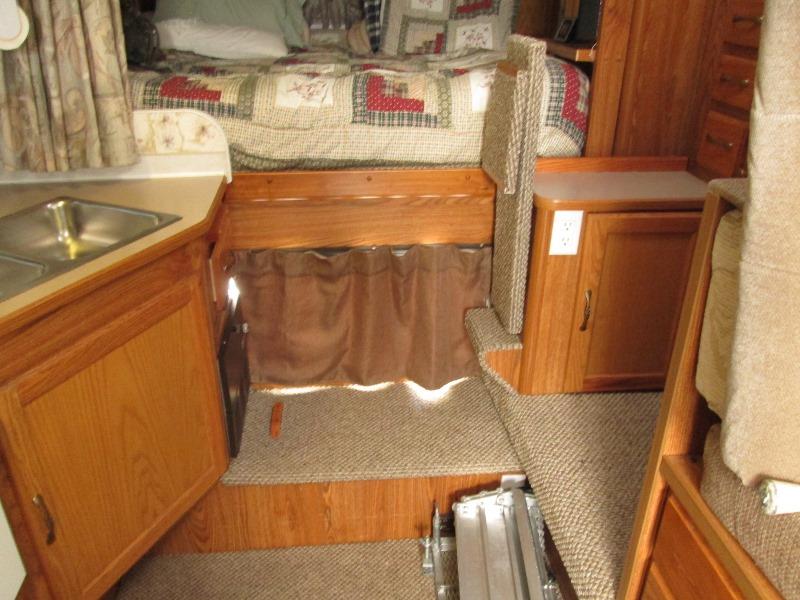
Hey it fits! Screwed the step hinge to cabinet. Now the cabinet top. Removing the block on wall and place on tank lid step so steps leg cant swing in. Later I'll match drill block and leg to insert a pin (maybe 2) to capture step leg tying it to water tank lid. Lot of leverage on free leg end 'could' twist hinge side at cabinet.

Scribed the cabinet top overhang, removed the top.

Prepping the top to cut. If nothing, at least the builders of our camper were consistent. 19 staples to hold a 10" piece of white vinyl corner trim, its not going back. Removed the outer edge trim and back rail. Marked 5/8" cut off line and from all screw holes so I can drill pilots in the particle board.
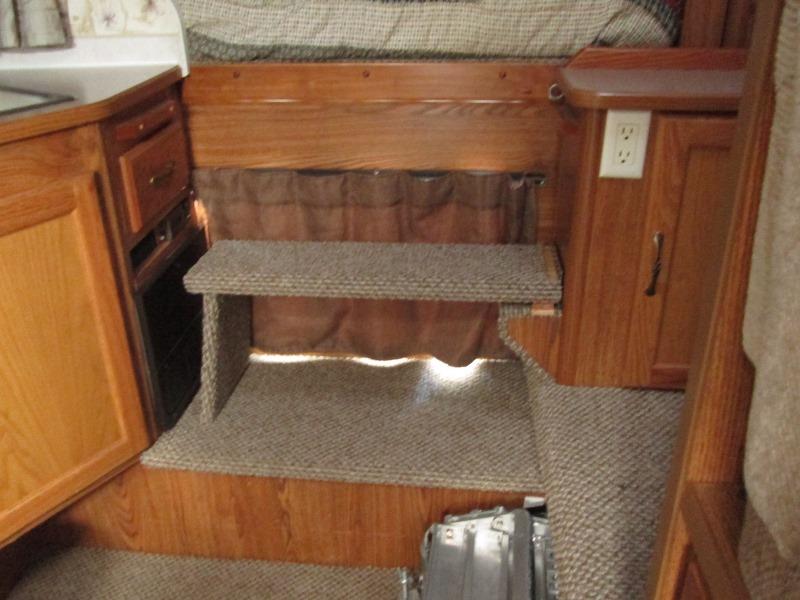
Top cut and reinstalled, working
Used simple hook and eye to hold step up. Step stands vertically- least more so than it did giving more room to get by when slide is in. Also shows block moved to floor as leg restraint to ensure doesn't walk over center.
Hmm, Knew it was going to be close with slide in. Height was what I didn't see. Negated part of reason to cut the cabinet top though still looks better. Oh well, I can easily climb over cabinet standing on the slide floor. Margaret packing, I'll move slide out. Small price for ease of access, self storing, easy deploy.

Step deployed. On the round to it is a hand hold/grab bar or steady rest. But first, sooner than later, is adding positive tension hold down for steps leg. Moved block not tall enough. Maybe an over center cam action latches, or simple jeep hood latch. Something to resist any rolling action. Its why I sat on existing step when folded down, but 28" is a lot of leverage. TBD
And no sooner finished, I stumbled upon this- Extension Ladder.
Jan. 2016 #12 mod (bottom of that page) at truck camper magazine. Clever wood extension ladder.
I couldn't use as designed because of slide but the concept-lower half extending solves issue of getting to floor past water tank box. Instead of hinged to set on top of box, is hinged to store perpendicular to bed to retract slide. After doing step, I found space wasn't usable anyway. One side rail extended to mattress height for handhold...the step works so I've a couple of years, but if revisiting this will be the direction as 2 piece ladder will allow me to build the ladder I envisioned.
Back to top of page
Latches, securing step while in use
Simple latches on order to positively anchor step leg. Not sure will work as leg is at right angle to box it sets on but trying. Hopefully with hook half rotated so its base is under leg, latch engagement will be over center enough to keep latch engaged.
Bigger issue will be if enough room to flip handle...TBD
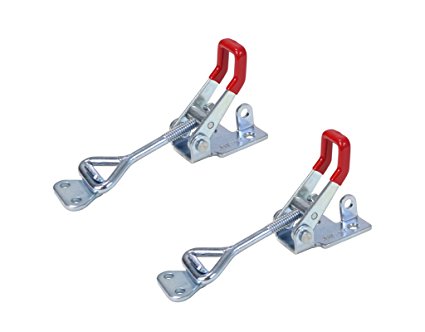
Latches arrived. Not too bad for price. Bent the latch hooks over for more catch, mounted backwards latch will be pulling into hook so should stay engaged pulling at 90°. These sold by many vendors are #4002. I was afraid they might be to big and almost ordered smaller #4001. Glad I didn't these are perfect size wise-but smaller than I thought.
Wow 1/8"clearance, wasn't sure until mounted. Handles need to fully swing down so latch eye slips into hooks then push step leg down. Leg captured between added block and the latch hooks. The latch hook mount faces are under the leg. Screwed thru carpet to tank box lid which leg setting on them a lot firmer than previously setting on carpet. Flip the handles up to pull tight. Works! Almost zero movement now so wont be tweaking the hinge end.
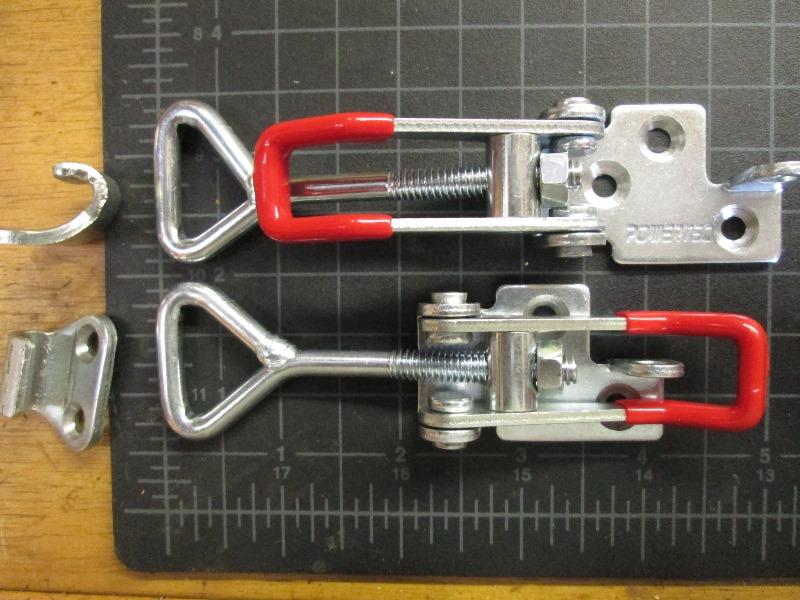
Latches screwed to leg with 2) 1" bugle head screws and one #10 CS bolt & nut each. The hooks I just bugle head screwed to get mounted until I get to the hardware store. Replacing all the screws on the hooks with CS bolts and nuts with a back up bar thru the plywood box top. Weakest link is the vertical pull from latches on the hooks, the wood screws wont last long and just pull out any real force applied. Drilling thru carpet no fun, pretty risky so likely drill from back side just shy of carpet then drive the bolts thru.
Was going to paint latches and redo the plastic dip in black but pretty much unseen.
Think were done, should be a lot easier climbing up into cabover.
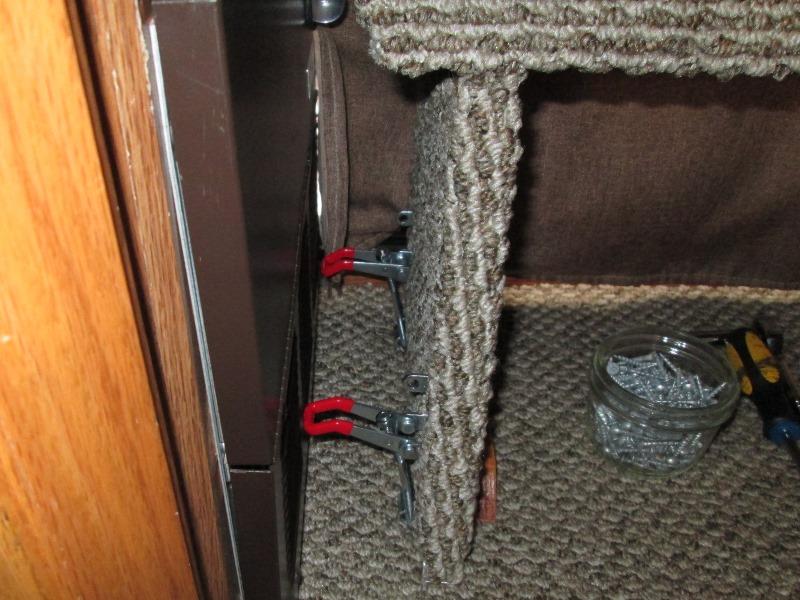
Just picture of installed hooks after replacing screws with thru bolts. Aluminum channel is what's on bottom of leg, after inserting the latch eye into hooks the leg slips between hooks and block
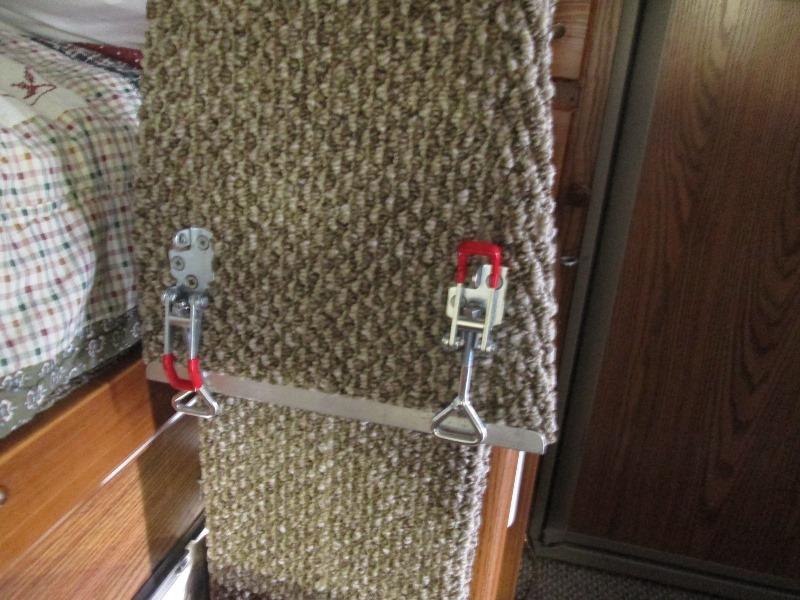
And picture of mounted latches, one open, one closed.
UPDATE: Out on the road the step is awesome. However the latches required a bit of fiddling. Problem is the latch handles don't always have enough room to swing over, hit the converter. Also distance between catches and wood block a tad to tight, latch hoops and bottom of leg thicker than space, though only a problem when latches cant fully open.
Cause is the one end of step is attached to slide and the other end to fixed camper side. Distance slide goes out varies depending on truck twisted, unlevel ground etc.
It takes very little to cause the 1/8" clearance I had for the latches to simply go away.
Once home removed the step leg and moved toward cabinet hinge about 3/4". Also moved both latch catches and the wood stop block over away from converter about 3/4" moving the wood block an additional 1/8" toward fixed hinge.

Gained almost an inch clear between handles and converter. Slide travel shouldn't be an issue. Plus is more room for hand in between.
- Updates 07/2019 Moved to seperate page Address hook & eye that hold step in stored position, add hand grab assist handles
Replace camper carpet
Back to Ourelkhorn Camper Modifications page