Replace camper toilet with taller foot control unit
-
The purpose
Make us young again..well may help address couple of things that come with growing older.
One, never cared for the hand control on campers toilet and it's not getting any easier to use. Second is toilet just getting further to get off of let alone getting down to it. May also help with knees hitting the bath wall as setting higher legs will be straighter. Lastly toilet is rocking a lot. Always has to a slight degree but getting worse. Needs addressing.
Decided pulling to replace gasket & see what's going on be good time to just change out toilet and gain benefits of replacement. It is 17+ years old. Plus removing I can add a shut off valve, mostly to throttle water flow. Got on line ordered a Thetford aqua magic V, (18" tall/foot control), longer replacement flex line and a shut off valve.
Won't be here for a few days so decided I'd go ahead and pull toilet, clean up to get ready for reinstall. And it all turned to pooh...
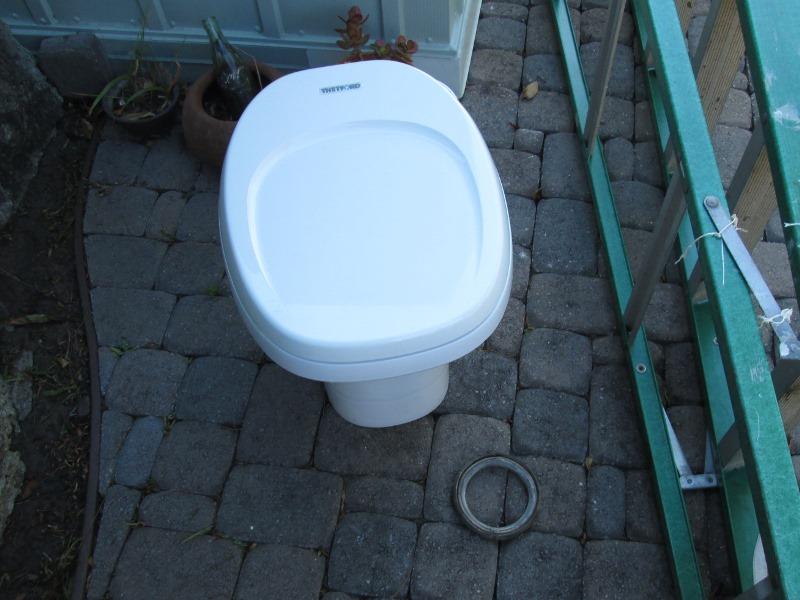
Perfectly good toilet, removed.
And first glimpse of problem, other than last dump I hadn't rinsed tank- whew.
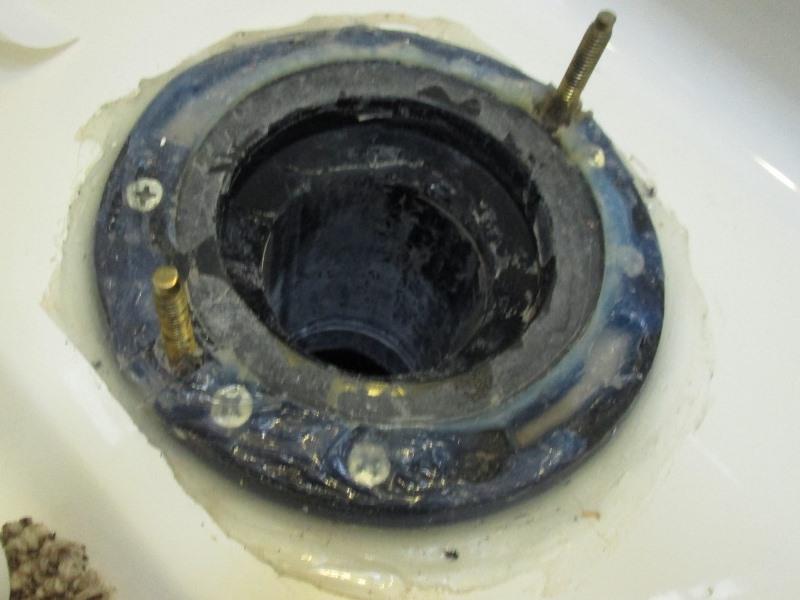 Lathered in sealant, toilet uses a foam gasket. Took me a minuet to figure out that flange, because its a wet bath, indeed needs perimeter sealed. Toilet is rocking though due to flange raised/bowed up at bolts. Not much I can due with all the sealant. So plan is to carefully cut along vertical edge of flange and remove all the caulk from surface. Not to bad, only took an hour, but revealed this isn't going to be a 10 minuet install.
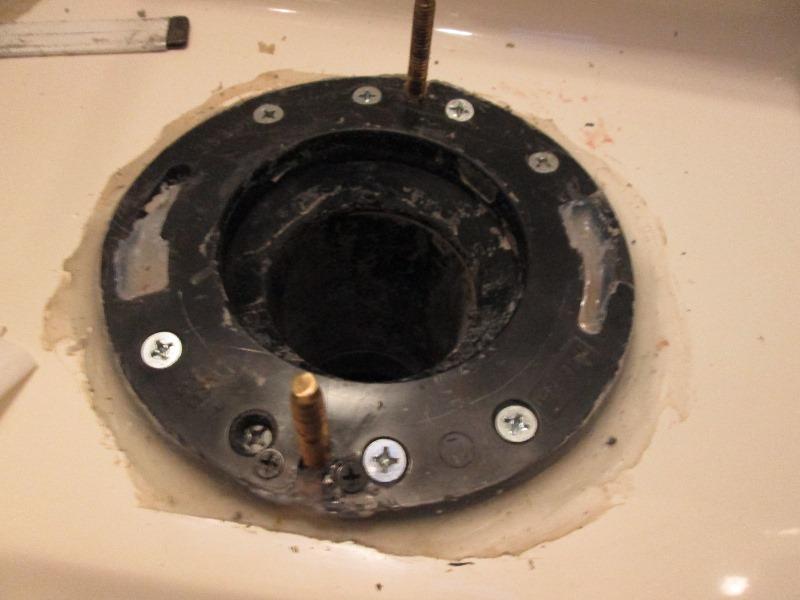
And became more fun. Top of flange is warped and taco'd like an old vinyl LP laid in the sun. Original install, flange screw was driven thru, wont come back out, to 'fix' 2 dry wall screws were driven on either side, not countersunk. That's why toilet wont set flat on the left side.
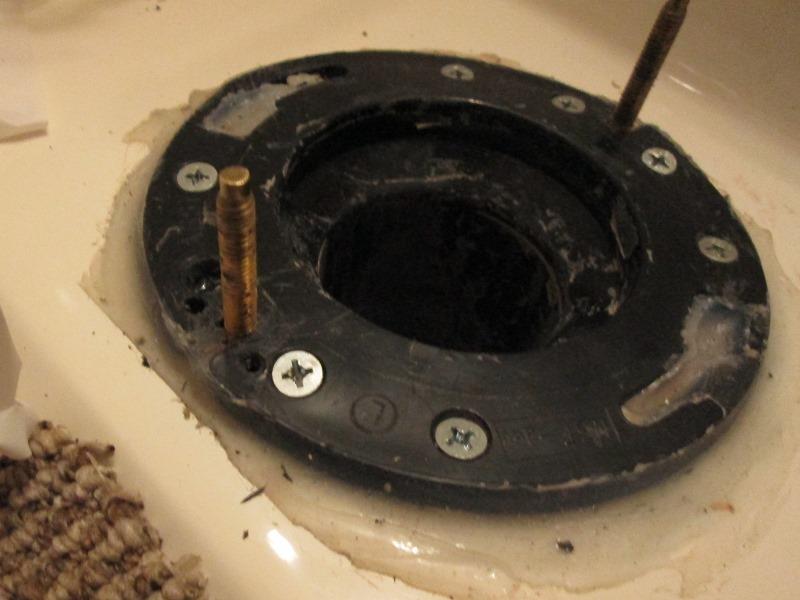
Then I noticed the screw in front of bolt, it pretty crooked, head above surface.
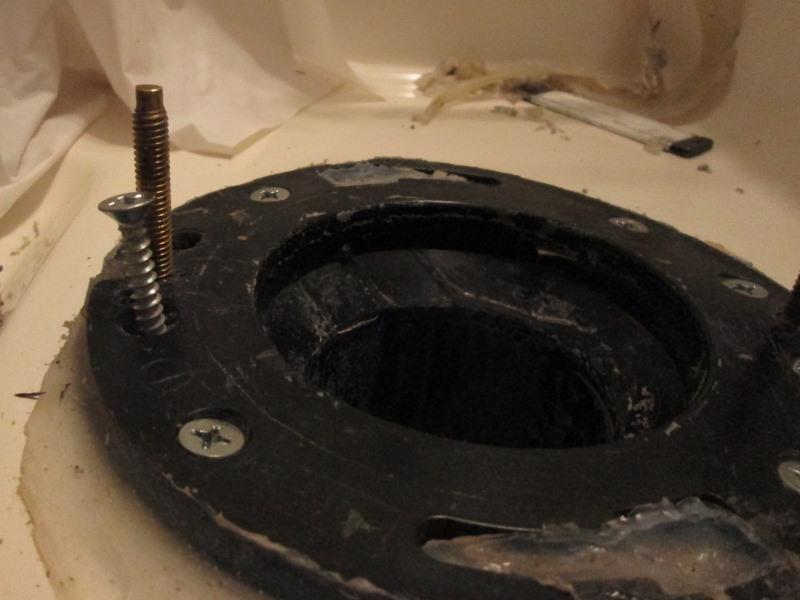
Screwed it out...determined installer missed the edge underneath-duh. I'll redrill outward so screw catches wood. After removing, set toilet back on to see if it would set flat. Nope, its the right side still that's so warped making it rock. Not sure what I can do, flange needs to be replaced but its glued on verse many RVs a screw on to pipe flange is used. Couldn't be that lucky. It could be that bottom of pipe is screwed to tank, however not willing to try. If its not screwed or requires to much force, that potentially could damage tank.
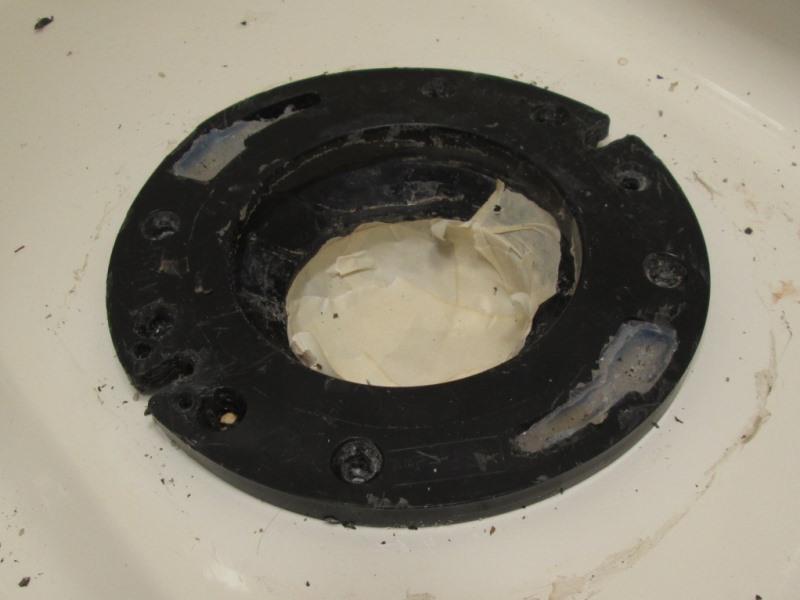
Thinking I might sand top down a bit I removed the bolts and remaining sealant before taking into consideration flange isn't solid, by the time flat I'd be thru surface. That ain't going to work...
Got on online to see what my options might be... There are options and methods to remove glued flange. Couple of hours later decided simplest is if I can find locally a 4x3 flange that goes inside a 3" pipe instead of outside. I could cut off old flange leaving its glued hub on OD of pipe. And then I stumbled upon this...
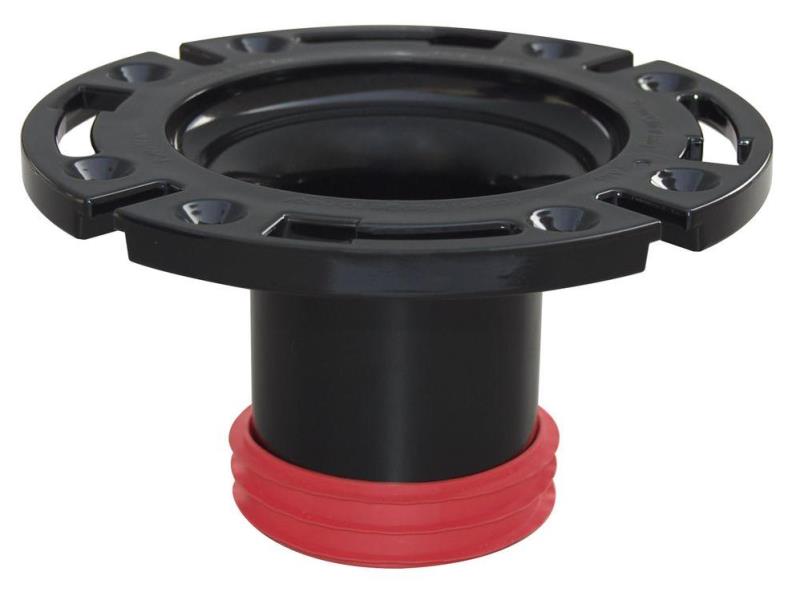
WOW. I didn't know these were made. Uses rubber gasket to seal, it will slip inside the existing 3" pipe, no gluing required but more importantly it will address the movement of camper and the fact that tank is directly below. Reason the rocking as gotten worse is shower floor is sagging/settling and flange with pipe to tank cant go down. But a slip in flange will allow stuff to move, take any pressure off tank top. Slip Joint!
So taped up pipe and hacked off flange.
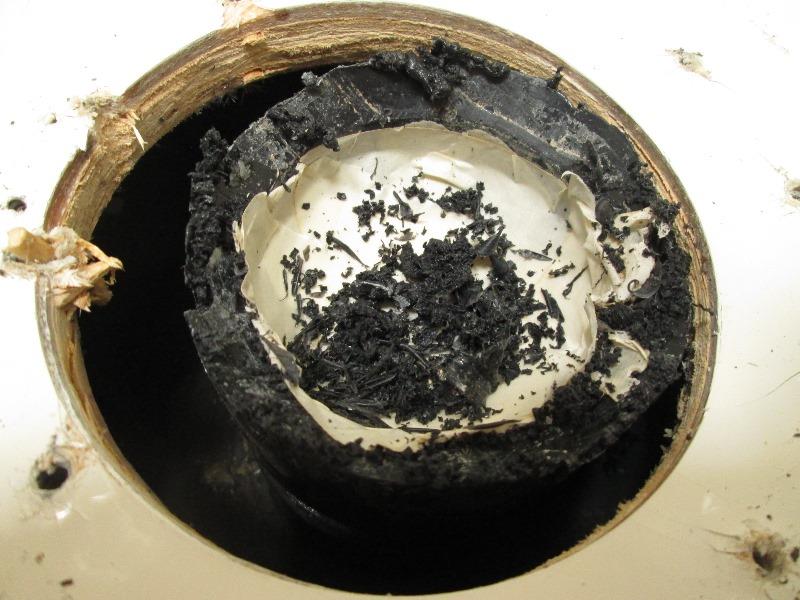
Drilled a hole to use a jig saw cutting just below floor. A small hand saw would have been safer but its cut.
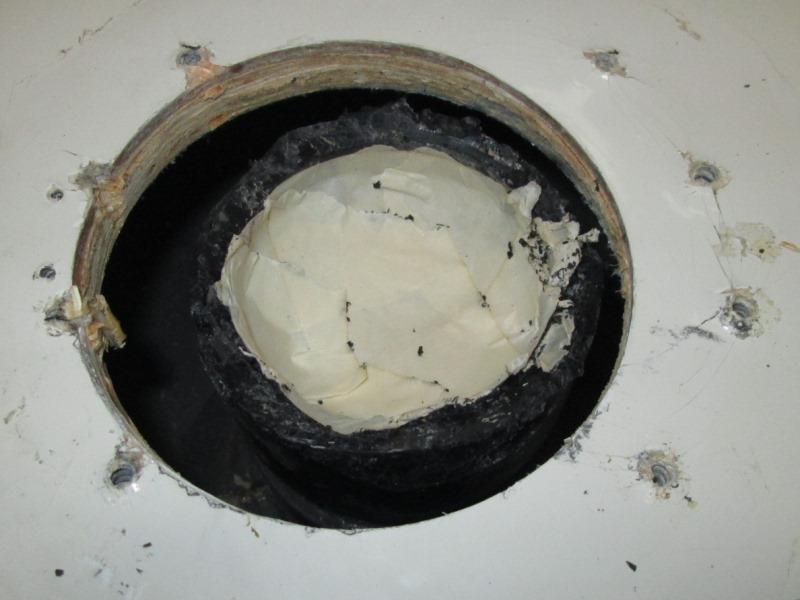
Cleaned it up and studied this comedy of errors, visualizing original installers back to back succession of hacks that led to this.
First the pipe is not centered in hole. When screwing down the left side, screws were angled inward and broke thru edge, one driven thru flange trying to tighten. Drywall screws added to secure, they sat above face. Toilet bosses underneath sit on these raising off floor.
Right side is into wood, but they were seriously over tightened, probably trying to stop toilet from rocking because of the 'fix'. The 2 center screws holes are mushroomed up about 3/16" causing right side of flange at bolt to be raised. Further adding to issue. Again toilet boss sets on this and rocks.
An easy fix if reusing old toilet would be to simply clearance the plastic bosses under toilet. Toilets perimeter edge is pretty thin, using shims may have worked but likely not. At any rate were now replacing the flange.
Sadly the real story shown is production workers driven to point that this happens. Hack probably saved some ones job.
Continuing...
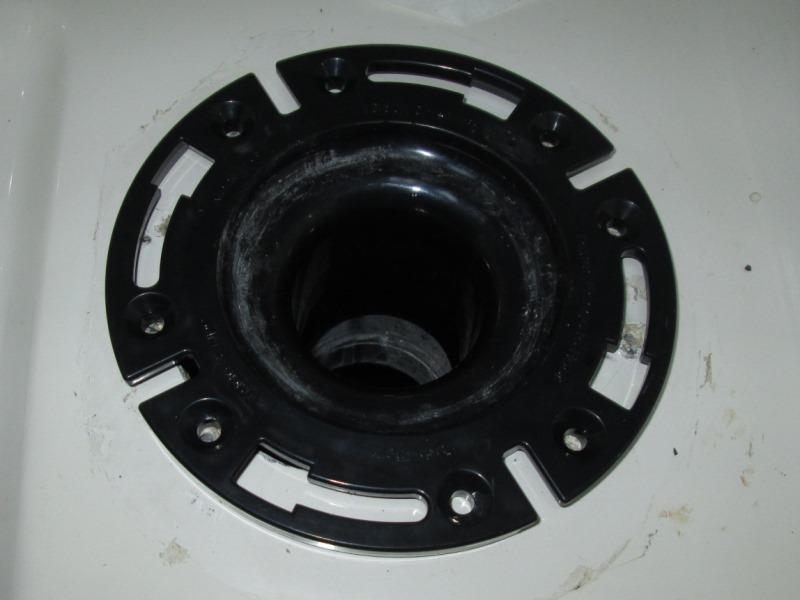
Slipping new flange in pipe with out the gasket. Though I'd rather use the side slots for the bolts, rotating flange to use drop in slots solves a few issues. Primarily rotates the screw holes over ones that are into wood or over areas that will be. Also right slot compensates for mushroomed screw holes. Flange will set flat.
More work but as I have 2 days sanding down high mushroomed holes on right side, glue a block underneath on left side. Toilet less like to rotate using side slots, and material is thicker, less likely to break flange. Toilet is plastic and has no weight, bolts are the only means to secure. As many campers that have wet bath I'm surprised a specific flange isn't designed to better accomplish sealing and install. I see a whole tube of sealant.
10 minuet job...
Awaiting parts....
Just for grins..watched a video of fellah dragging out half his shop tools explaining what might come in handy. Then one by one sets them aside stating don't need that or this.., narrows it down to hammer and drift, taps the flange then unscrews
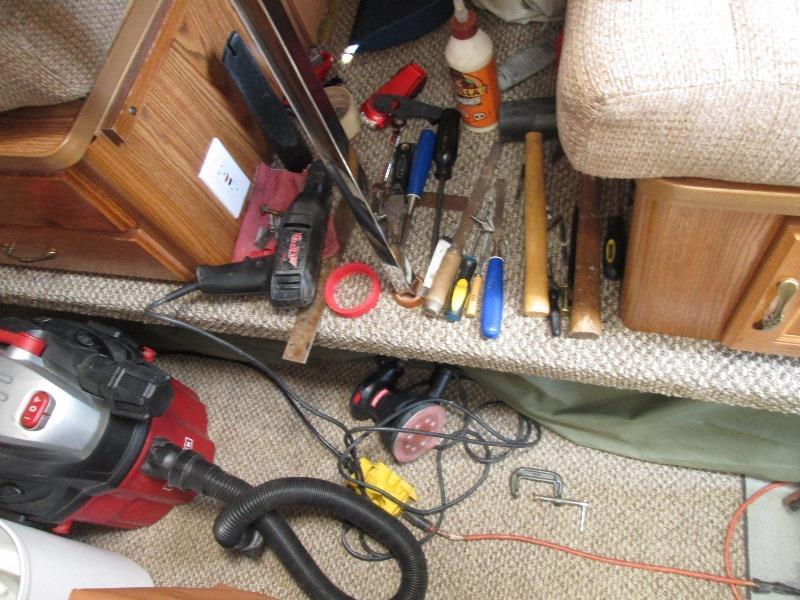
This is pile I have and used them all- doesn't show jig saw or sander to shape blocks. Haven't even got toilet yet....
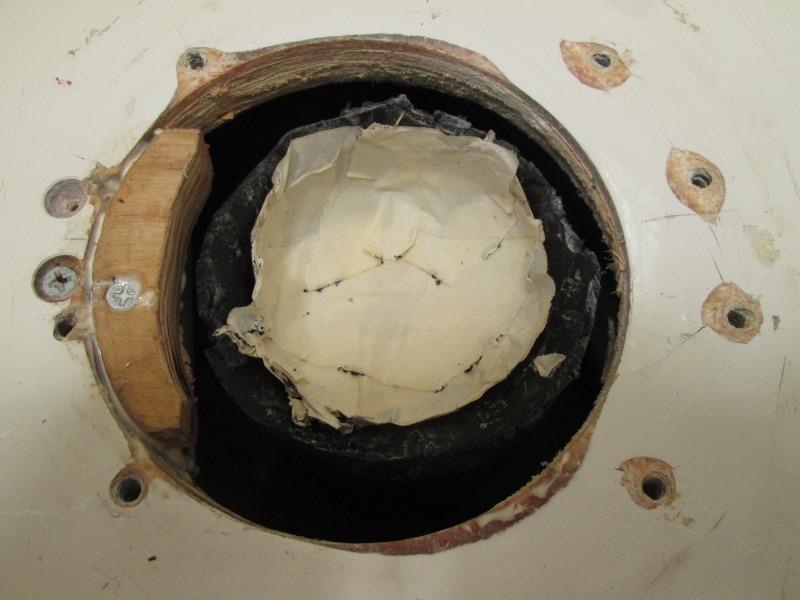
Awaiting parts did get floor sanded flat and a back up on the side that broke plywood edge. And prepped, Sand down right side. Glued and screwed blocks, just insurance. These probably not needed but if I get close to edge shouldn't break out and eventually find wood. I did redrill new pilot hole on one hole that previously went into space. Because flange needs to be bedded in sealant and then perimeter and top sealed and toilet mounted, it'll be 'all at once' affair once toilet arrives. Not looking forward to the caulking aspect.
Parts have arrived.
Set up toilet verify flange placement.
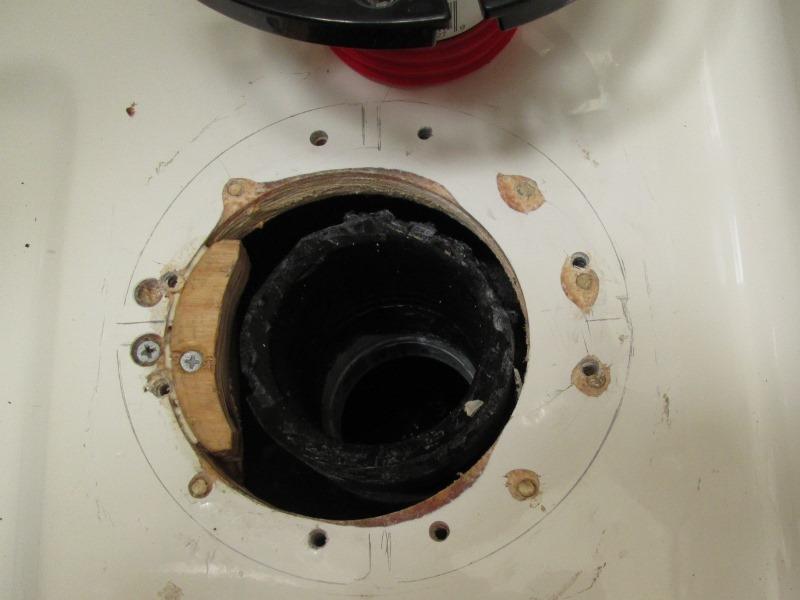
Toilet base is slightly wider than old one so can't fudge over to the left covering more of the off center hole better. Also raised section of floor requires toilet to set slightly rotated so base isn't off edge. In relaxed position flange wants to set further back. Only 2 of the holes lined up so plugged all of with glued in dowels- redrill floor where flange wants to set.
Side note, nothing I can do but the rough in hole is about 1 1/2" further out from wall than it needs to be. That's useable floor space behind toilet. You would think in such a small space fixture placement would be given more thought.
Use some foam backer rod to fill gaps at ends of added block on left (should have cut my back up block with longer arc a bit larger).
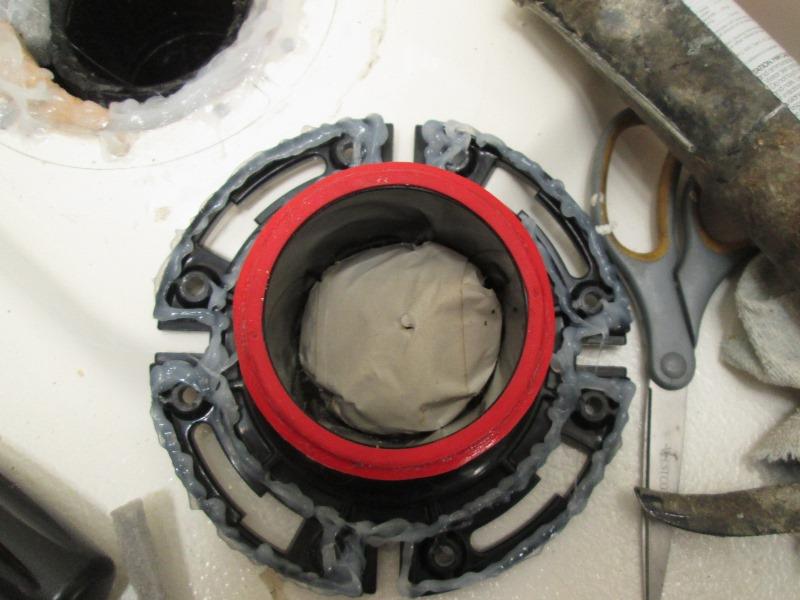
Moved dam to flange. Applied caulk to backside contact areas of flange, liberally around/in holes of floor. Set flange bedded in caulk and screwed it down. Applied caulk to face and edge, filling all holes, used half a tube of GE Silicon II sealant. Didn't get picture of flange buried in caulk, looks pretty much like what I found.
Set toilet and slowly tightened down with my weight on seat. No rock!
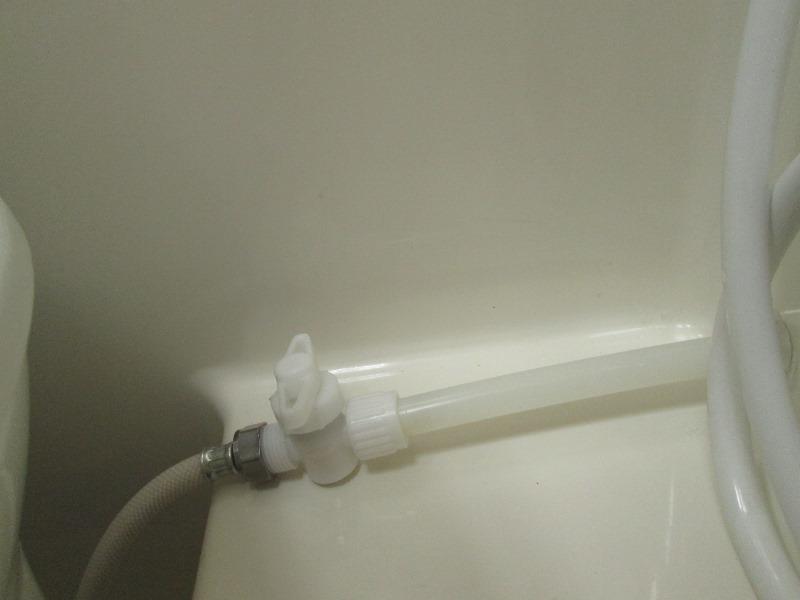
Installed 20" x 1/2"FIPx1/2"FIP flex water line on toilet. Unlike residential toilets most RV toilets are 1/2" thread like a faucet. Cut off the Pex tube that previously was hard plumbed to old toilet and installed Flair-it valve. Later I'll recut the Pex closer to wall but need a hoop like on the shower hose to contain flex line.
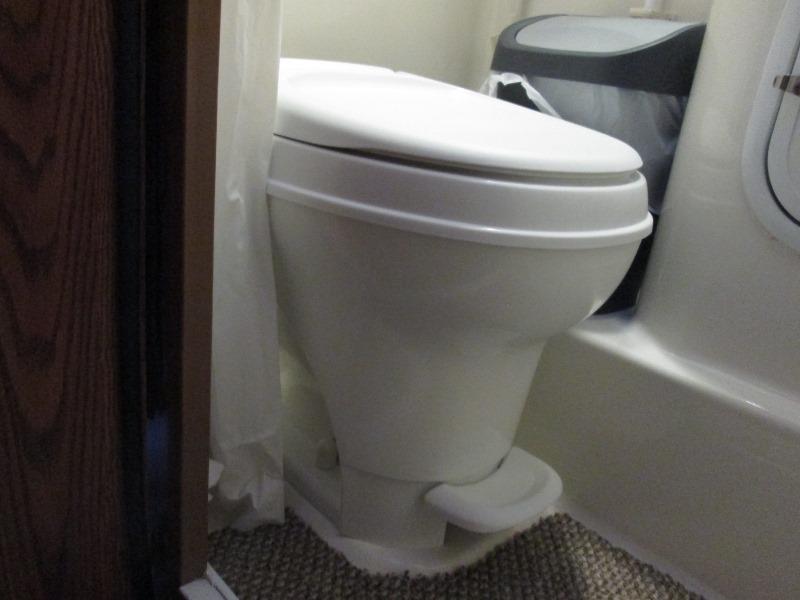
What can you say, toilet. The added height is nice as is the foot control. Throttling the valve can considerately reduce volume and still rinse bowl. Recommended flow is 10 quarts a minute. Really?. That's approx. 1/2qt per flush. May not sound like much unless you have limited water supply and holding tank capacity.
Install time typically should be maybe an hour at most. A matter of simply removing old toilet and setting new one in its place. Worst case I would think on average install is having to replace the hold down bolts and resealing. Assuming your flange re useable, that would be the norm. But nooo...mine flange was hacked in and subsequently warped to heck and glued in instead of screwed on. But we got it.
Got everything put away and cleaned up last night, reflecting on our new toilet, picture of the tape dam I used to seal pipe popped into my head. Ummm...Yep..shining flashlight down toilet, there it is setting on shelf inside tank. Oh joy
Tried for over an hour to 'fish' it out of 3"x2' deep hole. Almost had it several times. Last try got almost to top, fell off hit little bit off water and sailed off the edge into tank...Good grief
With little hope and no other recourse I'l try rinsing holding tank into blue pooh bucket, drain it using 3/4" hose-only way to verify if it comes out. First though is the rinse wand now too short.
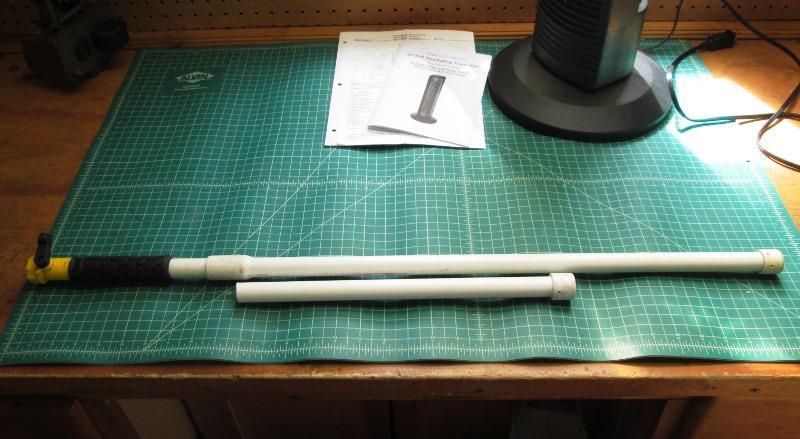
Extended rinse wand cut and longer pipe added- 24" now 34". Was always a bit short, added height of new toilet made un useable. Cut 14" off end of pipe with cap, added back a 24" scrap with bell end coupling and a new cap. Drilled cap with 3 thru holes at different angles verse the 2 old one had. Might get more surface blasting as its hard to rotate with hose more than 1/4 turn.
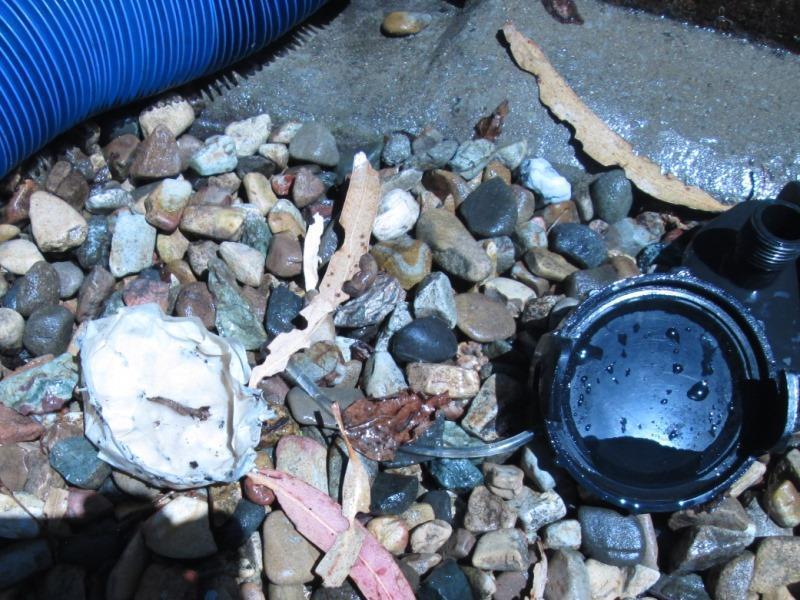
With that done hooked up the auxiliary pooh bucket, rinsed holding tank into it bucket. Drug bucket over to clean out and dumped. WHOoWHOO. First try! surprisingly the masking tape was in bucket. I was thinking if it came out at all, would take several attempts. Whew! Alls well that ends well?
Rinsed tank couple more times in hopes no other debris left behind. Done and glad for it.
Back to Ourelkhorn Camper Modifications page